
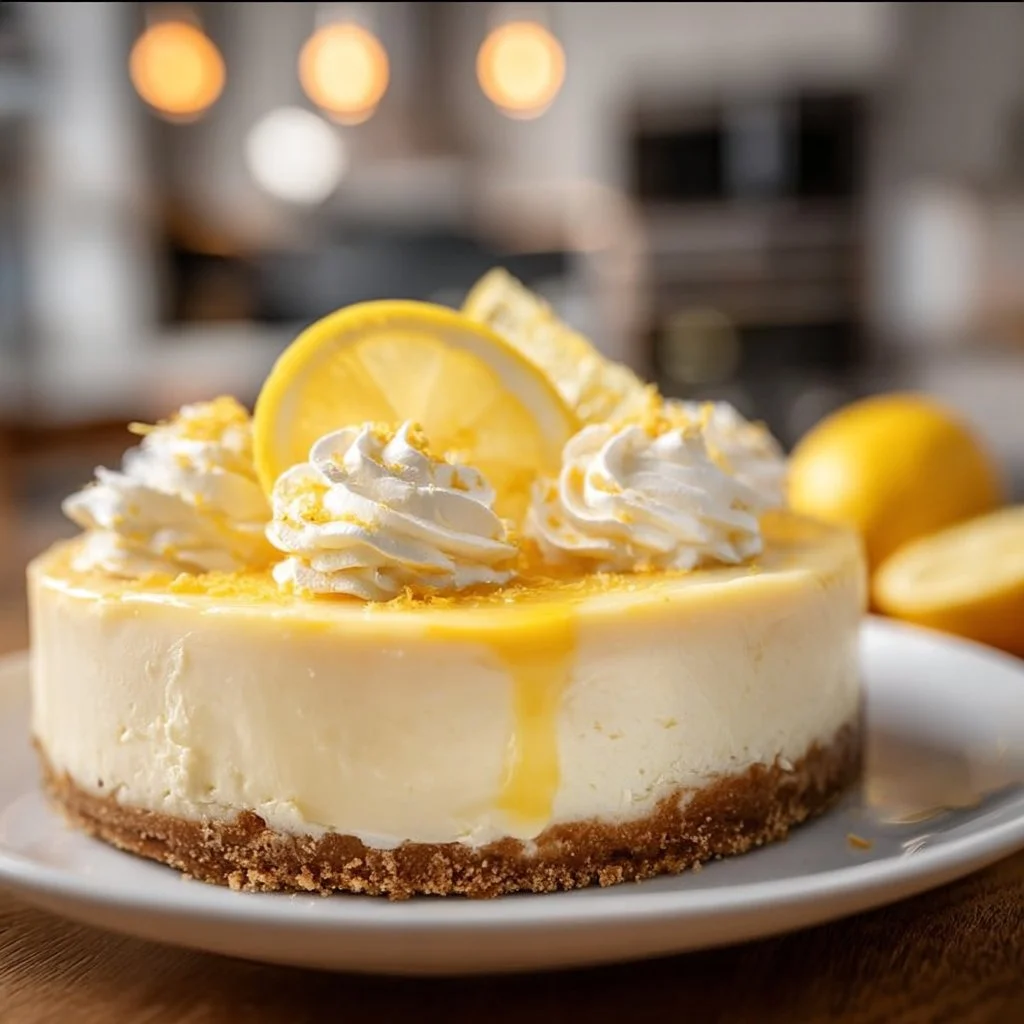
Smooth Lemon Cheesecake
Lemon cheesecake is a delightful treat that perfectly balances rich creaminess with zesty freshness. This Smooth Lemon Cheesecake offers a light and airy texture that just melts in your mouth. The tang of fresh lemon juice combines beautifully with the sweetness of the cream cheese, creating a harmonious flavor that is both refreshing and indulgent. It’s the kind of dessert that’s perfect for summer gatherings, special occasions, or simply as a sweet finish to your dinner.
What makes this cheesecake truly special is its simplicity. You can whip it up with ease, making it a go-to recipe for both novice bakers and seasoned pros. The bright flavors of lemon make it an ideal choice for warmer months, but its creamy texture allows it to be enjoyed year-round. Serve it at birthday parties, brunches, or holiday gatherings – no one can resist a slice of this dreamy cheesecake!
Prep Time: 15 min | Cook Time: 60 min | Total Time: 75 min (plus chilling time)
How to Make Smooth Lemon Cheesecake
Ingredients
- 1.5 cups graham cracker crumbs (For the crust)
- 1/3 cup melted butter (Binds the crust)
- 1/4 cup granulated sugar (Sweetens crust)
- 1 pinch salt (Balances sweetness)
- 32 oz cream cheese (Room temperature)
- 1 cup granulated sugar (For filling)
- 4 large eggs (Structure)
- 1/3 cup fresh lemon juice (Citrus flavor)
- 2 tbsp lemon zest (Aromatic)
- 1 tsp vanilla extract (Flavor depth)
- 1/4 cup sour cream (Adds tang)
- 2 tbsp all-purpose flour (Prevents cracking)
Step-by-Step Instructions
- Start by mixing the crust ingredients: graham cracker crumbs, melted butter, sugar, and a pinch of salt. Press this mixture firmly into the bottom of a springform pan to create a solid base.
- Preheat your oven to 350°F and bake the crust for about 10 minutes. This will give the crust a lightly toasted flavor and crisp texture.
- In a large mixing bowl, beat the cream cheese until it’s completely smooth. This step is crucial to prevent any lumps in your cheesecake filling.
- Gradually add the sugar while continuing to beat the cream cheese. Make sure everything is fully incorporated before moving on to the next step.
- Mix in the eggs one at a time, followed by the lemon juice, lemon zest, sour cream, and flour. It’s important to mix until just combined; overmixing can cause the cake to crack.
- Pour the creamy filling over your baked crust and reduce the oven temperature to 325°F. Bake for about 60 minutes until the center jiggles slightly.
- Turn off the oven and leave the cheesecake inside to cool for one hour. This method helps to prevent cracking as it cools slowly.
- Finally, refrigerate the cheesecake for at least four hours, or overnight if possible, allowing the flavors to meld and the texture to set completely.
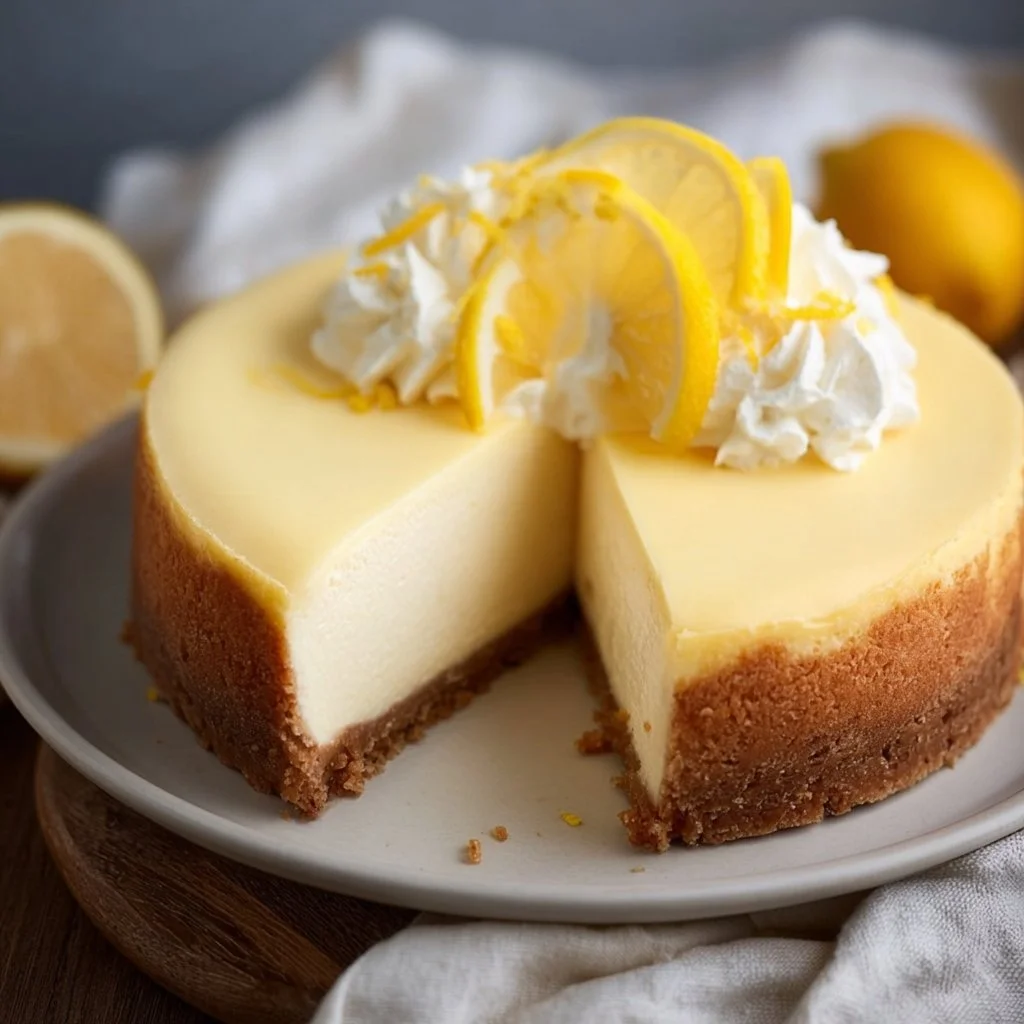
Pro Tips
-
Room Temperature Ingredients: Make sure your cream cheese is at room temperature. This ensures a smooth batter and a lump-free cheesecake. If it’s too cold, you might end up with a bumpy texture.
-
Prevent Cracking: Cooling the cheesecake gradually in the oven helps prevent cracks. Rapid cooling can cause the cheesecake to crack, so be patient and follow this step for a flawless finish.
-
Eggs: Adding eggs one at a time allows for better incorporation and helps create a smooth texture. Mixing too vigorously can introduce air that causes cracks during baking.
-
Chilling Time: While it might be tempting to slice into your cheesecake right after chilling, giving it ample time in the fridge enhances the flavor and ensures the proper consistency. Overnight chilling is the best option!
-
Flavor Enhancements: Want to elevate the lemon flavor? Consider adding a tablespoon of lemon extract or a hint of almond extract for an interesting twist.
Why You’ll Love This Recipe
This Smooth Lemon Cheesecake is a standout dessert for many reasons. It boasts a balanced flavor profile, where creamy and tangy intertwine, making each bite a delight. Whether you’re a fan of cheesecakes or simply looking for a sweet treat, this recipe will surely hit the spot. It’s not overly sweet, allowing the lemon’s brightness to shine through and keeping it refreshing.
Plus, what’s great about this cheesecake is its adaptability. Gluten-free lovers can easily substitute the graham cracker crust with alternative options, while fans of low-sugar diets can swap regular sugar for healthier sweeteners. Whether enjoyed after a weeknight dinner or as a showstopper at parties, this lemon cheesecake fits right in.
How to Serve Smooth Lemon Cheesecake
When it comes to serving your Smooth Lemon Cheesecake, presentation matters! Top it with fresh berries like blueberries or raspberries to add color and an extra burst of flavor. A dollop of whipped cream can elevate the creaminess, while lemon slices make for a beautiful garnish.
Pair this cheesecake with a light salad or citrus-infused beverage for a refreshing meal. Lemonade, iced tea, or sparkling water with a slice of lemon are all great accompaniments. For a special touch, serve it alongside a glass of dessert wine or Prosecco for adults.
How to Store Smooth Lemon Cheesecake
To keep your cheesecake fresh, store it in the refrigerator. Make sure to cover it well with plastic wrap or aluminum foil to prevent it from absorbing any unwanted odors or flavors. It will last in the fridge for up to five days.
If you want to freeze it, slice the cheesecake into individual portions, wrap each slice tightly with plastic wrap, and place them in an airtight container. Properly stored, the cheesecake can be frozen for up to three months. Just remember to thaw it in the fridge before serving for the best texture!
Tips to Make Smooth Lemon Cheesecake
One major tip for preventing cracks is to not open the oven door while baking. This can create fluctuations in temperature. Instead, use the oven light to check your cheesecake, if possible.
Also, be mindful of measuring your ingredients accurately. Using too much flour can dry out the cake, while too little can lead to a dense texture. It’s all about finding the right balance for that smooth, creamy result.
Variation
If you’re looking for variations on this recipe, consider making a gluten-free version by using a gluten-free graham cracker substitute. For a vegan twist, try replacing cream cheese with cashew cheese or tofu blended with lemon juice and zest. You can also experiment with flavors, such as adding white chocolate or berry swirls to the filling for a different taste experience.
Nutrition Information
- Serving Size: 1 slice (1/12 of cake)
- Calories: 390
- Protein: 7g
- Carbs: 36g
- Fat: 26g
- Fiber: 0g
- Sugar: 20g
This cheesecake is rich in calories primarily due to the cream cheese and sugar, making it a more indulgent choice. However, it offers some protein from the cream cheese and eggs, and you can always balance it out with lighter meals earlier in the day.
Storage and Reheating
For reheating, you can enjoy your cheesecake cold straight from the fridge. However, if you prefer it slightly warmed, preheat your oven to 300°F and place the slice on a baking sheet for about 5-10 minutes. Avoid using the microwave, as this can result in an uneven texture.
To maintain its freshness, always cover the cheesecake properly before storing. Refrigerate leftovers as soon as you’re done serving.
Customization Ideas
Feel free to adjust the flavorings in this cheesecake to make it your own. For a richer taste, you could add a hint of almond extract or incorporate some crushed cookies into the crust. Top it with different fruits depending on the season—strawberries in winter or peaches in summer can add new dimensions to your cheesecake.
Common Mistakes to Avoid
-
Rushing Chilling Time: Don’t be tempted to cut into your cheesecake immediately after cooling. Give it enough time to set.
-
Overmixing the Filling: While you want your ingredients to be well combined, overmixing can introduce too much air, leading to cracks.
-
Not Using Room Temperature Ingredients: Cold cream cheese can lead to lumps. Always let it soften properly.
-
Skipping the Water Bath: If you’re prone to cracking, consider using a water bath when baking. It provides extra moisture and prevents the cheesecake from drying out.
-
Not Baking Long Enough: Make sure you bake until the center jiggles slightly. If it’s too wobbly, it needs more time.
Serving Occasions
This Smooth Lemon Cheesecake is ideal for a variety of occasions. It’s perfect for family gatherings, birthday parties, or a light dessert after dinner with friends. Serve it during holiday celebrations, or even as a midday treat with coffee after a busy workweek. Any event where you want to impress your guests with something delicious will be made better by including this cheesecake!
Why Make This Recipe
This recipe stands out among traditional desserts because of its fresh, zesty twist on a classic cheesecake. Rather than being overly rich, the lemony brightness cuts through the creaminess, making it incredibly gratifying without feeling heavy. It also embodies the essence of simplicity in baking—you don’t need advanced skills to make something extraordinary. The ingredients are easy to find, and the instructions are straightforward, making it accessible to bakers of all levels.
For anyone who loves the combination of cheesecake and citrus, this recipe is a dream come true, delivering great flavor in every bite.
FAQs
Q1: Can I make this cheesecake in advance?
Absolutely! In fact, cheesecakes taste even better the next day after chilling. Just make sure to store it properly in the refrigerator.
Q2: Can I substitute the cream cheese?
You can use mascarpone or ricotta cheese for a different flavor. Just keep in mind that the texture may vary slightly.
Q3: What if I don’t like lemon?
Feel free to substitute the lemon juice with orange or lime juice for a different citrus flavor. You can even try doing a combination of citrus!
Q4: Can I use a different type of crust?
Yes! You could use an Oreo crust or a nut-based crust for a gluten-free version. Just adjust the quantities accordingly.
Q5: How do I avoid a soggy crust?
Make sure to bake the crust before adding the filling. This pre-baking step helps it become firm and prevents sogginess.
Disclaimer
The nutrition information provided is approximate and will vary based on specific ingredients used and portion sizes. It’s always good practice to check labels for accurate nutritional information.
Print
Smooth Lemon Cheesecake
- Total Time: 75 minutes
- Yield: 12 servings 1x
- Diet: Vegetarian
Description
A delightful lemon cheesecake that combines rich creaminess with zesty freshness, perfect for summer gatherings and special occasions.
Ingredients
- 1.5 cups graham cracker crumbs (For the crust)
- 1/3 cup melted butter (Binds the crust)
- 1/4 cup granulated sugar (Sweetens crust)
- 1 pinch salt (Balances sweetness)
- 32 oz cream cheese (Room temperature)
- 1 cup granulated sugar (For filling)
- 4 large eggs (Structure)
- 1/3 cup fresh lemon juice (Citrus flavor)
- 2 tbsp lemon zest (Aromatic)
- 1 tsp vanilla extract (Flavor depth)
- 1/4 cup sour cream (Adds tang)
- 2 tbsp all-purpose flour (Prevents cracking)
Instructions
- Start by mixing the crust ingredients: graham cracker crumbs, melted butter, sugar, and a pinch of salt. Press this mixture firmly into the bottom of a springform pan to create a solid base.
- Preheat your oven to 350°F and bake the crust for about 10 minutes.
- In a large mixing bowl, beat the cream cheese until it’s completely smooth.
- Gradually add the sugar while continuing to beat the cream cheese until fully incorporated.
- Mix in the eggs one at a time, followed by the lemon juice, lemon zest, sour cream, and flour until just combined.
- Pour the creamy filling over your baked crust and reduce the oven temperature to 325°F. Bake for about 60 minutes until the center jiggles slightly.
- Turn off the oven and leave the cheesecake inside to cool for one hour.
- Finally, refrigerate the cheesecake for at least four hours, or overnight if possible.
Notes
Top with fresh berries or a dollop of whipped cream for an elevated presentation.
- Prep Time: 15 minutes
- Cook Time: 60 minutes
- Category: Dessert
- Method: Baking
- Cuisine: American
Nutrition
- Serving Size: 1 slice
- Calories: 390
- Sugar: 20g
- Sodium: 350mg
- Fat: 26g
- Saturated Fat: 15g
- Unsaturated Fat: 6g
- Trans Fat: 0g
- Carbohydrates: 36g
- Fiber: 0g
- Protein: 7g
- Cholesterol: 140mg