
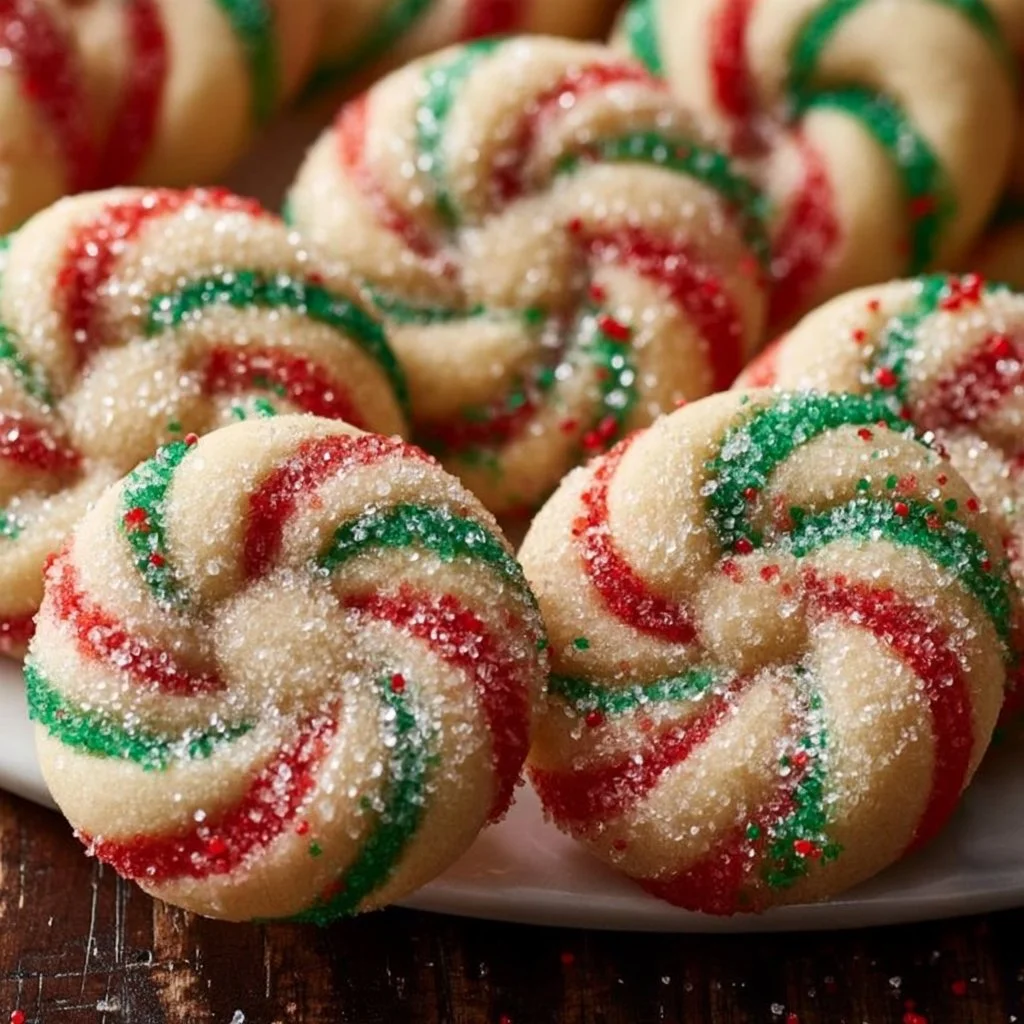
Twisted Christmas Cookies
The holiday season is synonymous with warm kitchens, the aroma of fresh-baked cookies, and the inviting spirit of festivity. Twisted Christmas Cookies perfectly encapsulate this joyous time with their vibrant appearance and delightful flavors. These cookies, with their unique spiral design, are not only a feast for the eyes but also a treat for the taste buds. Combining the rich flavors of butter and vanilla with the sweetness of sugar, these cookies deliver a tender bite that crumbles just right. The vibrant red and green hues make them perfect for holiday celebrations, evoking the spirit of Christmas with every delectable twist.
What truly makes these cookies stand out is the fusion of traditional cookie flavors with an artistic presentation. The process involves rolling and twisting colored dough, creating a festive contrast that brightens any cookie platter. With just the right amount of sweetness, Twisted Christmas Cookies balance rich flavors with the lightness of a classic holiday treat. The texture is soft yet has a slight crisp edge, giving you that satisfying crunch followed by the delightful chewiness that cookie lovers crave.
These whimsical cookies are perfect for various occasions—whether you’re hosting a holiday gathering, preparing for a cookie exchange, or simply looking to add a festive touch to your family dinners. They can be served warm straight from the oven, or allowed to cool and presented alongside a steaming cup of holiday beverages. Their cheerful appearance will surely bring smiles to faces young and old, making them an essential addition to your holiday cookie tradition.
What Makes This Recipe Special
Twisted Christmas Cookies stand apart from your typical holiday baked goods due to their vibrant colors and festive presentation. The combination of butter, sugar, and vanilla creates a flavor profile that invites warmth and joy, while the use of red and green food colorings not only serves aesthetic purposes but also symbolizes the holiday cheer. This recipe captures the essence of Christmas in both taste and visual appeal, making it an ideal choice for festive gatherings where impressing guests is a priority.
Unlike standard cookies, which may be flat and uniform, the twisted design showcases the baker’s creativity and brings an element of fun to the baking experience. The simple act of twisting the dough not only enhances its attractiveness but also allows for a delightful contrast of flavors and textures in each bite. While other holiday cookies might be decorated with elaborate icing, these cookies rely on the natural beauty of their colorful spirals, making them less time-consuming yet equally enticing.
Home bakers may find enjoyment in crafting these cookies, as they combine elements of art and culinary delight. The simple ingredients are accessible, and most cooks will already have them in their pantry. The ability to customize the colors and sprinkle choices adds a personal touch, allowing bakers to express their creativity while also catering to personal tastes or themes of specific holiday events.
Ingredient Overview and Helpful Notes
The key ingredients in Twisted Christmas Cookies are straightforward, yet their roles are crucial in achieving the desired flavor and texture. Using high-quality butter is essential as it not only contributes to the richness of the cookies but also affects the final texture. Look for unsalted butter for better control of sweetness and saltiness. Softening the butter beforehand ensures it can be creamed well with sugar, creating a fluffy mixture that is pivotal in providing the right texture.
Granulated sugar plays a foundational role, contributing sweetness and aiding in the browning process during baking. It is important to cream the sugar thoroughly with the butter, as this technique introduces air into the mixture, resulting in a lighter cookie. The vanilla extract adds depth and enhances the overall flavor profile, giving that signature holiday feel that complements the buttery richness.
The all-purpose flour is the backbone of most baked goods, providing the structure needed for the cookies. It’s important to measure flour accurately; too much flour can lead to dry cookies, while too little can make them overly soft. The inclusion of baking powder introduces a leavening element that helps the cookies rise slightly. Lastly, using a pinch of salt not only balances the sweetness but also enhances the other flavors present in the dough.
Coloring the dough with red and green food coloring makes the cookies festive. While you can use gels or liquid food coloring, gel typically provides more vibrant colors without altering the dough’s consistency. Sprinkles are an optional decorative touch that can add even more visual appeal, making your cookies sparkle just like the holiday lights.
Nutrition & Recipe Details
Nutritional values may vary depending on the specific brands of ingredients you use, portion sizes, and preparation methods. However, here is an estimate of the nutritional content for Twisted Christmas Cookies.
| Item | Value |
|---|---|
| Prep time | 20 minutes |
| Cook time | 10 minutes |
| Store time | Up to 2 weeks |
| Calories | 100 per cookie |
| Protein | 1g |
| Carbohydrates | 15g |
| Fat | 4g |
How to Make Twisted Christmas Cookies
The process of making Twisted Christmas Cookies can be as delightful as the cookies themselves. Begin by gathering your ingredients and ensuring your kitchen tools are ready. Mixing bowls, measuring cups, a baking sheet, and parchment paper will all come in handy. Set your oven to preheat at 350°F (175°C), as this ensures the cookies start baking optimally, creating the perfect texture.
Ingredients
| Ingredient | Quantity |
|---|---|
| All-purpose flour | 2 3/4 cups |
| Butter, softened | 1 cup |
| Granulated sugar | 1 cup |
| Egg | 1 |
| Vanilla extract | 1 teaspoon |
| Baking powder | 1/2 teaspoon |
| Salt | 1/4 teaspoon |
| Red food coloring | to tint |
| Green food coloring | to tint |
| Sprinkles (optional) | for decoration |
Before starting, make sure that the butter is softened to a spreadable consistency. This step is important, as it allows for better incorporation with sugar. In a separate bowl, have your flour, baking powder, and salt combined and whisked together, so they are ready to mix in during the process.
Step-by-Step Instructions
-
Preheat your oven: Begin by preheating your oven to 350°F (175°C). This step is critical to achieve perfectly baked cookies. Make sure the oven is fully heated before the cookies go in, as this will ensure even cooking.
-
Cream the butter and sugar: In a large bowl, cream together the softened butter and granulated sugar. Use a hand or stand mixer on medium speed to whisk until the mixture is light and fluffy. This typically takes about 3–5 minutes. The mixture should turn pale and have a slight aeration, which is essential for achieving the right cookie texture.
-
Add egg and vanilla: Once the butter and sugar are properly creamed, add one egg and vanilla extract to the mixture. Beat this together until thoroughly combined. The egg adds moisture and richness to your dough, while the vanilla enhances the flavor.
-
Combine dry ingredients: In another bowl, whisk together the all-purpose flour, baking powder, and salt. Gradually mix this dry blend into the wet ingredients, combining until no flour is visible. Avoid overmixing at this stage; it’s important to stop as soon as the ingredients are combined to maintain a tender cookie texture.
-
Color the dough: Divide the dough in half. Tint one half with red food coloring and the other half with green food coloring. Use a spatula or your hands to ensure the color is uniformly distributed. You can adjust the color depth by adding more coloring as needed.
-
Shape the cookies: Once your dough is colored and well mixed, roll out small pieces of each colored dough into logs about the length of your fingers. Then, twist one red log and one green log together gently to form a spiral shape.
-
Prepare baking sheets: Line your baking sheets with parchment paper for easy removal and cleaning. Arrange the twisted cookie shapes on the sheets, leaving space between them as they will spread slightly during baking.
-
Add sprinkles: If desired, sprinkle the tops of the twisted cookies with colored sugar or sprinkles. This step adds a festive touch and enhances their visual appeal.
-
Bake the cookies: Place the baking sheets in the preheated oven and bake for approximately 8–10 minutes, keeping a close eye on them. The cookies should be lightly golden at the edges, indicating they are done.
-
Cool and enjoy: Allow the cookies to cool on the sheets for a few minutes before transferring them to a wire rack to cool completely. Enjoy these delightful treats as they bring the aroma of the holidays right into your home.
Understanding the Flavor and Texture
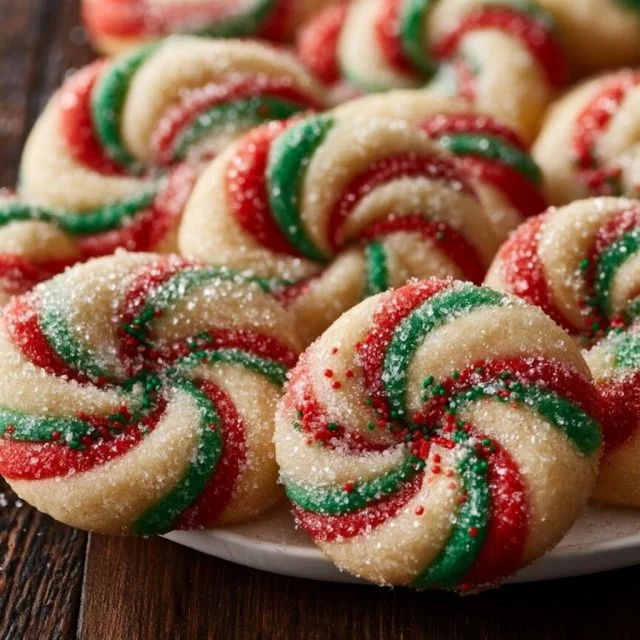
Twisted Christmas Cookies present a delightful balance of flavors and textures that charm anyone who takes a bite. The rich, buttery flavor combined with the sweetness from the sugar creates a comforting taste that is classic for holiday cookies. The vanilla extract enhances this profile, adding depth that makes each cookie deliciously memorable.
When baked, the cookies achieve a perfect contrast between soft and slightly firm textures. The edges, having been touched by high heat, become lightly crisped, allowing for that pleasing crunch as you bite in. The center retains moisture, thanks to the butter and egg content, leading to a tender and rich consistency that balances well with the slight snap of the cookie edges.
Visually, the swirls of red and green create an exciting holiday appeal, while the sprinkles add a layer of texture and crunch. The dough’s vibrant colors represent the festive spirit, with the twist showcasing a blend of flavors in each slice. As the cookies bake, they’ll spread just enough to develop a unique shape that sets them apart from regular cookies, making them a feast for both the eyes and palate.
Pro Tips
A few small techniques can significantly improve the outcome of your Twisted Christmas Cookies. Observing certain baking practices will enhance flavor, texture, and overall satisfaction.
| Tip | Description |
|---|---|
| Use Room Temperature Butter | Ensure the butter is softened at room temperature before creaming. This makes it easier to incorporate air, leading to lighter cookies. |
| Do Not Overmix Batter | Avoid overmixin the dough once the flour is added. This can develop gluten, leading to tougher cookies instead of tender ones. |
| Check Your Oven Calibration | Ovens can vary in temperature. Use an oven thermometer to ensure yours is at the right heat for precision baking. |
| Experiment with Colors | Feel free to play around with different food colors for fun variations. Pastel colors can work beautifully for other occasions! |
In addition to these tips, ensure that your baking sheets are not overcrowded. Leave enough space to allow the cookies to spread without merging into one another. Also, consider rotating your trays halfway through baking, so they cook evenly, especially if your oven has hot spots. This will ensure that every cookie receives the perfect amount of heat for an even, golden color.
Why You’ll Love This Recipe
There is much to love about Twisted Christmas Cookies, starting with their charming appearance that captures the spirit of the holiday season. Their playful design makes them the star of any cookie platter or dessert table—sure to attract both children and adults alike. The delightful mix of flavors and textures makes for a memorable treat that everyone can enjoy.
Preparation is relatively simple, making this recipe approachable for bakers of all skill levels. With everyday ingredients and a straightforward method, even novice cookie enthusiasts can feel confident whipping up a batch. The absence of complex techniques or specialized equipment means you can make these cookies without stress, allowing for a fun holiday baking experience.
Moreover, these cookies are versatile in serving. Perfect for cookie exchanges, family gatherings, or holiday parties, they can be enjoyed on their own or as part of a festive dessert spread. Their cheerful appearance adds a splash of color to any occasion, while their appealing taste is sure to leave a lasting impression.
How to Serve Twisted Christmas Cookies
When it comes to serving Twisted Christmas Cookies, presentation plays a significant role in enhancing their festive appeal. Arranging the cookies on a large, colorful platter allows for a visually pleasing display. For a more whimsical touch, consider using decorative cake stands or tiered serving platters. Adding festive garnishes such as holly leaves or edible glitter can further elevate their look.
These cookies can be served as a simple snack alongside hot beverages—think cocoa, mulled cider, or warm milk. A festive backdrop, such as a cozy fire or a beautifully decorated dining table, will complement the joyous atmosphere. Offering them in a holiday-themed cookie box with layers of parchment paper can also make for a thoughtful and charming gift during the season.
In terms of pairing, these sweet confections work well with creamy or spiced drinks, enhancing the overall flavor experience. While they can be enjoyed on their own, serving them with a side of chocolate sauce, whipped cream, or a scoop of vanilla ice cream adds an extra layer of indulgence.
How to Store Twisted Christmas Cookies
Storing your Twisted Christmas Cookies properly ensures their freshness and flavor for an extended time. After they’ve cooled completely, it’s best to store them in an airtight container. Keeping the cookies sealed minimizes moisture exposure, preventing them from becoming stale.
If you plan to enjoy the cookies over several days, they can be safely stored at room temperature for 5–7 days. However, for longer preservation, refrigeration is advisable, extending their shelf life to about two weeks. A tip here is to layer the cookies between sheets of parchment paper to prevent them from sticking together.
For those looking to enjoy the cookies even further out, freezing is an excellent option. Simply place them in a freezer-safe bag or container and consume within three months for optimal freshness. When you’re ready to enjoy them, allow the cookies to thaw at room temperature, ensuring they retain their delightful texture.
Tips to Make Twisted Christmas Cookies
Creating delightful Twisted Christmas Cookies may seem straightforward, yet a few detailed tips can enhance your baking experience and final product. Begin by ensuring that all ingredients are measured accurately. Using a kitchen scale for flour can prevent dense cookies caused by incorrect measurements.
Pay attention to the mixing process. Creaming the butter and sugar until fluffy creates a lighter texture, but it’s essential to stop mixing just when the ingredients are well combined. Overmixing can develop gluten too much, resulting in tougher cookies.
Let the baked cookies cool completely on wire racks. This cooling step is vital for letting the cookies set their structure. Trying to move them too early may result in misshaped cookies. Also, the chilling of dough for about 30 minutes before shaping can help develop flavors and make the dough easier to manage.
Finally, be mindful of the baking time and visual cues during the baking process. Cookies should be taken out when the edges just start to turn golden and the centers still appear soft. They’ll continue to cook slightly even after being removed from the oven, ensuring that they remain soft and chewy.
Variations and Substitutions
There are countless ways to personalize Twisted Christmas Cookies to cater to individual tastes or dietary preferences. For a gluten-free version, substitute all-purpose flour with a 1:1 gluten-free flour blend. This maintains a similar texture without sacrificing flavor.
Consider introducing nuts or chocolate chips for an added crunch or rich flavor. Incorporate ½ cup of finely chopped walnuts or pecans or 1/2 cup of mini chocolate chips into the dough. However, when adding, be aware they will change the overall texture slightly, making the cookies more robust.
If you’re seeking a dairy-free alternative, replace butter with a plant-based butter substitute. Additionally, you can use aquafaba (the liquid from canned chickpeas) to replace the egg. Substitute about 3 tablespoons of aquafaba for one egg, which works well in preserving moisture and holding structure.
For those who want unique flavors, consider experimenting with different extracts, such as almond or peppermint, instead of vanilla. A few drops of almond extract can produce a delightful nutty flavor, whereas mint can bring in a seasonal twist perfect for the holidays.
Storage and Reheating
When it comes to storing Twisted Christmas Cookies, organize leftovers into manageable portions. Use airtight containers to keep them fresh, or wrap them tightly in plastic wrap followed by aluminum foil. This technique helps protect them from freezer burn if choosing to freeze.
For reheating, consider the method carefully to maintain the cookie’s delightful texture. The microwave is a quick option—heat for about 10 seconds on medium power—but be cautious not to overheat; otherwise, the cookies can become tough.
If using the oven, preheat it to 300°F (150°C) and place cookies on a baking sheet for about 5 minutes until warmed through. This method helps retain tenderness without causing the cookies to become dry. Avoid microwaving from frozen without thawing, as this will create uneven heating.
When reheating leftovers, adding a small pat of butter on top of the cookie can rejuvenate its moisture content, bringing it back to its freshly baked state.
Customization Ideas
Twisted Christmas Cookies offer a fantastic base for various adjustments, allowing for creativity and enjoyment. For those who appreciate a crunch, incorporating crushed candies, such as peppermint or toffee, into the dough can add an exciting flavor punch and texture contrast.
Seasonal spices like cinnamon or nutmeg could also be included in the dough for a hint of warmth and depth. A teaspoon of cinnamon is a perfect complement to the classic flavors of vanilla and butter, enhancing the holiday spirit.
Serving these cookies can also be varied—try pairing them with different dips or frostings. A simple vanilla glaze or cream cheese frosting can add richness, while a fruit-based sauce can introduce a refreshing counterbalance.
Lastly, consider experimenting with shapes! Instead of the traditional spiral, you could twist the dough into festive shapes such as stars or trees. This variation not only changes the appearance but can also inspire fun decorating opportunities, especially for children (and the young at heart).
Common Mistakes to Avoid
Baking can often be tricky, especially during the holiday rush. Here are some common mistakes to avoid when whipping up Twisted Christmas Cookies:
-
Using Cold Butter: Cold butter will not cream properly with sugar, leading to dense cookies. Always allow butter to soften at room temperature.
-
Under or Overbaking: Baking times may vary by oven; keep a close eye on your cookies. They should be taken out when the edges are golden and the centers appear slightly soft to maintain that chewy texture.
-
Ignoring Measurements: Adding too much flour by scooping directly from the container can produce dry cookies. Always spoon flour into a measuring cup and level it out.
-
Overmixing the Dough: After adding the flour, mix just until combined. Overmixing can cause gluten development, resulting in tougher cookies.
-
Skipping Cooling Time: Undercooling cookies can lead to them breaking or spreading out too much. Allow them to cool on baking sheets for a few minutes before transferring them to a wire rack.
Being mindful of these issues can help ensure that your Twisted Christmas Cookies turn out perfectly every time you make them, filling your holiday season with sweetness and cheer.
Serving Occasions
Twisted Christmas Cookies are a delightful addition to various occasions throughout the holiday season. They shine the brightest at holiday parties, where their colorful appearance can attract guests and encourage sharing. Coffee shops or casual get-togethers with friends also present a perfect opportunity for serving these cookies alongside hot beverages.
These festive delights also work well for more formal gatherings, like family dinners or work parties. Their charming design and festive spirit contribute to an inviting atmosphere. Their versatility makes them ideal for cookie exchanges, showcasing your baking skills with a unique presentation.
The color and flavor make them suitable not only for Christmas but also for other celebrations, such as New Year’s or winter birthdays. Simply adjust the color of the food dye or the decoration to fit the season, allowing for year-round enjoyment with a little creativity.
Why Make This Recipe?
Choosing to make Twisted Christmas Cookies rather than opting for other holiday cookies sets you up for a fun experience and delicious results. This recipe brings together the traditional flavors of the season in a visually engaging way, making it a memorable activity for family and friends involved in the baking process.
The simplicity of the recipe, with accessible ingredients and straightforward techniques, allows for more bakers to feel successful. It also provides room for creativity, whether by adding different flourishes through colors, shapes, or flavors.
Another practical reason to keep this recipe in your regular rotation is its adaptability for other occasions or modifications. From family gatherings to potlucks and beyond, Twisted Christmas Cookies can appeal to diverse preferences, ensuring that they remain a beloved treat for all.
Make-Ahead Preparation
For those looking to make Twisted Christmas Cookies ahead of time, several options exist. The cookie dough can be prepared and stored in the refrigerator for up to 3 days before shaping and baking. This resting period can even enhance the flavors, creating a richer taste.
Another excellent option is to freeze the rolled cookie logs before baking. Wrap each log in plastic wrap and then in aluminum foil to protect against freezer burn. These logs can be stored for up to three months. When you’re ready to bake, simply slice and bake straight from the freezer—I suggest adding an extra minute or two to the baking time.
Baked cookies can also be made in advance and stored properly, allowing for last-minute serving at gatherings without the pressure of baking fresh. Simply freeze the cooled cookies, and when needed, allow them to thaw at room temperature. This flexibility ensures that delicious holiday treats are always within reach.
Equipment and Kitchen Preparation
When it comes to making Twisted Christmas Cookies, having the right equipment makes the process easier and more enjoyable. Essential kitchen tools include mixing bowls, a hand mixer or stand mixer, measuring cups and spoons, a rolling pin, and a baking sheet. A spatula is also useful for gently twisting and placing the cookie shapes onto the baking sheets.
To improve your baking experience, consider lining your baking sheets with parchment paper, which helps prevent sticking and makes for easy clean-up. While you may not need specific molds or cookie cutters for this recipe, having a rolling pin handy allows for smooth and even shaping of the dough.
Before starting, prepare your workspace by clearing the counter of any unnecessary items and organizing the ingredients. This practice helps streamline the baking process, reducing the likelihood of missing ingredients or steps over the course of preparation.
FAQs
Can I use different colors of food coloring?
Yes! Feel free to experiment with different colors to suit your themed events or personal preferences. Just remember that varying colors may not achieve the exact festive feel of traditional red and green.
Can I freeze the cookie dough?
Absolutely! Prepare the dough, shape it into logs, wrap it well, and freeze. When you’re ready to bake, simply slice and bake from frozen, adding a minute or two to the cooking time.
How do I know when the cookies are done?
The cookies are done when the edges are lightly golden and the centers remain soft. They will firm up slightly as they cool, so don’t worry if they appear soft when you first take them out.
What can I use as a substitute for butter?
You can replace butter with a dairy-free alternative, like plant-based margarine. Keep in mind that it may alter the flavor slightly, but it should still provide good results.
Can I make these cookies gluten-free?
Yes, you can substitute all-purpose flour with a gluten-free flour blend in a 1:1 ratio, which works well for this recipe to maintain similar texture and flavor.
Can I add nuts or chocolate to the recipe?
Certainly! You can mix in ½ cup of nuts or chocolate chips to the dough before shaping. Adjust the flour slightly if the mixture feels too wet.
How should I store the cookies?
After cooling, store the cookies in an airtight container for up to a week at room temperature. For longer preservation, you can freeze them.
Can these cookies be decorated?
Yes! Feel free to add sprinkles or a light glaze post-baking for a decorative touch. This enhances their festive presentation even further.
Disclaimer
Nutritional information is approximate and may vary based on ingredient brands, substitutions, portion sizes, and preparation methods.