
Cheese Mummies
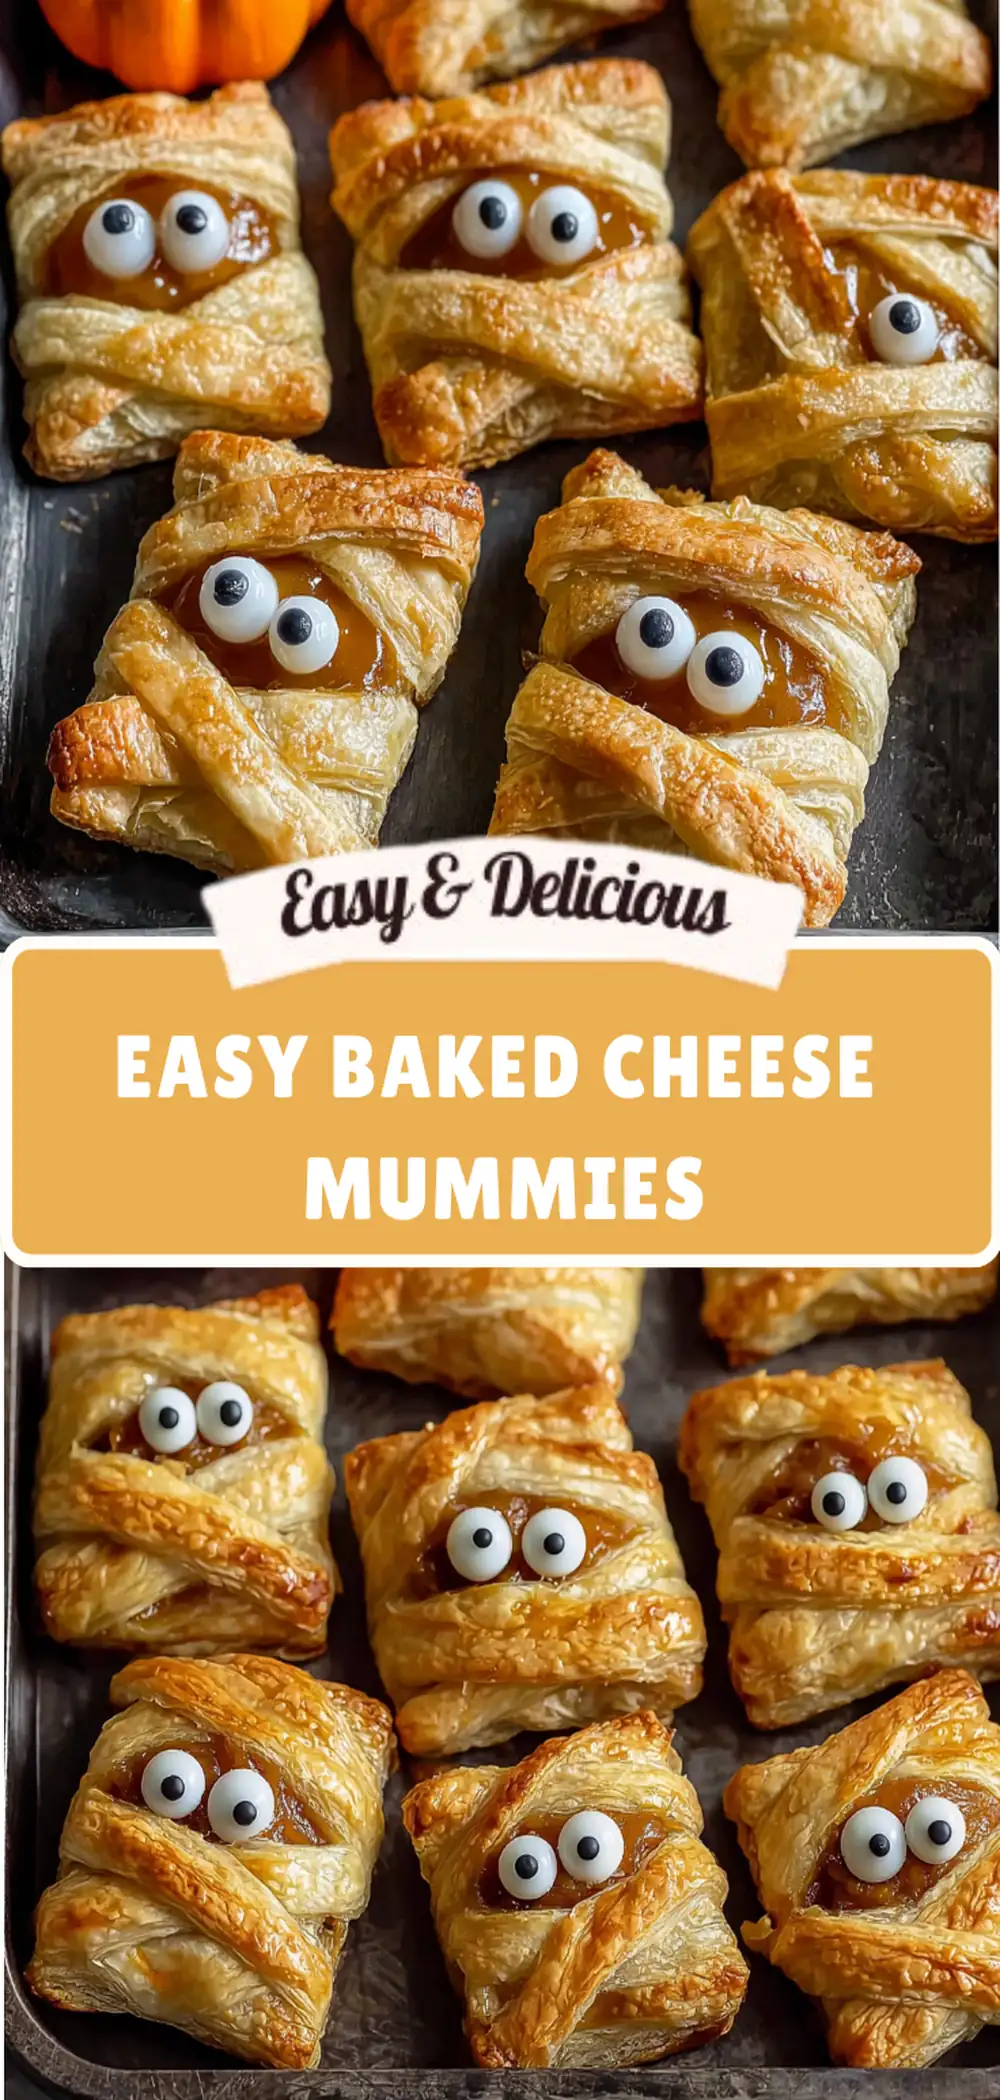
If you’re looking for the perfect spooky snack that’s both fun and delicious, these Baked Cheese Mummies are a Halloween must-try! Golden, flaky, and stuffed with melty cheese, they’re quick to make and sure to wow kids and adults alike at any Halloween party.
🕒 Prep Time: 15 minutes
🕒 Cook Time: 15 minutes
🕒 Total Time: 30 minutes
Ingredients
- 1 sheet puff pastry (thawed if frozen)
- 8 mozzarella string cheese sticks (or cheddar sticks)
- 1 large egg (beaten, for egg wash)
- 1 tablespoon water
- 2 tablespoons butter (optional, melted for extra flavor)
- Black olives or candy eyes (for decoration)
- A pinch of garlic powder or Italian seasoning (optional for flavor)
Step-by-Step Instructions
- Preheat the oven
Set your oven to 375°F (190°C). Line a baking sheet with parchment paper for easy cleanup. - Prepare the puff pastry
Roll out the puff pastry on a lightly floured surface. Using a sharp knife or pizza cutter, slice it into thin strips about ¼ inch wide. These strips will become the mummy “bandages.” - Wrap the cheese sticks
Take one cheese stick and start wrapping it with the puff pastry strips. Overlap slightly to create that crisscross “mummy” look. Make sure to leave a little space at the top for the mummy’s “eyes.” - Seal the ends
Pinch the ends of the pastry so it sticks firmly to the cheese. This will help prevent the cheese from leaking too much while baking. - Place on baking sheet
Arrange your wrapped cheese sticks on the prepared baking sheet. Be sure to leave about 1–2 inches between each one for even baking. - Add egg wash
Whisk the egg with 1 tablespoon of water. Brush each mummy lightly with this egg wash to help it turn golden brown while baking. - Bake
Place in the preheated oven and bake for 13–15 minutes, or until the puff pastry is puffed and golden. - Add eyes
Once baked, let them cool slightly. Add black olive pieces or candy eyes in the exposed space to give them that classic mummy face. - Serve & enjoy!
Serve warm with marinara sauce, ranch dip, or spooky green guacamole for extra Halloween fun.
Pro Tips for Perfect Cheese Mummies
- Cheese Choices: Mozzarella sticks are classic, but cheddar or pepper jack adds a sharper flavor.
- Make Ahead: Assemble the mummies a few hours early and refrigerate. Bake just before serving.
- Prevent Cheese Leaks: Freeze the cheese sticks for 10 minutes before wrapping—this helps reduce oozing while baking.
Why You’ll Love These
- Kid-Friendly: Kids will love helping to wrap the cheese mummies before baking.
- Party Perfect: A spooky, finger-friendly appetizer for any Halloween buffet.
- Quick & Easy: Only 30 minutes from start to finish.
Serving Ideas
Pair these Baked Cheese Mummies with a platter of other spooky snacks like:
- Halloween deviled eggs with olive “spiders”
- Pumpkin-shaped quesadillas
- Bloody marinara “dip” bowls
They also make a fun lunchbox surprise during October!
Storage & Reheating
- Storage: Store leftovers in an airtight container in the refrigerator for up to 2 days.
- Reheating: Warm them in the oven at 350°F for 5–7 minutes to keep the pastry crisp. Avoid microwaving, as the pastry will turn soggy.
Nutrition Information (per serving – 1 mummy)
| Serving Size | Calories | Protein | Carbs | Fat | Fiber | Sugar |
|---|---|---|---|---|---|---|
| 1 mummy | 160 | 6g | 12g | 10g | 1g | 1g |
Disclaimer: Nutrition facts are estimated using online tools and may vary based on your ingredients and preparation. Please consult a nutritionist for precise dietary advice.
Final Thoughts
These Baked Cheese Mummies are the ultimate mix of spooky and tasty! With just a handful of ingredients and a playful presentation, they’ll bring a festive touch to your Halloween spread. Whether you’re hosting a party or just making a fun snack for family movie night, these cheesy mummies will disappear quickly—so make a double batch!