
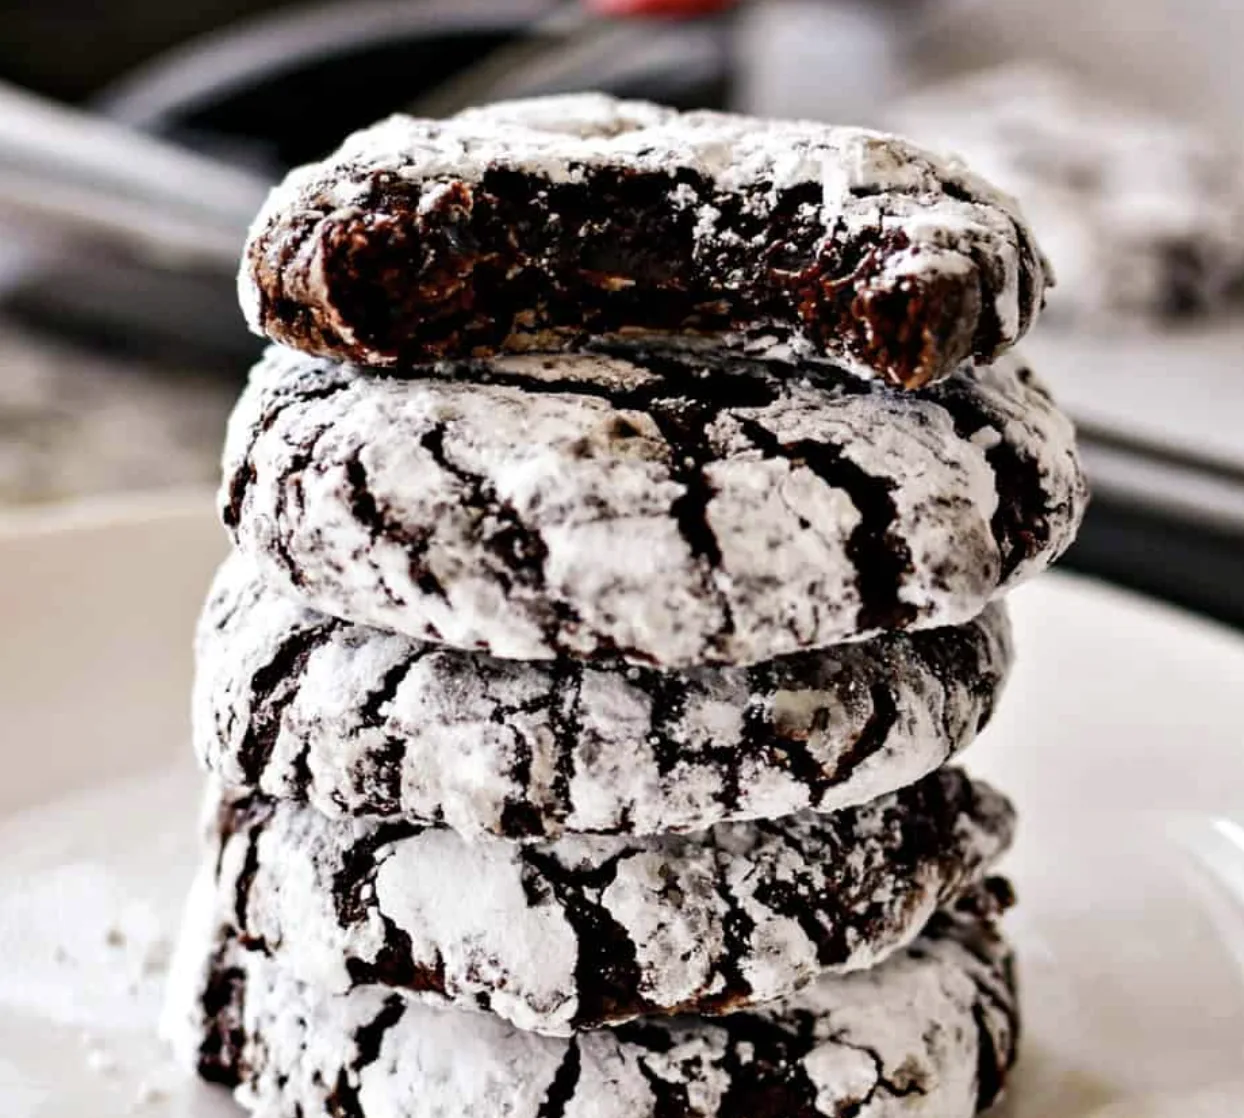
Chocolate Crinkle Cookies are a classic homemade treat loved for their rich chocolate flavor, soft centers, slightly chewy texture, and beautiful powdered sugar coating. Each cookie develops a distinctive crackled appearance as it bakes, revealing a dark chocolate interior beneath a snowy white exterior. The result is a cookie that looks impressive on a serving platter while remaining simple enough for home bakers to prepare.
These cookies have the delicious flavor and texture of a brownie in a convenient, bite-sized form. Unsweetened Dutch-processed cocoa powder gives them a deep chocolate taste, while granulated sugar and brown sugar contribute sweetness and help create their tender texture. Vegetable or canola oil keeps the recipe straightforward, and vanilla extract adds warmth to the chocolate flavor.
One of the best things about Chocolate Crinkle Cookies is their appearance. Before baking, each portion of dough is rolled generously in powdered sugar. As the cookies spread and rise in the oven, the coating separates into delicate white cracks that contrast beautifully with the chocolate underneath. This familiar crinkled finish makes them especially attractive for holiday cookie trays, Christmas celebrations, cookie exchanges, and homemade edible gifts.
Although these cookies are often associated with Christmas, they are delicious throughout the year. Serve them with coffee, tea, or a glass of milk, or add them to a dessert platter alongside other homemade cookies. Their rich chocolate flavor makes them satisfying on their own, without requiring frosting, icing, or complicated decorations.
This recipe yields approximately 30 cookies and requires just 20 minutes of preparation, followed by a short chilling period and a quick bake. The dough is refrigerated for 30–45 minutes before shaping, which makes it easier to handle. Once the cookies are portioned and coated in powdered sugar, they need only 10–11 minutes in the oven to develop their soft, brownie-like centers.
If you enjoy chocolate desserts that combine an appealing appearance with a tender texture, these Chocolate Crinkle Cookies are an excellent recipe to keep in your collection.
Why You Will Love These Chocolate Crinkle Cookies
There are plenty of reasons to make these cookies, whether you are preparing a holiday dessert assortment or simply craving something chocolatey.
1. Rich Chocolate Flavor
Unsweetened Dutch-processed cocoa powder gives these cookies their deep chocolate character. Rather than relying on melted chocolate, the recipe uses cocoa powder combined with sugar, oil, eggs, and vanilla to create a flavorful chocolate dough.
Dutch-processed cocoa is treated with an alkali to reduce its acidity. This produces a darker color and a smoother, more mellow chocolate flavor. Regular unsweetened cocoa powder can also be used, although the original recipe recommends a small adjustment when making that substitution.
2. Soft, Brownie-Like Centers
These cookies have a cake-like, fudgy texture that makes them different from crisp chocolate cookies. Their centers remain soft when the cookies are baked for the recommended 10–11 minutes.
The key is to avoid leaving them in the oven too long. Chocolate cookies can become dry when overbaked, so watching the baking time carefully helps preserve their tender texture.
3. A Beautiful Crinkled Appearance
The powdered sugar coating creates the signature look of chocolate crinkle cookies. As the dough bakes, the surface expands and cracks, allowing the dark chocolate cookie to show through the white coating.
Rolling each dough ball generously in powdered sugar helps create a more noticeable contrast. This simple finishing step makes the cookies attractive without adding any extra decoration after baking.
4. Straightforward Ingredients
The recipe uses familiar baking ingredients, including all-purpose flour, baking powder, salt, cocoa powder, two types of sugar, oil, eggs, vanilla extract, and powdered sugar.
You do not need a complicated list of specialty ingredients. Dutch-processed cocoa is the preferred choice, but the source recipe also explains how to substitute regular cocoa powder.
5. Great for Sharing
The recipe makes approximately 30 cookies, making it suitable for sharing with family and friends. Arrange them on a platter for a celebration, package them as homemade gifts, or bring them to a cookie exchange.
Their distinctive appearance also makes them a welcome addition to Christmas cookie collections, where they pair naturally with other chocolate, mint, and vanilla-flavored treats.
6. Convenient to Prepare Ahead
The dough can be prepared and refrigerated before baking. The required chilling period is 30–45 minutes, and the finished cookies can be stored at room temperature for up to five days or frozen for up to three months.
This flexibility makes the recipe practical when you want to prepare homemade cookies in advance.
Ingredients for Chocolate Crinkle Cookies
The following ingredients make approximately 30 cookies. Measure each ingredient carefully to help achieve the intended texture and flavor.
All-Purpose Flour: 2¼ Cups
All-purpose flour provides the structure for the cookies. It combines with the eggs and other ingredients to create a dough that can be chilled, portioned, rolled, and baked.
Accurate flour measurement is particularly important for soft cookies. Too much flour can make the dough overly stiff and contribute to a dry result.
For the most reliable measurement, loosen the flour in its container, spoon it into the measuring cup, and level the top with the back edge of a table knife. Avoid packing the flour into the cup.
Baking Powder: 2½ Teaspoons
Baking powder helps the cookies rise as they bake and contributes to their cake-like texture. Measure it carefully and combine it with the flour before adding the dry ingredients to the chocolate mixture.
Kosher Salt: ½ Teaspoon
Salt balances the sweetness and helps round out the chocolate flavor. Combining it with the flour and baking powder distributes it throughout the dough.
Unsweetened Dutch-Processed Cocoa Powder: 1 Cup
Cocoa powder is responsible for the cookies’ rich chocolate flavor and dark color.
The original recipe recommends Dutch-processed cocoa because its reduced acidity produces a smoother, more mellow chocolate taste. Regular unsweetened cocoa powder is also an option, but see the substitution guidance below before making the change.
Measure the cocoa carefully. If it has been sitting in the container for a long time, stir it to loosen it before measuring.
Granulated Sugar: 1¼ Cups
Granulated sugar provides sweetness and helps establish the balance of flavors in the dough. The recipe uses more granulated sugar than brown sugar, creating the preferred combination described by the original author.
Brown Sugar: ½ Cup
Brown sugar adds sweetness and contributes to the cookies’ tender texture. Used alongside granulated sugar, it gives the chocolate dough a balanced flavor rather than relying on just one type of sugar.
Measure the brown sugar according to your usual baking practice and combine it with the granulated sugar and cocoa powder.
Vegetable Oil or Canola Oil: ½ Cup
Oil adds moisture and helps create the soft texture associated with these cookies. The recipe allows either vegetable oil or canola oil, so you can use whichever option you have available.
Combine the oil with the cocoa powder and sugars before incorporating the eggs and vanilla.
Large Eggs: 4
The recipe calls for four large eggs. They help bind the ingredients together and give the dough its structure.
Add the eggs one at a time to the chocolate mixture, stirring each one in before adding the next. Using large eggs as specified helps keep the ingredient proportions consistent.
Vanilla Extract: 1 Teaspoon
Vanilla extract complements the chocolate and adds depth to the overall flavor. Pure vanilla extract is the preferred choice in the original recipe.
Stir it into the chocolate mixture after incorporating the eggs.
Powdered Sugar: ⅔ Cup
Powdered sugar creates the cookies’ characteristic white coating and cracked appearance.
After chilling the dough, roll each portion in powdered sugar before placing it on the prepared baking sheet. The coating should be generous enough to provide a visible contrast against the dark chocolate surface.
How to Make Chocolate Crinkle Cookies
Follow these steps to prepare the dough, shape the cookies, and bake them until the centers are soft and the powdered sugar coating has developed its signature crinkles.
Step 1: Prepare the Oven and Baking Sheet
Preheat the oven to 350°F.
Line a baking sheet with a silicone baking mat or parchment paper. This provides a prepared surface for the cookies and makes it easier to handle them after baking.
Before moving on, make sure your ingredients are measured and your mixing bowls are ready. Since the dough needs to chill for 30–45 minutes, you can use that time to organize your baking area.
Step 2: Combine the Dry Ingredients
Place the all-purpose flour, baking powder, and kosher salt in a small bowl.
Whisk the ingredients together until they are evenly combined, then set the bowl aside.
Mixing these ingredients separately helps distribute the baking powder and salt throughout the flour before they are added to the chocolate mixture.
Step 3: Mix the Cocoa, Sugars, and Oil
In a medium bowl, combine the Dutch-processed cocoa powder, granulated sugar, brown sugar, and vegetable or canola oil.
Stir the ingredients together until the cocoa and sugars are incorporated into the oil.
The mixture will form the chocolate base of the cookie dough. Take a moment to scrape the sides of the bowl as needed so the ingredients are combined as evenly as possible.
Step 4: Add the Eggs and Vanilla
Add the four large eggs one at a time, beating each egg into the chocolate mixture before adding the next.
Once all four eggs have been incorporated, stir in the vanilla extract.
The mixture should now have a rich chocolate color and a more cohesive consistency. Adding the eggs gradually helps incorporate them throughout the mixture rather than adding them all at once.
Step 5: Add the Flour Mixture
Slowly stir the reserved flour mixture into the chocolate mixture.
Continue mixing until the dry ingredients are incorporated and the dough is combined. Avoid adding extra flour simply because the dough feels thick; the recipe depends on the specified proportions for its intended texture.
Once the dough is combined, cover the bowl with plastic wrap.
Step 6: Refrigerate the Dough
Place the covered bowl in the refrigerator for 30–45 minutes.
This chilling period is an important part of the recipe. It gives the dough time to firm up, making it easier to portion and roll into balls.
Chilled dough is also more manageable when coating each portion in powdered sugar. If you are baking multiple batches, keep the remaining dough refrigerated between batches, as recommended by the original recipe.
Step 7: Shape the Cookie Dough
Remove the chilled dough from the refrigerator.
Using a cookie scoop and your hands, form the dough into balls approximately 1¼ inches in diameter.
Try to keep the portions similar in size. Consistent portions help the cookies bake at a similar rate, reducing the chance that some will become overbaked while others need additional time.
Handle the dough gently and work efficiently so it remains easy to shape.
Step 8: Coat the Dough Balls in Powdered Sugar
Place the powdered sugar in a bowl and roll each dough ball in it until coated.
The original recipe uses ⅔ cup of powdered sugar for this step. Apply the coating generously so that the chocolate dough is well covered before baking.
This coating is essential to the appearance of Chocolate Crinkle Cookies. As the cookies expand in the oven, the powdered sugar separates across the surface, revealing the dark chocolate beneath it.
Once coated, place each dough ball on the prepared baking sheet.
Step 9: Space the Cookies on the Baking Sheet
Arrange the coated dough balls approximately 2–2½ inches apart.
Do not overcrowd the baking sheet. The cookies need space as they spread during baking, and leaving room between them helps prevent neighboring cookies from touching.
If all the dough does not fit comfortably on one sheet, bake it in batches. Keep the remaining dough refrigerated between batches so it stays easier to handle.
Step 10: Bake for 10–11 Minutes
Place the baking sheet in the preheated 350°F oven.
Bake the cookies for 10–11 minutes. Keep a close eye on them because the goal is a soft, cake-like cookie rather than a dry or crunchy one.
The original recipe recommends testing the baking time with one or two cookies if you are uncertain about how your oven behaves. This small practice batch can help you determine the best timing and check whether the cookies spread as expected.
Avoid extending the baking time unnecessarily. A few extra minutes can make a difference to the texture of a soft chocolate cookie.
Step 11: Cool Before Moving
Remove the baking sheet from the oven when the cookies have finished baking.
Let the cookies cool on the baking sheet for two minutes before carefully transferring them to wire cooling racks.
Freshly baked cookies are delicate, so moving them immediately can cause them to break or lose their shape. Allowing them to rest briefly makes handling easier.
Transfer them gently and leave them on the racks until they have cooled.
Step 12: Serve and Enjoy
Once cooled, arrange the Chocolate Crinkle Cookies on a serving plate.
Their dark chocolate centers and powdered sugar coating make them attractive without any additional decoration. Serve them with coffee, tea, or milk, or include them in a larger assortment of homemade cookies.
If you are preparing them for a holiday gathering, allow the cookies to cool completely before packing them into a storage container or gift box.
Essential Tips for the Best Chocolate Crinkle Cookies
A few small details can make the preparation process easier and help preserve the cookies’ soft texture.
Measure the Flour Correctly
Incorrect flour measurement is one of the problems highlighted in the original recipe. Too much flour can make the dough stiff and contribute to dry cookies.
If the flour has been sitting in its container for a while, stir it to loosen it before measuring. Spoon it into the measuring cup and level the top with the back edge of a table knife.
Use the same careful approach when measuring cocoa powder.
Chill the Dough for the Recommended Time
Allow the dough to refrigerate for 30–45 minutes before shaping.
This period helps firm up the dough and makes it easier to roll into evenly sized balls. Cover the bowl while chilling, and return the dough to the refrigerator between batches if you are baking more than one sheet.
Do not skip the chilling period simply to save time, because it is part of the original recipe’s preparation process.
Use a Generous Powdered Sugar Coating
The powdered sugar is responsible for the distinctive crinkled finish. A light dusting may not create the same striking contrast, so roll each dough ball generously before baking.
Make sure the dough balls are coated before placing them on the baking sheet.
Leave Enough Space Between Cookies
Arrange the dough balls about 2–2½ inches apart. Overcrowding can cause the cookies to spread into one another.
Baking in batches is preferable to squeezing too many portions onto a single baking sheet.
Avoid Overbaking
The recipe calls for just 10–11 minutes in the oven. These cookies are intended to remain soft, so baking them too long can compromise their texture.
If you are unsure about your oven, bake one or two cookies first. Use that practice run to establish the optimum baking time and check how much the dough spreads.
Handle the Cookies Carefully
Allow the baked cookies to rest on the baking sheet for two minutes before transferring them to wire racks.
They are delicate while hot. A short cooling period helps them become easier to move without breaking.
Keep the Dough Covered Between Batches
If you need to bake several trays, cover and refrigerate the remaining dough between batches.
This is especially helpful when you are working at a relaxed pace or preparing a larger quantity for a gathering. Keeping the dough covered also prevents it from being left exposed while you finish the first batch.
Can You Use Regular Cocoa Powder Instead of Dutch-Processed Cocoa?
Yes. According to the original recipe, regular unsweetened cocoa powder can be substituted for Dutch-processed cocoa powder.
The two types of cocoa are processed differently. Dutch-processed cocoa is treated with an alkali to neutralize some of its acidity, producing a darker color and a more mellow flavor. Regular cocoa powder retains more of its natural acidity.
The original author recommends adding ¾ teaspoon of baking soda when using regular cocoa powder to give it a milder, less acidic flavor.
Because this is a substitution suggested by the source recipe, remember that the published ingredient list itself calls for one cup of unsweetened Dutch-processed cocoa powder and 2½ teaspoons of baking powder. If you choose regular cocoa, follow the stated substitution guidance rather than assuming the original ingredient list is unchanged.
How to Prevent Chocolate Crinkle Cookies from Becoming Dry
Dry cookies can be disappointing, especially when you expect a soft, brownie-like center. The original recipe points to incorrect flour measurement as an important factor to check.
Start by measuring the flour carefully. Loosen it in its container, spoon it into the measuring cup, and level it with a table knife. Do not press extra flour into the cup.
Apply the same principle to the cocoa powder. If it has been sitting for a long time, stir it to loosen it before measuring.
Next, pay attention to the baking time. The recipe recommends 10–11 minutes at 350°F. Leaving the cookies in the oven for too long can cause them to lose the soft texture that makes them appealing.
Finally, allow the cookies to cool for two minutes on the baking sheet before transferring them to wire racks. Handle them carefully while they are warm.
By measuring accurately and following the recommended baking time, you can avoid two common issues identified in the original recipe: overly stiff dough and dry cookies.
How to Store Chocolate Crinkle Cookies
Proper storage helps keep these cookies fresh after baking.
Storing at Room Temperature
Once the cookies have cooled completely, place them in an airtight container.
Store the container on the counter at room temperature for up to five days, following the original recipe’s storage instructions.
Allowing the cookies to cool before sealing them is a useful step when preparing them for storage. You can keep them in the same airtight container until you are ready to serve them.
Freezing Baked Cookies
Chocolate Crinkle Cookies freeze well, and the original recipe recommends freezing them for up to three months.
First, allow the cookies to cool thoroughly. Place them in a sturdy, airtight freezer container, separating the layers with wax paper or parchment paper.
For additional protection, arrange the cookies in freezer bags in a single layer and remove as much air as possible. Then place the bags in a freezer container.
This approach helps protect the cookies while they are stored and makes it easier to keep them organized.
Freezing Without Crushing the Cookies
The powdered sugar coating is an important part of the cookies’ appearance, so take care when packing them.
Avoid placing heavy items on top of the container. Use a sturdy container and separate the layers with parchment or wax paper, as recommended in the original recipe.
Labeling the container with the storage date can also help you keep track of the recommended three-month freezing period.
Can You Make Chocolate Crinkle Cookies Ahead of Time?
Yes. The dough can be prepared and chilled before baking, making the recipe convenient when you want to spread the work across your available time.
The original instructions call for covering the dough with plastic wrap and refrigerating it for 30–45 minutes. This is the specified chilling period before shaping and baking.
You can also bake the cookies in advance and store them in an airtight container at room temperature for up to five days. If you want to keep them longer, the recipe allows freezing the baked cookies for up to three months.
For the best organization, decide whether you want to prepare the dough first or bake the cookies ahead of your event. Either option can help make holiday baking more manageable.
Serving Ideas for Chocolate Crinkle Cookies
These cookies are versatile enough for casual snacks, dessert platters, and special occasions.
Serve with Coffee or Tea
A Chocolate Crinkle Cookie makes a lovely accompaniment to a warm cup of coffee or tea. The rich chocolate flavor pairs naturally with these drinks, making the cookies suitable for an afternoon break or a simple dessert after a meal.
Enjoy with a Glass of Milk
Milk is a classic companion for chocolate cookies. Serve the cookies with a cold glass of milk for an easy snack that appeals to both children and adults.
Add Them to a Christmas Cookie Tray
Their snowy powdered sugar coating makes Chocolate Crinkle Cookies especially attractive on Christmas platters.
Arrange them alongside other homemade cookies to create a varied assortment of shapes, colors, and flavors. They also make a nice contribution to a holiday cookie exchange.
Package Them as Homemade Gifts
Once completely cooled, the cookies can be arranged in a suitable gift box or container.
Use parchment or wax paper to separate layers and help protect their powdered sugar coating. Homemade cookies are a thoughtful option for friends, family members, neighbors, or holiday hosts.
Create a Chocolate Dessert Assortment
For a dessert platter with several different flavors, combine Chocolate Crinkle Cookies with other chocolate-based cookies, mint-flavored treats, and simple vanilla cookies.
The crinkled white coating gives these cookies a distinctive appearance, helping them stand out among other baked goods.
Frequently Asked Questions
Can I use regular cocoa powder instead of Dutch-processed cocoa?
Yes. The original recipe says regular unsweetened cocoa powder can be used. The author recommends adding ¾ teaspoon of baking soda to give the flavor a milder, less acidic character. The listed recipe otherwise calls for one cup of Dutch-processed cocoa powder.
Can Chocolate Crinkle Cookies be frozen?
Yes. These cookies freeze well for up to three months.
Cool them thoroughly before freezing, then place them in a sturdy, airtight container. Separate the layers with wax or parchment paper. For extra protection, put the cookies in freezer bags in a single layer, remove as much air as possible, and place the bags in a freezer container.
How long do Chocolate Crinkle Cookies last at room temperature?
The original recipe recommends storing them in an airtight container on the counter at room temperature for up to five days.
Allow the cookies to cool completely before placing them in the container.
Why is my cookie dough stiff?
The original author identifies incorrect flour measurement as a possible cause of stiff dough.
If you pack too much flour into the measuring cup, the dough may become too stiff. Stir the flour to loosen it, spoon it into the measuring cup, and level it with the back edge of a table knife.
The same measuring advice applies to cocoa powder that has been sitting in its container for a while.
Why did my Chocolate Crinkle Cookies turn out dry?
Too much flour and excessive baking are two important things to check.
Measure the flour and cocoa carefully, using the spoon-and-level method described above. Then follow the recommended baking time of 10–11 minutes at 350°F.
Because these are intended to be soft, cake-like cookies, avoid leaving them in the oven longer than necessary.
How do I get a more noticeable crinkle pattern?
The original recipe emphasizes rolling the dough balls heavily in powdered sugar. A generous coating helps create the white-and-dark contrast that gives these cookies their familiar appearance.
Make sure each portion is coated before it goes into the oven.
How far apart should I place the cookies?
Place the dough balls approximately 2–2½ inches apart on the prepared baking sheet.
This spacing gives the cookies room to spread as they bake and helps prevent them from touching one another.
How long should I chill the dough?
Refrigerate the covered dough for 30–45 minutes before shaping it.
If you are baking in multiple batches, keep the remaining dough covered and refrigerated between batches.
How long do the cookies need to bake?
Bake the cookies for 10–11 minutes in an oven preheated to 350°F.
The original author recommends baking one or two cookies as a test if you are unsure about the timing or how much the dough will spread in your oven.
Should I move the cookies immediately after baking?
No. Let them cool on the baking sheet for two minutes before carefully transferring them to wire cooling racks.
This short resting period makes the cookies easier to handle while they are still warm.
How many cookies does this recipe make?
The recipe yields approximately 30 cookies when the dough is shaped into balls about 1¼ inches in diameter.
The exact number may vary slightly depending on how consistently you portion the dough.
Can I use vegetable oil instead of canola oil?
Yes. The ingredient list specifically allows either vegetable oil or canola oil. Use ½ cup of whichever option you choose.
What makes these cookies different from regular chocolate cookies?
Chocolate Crinkle Cookies have a soft, cake-like texture and a distinctive powdered sugar coating that cracks as the dough bakes.
Their rich chocolate flavor and brownie-like centers make them different from cookies that are designed to be crisp throughout.
Chocolate Crinkle Cookies Recipe Card
Prep Time: 20 minutes
Cook Time: 10 minutes
Chilling Time: 30–45 minutes
Yield: Approximately 30 cookies
Course: Cookie
Cuisine: American
Author: Beth Pierce
Ingredients
- 2¼ cups all-purpose flour
- 2½ teaspoons baking powder
- ½ teaspoon kosher salt
- 1 cup unsweetened Dutch-processed cocoa powder
- 1¼ cups granulated sugar
- ½ cup brown sugar
- ½ cup vegetable oil or canola oil
- 4 large eggs
- 1 teaspoon vanilla extract
- ⅔ cup powdered sugar
Instructions
- Preheat the oven to 350°F. Cover a baking sheet with a silicone baking mat or parchment paper.
- In a small bowl, combine the flour, baking powder, and salt.
- In a medium bowl, combine the cocoa powder, granulated sugar, brown sugar, and canola or vegetable oil.
- Beat the eggs into the chocolate mixture one at a time, then stir in the vanilla extract.
- Slowly stir the flour mixture into the chocolate mixture until combined.
- Cover the bowl with plastic wrap and refrigerate the dough for 30–45 minutes.
- Using a cookie scoop and your hands, roll the dough into balls approximately 1¼ inches in diameter.
- Roll each ball in powdered sugar until generously coated.
- Arrange the dough balls on the prepared baking sheet, leaving approximately 2–2½ inches between them.
- Bake for 10–11 minutes.
- Let the cookies cool on the baking sheet for two minutes before transferring them to wire cooling racks.
Storage Notes
Store the cookies in an airtight container at room temperature for up to five days.
To freeze, cool the cookies completely and place them in a sturdy, airtight freezer container, separating the layers with wax or parchment paper. They can be frozen for up to three months.
Nutrition Information
Per cookie, based on the original recipe:
- Calories: 138 kcal
- Carbohydrates: 24 g
- Protein: 2 g
- Fat: 5 g
- Saturated Fat: 1 g
- Polyunsaturated Fat: 2 g
- Monounsaturated Fat: 1 g
- Trans Fat: 0.03 g
- Cholesterol: 22 mg
- Sodium: 84 mg
- Potassium: 67 mg
- Fiber: 1 g
- Sugar: 15 g
- Vitamin A: 32 IU
- Calcium: 31 mg
- Iron: 1 mg
Final Thoughts
Chocolate Crinkle Cookies are a wonderful choice when you want a homemade chocolate treat that looks as good as it tastes. Their rich cocoa flavor, soft centers, and generous powdered sugar coating create a classic cookie that works for everyday snacking as well as special celebrations.
The preparation is straightforward: combine the dry ingredients, mix the chocolate base, incorporate the eggs and vanilla, chill the dough, roll the portions in powdered sugar, and bake for just 10–11 minutes. Paying attention to flour measurements, chilling time, coating, and baking time helps preserve the soft texture that makes these cookies so appealing.
Prepare a batch for a Christmas cookie platter, share them with friends, or keep a few in an airtight container for a chocolate treat during the week. With approximately 30 cookies per batch and storage options that include room-temperature keeping and freezing, this recipe is a practical addition to any home baker’s collection.
If you love soft, fudgy chocolate cookies with a beautiful crinkled finish, these Chocolate Crinkle Cookies deserve a place in your recipe collection.