
Cookie Monster Cheesecake
Introduction:
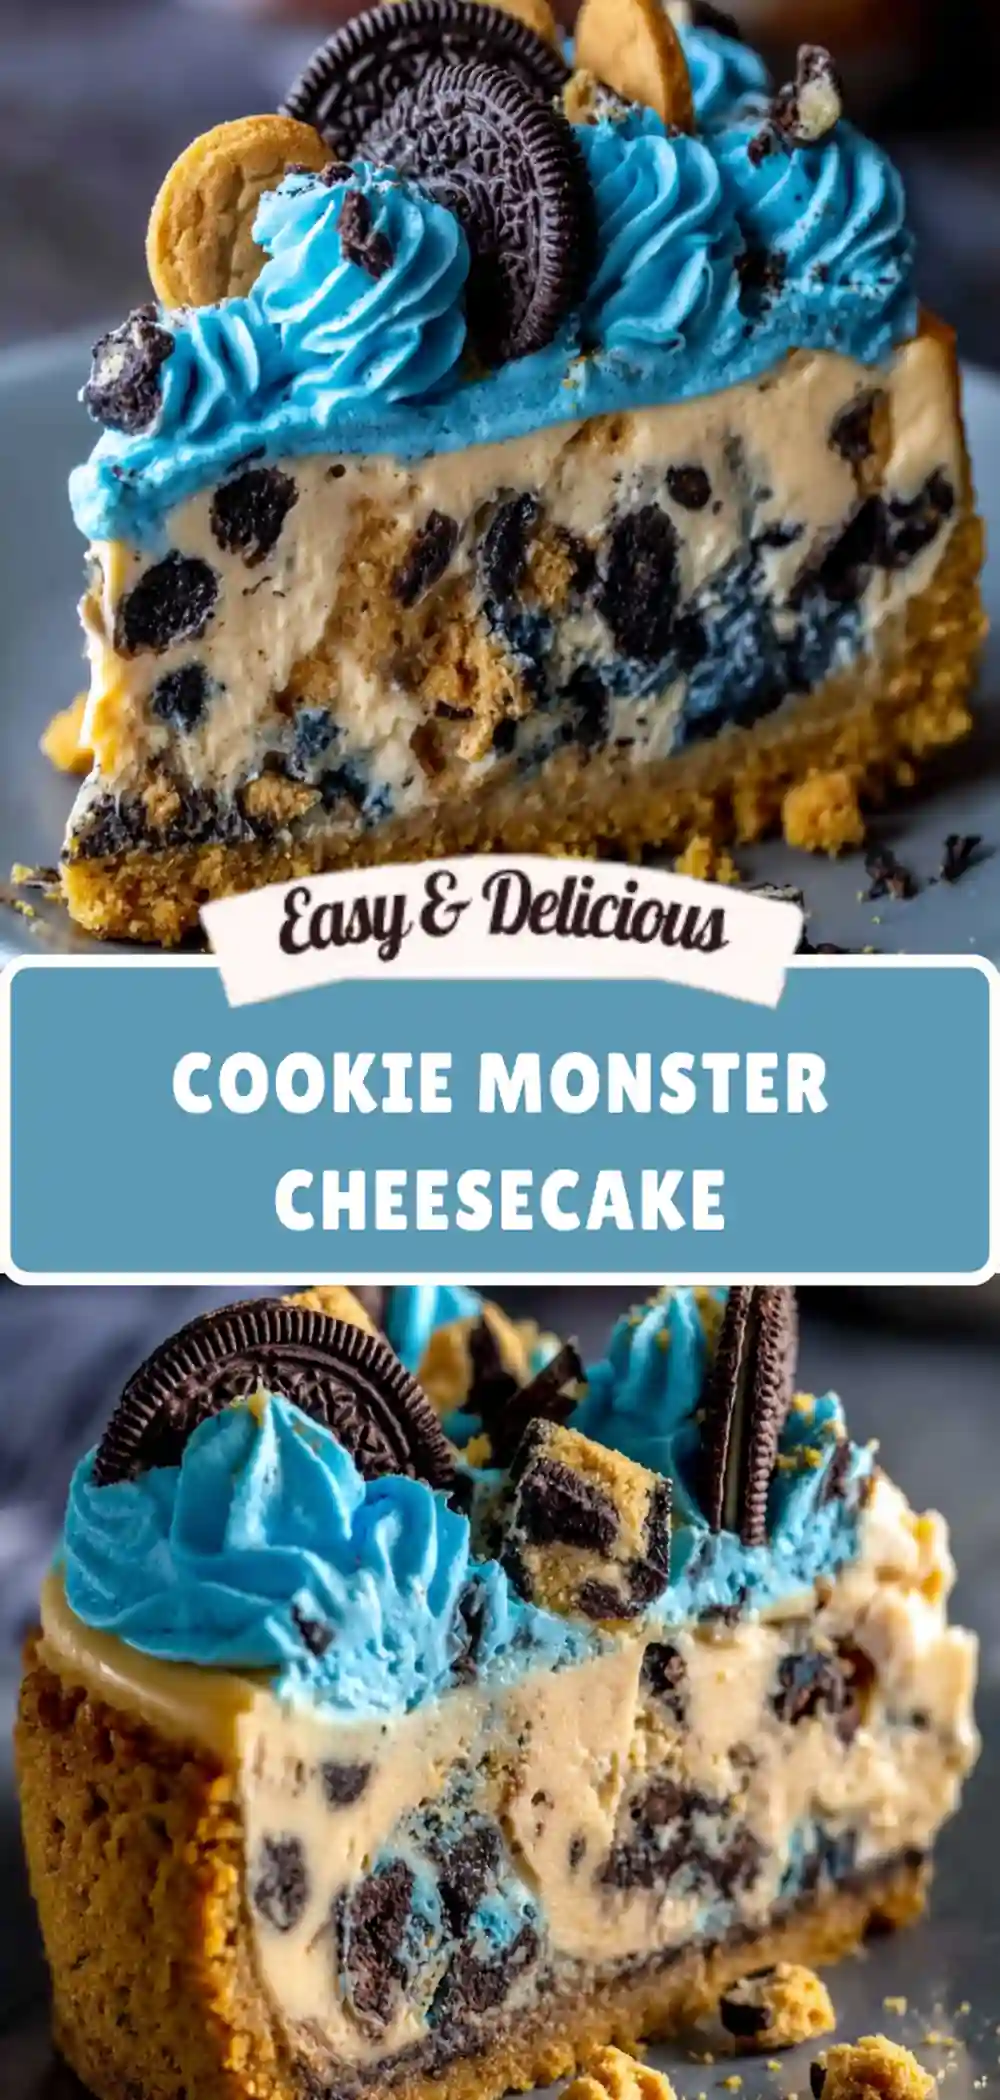
Get ready for a playful, bakery-style dessert that’s as fun to look at as it is to eat! This Cookie Monster Cheesecake combines crushed Oreos, chewy chocolate chip cookies, and a rich, creamy cheesecake layer dyed in that signature Cookie Monster blue. It’s the perfect showstopper for birthdays, parties, or any day you’re craving a little fun in your dessert!
🕒 Prep Time: 25 minutes
🕒 Cook Time: 55 minutes
🕒 Total Time: 1 hour 20 minutes (plus chilling time)
Ingredients:
For the Crust:
- 24 Oreo cookies (crushed finely)
- 5 tablespoons unsalted butter, melted
For the Cheesecake Filling:
- 24 oz (680g) cream cheese, softened
- 1 cup granulated sugar
- 3 large eggs
- 1 cup sour cream
- 1 teaspoon vanilla extract
- A few drops of blue food coloring (gel preferred)
- 10 mini chocolate chip cookies, roughly chopped
- 6 Oreo cookies, chopped
For the Topping:
- 1 cup whipped cream (homemade or store-bought)
- Crushed Oreos and mini cookies for garnish
- Extra chocolate chips for drizzle (optional)
Step-by-Step Instructions:
Step 1: Prepare the Crust
Preheat your oven to 325°F (160°C). In a medium bowl, combine the finely crushed Oreos with melted butter. Stir until the crumbs are evenly moistened. Press this mixture firmly into the bottom of a 9-inch springform pan. Bake for 10 minutes, then set aside to cool while you prepare the filling.
Step 2: Beat the Cream Cheese
In a large mixing bowl, beat the softened cream cheese on medium speed until smooth and creamy. Add the sugar and continue to beat until no lumps remain. Scrape down the sides of the bowl to ensure everything is well mixed.
Step 3: Add Eggs and Flavoring
Add the eggs one at a time, mixing on low speed after each addition just until blended. Stir in the vanilla extract and sour cream. Be careful not to overmix—this helps avoid cracks in the cheesecake as it bakes.
Step 4: Add Color and Cookies
Add several drops of blue food coloring until you reach that iconic Cookie Monster shade. Fold in the chopped Oreos and mini cookies gently with a spatula so they’re evenly distributed throughout the batter.
Step 5: Bake the Cheesecake
Pour the blue cheesecake filling over the cooled crust. Smooth the top with a spatula. Bake for about 55–60 minutes, or until the edges are set but the center still jiggles slightly. Turn off the oven, crack the door open, and let the cheesecake cool inside for about an hour to prevent cracking.
Step 6: Chill Completely
After cooling, cover the cheesecake with plastic wrap and refrigerate for at least 4 hours—or preferably overnight—for the best texture and flavor.
Step 7: Add the Whipped Topping
Once chilled, spread or pipe whipped cream over the top. Sprinkle crushed Oreos and cookie chunks for that signature “monster” look. If desired, drizzle with melted chocolate or add chocolate chips for extra texture.
Step 8: Decorate Like a Cookie Monster!
To make it even more fun, place two round cookies on top as “eyes” and a small dollop of whipped cream to hold mini chocolate chips as pupils. This gives your cheesecake a playful Cookie Monster face that’s perfect for parties or photos.
Pro Tips:
- Avoid cracks: Don’t overbeat the batter. If you want a perfectly smooth surface, bake your cheesecake in a water bath by placing the springform pan inside a larger pan filled with about an inch of hot water.
- Chill time matters: Cheesecake texture improves as it chills. Overnight refrigeration helps it firm up and makes it easier to slice cleanly.
- Storage: Store covered in the refrigerator for up to 5 days. You can also freeze slices individually wrapped in plastic and foil for up to 1 month.
Flavor Variations:
- Mint Monster: Add a drop of mint extract and crushed mint Oreos for a cool twist.
- Cookie Dough Swirl: Drop small chunks of edible cookie dough into the filling before baking for extra cookie fun.
- No-Bake Version: Use a whipped cream cheese base instead of baked cheesecake for a faster dessert—just chill to set.
Serving Suggestions:
Serve chilled, with a drizzle of chocolate sauce or a scoop of vanilla ice cream on the side. It’s perfect for birthdays, kids’ parties, or any dessert table that needs a pop of color.
Nutrition Info:
| Serving Size | Calories | Protein | Carbs | Fat | Fiber | Sugar |
|---|---|---|---|---|---|---|
| 1 slice (1/12 cake) | 460 | 8g | 42g | 28g | 1g | 30g |
Disclaimer:
Nutrition facts are estimated using online tools and may vary based on your ingredients and preparation. Please consult a nutritionist for precise dietary advice.