
If you are looking for a stylish crochet accessory that is simple enough to enjoy over a relaxing afternoon but interesting enough to keep your hands busy, this easy crochet bandana pattern is a wonderful project to try. The XoXo Crochet Bandana is a versatile head kerchief designed with basic crochet stitches and attractive V-stitch texture. It works beautifully as a seasonal accessory and can complement boho-chic, cottage-core, casual, and everyday outfits.
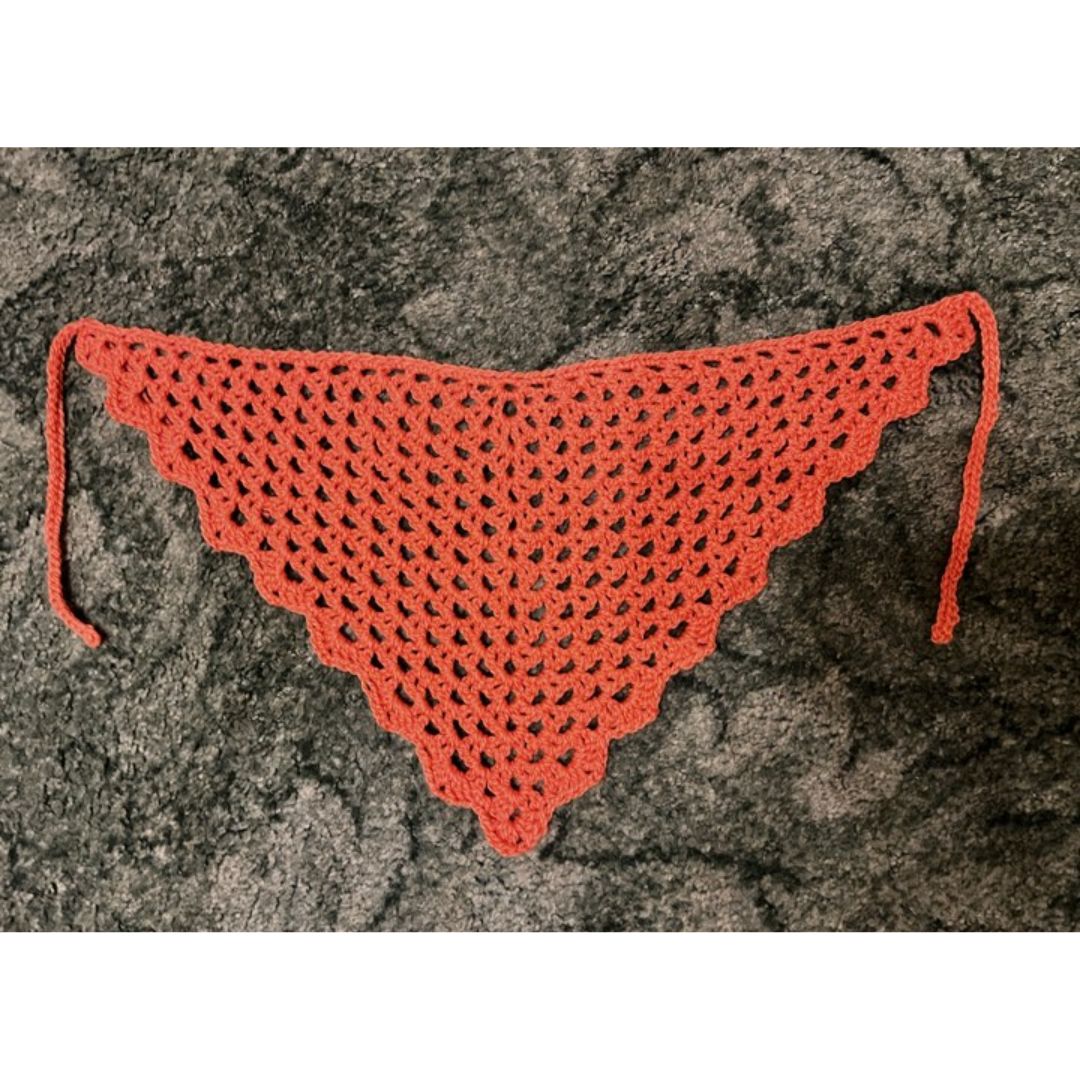
This project is especially useful for crocheters who want to practice working with V stitches while creating something practical. Although the pattern uses familiar stitches, the construction gives you useful opportunities to practice stitch placement, chain spaces, increases, row repeats, edging, and finishing.
The original pattern describes the bandana as a simple project suitable for all seasons. It is also a convenient project for taking along on a road trip or working on while relaxing at home. Depending on the yarn you choose, the finished accessory can have a lightweight summer character or a cozier feel for cooler weather.
What Makes This Crochet Bandana Special?
Many crochet bandanas are made using the traditional granny stitch, but this design takes a different approach by using V stitches. The V-stitch construction creates an open, decorative texture while keeping the pattern straightforward to repeat. Once the beginning rows are established, the main body becomes a rhythm of V stitches, chain spaces, and the central increase area.
The bandana begins from a small circle and grows outward row by row. The center is marked so that the important increase area can be located consistently as the piece becomes larger. This is particularly helpful because the stitch marker is moved after every row.
The finished piece is intended to measure approximately 18 inches before the final finishing work, although the pattern also allows you to stop earlier for a smaller version. The tying ropes are made separately by chaining 39 stitches on each side, with an instruction allowing you to increase or decrease the number of chains if you want a different tying rope length.
Project Overview
Before starting, it is helpful to understand the overall construction. The bandana consists of a triangular growing section worked from a central starting circle. The body is developed through numbered rows, with Rows 4 and 5 repeated until the piece reaches the desired measurement. A decorative final row is then added, followed by the tying chains and an evenly crocheted single crochet edge.
The project is listed as intermediate skill level in the source pattern. However, crocheters who are comfortable with chain stitches, half double crochet, double crochet, slip stitches, and working into chain spaces can use it as a useful skill-building project.
Materials and Supplies
Use the following materials specified in the original pattern:
- Yarn: Stylecraft Aran, #4, 100% Acrylic, 382 yards per 7.1 oz/200g ball.
- Estimated total yardage: 70 yards.
- Crochet hook: 5.5 mm crochet hook.
- Finishing tool: Tapestry needle for weaving in ends.
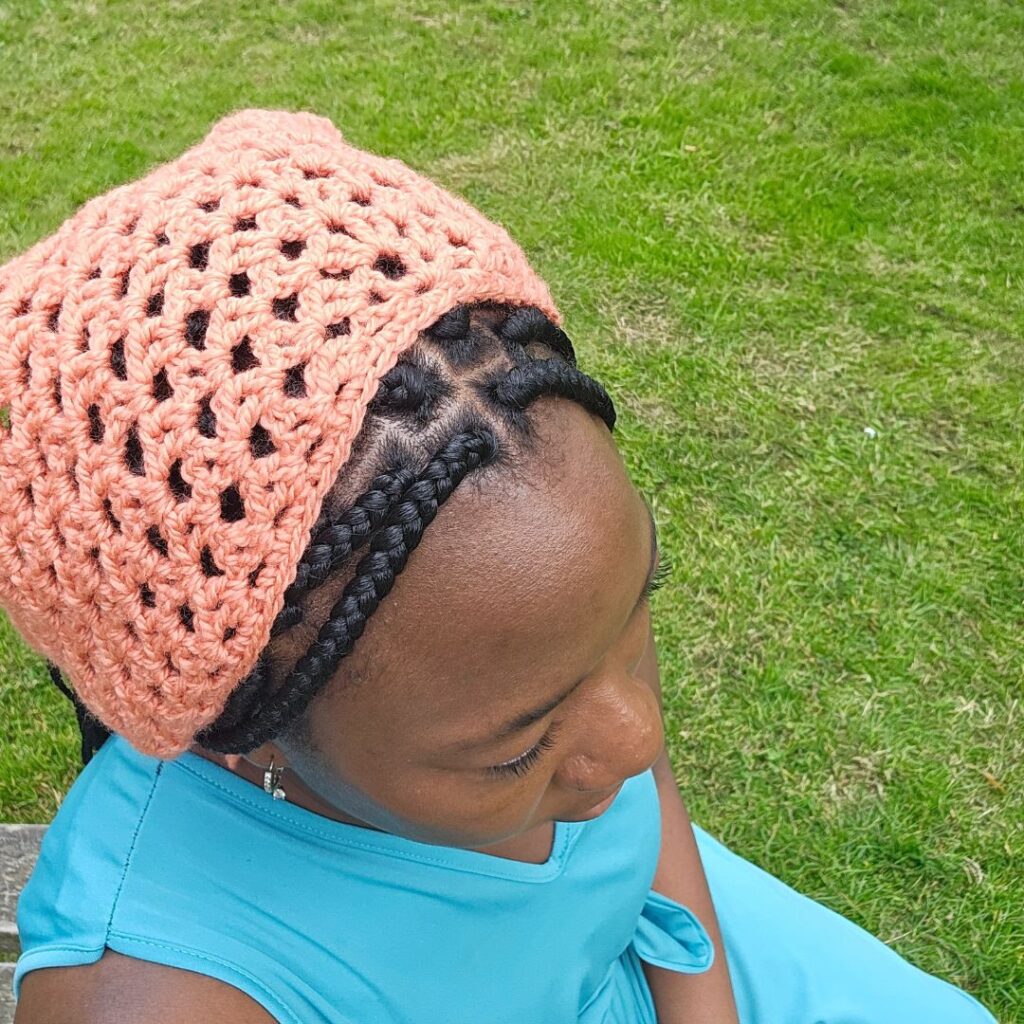
The pattern also states that a similar #4 weight yarn can be substituted, but the gauge should be checked when making a substitution. The original project uses acrylic yarn, while the accompanying pattern discussion notes that cotton is also recommended for a breathable and lightweight feel, particularly for summer outfits. Acrylic can provide a cozy option for an autumn-weather accessory.
Gauge for the Bandana
The stated gauge is 16 stitches over 8 rows = 4 inches by 4 inches, made in xhdc before blocking.
Gauge is not considered crucial to this project according to the original pattern. Nevertheless, checking your gauge can still be useful if you want your finished bandana to have a similar scale to the original. This becomes particularly relevant when substituting yarn or changing your crochet tension.
If your gauge swatch differs from the stated gauge, the original FAQ suggests trying a smaller or larger crochet hook to adjust your tension and help achieve the desired result.
Abbreviations Used
Keep these abbreviations nearby while working through the instructions:
- ch – chain
- hdc – half double crochet
- st – stitch
- sl st – slip stitch
- dc – double crochet
Understanding the V Stitch
The special stitch used throughout the main body is the V stitch. In this pattern, a V stitch is made with dc, ch 1, dc in the indicated stitch.
Understanding this construction before beginning the bandana can make the later rows much easier to follow. The two double crochets create the sides of the V, while the chain-one space between them becomes an important location for subsequent stitches.
From Row 2 onward, the pattern specifically instructs you to skip all V stitches from that point. The V stitches are therefore built into the chain spaces rather than being worked directly into the double crochet portions of previous V stitches. Pay close attention to this instruction as you progress.
Starting the Crochet Bandana
Begin by chaining 4. Join the chain to make a circle.
Before continuing, make sure your starting circle is joined securely and that you can identify the center area where the first row will be worked. The pattern uses a stitch marker as an important reference point. You will move the stitch marker after every row.
Row 1: Establishing the Center
For Row 1, chain 4. This chain 4 counts as a double crochet plus chain 1 here and throughout the pattern.
Work the following sequence into the circle:
- V stitch
- Chain 2
- Place a stitch marker and move it after every row
- V stitch
- Chain 1
- Double crochet in the circle
- Turn
The stated stitch information for Row 1 is 2 V stitches, 2 double crochets, and 3 chain spaces.

Row 2: Building the V-Stitch Structure
Begin Row 2 with chain 4. Remember that this counts as a double crochet and chain 1.
Work a V stitch in the same stitch. Chain 1, then work a V stitch in the next V stitch. Chain 1.
At the central chain-2 space, work (V stitch, chain 2, V stitch). This central area is important because it creates the increase that allows the bandana to grow outward.
Continue with chain 1, a V stitch in the next V stitch, chain 1, and a V stitch in the last stitch, which is the third chain from the chain-4 space. Chain 1 and work a double crochet in the same stitch. Turn.
At the end of Row 2, the stated count is 6 V stitches, 2 double crochets, and 7 chain spaces.
From this point onward, keep in mind the instruction to skip all V stitches. The chain spaces become the working locations that help form the open texture of the following rows.
Row 3: Expanding Across the Width
Start Row 3 with chain 4. Work a V stitch in the first chain space, followed by chain 1.
Work a V stitch in the next chain-1 space, chain 1, and repeat that sequence one more time.
At the central chain-2 space, work (V stitch, chain 2, V stitch).
After the central increase, continue the V-stitch and chain-1 sequence toward the opposite side. The pattern instructs you to repeat the indicated sequence two more times, then finish with a V stitch, chain 1, and a double crochet in the last stitch.
The stated Row 3 count is 8 V stitches, 2 double crochets, and 9 chain spaces.
Rows 4 and 5: The Main Repeating Section
Rows 4 and 5 establish the primary repeating rhythm of the bandana. Once you understand how the chain-1 spaces and central chain-2 space work, these rows become the foundation of the main body.
Row 4
Chain 4. Work a V stitch in the first chain space, then chain 1.
Continue by working a V stitch in the next chain-1 space and chain 1. Repeat the indicated sequence until you reach the next stitch marker.
At the central chain-2 space, work (V stitch, chain 2, V stitch).
Continue the V stitch and chain-1 sequence until the last stitch. Finish with a V stitch, chain 1, and a double crochet in the last stitch.
The stated count for Row 4 is 10 V stitches, 2 double crochets, and 11 chain spaces.
Row 5
Chain 4. Work a V stitch in the first chain space and chain 1.
Continue working V stitches in the chain-1 spaces, with chain 1 between the V stitches, until reaching the stitch marker. Work (V stitch, chain 2, V stitch) in the central chain-2 space.
Continue the same V-stitch and chain-1 sequence until the last stitch, then work a V stitch, chain 1, and a double crochet in the last stitch.
The stated count for Row 5 is 12 V stitches, 2 double crochets, and 13 chain spaces.
Repeating Rows 4–5
After completing Rows 4 and 5, repeat Rows 4–5 until your piece measures 18 inches.
The repeated structure is what creates the growing triangular bandana shape. The central chain-2 space remains an important reference point, while the V stitches and chain spaces expand the body on either side.
For a smaller version, the original instructions state that you can stop at any point you would love. This gives you flexibility to create a smaller accessory while keeping the same basic construction.
Helpful Stitch Checkpoints
When working a growing crochet project, counting at important checkpoints can help you catch mistakes before they become difficult to correct. The original pattern provides counts for the first five rows, making those numbers especially useful.
- Row 1: 2 V stitches, 2 dc, 3 chain spaces.
- Row 2: 6 V stitches, 2 dc, 7 chain spaces.
- Row 3: 8 V stitches, 2 dc, 9 chain spaces.
- Row 4: 10 V stitches, 2 dc, 11 chain spaces.
- Row 5: 12 V stitches, 2 dc, 13 chain spaces.
These counts are useful checkpoints rather than a reason to change the pattern. If your count does not match, carefully review the previous row and the central increase area before continuing.
Keeping the Center Straight
The stitch marker plays an important role in this design. The instructions specifically say to place the stitch marker and move it after every row. Keeping the marker in the correct location makes it easier to identify the central area where the V stitch, chain 2, V stitch increase is worked.
As the bandana becomes larger, this central point becomes increasingly important. A misplaced marker can make the next row more difficult to follow, so take a moment at the beginning of each new row to confirm that your marker is positioned correctly.
Working the Last Row
Once the body has reached the desired size, work the final decorative row.
Begin with chain 3, then work 2 dc, chain 2, 3 dc in the next chain-1 space.
Then repeat the following sequence across:
- Single crochet in the next chain-1 space.
- 3 dc, chain 2, 3 dc in the next chain space.
- Repeat across.
This final row changes the visual character of the edge by introducing groups of double crochet stitches around the chain spaces. Work carefully across the bandana and follow the sequence as written.
Do Not Fasten Off Yet
One important construction detail is that you should not fasten off immediately after completing the last row. The remaining yarn is used as part of the finishing process and allows you to crochet along the edge before completing the second tying rope.
Creating the First Tying Rope
After the last row, chain 39. Then slip stitch in the second chain from the hook and continue with a slip stitch in each chain across.
The pattern specifically allows you to increase or decrease the number of chains if you want a different rope length. This is useful when you want the ties to suit your preferred way of wearing the bandana.
Because the original pattern gives a fixed starting number of 39 chains, use that number when following the standard instructions, and only adjust it if you want a different tying rope length.
Crocheting Along the Edge
After completing the first tying rope, crochet across the edge of the bandana. Work single crochet stitches evenly across to the other edge.
Working the single crochet evenly helps create a neat finishing edge and gives the bandana a more defined outline. Take care not to pull the stitches excessively tight as you move across the edge.
Creating the Second Tying Rope
When you reach the opposite edge, chain 39 again. Slip stitch in the second chain from the hook and continue with a slip stitch in each chain across.
As with the first rope, the number of chains can be increased or decreased if you want to customize the rope length.
Once the second rope is complete, fasten off.
Weaving in the Ends
Finish the project by sewing in all ends. The original supplies list recommends a tapestry needle for this step.
Take time to secure the loose yarn ends carefully. A clean finishing process helps the bandana look polished and keeps the loose ends from interfering with the final appearance.
Tips for a Clean Beginner-Friendly Finish
Although the pattern is relatively compact, a few habits can make the process easier.
- Read the pattern first: The original instructions specifically recommend reading through the pattern before starting.
- Keep your stitch marker handy: Move it after every row as instructed.
- Watch the chain spaces: The main body is built around V stitches and chain spaces, so stitch placement matters.
- Check the central increase: The chain-2 space is the key point for the repeated increase.
- Count at checkpoints: Use the stated counts for Rows 1–5 to verify your work.
- Measure the growing piece: Continue Rows 4–5 until the piece measures 18 inches for the stated size.
- Do not fasten off after the final body row: The finishing instructions continue directly into the tying rope and edging.
- Use a tapestry needle for finishing: Weave in all loose ends after the final fasten-off.
How to Make a Smaller Bandana
The original pattern gives a straightforward option for a smaller version: stop at any point you would love. This means the repeated body section does not have to continue until the full 18-inch measurement if you prefer a smaller accessory.
When making a smaller version, keep the same construction principles and pay attention to the row sequence. The pattern also notes that similar #4 weight yarn may be substituted, with gauge checking recommended.
Yarn Choice and Seasonal Styling
The specified yarn for the pattern is Stylecraft Aran, #4, 100% Acrylic, with 382 yards per 7.1 oz/200g ball. The estimated total yardage for the project is 70 yards.
The design is versatile enough to work with different seasonal styling ideas. Cotton yarn is recommended in the original FAQ for a breathable and lightweight feel, making it particularly suitable for summer outfits. Acrylic is another option and can work well when you want a cozy accessory for an autumn breeze.
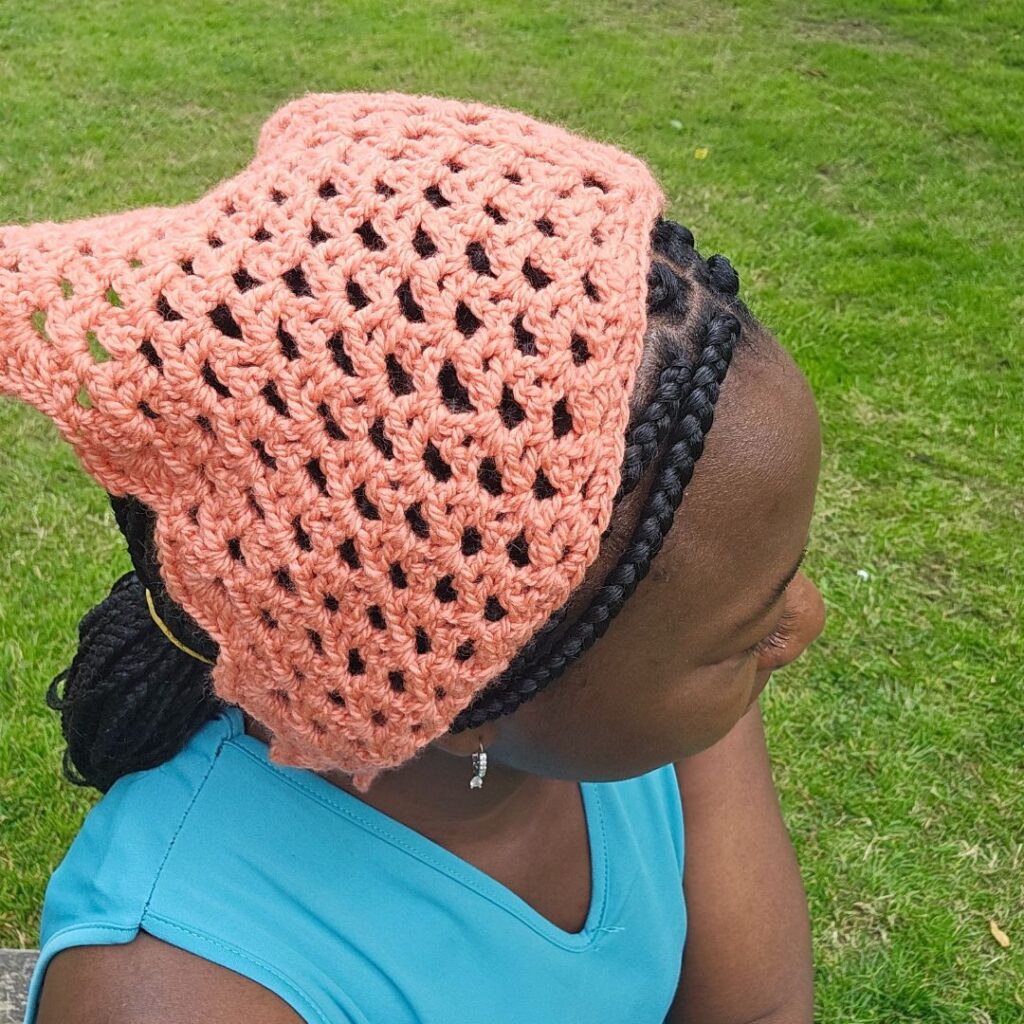
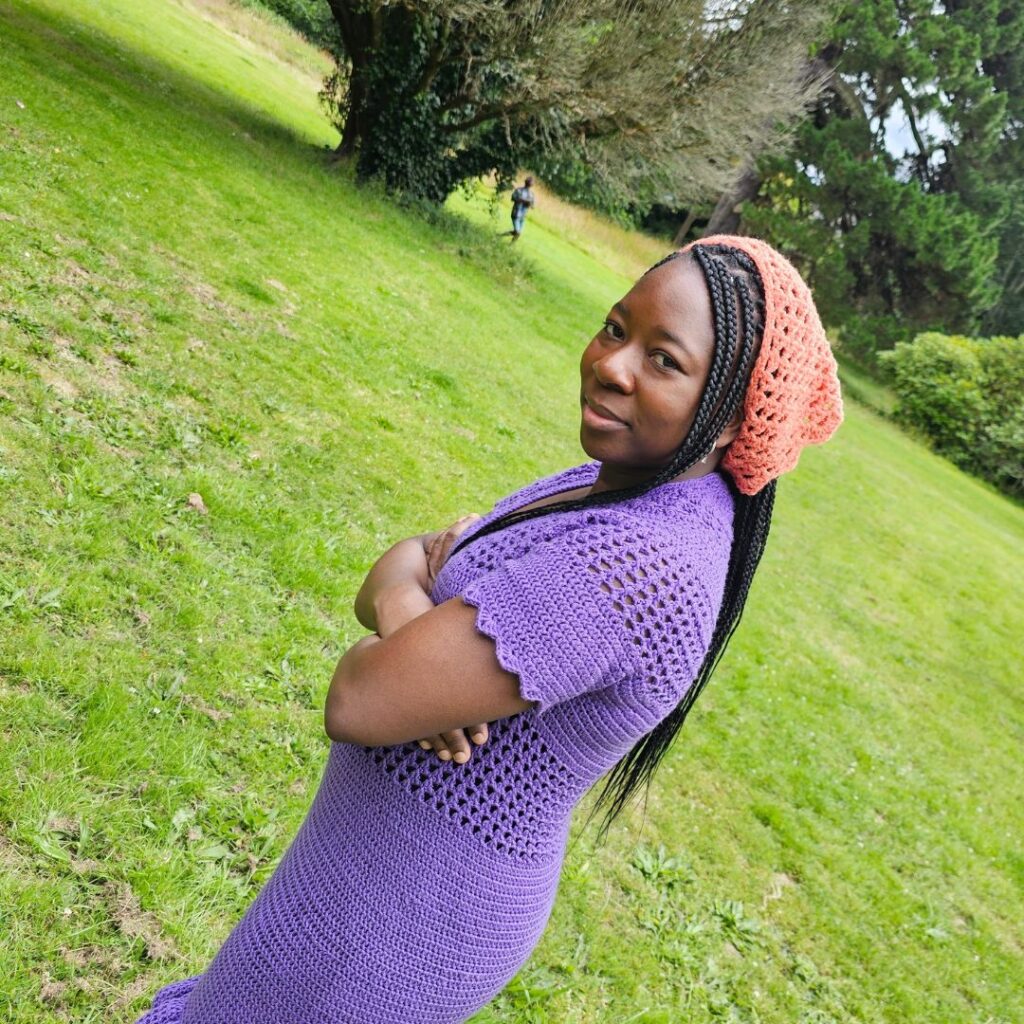
The finished bandana can be styled as a practical head kerchief while also adding texture and handmade character to an outfit. The V-stitch pattern gives it a decorative appearance without requiring a complicated stitch vocabulary.
Troubleshooting Common Problems
My Gauge Is Different
The original pattern states that gauge is not crucial, but if your gauge is significantly different from the stated 16 stitches over 8 rows = 4 inches by 4 inches made in xhdc before blocking, you can try a smaller or larger hook to adjust your tension.
I Am Losing the Center of the Bandana
Check your stitch marker. The pattern instructs you to place the marker and move it after every row. The center is where the chain-2 space and the special increase sequence are located, so keeping this point clearly marked is helpful.
The Pattern Looks Different From the Beginning
The first rows establish the structure, while Rows 4–5 form the repeating main section. The appearance will change as the bandana grows and more V stitches and chain spaces are added.
I Want Longer Ties
The standard instructions use 39 chains for each tying rope. The pattern specifically says that you can increase or decrease the number of chains for a desirable rope for tying.
I Want a Smaller Bandana
The instructions allow you to stop the repeated section at any point you would love. This provides a simple way to make a smaller version without changing the fundamental construction.
Quick Reference for the Main Pattern
- Start: Chain 4 and join to make a circle.
- Row 1: 2 V stitches, 2 dc, 3 chain spaces.
- Row 2: 6 V stitches, 2 dc, 7 chain spaces.
- Row 3: 8 V stitches, 2 dc, 9 chain spaces.
- Row 4: 10 V stitches, 2 dc, 11 chain spaces.
- Row 5: 12 V stitches, 2 dc, 13 chain spaces.
- Repeat Rows 4–5 until the piece measures 18 inches.
- Smaller version: stop the repeated section at any point you would love.
- Last row: use the specified dc and sc decorative sequence.
- Do not fasten off after the last row.
- Chain 39 for the first tying rope and slip stitch back across.
- Single crochet evenly across the edge.
- Chain 39 for the second tying rope and slip stitch back across.
- Fasten off.
- Sew in all ends.
Frequently Asked Questions
How long does this crochet bandana take to make?
The original pattern describes the project as relatively quick and says it can be completed in a few hours. This makes it suitable for a weekend project or even a road trip project.
Can I sell finished bandanas made from this pattern?
Yes. The original FAQ states that finished items made from this pattern can be sold. If you share your finished work on social media, the pattern source invites makers to tag them on TikTok and Facebook.
Can I make the bandana smaller or larger?
Yes. For a smaller version, the pattern specifically says to stop at any point you would love. The FAQ also mentions adjusting hook size, yarn weight, or the number of stitches and rows as ways to adjust the finished size.
What should I do if I have difficulty following the pattern?
Start by checking the row number, the central stitch marker, and the chain spaces. The original source also mentions its Facebook group as an option for additional support and tips.
Does this pattern use special techniques?
The main pattern uses V stitches, which are defined as dc, ch 1, dc in the indicated stitch. The source FAQ also mentions techniques such as the magic ring and shell stitch. However, the written construction supplied in the main pattern begins with chain 4 joined to make a circle and uses the specified V-stitch and finishing instructions.
What yarn is best for this crochet bandana?
The specified yarn is Stylecraft Aran, #4, 100% Acrylic. The pattern also permits a similar #4 weight yarn as a substitute, with gauge checking recommended. Cotton is suggested in the FAQ for a breathable and lightweight summer version, while acrylic can provide a cozy option for cooler weather.
What if my gauge is off?
Although gauge is not crucial to this project, the original instructions recommend trying a smaller or larger hook if your gauge swatch does not match the stated gauge. The specified gauge is 16 stitches over 8 rows = 4 inches by 4 inches made in xhdc before blocking.
How do I finish the bandana?
After the last row, do not fasten off. Chain 39 and slip stitch back across the chain. Then single crochet evenly across the edge to the opposite side. Chain 39 again and slip stitch back across. Fasten off and sew in all ends with a tapestry needle.
Final Project Checklist
- 5.5 mm crochet hook ready.
- Stylecraft Aran #4, 100% Acrylic available, or a similar #4 weight yarn.
- Approximately 70 yards of yarn available.
- Tapestry needle ready for finishing.
- Stitch marker ready for the center point.
- V stitch understood: dc, ch 1, dc in the indicated stitch.
- Row counts checked during the opening section.
- Rows 4–5 repeated until the desired measurement is reached.
- Standard target measurement: 18 inches.
- Last row completed using the specified decorative sequence.
- First tying rope made with 39 chains.
- Single crochet worked evenly across the edge.
- Second tying rope made with 39 chains.
- All ends sewn in securely.
Enjoy Your Handmade Crochet Bandana
The XoXo Crochet Bandana is a practical way to combine a relatively quick project with useful crochet practice. Its V-stitch texture gives the accessory a distinctive appearance, while the repeating rows make the growing body easier to recognize as you work.
The pattern also leaves room for personal preference without changing its core instructions. You can make a smaller version by stopping the repeated section earlier, and the tying ropes can be adjusted by increasing or decreasing the number of chains. Yarn substitutions are also possible when using a similar #4 weight yarn and checking the gauge.
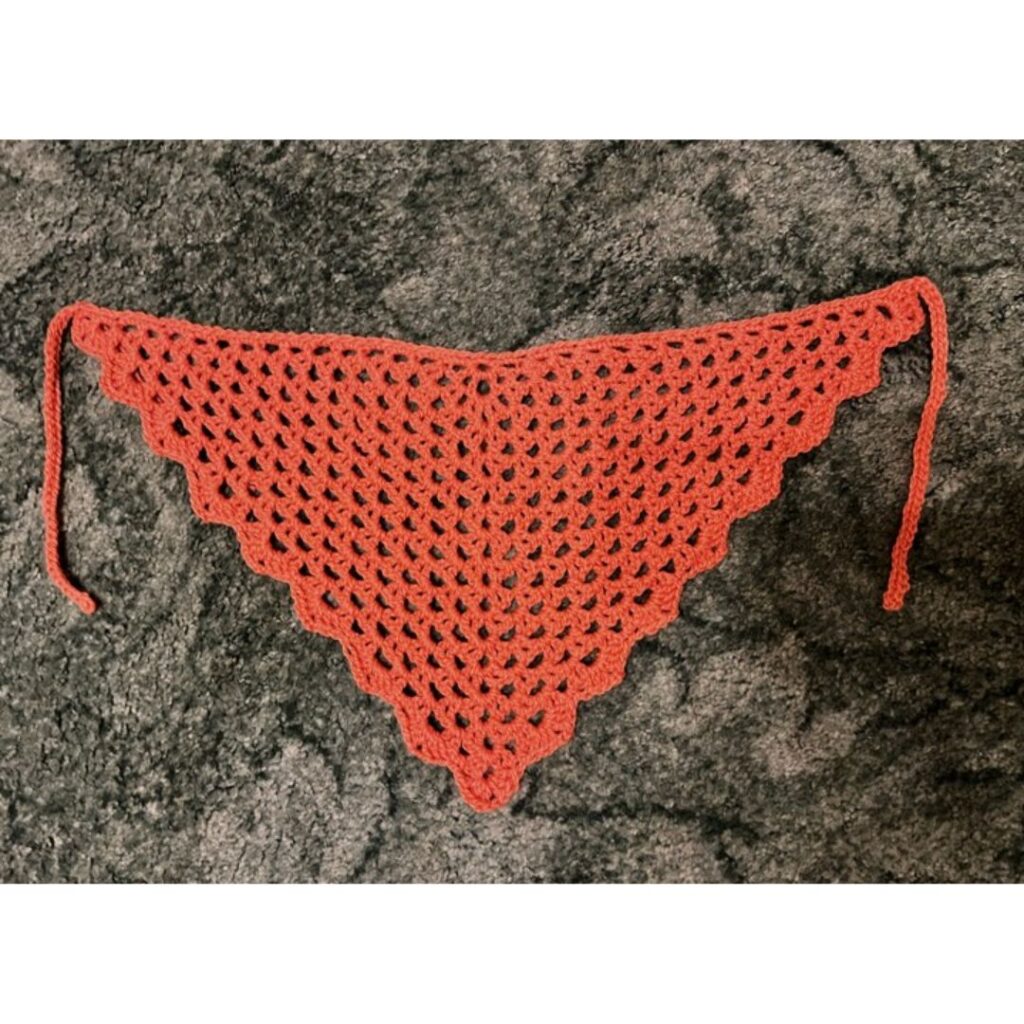
Whether you are making the full 18-inch version or choosing to stop earlier for a smaller accessory, take your time with the center marker, chain spaces, and V-stitch placement. These details are the foundation of the design. Once the body is complete, the final decorative row, tying ropes, edging, and neatly woven ends bring the project together.
With its simple materials, manageable construction, and versatile styling potential, this crochet bandana makes an enjoyable handmade accessory for different seasons. Gather your yarn, prepare your 5.5 mm hook, follow the row-by-row instructions carefully, and enjoy creating your own XoXo crochet bandana.