
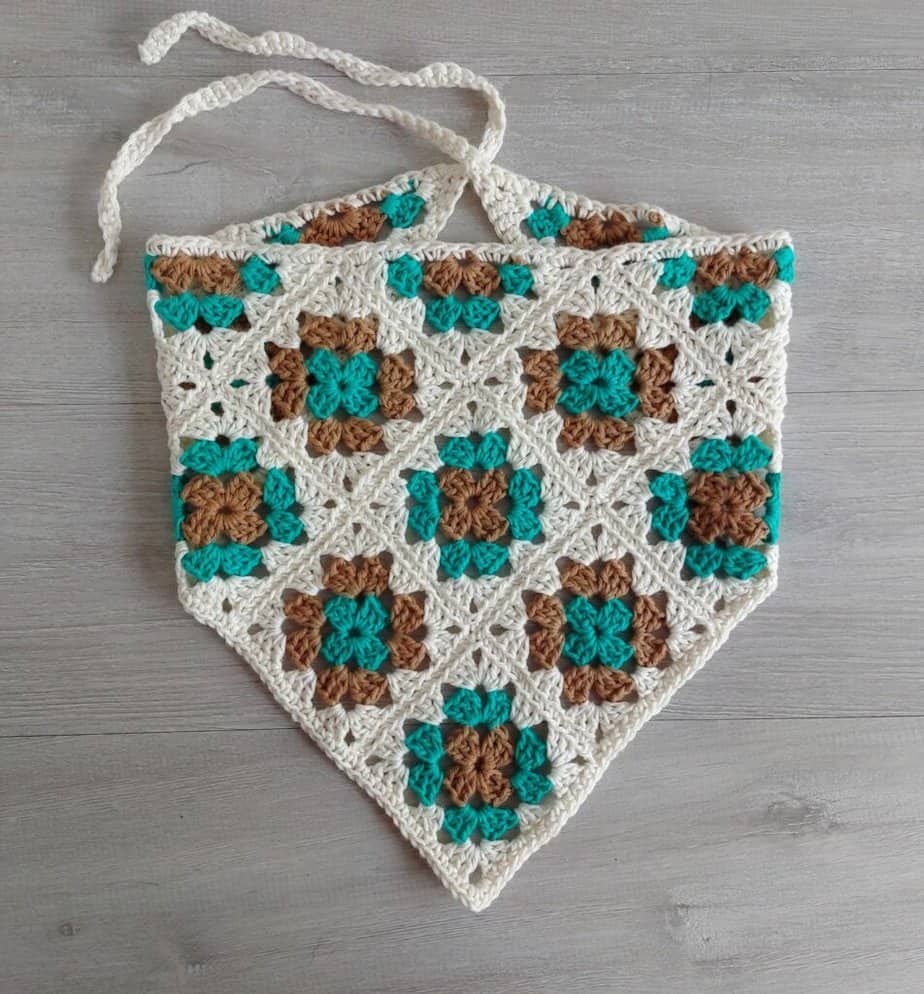
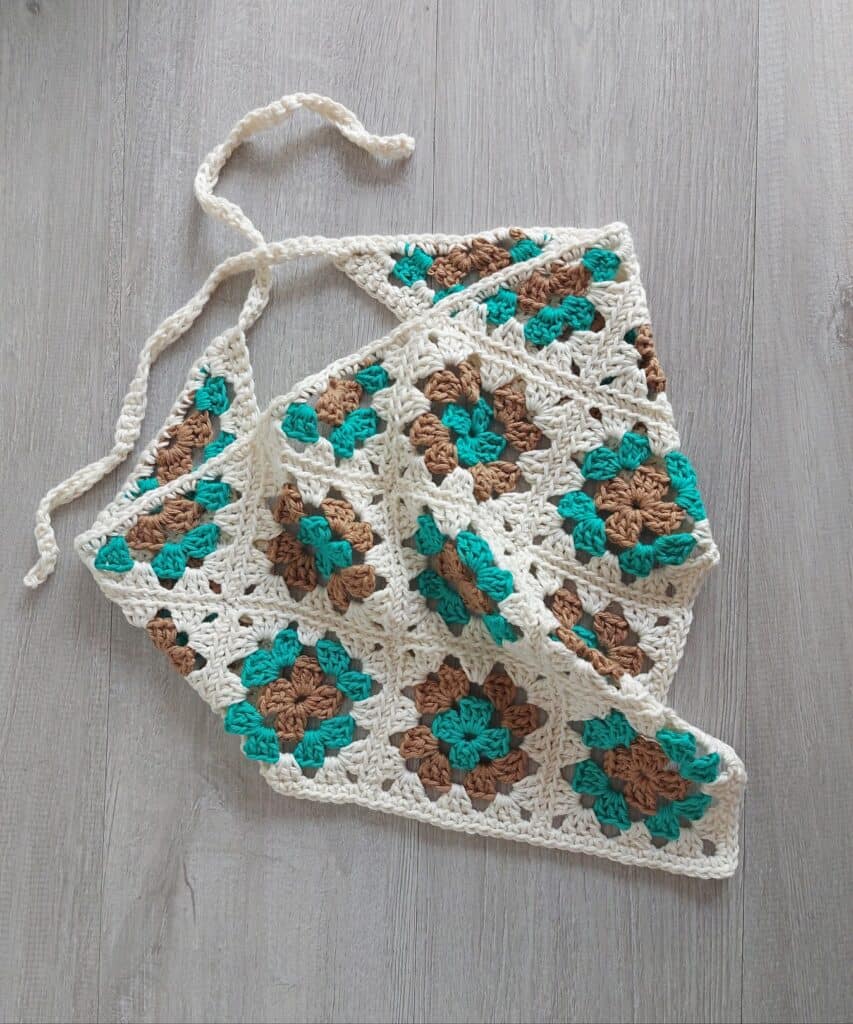
If you are looking for a crochet project that is useful, colorful, beginner-friendly, and perfect for warm-weather days, this granny square bandana is a wonderful place to start. The finished head scarf combines classic granny stitch motifs with a simple triangular shape, creating a relaxed accessory that works beautifully for summer outfits, festivals, beach days, garden afternoons, and everyday wear.
This crochet bandana is made from individual granny squares and granny triangles that are joined together before a simple border and two ties are added. The construction is approachable because the individual motifs are small and repetitive, while the finished piece has plenty of visual interest thanks to the changing colors.
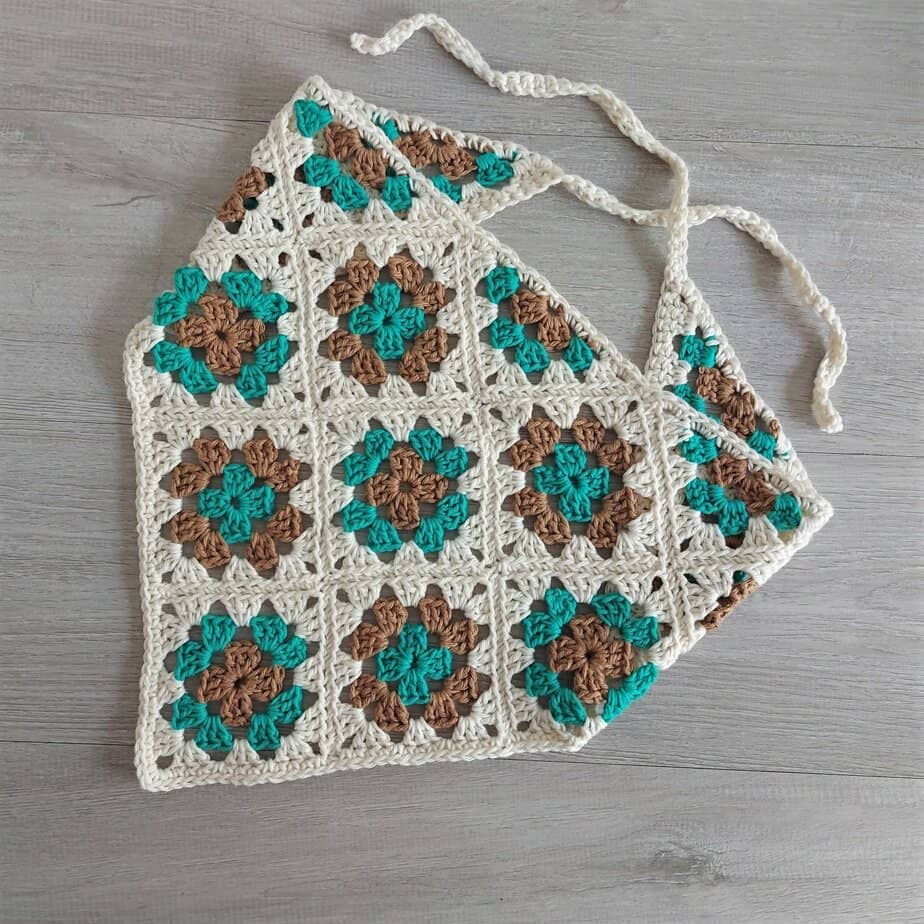
The pattern uses US crochet terminology and only basic crochet stitches. You will need to be comfortable making a granny square, working double crochet stitches, chaining, slip stitching, and joining crochet motifs. The finished scarf measures approximately 24 inches [61cm] wide and 12 inches [30cm] deep after light blocking, with 12-inch [30cm] ties.
Why This Granny Square Bandana Is a Great Beginner Project
One of the best features of this project is that you do not need to crochet the entire bandana as one large piece. Instead, you create ten small granny squares and five triangles, then assemble them according to the layout. This makes the project easier to manage and also gives you a chance to practice the same basic stitches repeatedly.
The individual motifs are worked in only three rounds or rows. Each round uses a different color, with Yarn A used for Round 3 of the squares and the third color used for the final row of the triangles. Because the motifs are small, they are also convenient for checking your tension before committing to the entire scarf.
The pattern is described as an easy project and is suitable for a beginner who is familiar with making a granny square. Gauge is not considered important, although each square should be approximately 3.5 inches [9cm] and each triangle should be approximately 3.5 x 4.8 inches [9cm x 12cm].
Project Overview at a Glance
- Project: Granny square crochet bandana/head scarf
- Skill level: Easy
- Construction: 10 granny squares and 5 granny triangles
- Finished width: 24in [61cm]
- Finished depth: 12in [30cm]
- Tie length: 12in [30cm]
- Recommended yarn: DK weight/light worsted weight
- Hook: 4mm [G/6] crochet hook
- Pattern terminology: US crochet terms
- Gauge: Not important
Choosing Yarn for the Crochet Bandana
The original pattern recommends DK weight or light worsted weight yarn. Cotton is especially suitable because it holds its shape well, is breathable, and is easy to wash. A cotton/acrylic blend can also be used.
The sample uses Cotlin from Knitpicks, which is 70% cotton and 30% linen. The listed yarn specification is 123yds [112m] per 50gr. The main color is Swan, while Marina and Cashew are used as contrasting colors.
The project uses relatively small amounts of yarn, making it a useful pattern for working through selected colors in your stash. The original color plan calls for one main ball and smaller quantities of contrast colors. If you choose your own palette, remember that the construction and stitch instructions remain unchanged even when your color choices are different.
Yarn Requirements
- Main Colour, Yarn A: 1 ball in Swan
- Yarn B: approximately 50m in Marina
- Yarn C: approximately 50m in Cashew
- Total alternative yarn quantity: approximately 200m of any DK weight yarn
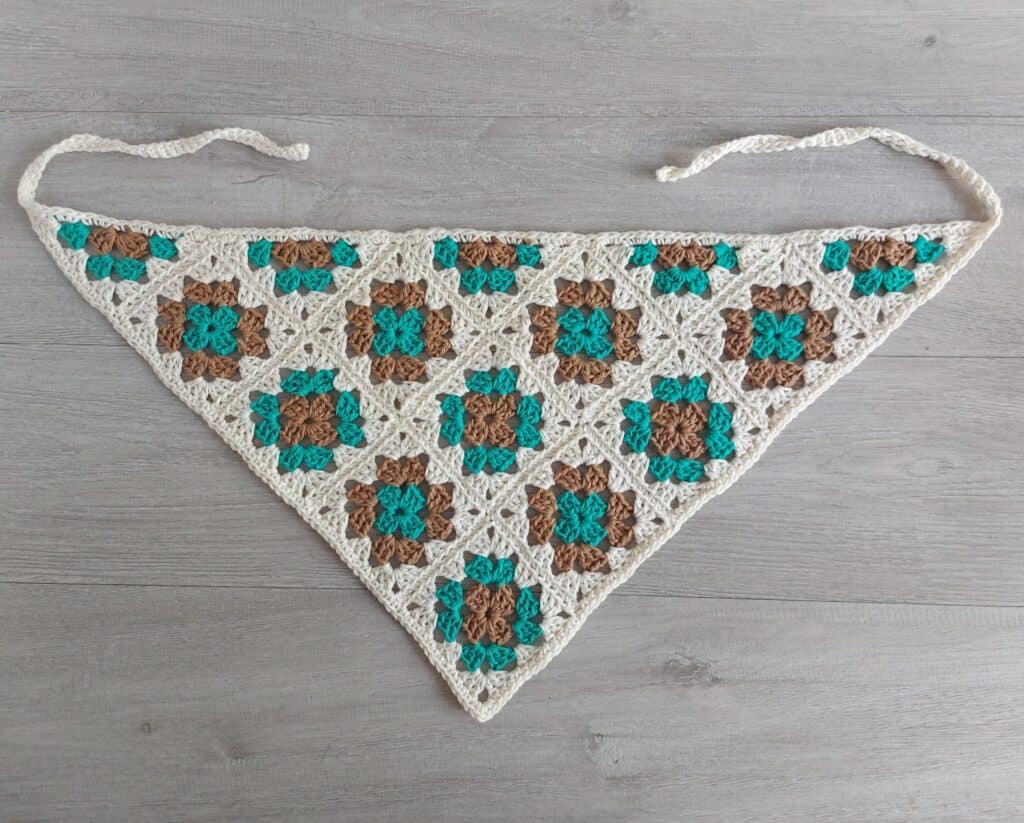
The original color combination is arranged so that six squares use yarn B, C, and A; four squares use yarn C, B, and A; and all five triangles use yarn C, B, and A. The assembly layout should be followed when arranging the finished motifs.
Tools and Materials
- DK weight/light worsted weight yarn
- Yarn A: 1 ball in Swan
- Yarn B: approximately 50m in Marina
- Yarn C: approximately 50m in Cashew
- 4mm [G/6] crochet hook
- Scissors
- Yarn needle
Before beginning, make sure you have enough space to lay the finished motifs out. This becomes particularly useful during the assembly stage because the ten squares and five triangles need to be positioned according to the intended bandana layout.
US Crochet Abbreviations
The pattern uses US crochet terminology. Keep the following abbreviations nearby while working:
- Beg: beginning
- Ch: chain
- St: stitch
- Sl st: slip stitch
- Dc: double crochet
- Yo: yarn over
- Sp: space
- RS: right side
Important Pattern Notes Before You Begin
There are two details that are particularly important when reading the written instructions. First, Ch 3 at the beginning of a round counts as 1 dc. Second, Ch 4 at the beginning of a row counts as 1 dc and ch-1.
The head scarf is constructed from ten squares and five triangles. These motifs are sewn together according to the assembly layout, after which the border and ties are worked around the completed piece.
For the triangles, there is no right side because both sides are the same. This is useful to remember when arranging them for assembly.
Make the Ten Granny Squares
You will need to make 10 granny squares. Each square is worked over three rounds, with each round worked in a different color. Yarn A is used for Round 3 in all motifs.
Starting the Granny Square
With the first color, chain 5 and slip stitch to the first chain to form a ring.
Round 1
Chain 3, which counts as 1 dc here and throughout at the beginning of a round. Work 2 dc in the ring, then work the following sequence three times: ch 3, 3 dc in the ring. Finish with ch 3 and join with a slip stitch in the third chain of the beginning chain. Fasten off the yarn.
This first round establishes the four corner spaces that create the basic square shape. Take care when joining the round so the motif remains flat.
Round 2
Join the second color in any corner ch-3 space. Ch 3, then work (2 dc, ch 3, 3 dc) in the same ch-space.
Next, work the following sequence three times: ch 1, then (3 dc, ch 3, 3 dc) in the next ch-3 space. Finish with ch 1 and join with a slip stitch in the third chain of the beginning chain. Fasten off the yarn.
Round 3
Join the third color in any corner ch-3 space. Ch 3, then work (2 dc, ch 3, 3 dc) in the same ch-space.
Continue with this sequence three times: ch 1, 3 dc in the next ch-1 space, ch 1, then (3 dc, ch 3, 3 dc) in the next ch-3 space.
After completing those repeats, work ch 1, 3 dc in the next ch-1 space, ch 1, and join with a slip stitch in the third chain of the beginning chain. Fasten off the yarn and weave in the threads.
Repeat these three rounds until you have all 10 granny squares required for the bandana.
Create the Five Granny Triangles
The triangular motifs are essential because they help create the pointed shape of the head scarf. Make 5 triangles. Unlike the squares, the triangle is worked in rows rather than rounds.
There is no RS for the triangles because both sides are the same.
Starting the Triangle
With the first color, chain 5 and slip stitch to the first chain to form a ring.
Row 1
Chain 4. This counts as 1 dc and ch-1 space here and throughout at the beginning of a row. Work 3 dc, ch 3, 3 dc, ch 1, and 1 dc in the ring. Turn and fasten off the yarn.
Row 2
Join the second color in the last dc made in Row 1. Chain 4, then work 3 dc in the first ch-1 space. Ch 1, then work (3 dc, ch 3, 3 dc) in the corner ch-3 space. Ch 1, then work (3 dc, ch 1, 1 dc) in the last ch-1 space. Turn and fasten off the yarn.
Row 3
Join the third color in the last dc made in Row 2. Chain 4, then work 3 dc in the first ch-1 space. Ch 1, 3 dc in the next ch-1 space, ch 1, and then work (3 dc, ch 3, 3 dc) in the corner ch-3 space.
Continue with ch 1, 3 dc in the next ch-1 space, ch 1, and (3 dc, ch 1, 1 dc) in the last ch-1 space. Fasten off the yarn and weave in the threads.
Repeat the three-row sequence until you have all 5 triangles.
Block the Motifs Before Assembly
Blocking is recommended before attaching the squares and triangles. This step can make a significant difference when several small motifs need to line up into one larger accessory.
Pin each square and triangle to an even shape. Spray the motifs with water, or hover a steam iron over each piece, and then leave them to dry.
The goal is not to alter the dimensions specified in the pattern. Instead, blocking helps the motifs settle into a more even shape so the joining process is easier and the finished bandana lies more neatly.
Assemble the Granny Square Bandana
Once all 15 motifs have been completed and blocked, lay the squares and triangles out according to the assembly layout. Taking a moment to check the arrangement before sewing is worthwhile because the placement of the motifs determines the final shape and color distribution.
Hold the right sides of the motifs together. Join the pieces by sewing through the back loops only using whip stitching.
When sewing, keep the stitches loose enough to prevent the fabric from puckering. At the same time, aim to join the motifs as evenly as possible so the seams remain consistent throughout the scarf.
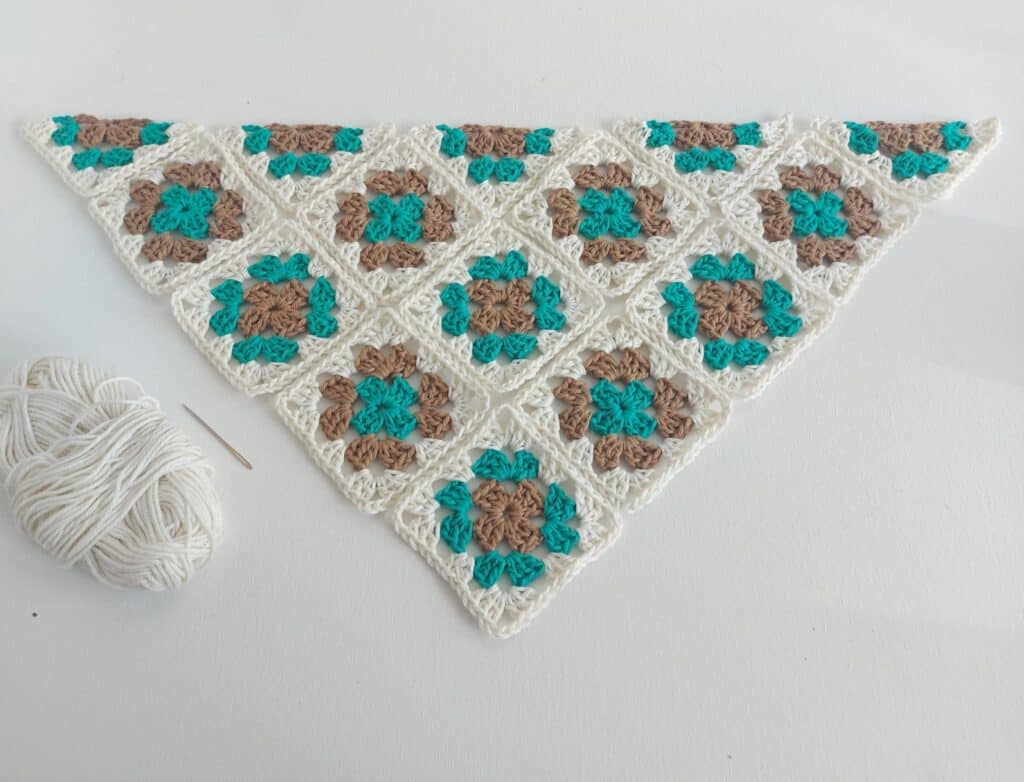
After the motifs have been joined, pin out the finished piece and steam block lightly. This gives the assembled fabric an opportunity to settle before the border and ties are added.
Adding the Border and Ties
The finishing stage gives the bandana its wearable shape and adds the two ties used to secure it. Yarn A is used for this section.
First Tie
Join Yarn A in the top left corner of the finished triangle. Chain 40. Work 1 sc in the second chain from the hook and in each chain across, giving you 39 sc. Slip stitch back to the main piece.
This creates the first tie. The pattern lists the finished ties as 12in [30cm] long, while also noting that you can add more chains if you would prefer longer ties.
Work Down the First Side
Make a sc in each dc and ch-1 space down the side of the piece, making 1 sc in the space between each motif.
When you reach the bottom peak of the triangle, make (2 sc, ch 1, 2 sc) in the ch-3 space. This creates the shaping needed at the pointed section of the bandana.
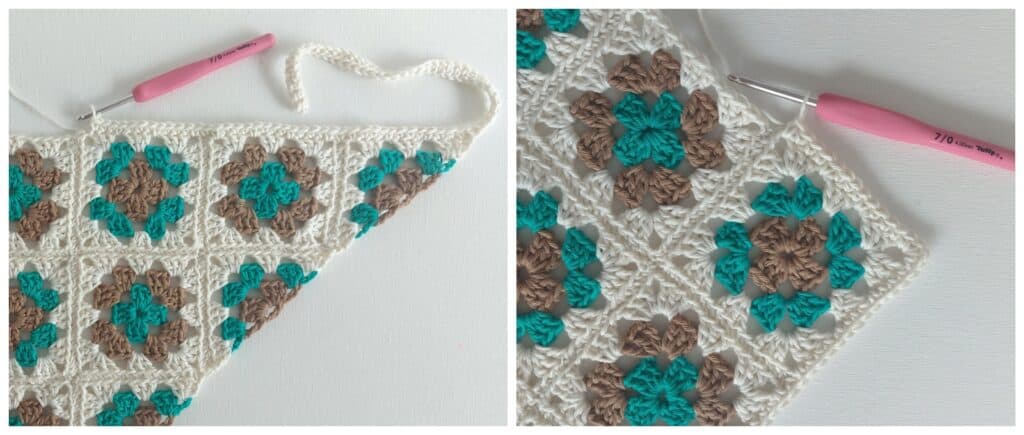
Work Up the Other Side
Continue working up the other side toward the top right corner. Make a sc in each dc and ch-1 space, again making 1 sc in the space between each motif.
Second Tie
When you reach the right corner, chain 40. Work 1 sc in the second chain from the hook and in each chain across, giving you 39 sc. Slip stitch back to the main piece.
Finish the Top Edge
Work across the top of the head scarf by making 3 sc in each row end of each triangle, 1 sc in each beginning ch 5, and 1 sc in the space between each motif. Join with a slip stitch to the beginning chain and weave in all ends.
If you want longer ties, the pattern specifically allows you to add more chains when making them.
Stitch and Shape Checkpoints
Because the project is made from multiple motifs, checking the pieces as you work can help avoid problems later. Each square should be approximately 3.5in [9cm]. Each triangle should measure approximately 3.5in x 4.8in [9cm x 12cm]. These dimensions are approximate and the pattern states that gauge is not important.
- Complete exactly 10 granny squares.
- Complete exactly 5 granny triangles.
- Each granny square has 3 rounds.
- Each triangle has 3 rows.
- Use Yarn A for Round 3 of every square.
- Fasten off and weave in threads after the final motif rounds or rows as instructed.
- Block the motifs before joining them.
- Join motifs by sewing through the back loops only.
- Keep whip stitches loose enough to prevent puckering.
- The finished scarf is approximately 24in [61cm] wide and 12in [30cm] deep after light blocking.
- The ties are 12in [30cm] long.
Common Problems and How to Avoid Them
The Motifs Do Not Look Even
If your squares or triangles look slightly uneven, blocking them before assembly is the recommended solution. Pin each piece to an even shape, spray it with water or hover a steam iron over it, and allow it to dry.
The Seams Are Puckering
The assembly instructions specifically recommend keeping the sewing stitches loose. Tight whip stitches can pull the motifs together and create puckering. Aim for an even seam without pulling the yarn excessively.
The Color Arrangement Looks Different From the Sample
Check the color plan before assembling. Six squares use yarn B, C, and A; four squares use yarn C, B, and A; and five triangles use yarn C, B, and A. The assembly layout should be used as the visual reference for placement.
The Bandana Feels Too Small or Too Large
The pattern gives approximately 3.5in [9cm] as the square size and approximately 3.5in x 4.8in [9cm x 12cm] for each triangle. If you substitute a different granny square design, the source recommends making a quick gauge swatch and adjusting the hook size so the squares measure 3.5in [9cm].
How Many Granny Squares Are Needed?
For this particular head scarf size, you need 10 granny squares and 5 granny triangles. The motifs are assembled together to create the triangular bandana shape.
This construction also makes the pattern adaptable for experimentation with different granny square designs. The original instructions note that you can substitute another granny square motif, provided you make a quick gauge swatch and adjust your hook size to make the squares 3.5in [9cm].
Finished Size and Wearability
After light blocking, the pictured scarf measures 24in [61cm] wide and 12in [30cm] deep. The ties measure 12in [30cm] long. The ties can be made longer by adding more chains, allowing you to adjust that part of the design according to your preference.
The relatively compact finished dimensions make this style of crochet accessory easy to wear as a head scarf. The granny square construction also gives the finished piece a colorful, handmade appearance without requiring a complicated stitch pattern.
Beginner-Friendly Tips for a Smoother Project
- Read the abbreviation list before beginning so US crochet terminology is familiar.
- Remember that Ch 3 counts as 1 dc at the beginning of a round.
- Remember that Ch 4 counts as 1 dc and ch-1 at the beginning of a row.
- Keep your completed motifs organized by color arrangement.
- Block the squares and triangles before sewing them together.
- Use the assembly layout rather than arranging the motifs randomly.
- Keep your joining stitches loose enough to prevent puckering.
- Check the approximate motif dimensions before assembly.
- Weave in the threads after completing the final motif rounds or rows.
- Pin the completed piece before lightly steam blocking the assembled bandana.
A Simple Way to Organize the Work
If you prefer to divide the project into manageable sessions, begin by completing the ten squares. Because each square follows the same three-round construction, you can work through them one after another while keeping track of the color sequence.
Next, make the five triangles. Once all motifs are finished, block them together or individually as appropriate, then lay them out according to the assembly diagram. Only after confirming the placement should you begin sewing the pieces together.
Finally, work the border and ties with Yarn A. This order keeps the construction logical and follows the original sequence of creating the motifs, assembling them, and finishing the outer edge.
Frequently Asked Questions
Is this crochet bandana suitable for beginners?
Yes. The pattern is rated Easy and uses only basic crochet stitches. You should be familiar with making a granny square.
What crochet terminology does the pattern use?
The pattern is written in US crochet terms.
How many motifs do I need?
You need 10 granny squares and 5 granny triangles.
What yarn weight should I use?
DK weight or light worsted weight yarn is recommended. Cotton works especially well because it is breathable, washable, and holds its shape well. Cotton/acrylic yarn can also be used.
Is gauge important?
The pattern states that gauge is not important. Each square is approximately 3.5in [9cm], and each triangle is approximately 3.5in x 4.8in [9cm x 12cm].
Can I make longer ties?
Yes. The listed tie length is 12in [30cm], but the instructions note that you may add more chains to make the ties longer.
Do the triangles have a right side?
No. The pattern notes that there is no RS for the triangles because both sides are the same.
Should I block the motifs?
Yes. Blocking each square and triangle before attaching them is recommended because it makes joining easier. The completed piece can also be pinned out and lightly steam blocked after assembly.
Quick Reference Before You Finish
- Squares: 10
- Triangles: 5
- Square size: approximately 3.5in [9cm]
- Triangle size: approximately 3.5in x 4.8in [9cm x 12cm]
- Finished scarf: 24in [61cm] wide x 12in [30cm] deep after light blocking
- Ties: 12in [30cm]
- Hook: 4mm [G/6]
- Yarn: DK weight/light worsted weight
- Yarn A: Swan
- Yarn B: Marina, approximately 50m
- Yarn C: Cashew, approximately 50m
- Alternative yarn quantity: approximately 200m DK weight yarn
- Terminology: US crochet terms
- Skill level: Easy
Final Finishing Advice
Once the border is complete, make sure all yarn ends have been woven in securely. Check the outer edge for an even finish and make sure the ties are attached securely at both upper corners.
The final light blocking step can help the joined motifs settle into their finished shape. Avoid pulling the fabric aggressively during this stage. The objective is to encourage an even, neat presentation while maintaining the dimensions and construction of the original pattern.
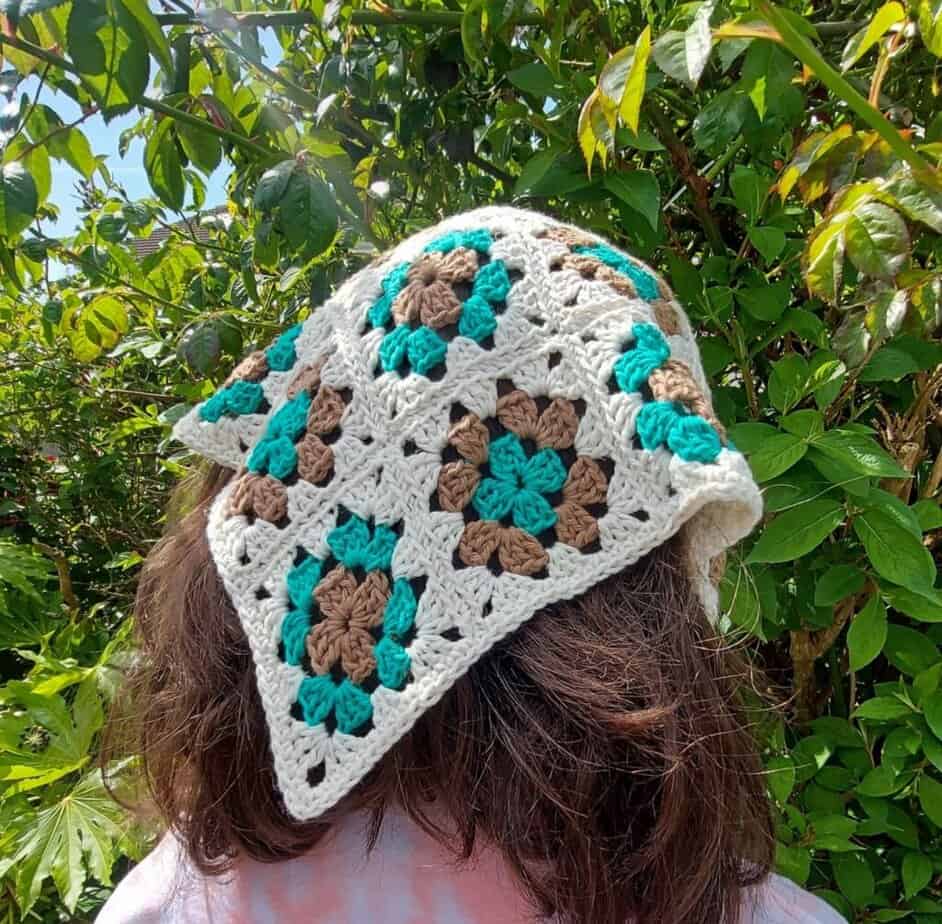
This granny square bandana is a practical way to turn a collection of simple crochet motifs into a finished wearable accessory. The project combines ten colorful squares, five triangles, a straightforward sewn assembly, and a single crochet border with two chain ties. Because every technical measurement and stitch sequence is clearly defined, you can concentrate on keeping your motifs consistent and your joins neat.
With its easy skill level, compact motif construction, breathable yarn options, and colorful granny-stitch appearance, the finished head scarf is well suited to summer wardrobes. Once you understand the three-round square and three-row triangle, the rest of the project becomes a matter of repeating the motifs, blocking them, arranging them correctly, and carefully completing the edging.
The original pattern also provides room for creative color choices while keeping the construction unchanged. Whether you follow the sample colors of Swan, Marina, and Cashew or work from a coordinated DK-weight yarn collection, the same 10-square and 5-triangle structure produces the distinctive triangular head scarf shape.
Take your time with the motif dimensions, blocking, assembly placement, and loose whip-stitch joins. These small preparation steps are what help the finished crochet bandana look balanced and polished.