
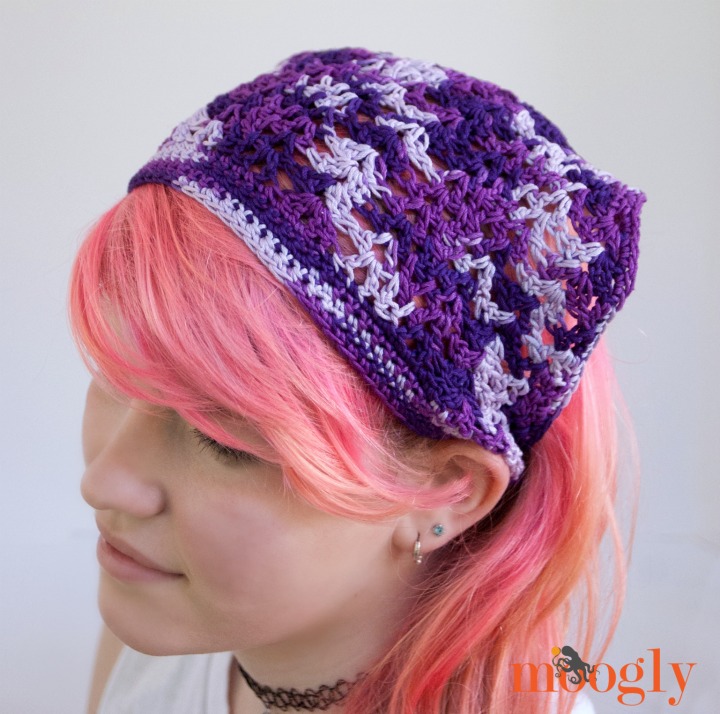
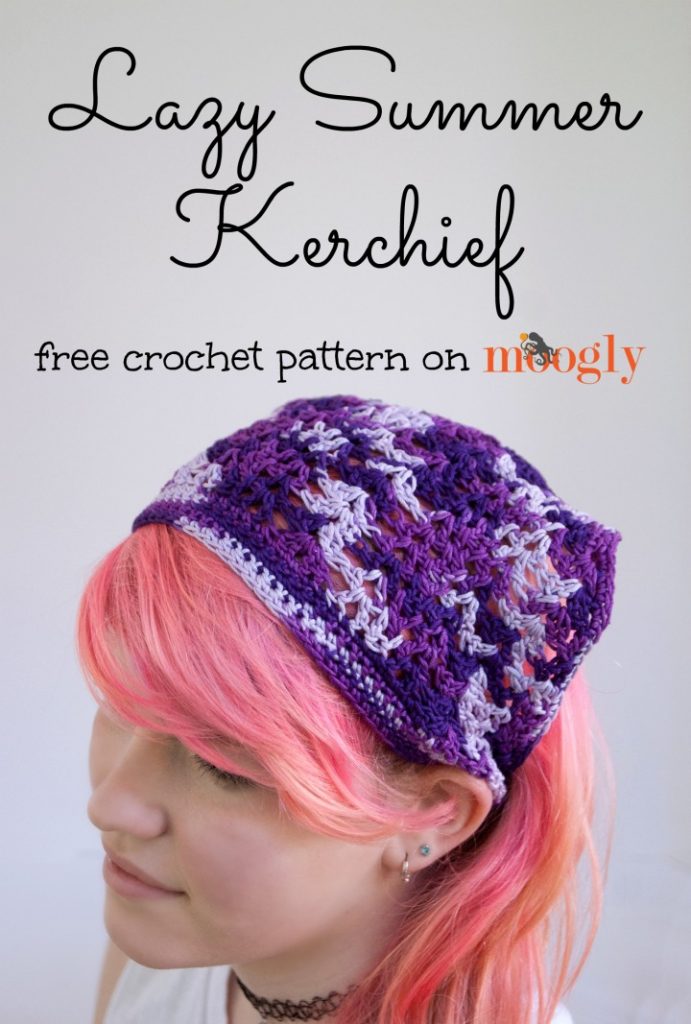
When warm weather arrives, a lightweight crochet kerchief can be a simple and practical accessory for keeping hair in place while adding a handmade touch to a summer outfit. The Lazy Summer Kerchief combines the familiar triangular look of a traditional bandana-style kerchief with a hair band instead of long ties. According to the original pattern, this construction makes the kerchief easy to put on and remove and gives it a comfortable, practical finish for summer days.
This crochet project is designed in four sizes, so the same basic pattern can be made for a baby, toddler or child, child or teen, or adult. The finished sizing is based on head circumference rather than a single universal measurement, and the pattern specifically recommends trying the kerchief on before cutting the yarn because hair bands vary in both size and elasticity.
The design uses a combination of double crochet, V stitches, double V stitches, and the special wide double crochet two together decrease. Although the stitch sequence develops gradually, the repeated structure makes this an interesting project for crocheters who want to practice working into chain spaces and maintaining stitch placement across multiple rows.
Project Overview
The Lazy Summer Kerchief is worked from the center of the kerchief outward through a sequence of rows that gradually develops the triangular fabric. After the main kerchief section is completed, the pattern changes to single crochet rows that form the headband section. A hair band or elastic band is enclosed during the final edging process.
The original pattern provides four sizes:
- Baby: 16-18″ head
- Toddler/Child: 18-20″ head
- Child/Teen: 20-22″ head
- Adult: 22-24″ head
The pattern uses a US H, 5.0mm crochet hook and 70-100 yards of Sport/5 ply yarn. The sample yarn specified in the source is Omega Sinfonia, which is 100% cotton, with 218 yards/199 meters and a weight of 3.52 oz/100 g. The specified sample colorway is #847.
Materials You Need
- Crochet hook: US H, 5.0mm
- Yarn: 70-100 yds Sport/5 ply yarn
- Sample yarn: Omega Sinfonia, 100% cotton, 218 yds/199 m, 3.52 oz/100 g
- Sample colorway: #847
- Hair band: 1 hair band/elastic band
The amount of yarn listed by the original pattern is 70-100 yards. Because the kerchief is available in four sizes and the headband section is adjusted according to the fit of the individual hair band, it is useful to have the required amount available before beginning. The source does not provide separate yardage amounts for each individual size, so those quantities should not be changed or estimated.
Gauge and Sizing
The stated gauge is 16 sts x 22 rows = 4 inches in sc. Gauge is particularly useful when working the band portion because the final fit depends on the relationship between the crocheted band, the yarn, and the elasticity of the hair band.
The four sizes are intended for the following head measurements:
- Baby: 16-18″ head
- Toddler/Child: 18-20″ head
- Child/Teen: 20-22″ head
- Adult: 22-24″ head
The source gives an important fitting instruction before the band is finished: try the kerchief on before cutting the yarn. Hair bands do not have standardized sizes or elasticity, so the number of stitches may need to be adjusted to create the desired fit. The original instructions specifically recommend erring on the tighter side to allow for stretching of both the hair band and the yarn.
Stitch Key and Special Stitches
Several special stitch instructions are important for understanding the main body of the kerchief. Keeping these definitions nearby can make the repeated rows easier to follow.
wdc2tog
wdc2tog means wide double crochet two together. The original pattern defines this as a dc2tog worked in between the posts on either side of the dc2tog of the previous round.
V Stitch
A V stitch, abbreviated as v st, is made with [dc, ch 1, dc] in the same stitch.
Double V Stitch
A double V stitch is written as [2 dc, ch 1, 2dc] in the same stitch.
The original pattern also gives an important placement note: V stitches are worked into the V stitches below, while double V stitches are worked into the double V stitches below. Maintaining these placements is essential to preserving the structure of the kerchief.
How the Kerchief Is Constructed
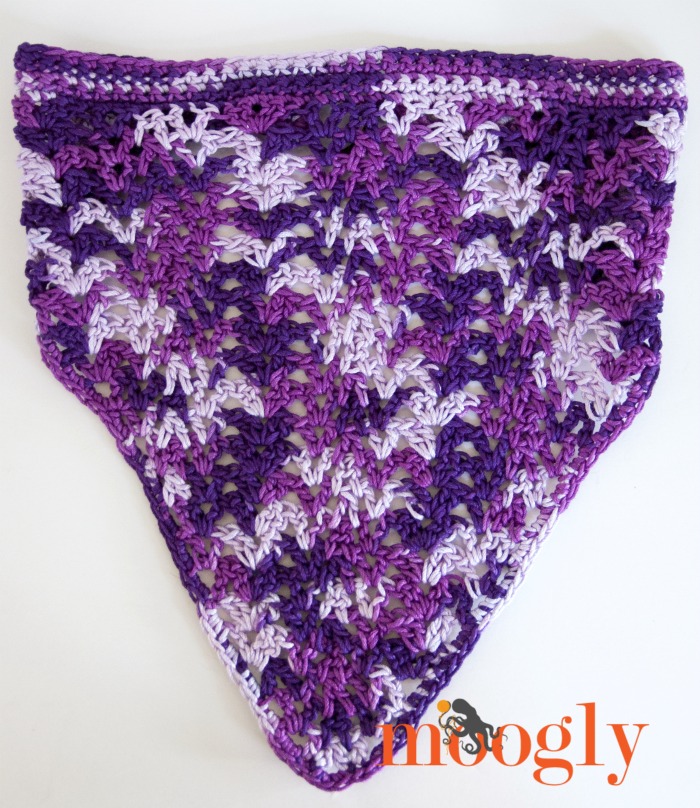
The project begins with a short chain and immediately establishes the first V stitches and decrease. From there, the rows expand outward through a repeating combination of V stitches, double V stitches, and wdc2tog decreases. The sequence creates the characteristic triangular kerchief shape.
For the Baby size, the main kerchief section finishes with Row 18. For the Toddler/Child size, the shaping continues through Row 20 before the single crochet row. For the Child/Teen size, the main section reaches Row 22. For the Adult size, it reaches Row 23.
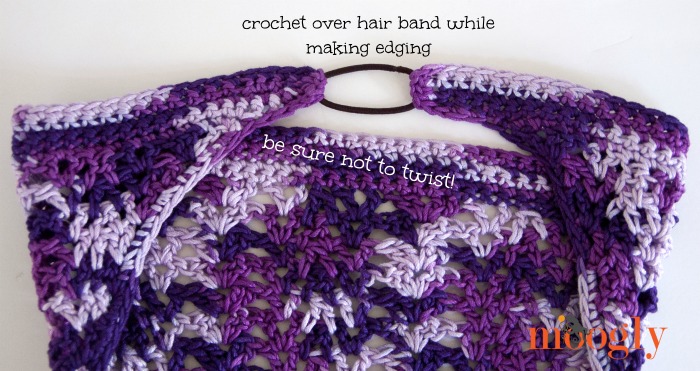
Once the main section is complete, the pattern changes to the headband portion. This section starts with a five-chain extension, continues with single crochet, and adds four foundation single crochet stitches to extend the row. The band is then worked for additional rows before the hair band is enclosed during the edging.
Baby Size: 16-18 Inch Head
The Baby version begins with the same opening sequence used throughout the pattern. The first row establishes the first V stitch, the central decrease, and the final V stitch.
Rows 1-9
Row 1: Ch 9, dc in the 5th ch from the hook (first v st made), dc2tog over the next 3 ch (skip center ch), v st in the last ch; turn.
Row 2: Ch 3 (counts as first dc), v st in next ch sp, wdc2tog, v st in ch sp, dc in top of ch 3; turn.
Row 3: Ch 4, dc in 1st st (first v st made), v st in next ch sp, wdc2tog. Vs st in next ch sp, v st in top of ch 3; turn.
Row 4: Ch 3, [dc, ch 1, 2 dc] in next ch sp, v st in next ch sp, wdc2tog, v st in next ch sp, [2 dc, ch 1, dc] in next ch sp, dc in top of ch 3; turn.
Row 5: Ch 3, double v st in next ch sp, v st in next ch sp, wdc2tog, v st in next ch sp, double v st in next ch sp, dc in top of ch 3; turn.
Row 6: Ch 4, dc in 1st st, double v st in next ch sp, v st in next ch sp, wdc2tog, v st in next ch sp, double v st in next ch sp, v st in top of ch 3; turn.
Row 7: Ch 3, v st in next ch sp, double v st in next ch sp, v st in next ch sp, wdc2tog, v st in next ch sp, double v st in next ch sp, v st in next ch sp, dc in top of ch 3; turn.
Row 8: Ch 3, dc in next st, v st in ch sp, double v st in next ch sp, v st in next ch sp, wdc2tog, v st in next ch sp, double v st in next ch sp, v st in next ch sp, dc in next st, dc in top of ch 3; turn.
Row 9: Ch 3, dc2tog working between first 2 sts of previous row and top of 3rd st of previous row, v st in next ch sp, double v st in next ch sp, v st in next ch sp, wdc2tog, v st in next ch sp, double v st in next ch sp, v st in next ch sp, dc2tog in top of next st and between last 2 sts, dc in top of ch 3; turn.
Rows 10-18
Row 10: Ch 4, dc in 1st st, wdc2tog, v st in next ch sp, double v st in next ch sp, v st in next ch sp, wdc2tog, v st in next ch sp, double v st in next ch sp, v st in next ch sp, wdc2tog, v st in top of ch 3; turn.
Row 11: Ch 3, *v st in next ch sp, wdc2tog, v st in next ch sp,** double v st in next ch sp; rep from * across, finishing last repeat at **, then dc in the top of the ch 3; turn.
Row 12: Ch 4, dc in 1st st *v st in next ch sp, wdc2tog, v st in next ch sp,** double v st in next ch sp; rep from * across, finishing last repeat at **, then v st in the top of the ch 3; turn.
Row 13: Ch 3, [dc, ch 1, 2 dc] in next ch sp, *v st in next ch sp, wdc2tog, v st in next ch sp,** double v st in next ch sp; rep from * across, finishing last repeat at **, then [2 dc, ch 1, dc] in last ch sp, dc in top of ch 3; turn.
Row 14: Ch 3, double v st in next ch sp, *v st in next ch sp, wdc2tog, v st in next ch sp, double v st in next ch sp; rep from * across, then dc in top of ch 3; turn.
Row 15: Ch 4, dc in 1st st, double v st in next ch sp, *v st in next ch sp, wdc2tog, v st in next ch sp, double v st in next ch sp; rep from * across, then v st in top of ch 3; turn.
Row 16: Ch 3, *v st in next ch sp, double v in next ch sp, v st in next ch sp,** wdc2tog; rep from * across, finishing last repeat at **, then dc in the top of the ch 3; turn.
Row 17: Ch 3, dc in next st, *v st in ch sp, double v st in next ch sp, v st in next ch sp,** wdc2tog; rep from * across, finishing last repeat at **, then dc in the next st, dc in the top of the ch 3; turn.
Row 18: Ch 1, sc in each st and ch sp across; turn. (51 sts)
Baby Headband
Row 19: Ch 5, skip the ch closest to the hook, sc in the remaining 4 chs, sc in each st across, extend the row with 4 FSC; turn. (59 sts)
Rows 20-21: Ch 1, sc in each st across; turn. (59 sts)
Row 22: Ch 1, sc in each st across, turn to sc across the ends of Rows 22-19, enclosing the hair band in each st; turn again to sc along the other side of the band and along the two sides of the scarf; at the next end of the band, sc across the ends of Rows 19-22, enclosing the other side of the hair band; break yarn and finish off, but not before you try it on.
Toddler/Child Size: 18-20 Inch Head
The Toddler/Child size follows the same stitch architecture as the Baby size through the early shaping rows, then continues farther before reaching the headband section. This version has a final main-body single crochet count of 57 stitches.
Rows 1-17 use the same instructions as the corresponding Baby rows. The additional shaping is:
Row 18: Ch 3, dc2tog working between first 2 sts of previous row and top of 3rd st of previous row, *v st in next ch sp, double v st in next ch sp, v st in next ch sp,** wdc2tog; rep from * across, finishing last repeat at **, dc2tog in top of next st and between last 2 sts, dc in top of ch 3; turn.
Row 19: Ch 4, dc in 1st st, wdc2tog, *v st in next ch sp, double v st in next ch sp, v st in next ch sp, wdc2tog; rep from * across, then v st in top of ch 3; turn.
Row 20: Ch 3, *v st in next ch sp, wdc2tog, v st in next ch sp,** double v st in next ch sp; rep from * across, finishing last repeat at **, then dc in the top of the ch 3; turn.
Row 21: Ch 1, sc in each st and ch sp across; turn. (57 sts)
For the band, the source specifies:
Row 22: Ch 5, skip the ch closest to the hook, sc in the remaining 4 chs, sc in each st across, extend the row with 4 FSC; turn. (65 sts)
Rows 23-24: Ch 1, sc in each st across; turn. (65 sts)
Row 25: Ch 1, sc in each st across, turn to sc across the ends of Rows 25-22, enclosing the hair band in each st; turn again to sc along the other side of the band and along the two sides of the scarf; at the next end of the band, sc across the ends of Rows 22-25, enclosing the other side of the hair band; break yarn and finish off, but not before you try it on.
Child/Teen Size: 20-22 Inch Head
The Child/Teen version extends the main triangular section farther than the previous size. Rows 1-20 follow the corresponding instructions already established in the pattern. The final shaping rows before the band are:
Row 21: Ch 4, dc in 1st st, *v st in next ch sp, wdc2tog, v st in next ch sp,** double v st in next ch sp; rep from * across, finishing last repeat at **, then v st in the top of the ch 3; turn.
Row 22: Ch 1, sc in each st and ch sp across; turn. (61 sts)
The band then begins:
Row 23: Ch 5, skip the ch closest to the hook, sc in the remaining 4 chs, sc in each st across, extend the row with 4 FSC; turn. (69 sts)
Rows 24-25: Ch 1, sc in each st across; turn. (69 sts)
Row 26: Ch 1, sc in each st across, turn to sc across the ends of Rows 26-23, enclosing the hair band in each st; turn again to sc along the other side of the band and along the two sides of the scarf; at the next end of the band, sc across the ends of Rows 23-26, enclosing the other side of the hair band; break yarn and finish off, but not before you try it on.

Adult Size: 22-24 Inch Head
The Adult size is the largest version in the pattern and continues the repeating construction through Row 23 before moving into the band. As with the other sizes, the first twenty rows establish the central structure and repeated V-stitch pattern.
Row 21: Ch 4, dc in 1st st, *v st in next ch sp, wdc2tog, v st in next ch sp,** double v st in next ch sp; rep from * across, finishing last repeat at **, then v st in the top of the ch 3; turn.
Row 22: Ch 3, [dc, ch 1, 2 dc] in next ch sp, *v st in next ch sp, wdc2tog, v st in next ch sp,** double v st in next ch sp; rep from * across, finishing last repeat at **, then [2 dc, ch 1, dc] in last ch sp, dc in top of ch 3; turn.
Row 23: Ch 1, sc in each st and ch sp across; turn. (65 sts)
The adult headband section is then worked as follows:
Row 24: Ch 5, skip the ch closest to the hook, sc in the remaining 4 chs, sc in each st across, extend the row with 4 FSC; turn. (73 sts)
Rows 25-26: Ch 1, sc in each st across; turn. (73 sts)
Row 27: Ch 1, sc in each st across, turn to sc across the ends of Rows 27-24, enclosing the hair band in each st; turn again to sc along the other side of the band and along the two sides of the scarf; at the next end of the band, sc across the ends of Rows 24-27, enclosing the other side of the hair band; break yarn and finish off, but not before you try it on.
Understanding the Repeating Stitch Structure
One of the most useful ways to approach this project is to recognize the visual rhythm of the stitches instead of treating every row as an unrelated instruction. The V stitches form repeated open spaces, while the double V stitches create larger points of expansion. The wdc2tog decreases appear within this structure and help control the shaping.
When a row instructs you to work a V stitch into the next chain space, check the previous row so that you are working into the correct V-shaped space. Likewise, when the instruction calls for a double V stitch, locate the double V stitch below rather than substituting an ordinary chain space.
This is especially important in the longer rows because a small placement error can change the appearance of the center section and make subsequent repeats harder to identify. Counting and visual checking at the end of each row can therefore be more useful than trying to work quickly.
Stitch-Count Checkpoints
The source provides explicit stitch counts at the transition into the band section. These are valuable checkpoints before moving forward:
- Baby Row 18: 51 sts
- Baby Row 19: 59 sts
- Toddler/Child Row 21: 57 sts
- Toddler/Child Row 22: 65 sts
- Child/Teen Row 22: 61 sts
- Child/Teen Row 23: 69 sts
- Adult Row 23: 65 sts
- Adult Row 24: 73 sts
These counts are not interchangeable between sizes. Each size has its own row sequence and its own transition into the band. If your count does not match the stated checkpoint for the size you are making, it is worth reviewing the current row before continuing.
Getting the Hair Band Fit Right
The hair band is an important part of this design because it replaces the ties normally associated with a traditional kerchief. The source specifically points out that hair bands do not come in standard sizes or elasticity. This means that two bands may behave differently even when they appear similar.
For this reason, the fitting instruction is part of the construction process rather than merely an optional finishing suggestion. Before cutting the yarn, try the kerchief on. The original pattern recommends erring on the tighter side because both the hair band and the yarn can stretch.
If the band needs adjustment, the source permits adjusting the number of stitches in the band section to create the perfect fit. This is a fitting adjustment rather than a change to the main stitch pattern, and it should be made while the yarn remains attached.
Tips for a Smooth Crochet Session
- Keep the stitch definitions nearby. The V stitch, double V stitch, and wdc2tog are central to the pattern.
- Watch your stitch placement. V stitches go into V stitches below, and double V stitches go into double V stitches below.
- Use the stated stitch counts as checkpoints. They are particularly useful at the beginning of the headband section.
- Do not cut the yarn too early. The pattern specifically asks you to try the kerchief on before finishing.
- Allow for stretch. The yarn and hair band can both stretch, which is why the original instructions recommend a slightly tighter fit.
- Keep the size instructions separate. The four sizes share much of their construction but do not have identical row counts.
Common Troubleshooting Points
The V-stitch pattern does not look symmetrical
Check whether each V stitch has been worked into the corresponding V stitch below and whether each double V stitch has been placed into the double V stitch below. The pattern explicitly relies on these placements.
The stitch count is different from the checkpoint
Review the row where the count first changes. Pay particular attention to the decreases and to the chain spaces used for V stitches and double V stitches. Do not simply add or remove stitches without identifying the source of the difference.
The finished band feels loose
Remember that the original pattern recommends trying the kerchief on before cutting the yarn and erring on the tighter side because of stretching. Hair bands also vary in elasticity, so the same number of stitches may not produce identical results with different bands.
The band is too tight
The source allows the number of stitches in the band to be adjusted to create a suitable fit. Make this assessment before cutting the yarn.
Quick Reference by Size
| Size | Head Size | Main Body Ends | Band Start | Band Checkpoint |
|---|---|---|---|---|
| Baby | 16-18″ | Row 18 | Row 19 | 59 sts |
| Toddler/Child | 18-20″ | Row 21 | Row 22 | 65 sts |
| Child/Teen | 20-22″ | Row 22 | Row 23 | 69 sts |
| Adult | 22-24″ | Row 23 | Row 24 | 73 sts |
Why This Kerchief Works Well for Summer
The original design was inspired by a traditional bandana-style kerchief, but the addition of a hair band changes the way the accessory is worn. Instead of relying on long ties, the finished piece wraps around the head and incorporates the elastic band into its construction.
The lightweight yarn specification and open V-stitch structure also give the project a distinctly summer-oriented appearance. The pattern is compact enough to work with 70-100 yards of Sport/5 ply yarn, while the four size options make it possible to create versions for different head sizes.
Frequently Asked Questions
What crochet hook size is used?
The pattern uses a US H, 5.0mm hook.
What yarn does the pattern call for?
The pattern specifies 70-100 yards of Sport/5 ply yarn. Omega Sinfonia was used for the sample: 100% cotton, 218 yards/199 meters, 3.52 oz/100 g, colorway #847.
How many sizes are included?
Four sizes are provided: Baby for a 16-18″ head, Toddler/Child for an 18-20″ head, Child/Teen for a 20-22″ head, and Adult for a 22-24″ head.
What is the gauge?
The stated gauge is 16 sts x 22 rows = 4 inches in sc.
Does the pattern use a hair tie?
Yes. The materials list includes 1 hair band/elastic band, and the final edging encloses the hair band within the crocheted band.
Should the kerchief be tried on before finishing?
Yes. The original instructions specifically say to try it on before cutting the yarn because hair bands differ in size and elasticity. The instructions recommend erring on the tighter side to account for stretching of both the band and yarn.
Can the band be adjusted?
Yes. The source explains that you may need to adjust the number of stitches in the band to create the perfect fit.
Final Finishing Checklist
- Confirm that you are working the correct size.
- Keep the 5.0mm US H hook available.
- Use the specified Sport/5 ply yarn and the required hair band.
- Maintain the V-stitch and double V-stitch placement.
- Check the stated stitch counts at the band transition.
- Try the kerchief on before cutting the yarn.
- Account for stretching of both yarn and hair band.
- Enclose the hair band during the final edging as instructed.
- Break the yarn and finish off only after the fit has been checked.
Finished Project
The completed Lazy Summer Kerchief is a practical handmade accessory built around a simple idea: take the recognizable shape of a traditional kerchief and combine it with the convenience of an elastic hair band. The four-size format makes the pattern adaptable across age groups, while the repeated V-stitch construction gives the fabric an open, decorative appearance.
For crocheters, the project also offers several useful techniques in one small accessory. It includes double crochet, V stitches, double V stitches, decreases, chain spaces, single crochet, and foundation single crochet extension. The final construction introduces another useful skill by incorporating an elastic hair band into crocheted edging.
The most important details to preserve while making the project are the original stitch placement, row sequence, size-specific stitch counts, and fitting instructions. Once the appropriate size is selected and the main stitch structure is understood, the repeating pattern becomes easier to follow row by row.
Whether you are making the Baby, Toddler/Child, Child/Teen, or Adult version, the final fitting step should not be skipped. Because elastic bands vary, the pattern intentionally leaves room for adjustment before the yarn is cut. That practical detail is an important part of achieving the intended comfortable fit.
This four-size crochet kerchief is therefore a useful summer project for anyone looking for a handmade head accessory with a different construction from a traditional tied kerchief. Follow the size-specific rows carefully, use the stitch checkpoints to verify your progress, and make the final fit adjustment before finishing the yarn.