
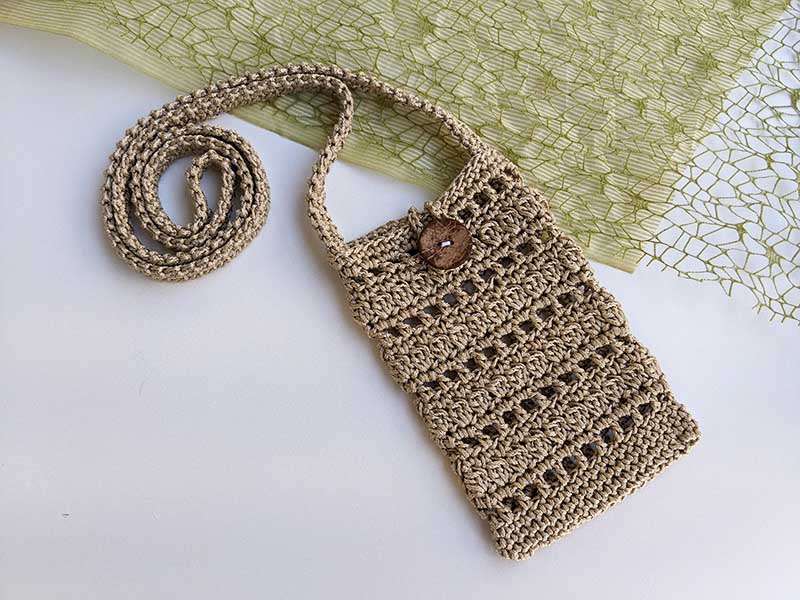
If you are looking for a small crochet project that is useful, portable, and enjoyable to make, this crochet smartphone bag is a wonderful option. It is designed as a compact phone case that can be worn with a long crochet handle, making it convenient when you want to keep your smartphone close without carrying a larger bag.
This pattern combines simple single crochet rounds with openwork double crochet sections and a textured cluster-stitch design. The result is a phone bag with several different stitch textures while keeping the overall construction straightforward. The finished bag measures approximately 13 cm (5 inches) wide and 19 cm (7.5 inches) high, with a 122 cm (48 inch) long handle.
The pattern is written in US crochet terms and includes a practical button closure. The body is worked with a 4 mm crochet hook, while the handle is made using a smaller 2.5 mm hook. The original pattern also recommends watching the accompanying video tutorial for the assembling section and handle, beginning from the 27th minute.
Why Make This Crochet Phone Bag?
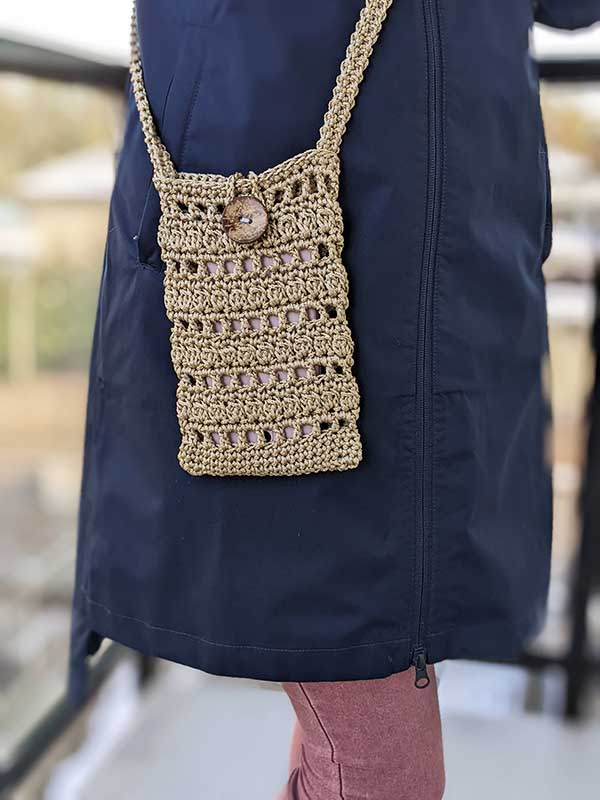
A smartphone bag is one of those crochet accessories that can be both decorative and genuinely useful. Instead of placing your phone loose in a larger handbag, you can give it its own small case. The long handle also makes the finished project suitable for hands-free carrying.
Another appealing feature of this design is the combination of stitches. The lower and upper portions use single crochet for a firm fabric, while the decorative rounds introduce open spaces and clusters. These changes create visual interest without requiring a complicated collection of different stitches.
The project is also small enough to make without committing to a large amount of yarn. The original materials list calls for twine or braided nylon measuring 2 mm, although the source notes that any cotton yarn you have may be used. The exact yarn quantity is not specified in the source.
Materials and Tools You Will Need
Before beginning, gather the materials and tools listed in the original pattern. Keeping the correct hook sizes available is particularly important because the body and handle are worked with different hooks.
- 4 mm crochet hook for the bag body.
- 2.5 mm crochet hook for the bag handle.
- Twine or braided nylon, 2 mm. The source also says that any cotton yarn you have may be used.
- Yarn needle for weaving in ends and sewing the button.
- Stitch markers.
- 30 mm button for the closure.
The original source does not specify a particular yarn color for this project, so you can follow the material guidance without introducing an unsupported color requirement.
Finished Measurements and Gauge
The finished crochet phone bag is designed to be compact while providing enough height for a smartphone. According to the pattern, the measurements are:
- Width: 13 cm (5 inches)
- Height: 19 cm (7.5 inches)
- Bag handle length: 122 cm (48 inches)
The stated gauge is 14 stitches = 4 inches, measured using a double crochet swatch.
Because the starting chain is adjustable according to the breadth of your phone, the pattern provides a useful way to begin with an even number of chains. The source specifically instructs you to start with Chain 18, or use any even number according to the breadth of your phone.
Understanding the Crochet Terms
This pattern is written in US crochet terminology. If you normally work from UK patterns, take care when following the stitch names because the terminology differs between systems.
- ch – chain
- dc – double crochet
- sc – single crochet
- st(s) – stitch(es)
- beg – beginning
- sl st – slip stitch
- pm – place marker
The 3 DC Cluster
The source explains the 3 DC cluster as a group of partial double crochets worked into the same stitch and then completed together. To make it according to the supplied instructions, yarn over, insert the hook into the required stitch, yarn over and pull up a loop, then yarn over and pull through only two loops. Two loops remain on the hook.
Yarn over and insert the hook into the same stitch again. Yarn over and pull up a loop, then yarn over and pull through only two loops. Three loops remain on the hook. Yarn over and insert the hook into the same stitch a third time, yarn over and pull up a loop, then yarn over and pull through only two loops. Four loops remain on the hook. Yarn over and pull through all four loops to complete the cluster.
The pattern’s Round 7 instructions contain a specific working description of the cluster that should be followed exactly as written in that round. When following a supplied crochet pattern, it is best to keep the round instructions beside you rather than substituting your own version of the stitch.
Start the Base of the Smartphone Bag
Begin with Chain 18, or choose any even number according to the breadth of your phone. The starting chain establishes the width of the case, so it is the point where you can account for the size of the phone you intend to carry.
Round 1
Chain 1. Starting in the second chain from the hook, make 1 single crochet in each chain. When you reach the last chain, make 4 single crochets in that last chain.
Continue working along the opposite side of the original chain. Make single crochet in all the chains on the opposite side. Once you reach the last stitch, make 3 more single crochets and slip stitch to the first single crochet.
The completed round contains 40 single crochet stitches.
This round creates the foundation around which the rest of the phone bag is built. When working around a foundation chain, keep the chain positioned consistently so the two sides of the base remain even.
Round 2
Chain 1, then make a single crochet into the same stitch and in each stitch around. Join to the first single crochet.
The round contains 40 single crochet stitches.
Rounds 3–4
Repeat Round 2 for Rounds 3 and 4. Each of these rounds contains 40 single crochet stitches.
At this stage, the project has established the firm lower portion of the phone case. Pay attention to your stitch count as you work, particularly when joining each round, because maintaining the correct number of stitches will help keep the decorative sections aligned later.
Create the First Decorative Openwork Round
Round 5
Chain 4. Skip the next stitch, then make a double crochet in the next stitch after it. Continue with the following sequence: chain 1, skip the next stitch, and make a double crochet in the next stitch after that.
Repeat this sequence from the asterisk until the end of the round. Chain 1 and slip stitch into the third chain of the beginning chain 4.
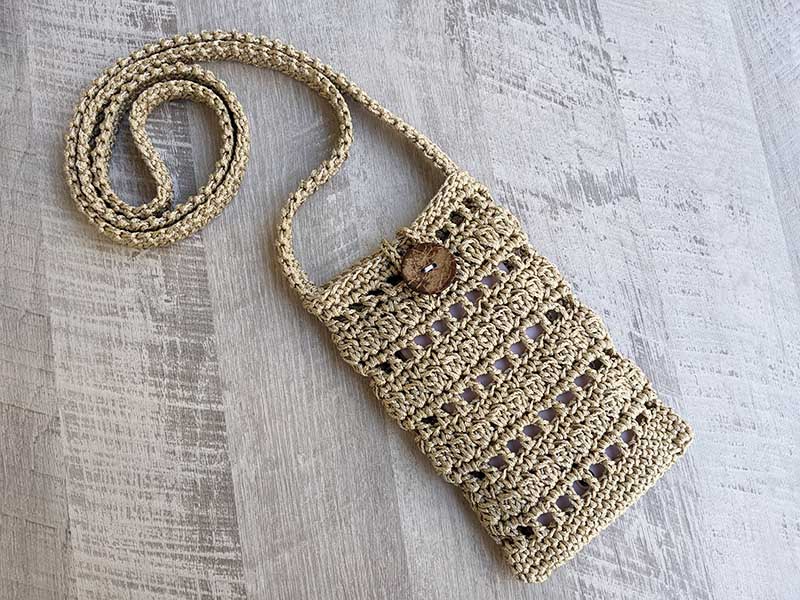
This round introduces open chain-1 spaces between the double crochet stitches. These spaces are part of the decorative construction and will be used in the next round.
Round 6
Chain 1, then make 2 single crochets in each chain-1 space around. Join to the first single crochet.
The completed round contains 40 single crochet stitches.
When working this round, concentrate on the chain-1 spaces created in Round 5. They are the locations specified by the pattern for the pairs of single crochets.
Add the Cluster Stitch Texture
Round 7
Chain 2. Yarn over and insert the hook into the same stitch, yarn over and pull up a loop, then yarn over and pull up only through two loops. You have two loops on the hook.
Yarn over and insert the hook into the same stitch, yarn over and pull up a loop, then yarn over and pull up only through two loops. You have 3 loops on the hook. To complete the cluster stitch, yarn over and pull through all 3 loops on the hook.
Then work the repeating sequence: chain 1, skip the next stitch, 3DC cluster. Repeat this sequence around. Finish with chain 1 and join to the first stitch.
Follow the supplied Round 7 instructions exactly, including the cluster construction and joining instruction. This is one of the defining decorative sections of the project, so keeping your stitch placement consistent is important.
Round 8
Chain 1 and make a single crochet into the same stitch. Then repeat the following sequence around: single crochet in the chain-1 space, single crochet in the next stitch.
Join to the first single crochet.
Rounds 5 through 8 form a decorative repeat that is used several times throughout the bag. Once you have completed this first sequence, the structure becomes easier to recognize because the same four-round pattern is repeated.
Repeat the Decorative Pattern
After completing Rounds 5–8, repeat Rounds 5–8 three more times. After those repetitions are complete, repeat Rounds 5 and 6.
This is an important checkpoint in the pattern because the decorative stitch sequence is responsible for much of the finished appearance of the bag. Rather than trying to change the sequence or estimate the number of rounds visually, keep track of each completed round so the construction remains faithful to the original instructions.
Once the additional Rounds 5 and 6 have been completed, move to the next round.
Complete the Upper Portion of the Bag
Next Round
Repeat Round 2. This means working chain 1, making a single crochet into the same stitch and in each stitch around, then joining to the first single crochet.
This final single crochet round provides the upper structure before the button-loop round. As you approach the closure, check that the top edge is sitting evenly and that the stitches are not accidentally stretched or compressed.
Make the Button Loop
The closure is created with a dedicated button-loop round. Begin with Chain 1 and make a single crochet into the same stitch.
Then make 7 single crochets, slip stitch in the next stitch, and chain 20. Slip stitch into the same stitch, then make single crochet in each stitch until the end. Join to the first single crochet.
The 20-chain section creates the loop that will pass around the 30 mm button. Since the button and loop work together as the closure, take care while positioning the button so the finished flap closes securely.
Finishing the Crochet Phone Case
Once the button-loop round is complete, cut the yarn and weave in the ends. The source then instructs you to sew the button.
Use a yarn needle for the finishing work and make sure loose yarn ends are secured neatly. Because this is a small accessory that will be handled regularly, a clean finish is especially useful.
Making the Long Bag Handle
The handle is made separately from the main bag body using the 2.5 mm crochet hook. The finished handle length specified by the pattern is 122 cm (48 inches).
The source recommends watching the video tutorial for the assembling portion and the bag handle pattern, beginning at the 27th minute. If you are following the original tutorial alongside the written instructions, this section is therefore the best place to consult that visual demonstration.
Keep the 2.5 mm hook separate from the 4 mm hook used for the bag body. The source specifically assigns the smaller hook to the handle, so do not automatically use the body hook for both parts.
Helpful Tips for Keeping Your Stitching Accurate
Keep your stitch marker nearby. The materials list includes stitch markers, and they can be useful for identifying important points as you work around the bag.
Watch the stitch count. The first four rounds establish a count of 40 single crochet stitches. Round 1, Round 2, and Rounds 3–4 are all clearly defined in the pattern, so use those counts as checkpoints.
Pay attention to chain spaces. Round 5 creates chain-1 spaces, and Round 6 specifically places 2 single crochets into each chain-1 space. Keeping those spaces easy to identify makes the transition between decorative rounds much easier.
Follow the round sequence rather than guessing from appearance. The decorative section is repeated several times. It can be tempting to stop when the bag looks tall enough, but the original pattern specifies exactly how many times to repeat Rounds 5–8 and when to work Rounds 5 and 6 again.
Use the correct hook for each component. The bag uses a 4 mm hook, while the handle uses a 2.5 mm hook. Keeping these assignments clear prevents confusion when moving between the body and handle.
Common Points to Check While Crocheting
- Confirm that your starting chain is an even number.
- Make sure the starting chain is appropriate for the breadth of your phone.
- Round 1 finishes with 40 single crochet stitches.
- Round 2 contains 40 single crochet stitches.
- Rounds 3–4 repeat Round 2 and contain 40 single crochet stitches.
- Round 5 creates chain-1 spaces between double crochet stitches.
- Round 6 returns to 40 single crochet stitches.
- Follow the supplied Round 7 cluster instructions exactly.
- Round 8 works single crochet through the chain-1 spaces and next stitches.
- Repeat Rounds 5–8 three more times as instructed.
- After that repetition, work Rounds 5 and 6 again.
- Repeat Round 2 for the next round.
- Work the specified 20-chain button loop.
- Sew the 30 mm button after finishing the yarn ends.
- Use the 2.5 mm hook for the 122 cm (48 inch) handle.
How the Stitch Sections Work Together
One of the most interesting aspects of this smartphone bag is the way the stitch patterns alternate. The first four rounds use single crochet, giving the lower part of the case a simple and structured appearance. Round 5 changes the rhythm with double crochet and chain-1 spaces. Round 6 works into those spaces, transforming the openwork into a row of single crochet stitches.
Round 7 introduces the cluster texture, followed by Round 8, which brings the fabric back to single crochet. Repeating this four-round sequence creates a patterned surface without requiring a completely different construction for every section.
This combination makes the finished accessory more visually interesting than a phone case made entirely from one basic stitch. At the same time, the written instructions remain organized into recognizable round groups, which can make the project easier to track.
Beginner-Friendly Project Workflow
If you are newer to crochet, it can help to divide the project into several checkpoints instead of thinking about the entire bag at once. First, complete the foundation and the four single crochet rounds. Then pause and verify your stitch count. Next, work through Rounds 5–8 as one decorative unit.
Once you are comfortable with the first decorative repeat, repeat the same four-round sequence three more times. Then complete Rounds 5 and 6, followed by the next Round 2. Finally, make the button loop and finish the body.
This approach makes the pattern feel more manageable because each stage has a clear purpose. The repeated stitch sequence also means that you do not need to learn a new construction method every time you begin a new section.
Button Closure and Final Assembly
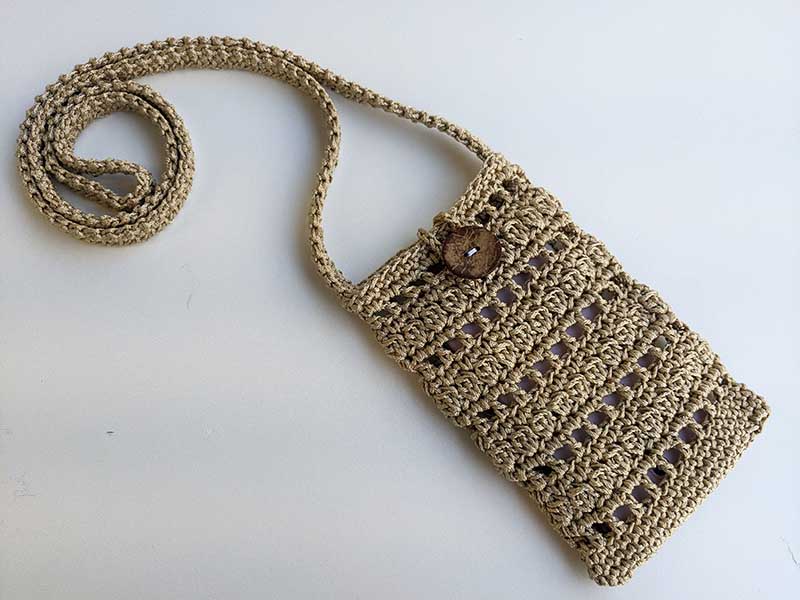
The button closure is one of the final details that turns the crocheted fabric into a functional phone bag. The pattern calls for a 30 mm button and creates a 20-chain loop during the dedicated button-loop round.
When sewing the button, keep its position aligned with the loop created by the pattern. The source does not provide an additional numerical placement measurement for the button, so do not add an unsupported measurement. Instead, use the finished button loop as the reference when completing this part of the project.
The long handle is then used with the completed bag. The finished handle length given in the source is 122 cm (48 inches), providing the intended long-handle format shown in the supplied project photographs.
Quick Reference for the Complete Pattern
- Chain 18, or any even number according to the breadth of your phone.
- Work Round 1 for 40 sc.
- Work Round 2 for 40 sc.
- Repeat Round 2 for Rounds 3–4.
- Work Round 5 using ch-1 spaces and dc stitches.
- Work Round 6 for 40 sc.
- Work Round 7 with the specified cluster sequence.
- Work Round 8 with sc in the chain-1 spaces and next stitches.
- Repeat Rounds 5–8 three more times.
- Repeat Rounds 5 and 6.
- Repeat Round 2.
- Work the button-loop round with the specified 20-chain loop.
- Cut the yarn and weave in the ends.
- Sew the 30 mm button.
- Make the handle using the 2.5 mm crochet hook.
- Follow the recommended video tutorial for assembly and the handle beginning at the 27th minute.
Frequently Asked Questions
What crochet terminology does this pattern use?
The pattern is written in US crochet terms. The abbreviations include ch, dc, sc, st(s), beg, sl st, and pm.
What hook size is used for the smartphone bag?
The main body of the bag is made with a 4 mm crochet hook.
What hook size is used for the handle?
The handle is made with a 2.5 mm crochet hook.
What are the finished dimensions?
The finished bag measures approximately 13 cm (5 inches) wide and 19 cm (7.5 inches) high. The handle is 122 cm (48 inches) long.
What yarn does the original pattern recommend?
The materials list specifies 2 mm twine or braided nylon. It also says that you may use any cotton yarn you have. No exact yarn quantity is provided in the source.
What is the gauge?
The stated gauge is 14 stitches = 4 inches, measured with a double crochet swatch.
How many stitches are in the first rounds?
Round 1 contains 40 sc. Round 2 also contains 40 sc, and Rounds 3–4 repeat Round 2 with 40 sc.
What size button is required?
The pattern calls for a 30 mm button.
How long is the finished handle?
The specified finished handle length is 122 cm (48 inches).
Final Thoughts
This crochet smartphone bag is a compact project that combines practical function with decorative crochet texture. Its 13 cm (5 inch) width and 19 cm (7.5 inch) height create a dedicated space for a phone, while the 122 cm (48 inch) handle allows it to be carried as a long-handle accessory.
The construction progresses from a single crochet foundation into alternating decorative sections made with double crochet, chain spaces, and clusters. Repeating Rounds 5–8 creates the main textured design, while the final single crochet round and button loop complete the upper edge.
For the best results, keep the original stitch counts and round sequence close at hand, use the 4 mm hook for the bag and the 2.5 mm hook for the handle, and follow the supplied instructions carefully. The original tutorial can also be especially helpful for the assembling and handle portion, beginning at the 27th minute.
With its small size, button closure, textured stitch pattern, and long handle, this crochet smartphone bag makes a useful handmade accessory while also providing an enjoyable project for practicing several fundamental crochet techniques.