
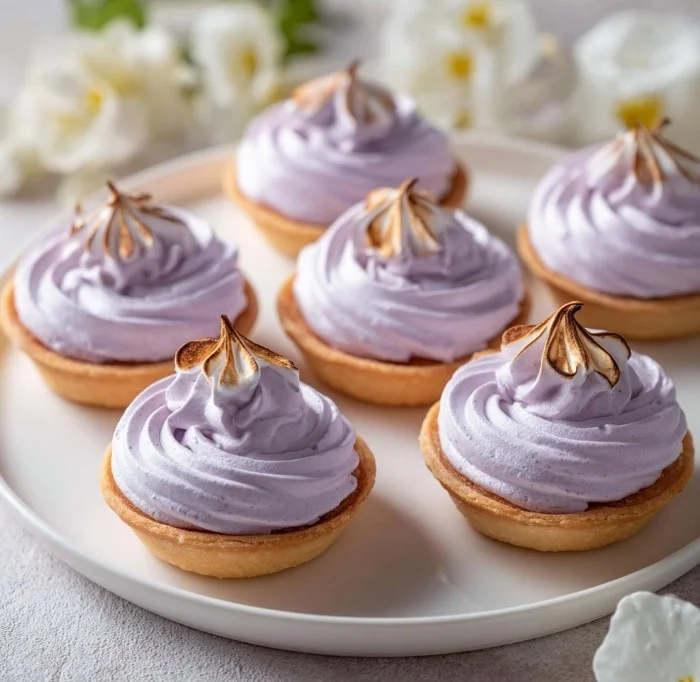
Mini Lemon Tarts
There’s something uniquely refreshing about lemon tarts. The lively zest of lemon combined with a smooth, creamy filling and a crisp crust creates a treat that’s hard to resist. Mini lemon tarts are especially delightful; they’re bite-sized gems that pack a big punch of flavor. The citrusy sweetness is perfectly balanced, making them an excellent dessert choice for any occasion.
These little tarts are a fantastic pick for gatherings, picnics, or just a sunny afternoon snack. Serve them up after a hearty meal to cleanse the palate, or bring them along to share at a party. They’re not only delicious but also incredibly charming in presentation, leaving your friends and family smiling with every bite.
Prep Time, Cook Time, Total Time:
Prep Time: 10 min | Cook Time: 25 min | Total Time: 35 min
How to Make Mini Lemon Tarts
Ingredients:
- 1 cup all-purpose flour
- 1/4 cup powdered sugar
- 1/2 cup unsalted butter, softened
- 1/2 cup granulated sugar
- 3 large eggs
- 1/2 cup fresh lemon juice
- 1 tablespoon lemon zest
- 1/4 teaspoon salt
- 4 egg whites
- 1 cup granulated sugar (for meringue)
- 1/4 teaspoon cream of tartar
Step-by-Step Instructions:
- Preheat the oven to 350°F (175°C).
- In a medium bowl, mix together the all-purpose flour and powdered sugar. Use a pastry cutter to cut in the softened butter until the mixture resembles coarse crumbs.
- Press the mixture into mini tartlet pans, making sure to form even layers. Bake for 15 minutes until lightly golden.
- While the crust is baking, prepare the lemon filling. In another bowl, whisk together the granulated sugar, eggs, fresh lemon juice, lemon zest, and salt until well blended.
- Pour the lemon filling into the baked crusts, and return them to the oven. Bake for an additional 15-20 minutes or until the filling is set.
- For the meringue, beat the egg whites in a clean bowl until soft peaks form. Gradually add the granulated sugar and cream of tartar, continuing to beat until stiff peaks form.
- Spread the meringue over the warm lemon tarts, creating peaks and swirls. If you like, use a kitchen torch to very carefully toast the tops until they’re golden brown.
- Let the tarts cool before removing them from the pans and serving.
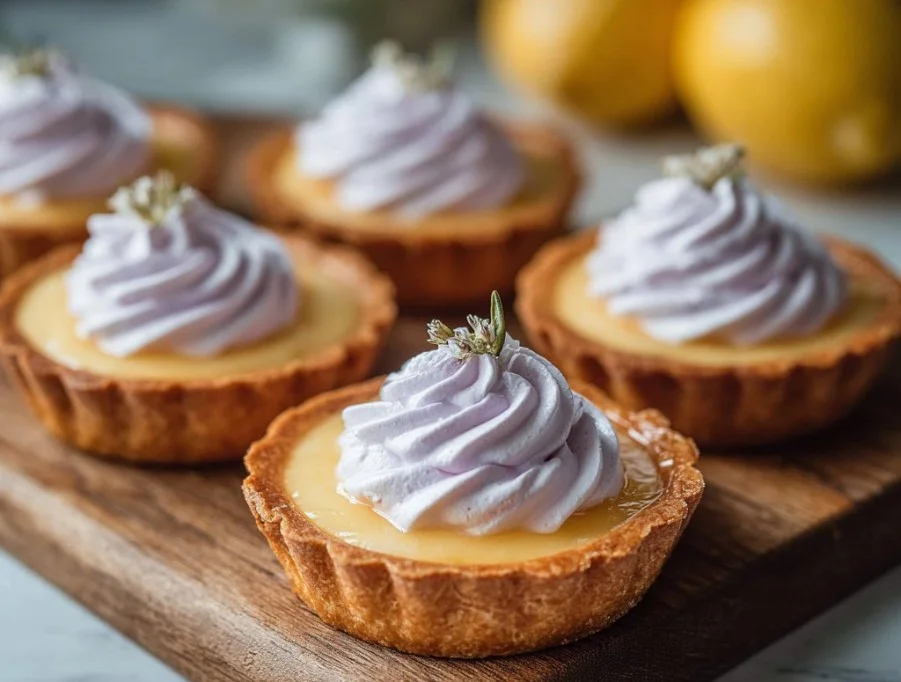
Pro Tips
- Butter Temperature: Make sure your butter is softened (room temperature) but not melted. This will help create a flaky crust.
- Avoid Overbaking: Keep a close eye on the filling after the first 15 minutes. Overcooked lemon filling can become rubbery.
- Egg Whites: Ensure your mixing bowl and tools are completely clean and dry. Any grease will make it difficult to achieve stiff peaks in your meringue.
- Torch Use: If you don’t have a kitchen torch, you can place the tarts under a broiler for a few minutes to brown the meringue, but watch them closely to prevent burning.
- Flavor Enhancements: Try adding a hint of vanilla extract to the lemon filling for added depth of flavor.
Why You’ll Love This Recipe
These mini lemon tarts are a true delight for the senses. They are tangy yet sweet, providing a refreshing aftertaste that encourages you to go in for another bite. The contrasting textures—from the buttery, crumbly crust to the smooth lemon filling and fluffy meringue—create a dessert that is both light and satisfying.
Not to mention, they are relatively simple to prepare, making them accessible even for novice bakers. This recipe uses fresh ingredients that cater to a variety of dietary preferences, allowing for adjustments that are friendly to vegan or gluten-free diets.
How to Serve Mini Lemon Tarts
Presentation is key when serving mini lemon tarts. Consider arranging them on a tiered cake stand for a whimsical effect. You can garnish each tart with a small sprig of mint or a slice of candied lemon for added flair. Pair these tarts with a cup of herbal tea or a glass of sparkling water to cut through the sweetness.
If you want to make it a full treat, serve the tarts alongside fresh fruits like strawberries or blueberries. This not only enhances the visual appeal but also adds different flavor notes that complement the lemon.
How to Store Mini Lemon Tarts
For the best quality, store mini lemon tarts in the refrigerator. They can last for up to 3 days if covered properly. To store, place them in an airtight container with parchment paper between layers to avoid sticking.
If you need to store them longer, consider freezing the unbaked tart shells and lemon filling separately. Bake the shells fresh when you’re ready or thaw and reassemble them gently before serving.
Tips to Make Mini Lemon Tarts
- Check the acidity of your lemons. If they feel a bit dry, opt for another lemon for a juicier filling.
- For a silky-smooth filling, strain the lemon mixture before pouring it into the crust to remove any pulp or seed remnants.
- Don’t rush the cooling process; letting the tarts cool at room temperature before refrigerating helps set the meringue properly.
Variations
- Vegan Version: Substitute eggs with a flaxseed mixture or aquafaba for a plant-based lemon tart.
- Gluten-Free Option: Use almond flour or gluten-free all-purpose flour to create a gluten-free crust.
- Flavor Twists: Mix with other citrus juices like lime or orange for a unique flavor, or add fresh herbs like basil or rosemary to the lemon filling.
Nutrition Information:
- Serving Size: 1 tart
- Calories: 210
- Protein: 3g
- Carbs: 26g
- Fat: 10g
- Fiber: 0g
- Sugar: 12g
These mini lemon tarts offer a good source of vitamin C from the lemons, but their sugar content means moderation is key. They’re a delightful treat for special occasions, but keep an eye on your portion sizes!
Storage and Reheating
To reheat leftovers, it’s best to gently warm the tarts rather than expose them to direct heat. If you prefer a warm tart, preheat your oven to 300°F (150°C), cover the tarts loosely with foil, and heat for about 10 minutes. Avoid microwaving, as it can make the crust chewy and the meringue soggy.
Customization Ideas
Adjust the flavor profile by adding spices or extracts, such as ginger or almond. If you like a bit of texture, consider folding in finely chopped nuts or even shredded coconut into the lemon filling. For a unique topping, try fresh berries or a drizzle of chocolate sauce.
Common Mistakes to Avoid
- Overmixing the Crust: This can lead to a tough texture; mix just until combined.
- Skipping the Cooling Step: Cutting into warm tarts may cause them to fall apart; always let them cool completely.
- Not Using Fresh Lemons: Bottled lemon juice lacks the vibrant flavor of fresh juice, affecting the end result.
- Ignoring Consistency: Ensure your meringue has stiff peaks before spreading it on the tarts for the best texture.
- Cutting Too Soon: Waiting a minimum of 30 minutes after baking ensures the filling has time to set.
Serving Occasions
Mini lemon tarts are versatile and suitable for various occasions. They’re perfect for afternoon tea parties, birthday celebrations, or summer barbecues. The bright citrus flavor makes them an excellent choice for holidays like Easter or Mother’s Day. They make an impressive addition to any dessert table!
Why Make This Recipe
What sets mini lemon tarts apart from other baked goods is their balance of flavors and textures. Unlike heavier desserts, they leave you feeling refreshed and satisfied, thanks to the zesty lemon and light meringue. They also show off your baking skills, with an elegant look that makes guests feel extra special.
Lemon desserts, in general, have a timeless appeal, but making them into mini tarts elevates the experience. Their small size allows for individual servings that guests can simply grab and enjoy, making them a fun and delightful addition to any celebration.
FAQs
-
Can I use bottled lemon juice?
- While bottled lemon juice may not have the same brightness as fresh, it can still work in a pinch. Fresh lemons are always recommended for the best flavor.
-
Can these tarts be made ahead of time?
- Yes! You can prepare the crusts and filling a day in advance and assemble them just before serving for an extra fresh taste.
-
Is it okay to freeze mini lemon tarts?
- Yes, but it’s best to freeze them before adding meringue. Bake and frost them once thawed for the best texture.
-
What can I substitute if I don’t have cream of tartar?
- You can use lemon juice or white vinegar as a substitute in equal amounts; these acids will help stabilize the meringue.
-
How do I prevent the crust from getting soggy?
- Pre-baking the crust is key. If you’re making them in advance, you can also brush the crust with a layer of melted chocolate after baking, which will act as a seal.
Disclaimer:
Nutrition information provided is approximate and can vary based on specific ingredients used. Always double-check with the ingredients you have on hand for the most accurate calculations.
Print
Mini Lemon Tarts
- Total Time: 35 minutes
- Yield: 12 servings 1x
- Diet: Vegetarian
Description
Delightful bite-sized lemon tarts with a crisp crust, creamy filling, and fluffy meringue.
Ingredients
- 1 cup all-purpose flour
- 1/4 cup powdered sugar
- 1/2 cup unsalted butter, softened
- 1/2 cup granulated sugar
- 3 large eggs
- 1/2 cup fresh lemon juice
- 1 tablespoon lemon zest
- 1/4 teaspoon salt
- 4 egg whites
- 1 cup granulated sugar (for meringue)
- 1/4 teaspoon cream of tartar
Instructions
- Preheat the oven to 350°F (175°C).
- In a medium bowl, mix together the all-purpose flour and powdered sugar. Use a pastry cutter to cut in the softened butter until the mixture resembles coarse crumbs.
- Press the mixture into mini tartlet pans, making sure to form even layers. Bake for 15 minutes until lightly golden.
- While the crust is baking, prepare the lemon filling. In another bowl, whisk together the granulated sugar, eggs, fresh lemon juice, lemon zest, and salt until well blended.
- Pour the lemon filling into the baked crusts, and return them to the oven. Bake for an additional 15-20 minutes or until the filling is set.
- For the meringue, beat the egg whites in a clean bowl until soft peaks form. Gradually add the granulated sugar and cream of tartar, continuing to beat until stiff peaks form.
- Spread the meringue over the warm lemon tarts, creating peaks and swirls. If you like, use a kitchen torch to very carefully toast the tops until they’re golden brown.
- Let the tarts cool before removing them from the pans and serving.
Notes
For a silky-smooth filling, strain the lemon mixture before pouring it into the crust to remove any pulp or seed remnants.
- Prep Time: 10 minutes
- Cook Time: 25 minutes
- Category: Dessert
- Method: Baking
- Cuisine: American
Nutrition
- Serving Size: 1 tart
- Calories: 210
- Sugar: 12g
- Sodium: 50mg
- Fat: 10g
- Saturated Fat: 6g
- Unsaturated Fat: 4g
- Trans Fat: 0g
- Carbohydrates: 26g
- Fiber: 0g
- Protein: 3g
- Cholesterol: 70mg