
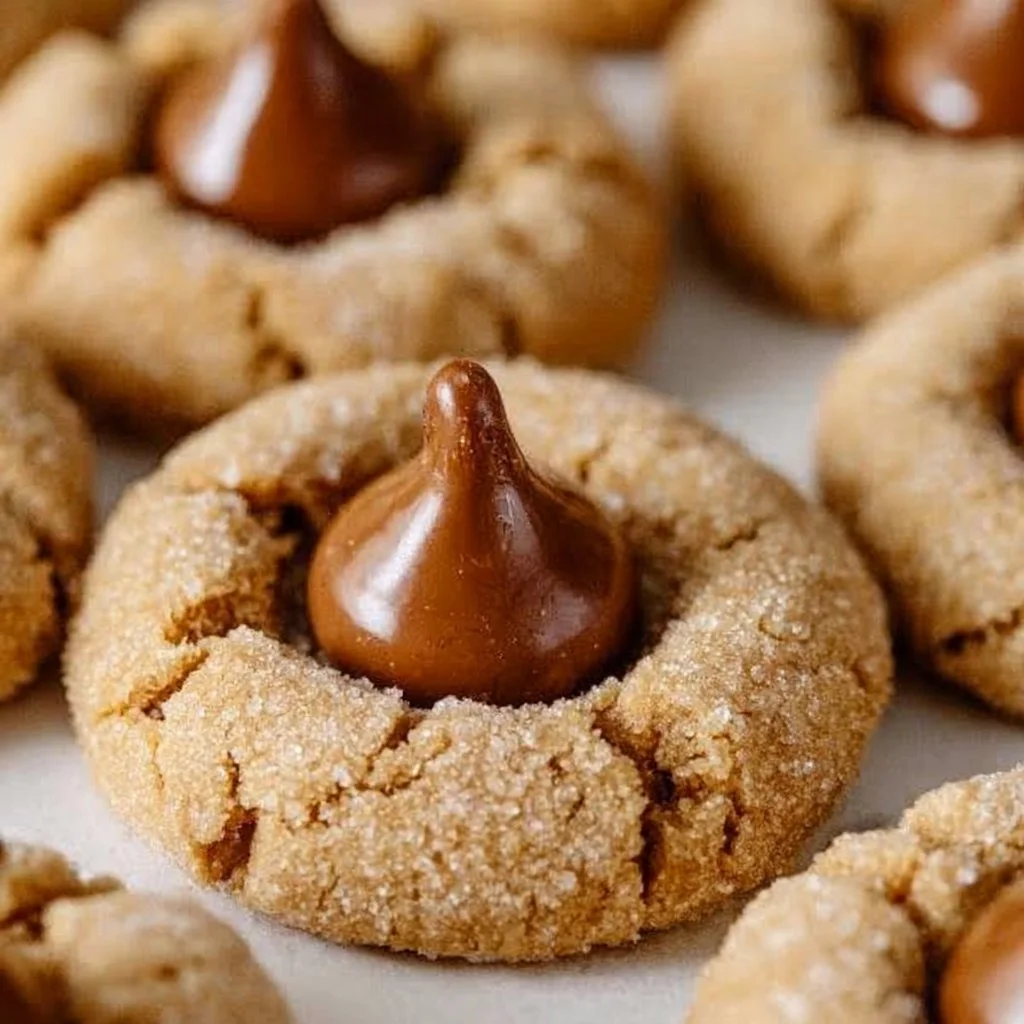
Classic Peanut Butter Blossoms
Peanut Butter Blossoms are a delightful twist on traditional cookies, combining the rich, creamy flavor of peanut butter with the sweet, melt-in-your-mouth satisfaction of chocolate. These cookies are not only fun to make but also bring a nostalgic vibe to the kitchen, often associated with gatherings, celebrations, and family traditions. With their soft yet slightly crunchy texture, these treats melt in your mouth, leaving behind a lasting taste that beautifully balances between salty and sweet.
At first glance, Peanut Butter Blossoms are not just delicious but visually appealing as well. The dough forms a beautiful golden-brown color when baked, and each cookie is crowned with a signature chocolate kiss that adds a rich, glossy finish. The contrast of the smooth chocolate against the coarse, slightly crackled surface of the cookie makes for an inviting appearance that tempts your taste buds even before the first bite. As you take your first bite, the initial crunch gives way to the soft, doughy center, with the kiss adding a smooth, chocolatey burst.
These cookies are perfect for various occasions, whether you’re preparing for a family gathering, a holiday celebration, or just a cozy night in. They bring warmth and joy, making them ideal for sharing with friends, co-workers, or loved ones. Their simplicity and the universal love for peanut butter and chocolate make them an excellent choice for people of all ages, ensuring a smile with every delicious bite.
Even if you are new to baking, making Peanut Butter Blossoms is a comforting experience. The recipe is straightforward, with simple ingredients that most home cooks have on hand. This accessible approach means you can whip up a batch in no time, making them an excellent choice for both beginner bakers and seasoned pros looking for a nostalgic treat.
What Makes This Recipe Special
What truly sets Peanut Butter Blossoms apart is the harmonious blend of flavors and textures they offer. The nutty richness of the peanut butter serves as a robust base, providing a satisfying depth that complements the sweetness of the sugar and the chocolate kiss. The creamy peanut butter combined with the buttery goodness of the dough creates a cookie that is both soft and chewy, making it an experience that’s indulgent yet comforting.
The preparation method adds its own unique flair to this recipe. Chilling the dough before baking allows for the flavors to meld together and enhances the cookie’s structure, leading to that perfect crackly top. The double-bake procedure, where the chocolate kiss is pressed into the cookie just before a final burst of heat, ensures that the chocolate remains perfectly melted on top yet maintains its shape and integrity.
In comparison to other chocolate treats, Peanut Butter Blossoms hold a special place in the hearts of many. While classic chocolate chip cookies are always a crowd favorite, Peanut Butter Blossoms provide a delightful twist by introducing the unique flavor of peanut butter. The addition of the chocolate kiss not only adds a charming aesthetic but also creates a moment of blissfulness as you savor the combination of rich chocolate and nutty cookie.
Those who try this recipe might also appreciate its versatility. While the classic version is undeniably delicious, it opens the door to multiple adaptations and variations, allowing bakers to get creative with flavors and ingredients. Whether you want to swap out the chocolate kiss for other types of chocolates, or explore nut butter alternatives, this recipe’s foundation encourages exploration and personalization.
Ingredient Overview and Helpful Notes
The foundation of Peanut Butter Blossoms consists of a carefully curated list of ingredients, each playing a pivotal role in shaping the final cookie.
-
All-Purpose Flour: This is the backbone of the cookie’s structure. It provides the necessary bulk and supports the cookie’s shape as it bakes. Look for flour that is freshly opened and preferably in an airtight container to ensure it maintains its quality.
-
Baking Soda: A vital leavening agent in these cookies, baking soda helps achieve that desirable rise, resulting in the soft texture characteristic of a good cookie. Ensure it’s fresh for optimal effectiveness.
-
Salt: Salt is essential in baking as it brings out the flavors within the cookie. A half teaspoon may seem small, but it significantly enhances the sweetness and balances the richness of the peanut butter.
-
Creamy Peanut Butter: This is the star ingredient, imparting a nutty flavor and rich mouthfeel. Choose a high-quality creamy peanut butter without hydrogenated oils for the best taste and texture.
-
Unsalted Butter: Using room temperature unsalted butter allows for excellent creaming with sugars, resulting in a light and fluffy texture. It’s crucial to have it softened before mixing to ensure an even blend.
-
Granulated Sugar and Light Brown Sugar: The combination of these sugars contributes to the cookie’s sweetness and texture. Granulated sugar encourages a crisper edge, while brown sugar adds moisture and a bit of chewiness.
-
Egg: The egg acts as a binder, bringing all the ingredients together while also adding richness. Make sure the egg is at room temperature for better incorporation into the dough.
-
Milk and Vanilla Extract: Both ingredients enhance the sweetness and offer a little more moisture. Vanilla extract introduces a warm, aromatic element that further enriches the overall flavor profile.
-
Hershey Kisses: The signature chocolate topping that makes these cookies iconic. They add a creamy texture and smooth chocolate flavor that pairs perfectly with the peanut butter cookie base. Opt for milk chocolate for a classic combination, or get creative with dark or white chocolate kisses for a twist.
When preparing, always remember the importance of measuring ingredients accurately. Too much or too little of any ingredient could fluctuation affect the texture or flavor. For example, using too much flour could lead to a dry cookie, whereas too little fat could yield a cookie that’s too flat or chewy. Following the recipe closely, especially with the ratios, helps ensure a successful batch of cookies.
Nutrition & Recipe Details
Please note that nutritional values may vary depending on ingredient brands, portion sizes, and preparation methods. Here’s a quick overview of what to expect:
| Item | Value |
|---|---|
| Prep time | 20 minutes |
| Cook time | 10 minutes |
| Store time | 1 week |
| Calories | 130 per cookie |
| Protein | 2g |
| Carbohydrates | 18g |
| Fat | 6g |
How to Make Classic Peanut Butter Blossoms
The process of making these cookies is as enjoyable as the final product is delightful. With basic tools such as mixing bowls, measuring cups, and spoons, you can set up a friendly baking session that the whole family can join.
To start, ensure your ingredients are set out and measured before diving into the mixing process. This organization will make the preparation smoother and lessen the chance of missing any crucial steps or ingredients. A stand mixer or hand mixer is particularly useful for this recipe, especially when creaming the butter and sugar together to achieve a light and fluffy texture.
Ingredients
| Ingredient | Quantity |
|---|---|
| All-Purpose Flour | 1 3/4 cup |
| Baking Soda | 1 tsp |
| Salt | 1/2 tsp |
| Creamy Peanut Butter | 1/2 cup |
| Unsalted Butter (room temperature) | 1/2 cup |
| Granulated Sugar | 1/2 cup |
| Light Brown Sugar (lightly packed) | 1/2 cup |
| Large Egg | 1 |
| Milk | 2 tbsp |
| Vanilla Extract | 1 tsp |
| Granulated Sugar (additional amount for coating cookies) | 1/2 cup |
| Hershey Kisses | 11 oz Bag |
Once all the ingredients are ready, one should start by whisking the dry ingredients together first. This ensures there are no clumps of baking soda or salt and that they are evenly distributed throughout the flour. In a separate bowl, cream together the creamy peanut butter, unsalted butter, granulated sugar, and light brown sugar until light and fluffy. Next, add in the egg, milk, and vanilla extract before carefully incorporating the dry mixture until a dough forms.
After your dough is well mixed, cover it and chill for at least one hour. Chilling is crucial as it allows the flavors to meld and makes the dough easier to shape. Once chilled, you’re ready to scoop, roll, and bake!
Step-by-Step Instructions
-
Prepare the Dry Ingredients: In a medium bowl, whisk together the all-purpose flour, baking soda, and salt. Set it aside for later. It’s essential to mix these dry components as they will need to be evenly combined into the wet mixture.
-
Cream the Butters and Sugars: Using either a hand mixer or a stand mixer fitted with a paddle attachment, cream together the peanut butter, unsalted butter, granulated sugar, and light brown sugar on medium-high speed until well blended. This process usually takes about 2 to 3 minutes and contributes to a light and airy cookie.
-
Add Wet Ingredients: Next, add the egg, milk, and vanilla extract to the creamed mixture. Scrape down the sides of the bowl as needed to ensure everything blends uniformly, which is important for achieving the cookie’s creamy texture.
-
Combine Wet and Dry Mix*: Lower the mixer speed and gradually add in the dry mixture. Be careful not to overmix; just blend until completely incorporated. A few dry spots are acceptable as the dough will come together.
-
Chill the Dough: It’s time to place the cookie dough in a well-sealed food container or tightly cover the mixing bowl with plastic wrap. Chill the dough for a minimum of 1 hour. This step is important, as it helps prevent the cookies from spreading too much during baking.
-
Preheat and Prepare Baking Sheets: After the dough has chilled, line two baking sheets with parchment paper or silicone mats. Adjust the oven rack to the second level mark (just above center) and preheat the oven to 375°F. This ensures an even bake for the cookies.
-
Shape the Cookies: Using a spoon or your clean hands, shape the dough into 1-inch balls, rolling them in granulated sugar before placing them about 1½ – 2 inches apart on the lined baking sheets. The sugar coating will provide a sweet, crispy edge once baked.
-
Bake the Cookies: Bake for 7-8 minutes. Once they are light golden brown around the edges, remove the cookies from the oven and gently press a milk chocolate kiss into each cookie. This moment is key as it will create the crackly edges when the cookies return to the oven.
-
Bake Again: After pressing the kisses into the cookies, return them to the oven and bake for an additional 2 minutes. This allows the kisses to melt slightly while ensuring that the cookies do not harden too much.
-
Cool: Once finished baking, let the cookies cool on the baking sheet for about 5-10 minutes. This will help them set and make transferring to a cooling rack easier.
-
Store Cookies: Once fully cooled, store the cookies in an airtight container with a slice of bread to maintain moisture, and enjoy them for up to a week.
Understanding the Flavor and Texture
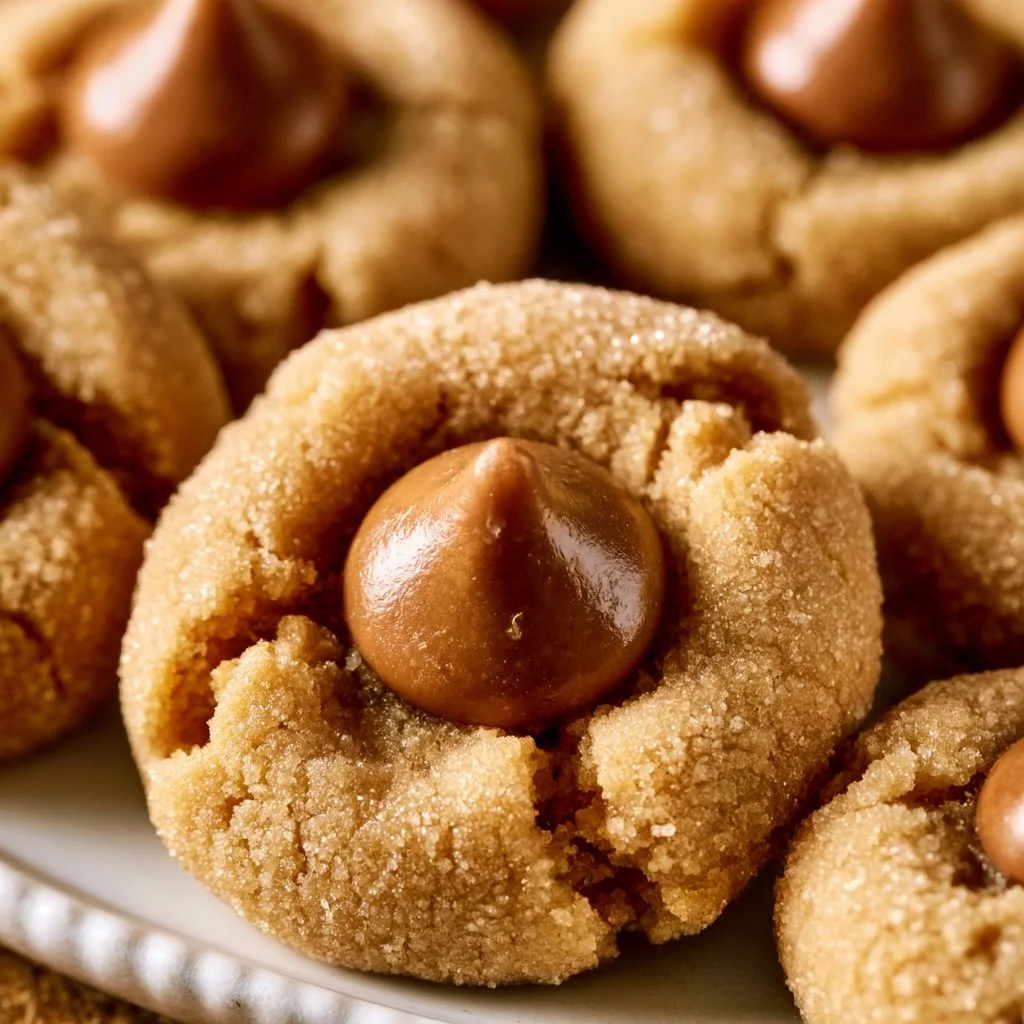
The Peanut Butter Blossoms offer an irresistible flavor blend that elevates them beyond the average cookie. At first bite, you experience the nutty richness of the peanut butter, which provides a warm foundation that is perfectly complemented by the sweetness of the sugars. The contrasting texture of the crispy edges and soft, chewy center creates a delightful balance that keeps you coming back for more.
The chocolate kiss adds a luxurious smoothness and depth to each cookie. As it melts slightly during the baking process, it creates a gooey layer that harmonizes beautifully with the textured cookie base. The gentle warmth from the oven causes the sugar to caramelize a bit, enhancing the overall sweetness and creating a lovely golden hue, indicative of a perfectly baked cookie.
Moreover, good baking technique—a balance between the right measurement of butter and flour, along with the chilling step—ensures that your Peanut Butter Blossoms maintain that coveted chewy yet slightly crisp texture. A perfectly executed cookie will have tender edges while remaining substantial, allowing the chocolate kiss to shine as the crowning jewel.
Bakers can recognize a successful batch through the appearance as well. Look for a golden-brown color around the edges with a soft center. The presence of slightly cracked surfaces reveals that the baking process has been executed just right, allowing steam to escape and leaving the middle soft.
Pro Tips
It may seem simple, yet a few small techniques can significantly enhance the result of your Peanut Butter Blossoms. Understanding the subtleties of baking can make a difference in achieving the perfect cookies.
| Tip | Description |
|---|---|
| Use Room Temperature Ingredients | Bringing your butter and egg to room temperature allows for better emulsification, resulting in a creamier texture. This can make a big difference in the final cookie’s consistency. |
| Chill the Dough Thoroughly | Chilling the dough is crucial for preventing the cookies from spreading too much. A well-chilled dough maintains its shape during baking and helps achieve that perfect cookie profile. |
| Proper Measurement of Flour | A common mistake is packing flour into the measuring cup. To get an accurate amount, spoon the flour into your cup and level it off with a knife—this helps prevent dry brownies. |
| Don’t Overmix | Avoid overmixing once you add the dry ingredients. Mix only until incorporated to maintain a tender cookie. Overmixing can lead to toughness due to gluten development. |
Beyond these essential tips, maintaining a tidy work environment can improve your baking experience. It allows you to focus on the process without distractions, making it enjoyable, especially if you’re baking with family or friends.
Why You’ll Love This Recipe
Peanut Butter Blossoms are a blend of flavor, ease, and nostalgia that appeals to everyone from casual bakers to seasoned chefs. The recipe’s simple ingredients mean you won’t need to hunt for specialty items; most likely, your pantry is already stocked!
The procedure is straightforward enough for beginners, with an approachable setup that encourages creativity without overwhelming complexity. Family members can gather in the kitchen, delighting in the process of rolling dough and placing chocolate kisses. This interactivity transforms baking from a chore into cherished moments.
For experienced cooks, the joy in making Peanut Butter Blossoms lies in their versatility. You can tailor the recipe to suit different preferences—add alternative toppings, adjust sweetness, or even swap out the type of nut butter. It is not only a crowd-pleaser but also opens avenues for experimentation.
On top of that, you can easily double or halve the recipe, making it suitable for small gatherings or larger holidays. Plus, these cookies store well, meaning your hard work can provide a sweet treat over several days, adding to their appeal.
How to Serve Classic Peanut Butter Blossoms
These delightful cookies shine in any setting, making them appropriate for countless occasions, from cozy family gatherings to festive holiday celebrations. Their shape and coating make them visually pleasing, so consider presenting them in an attractive cookie jar or on a decorative platter. For added flair, you can dust them with powdered sugar for a wintery look!
These cookies pair beautifully with a variety of beverages. A tall glass of cold milk is a classic choice, enhancing the peanut butter and chocolate flavors perfectly. Alternatively, consider pairing them with hot cocoa for a warm treat or even a cup of coffee for adults; the chocolate kiss complements the coffee’s bitterness nicely.
If you’re serving them at a party, you may want to include a selection of other cookies for variety. They pair well with oatmeal cookies or chocolate chip cookies. Including an assortment creates a fun, colorful dessert spread that invites guests to sample a little of everything.
When plating these cookies, think about how to arrange them attractively. A tiered stand can provide an eye-catching display, while individual wrappers can make them easily portable and enjoyable for guests at potlucks.
How to Store Classic Peanut Butter Blossoms
Proper storage of your Peanut Butter Blossoms is critical to maintaining their taste and texture. After the cookies have cooled completely on a wire rack, transfer them to an airtight container. If you’re storing cookies for a week or more, consider adding a slice of bread to the container; this helps to maintain moisture and keep the cookies soft, avoiding a dry texture.
If you have leftover cookies, refrigeration might be unnecessary unless you want to extend storage time something beyond a week. For long-term storage, consider freezing them. To do this, place layers of parchment paper between the cookies in a freezer-safe container. This method prevents them from sticking together, allowing you to pull out a single cookie whenever you crave one.
During storage, be aware that the texture of cookies can change slightly. While they stay soft initially, they can become harder if exposed to air for an extended period. On the other hand, if stored with too much moisture, they may become soggy. Keeping that balance is crucial to enjoying these treats at their best.
Tips to Make Classic Peanut Butter Blossoms
Baking is as much a science as it is an art, and knowing how to navigate those delicate balances can elevate your baking game. Here are some practical tips for crafting the perfect Peanut Butter Blossoms:
-
Measure Accurately: A common mistake is mismeasuring ingredients, leading to overly dry or overly wet cookie dough. Use the spoon-and-level method for flour, and compactly pack brown sugar, ensuring consistent results each time.
-
Monitor Baking Time: Every oven is different. Sometimes, the suggested baking times may require slight adjustments. Keep an eye on your cookies, and check for their golden edges; this is often a better indicator than strictly adhering to the clock.
-
Cool Properly: Properly cooling cookies is just as important as baking. Allowing them to rest for a few minutes before moving them to a wire rack helps them retain their shape and avoids breaking.
-
Experiment with Nut Butters: If you’re adventurous, try substituting different nut butters to add new flavors! Almond butter or cashew butter can bring a delightful twist, but make sure to choose smooth alternatives for consistency.
These small steps can positively impact your final dish, helping achieve that ideal cookie texture and flavor balance.
Variations and Substitutions
If you’re looking to mix things up a bit or accommodate dietary preferences, here are some variations and substitutions for Classic Peanut Butter Blossoms:
-
Nut Butters: If someone has a nut allergy, use sun butter or soy nut butter as an alternative to peanut butter. It retains that nutty flavor while being safe for those with nut allergies.
-
Gluten-Free Version: For a gluten-free adaptation, substitute the all-purpose flour with a gluten-free all-purpose blend. Ensure the blend contains a binding agent like xanthan gum to prevent crumbling.
-
Dairy-Free Option: To make these cookies dairy-free, replace the unsalted butter with a dairy-free alternative and use a dairy-free chocolate or even a fruit-based chocolate alternative for the candies on top.
-
Vegan Adaptation: For a vegan version, swap the egg for a flaxseed egg (1 tablespoon of ground flaxseed mixed with 2.5 tablespoons of water and allowed to sit until gelatinous). Use a non-dairy butter substitute and ensure all other ingredients are vegan-friendly.
-
Flavor Infusion: Consider infusing your dough with spices such as cinnamon or nutmeg for an extra layer of flavor. A pinch of instant coffee granules can also enhance the chocolate flavor of the Hershey kisses.
These substitutions might yield a slightly different flavor or texture, but they allow for personalization while maintaining the essence of what makes the original recipe so beloved.
Storage and Reheating
If you find yourself with leftover Peanut Butter Blossoms, proper storage can preserve their delightful taste and texture. Begin by allowing the cookies to cool completely on a wire cooling rack. Once cooled, carefully transfer them to an airtight container, layering parchment paper between them if desired to prevent sticking.
If you need to store cookies for an extended period, freezing is a great option. Place the cooled cookies in a freezer-safe bag or container, removing as much air as possible to prevent freezer burn. They can typically last up to three months in the freezer, ideal for special occasions or late-night cravings.
When it’s time to enjoy those cookies again, reheating them transforms them back into warm, melty morsels of goodness. For a soft-and-gooey finish, opt for the microwave. Reheat for about 10-15 seconds. If you are reheating multiple cookies or aim for a slightly crispy texture, use an oven or toaster oven. Preheat the oven to about 350°F and place the cookies on a baking sheet for approximately 5 minutes.
Always keep an eye on them to avoid overdoing it; the objective is to warm them without making them dry. This reheating process ensures that each cookie retains its original appeal, making them perfect regardless of when you decide to indulge.
Customization Ideas
For those who like to express their culinary creativity, customizing your Peanut Butter Blossoms can lead to exciting results. Here are a few ideas to inspire your next batch:
-
Different Toppings: Instead of the classic Hershey kiss, use chocolate-covered caramel candies or nut-based chocolate chunks for variation. Different options create new visual appeal and flavor experiences.
-
Mix-ins: Experiment with different add-ins, such as mini chocolate chips, to enhance the cookie’s texture and taste. Adding crushed pretzels can introduce a salty crunch, balancing the sweetness with a delightful twist.
-
Flavored Extracts: While vanilla extract is a common choice, consider using almond extract or even coconut extract for a flavor twist. Just a quarter teaspoon can add a uniquely delightful profile to the cookie.
-
Decorative Frosting: For a fun presentation, consider drizzling melted chocolate or icing on top of the cooled cookies. A white chocolate drip or simple icing can complement the chocolate kiss while adding visual flair.
Each idea allows bakers to personalize their batches according to specific preferences, enhancing the enjoyment both of making and consuming the cookies.
Common Mistakes to Avoid
Baking cookies might seem easy, but there are common missteps that can result in less-than-perfect cookies. Here are five to be aware of:
-
Packing Flour: Failing to measure flour accurately can lead to a dense or dry cookie. Always spoon the flour into your measuring cup and level it off with a knife for accuracy.
-
Overmixing Dough: Overmixing after adding the flour can lead to tough cookies due to excessive gluten development. Mix just until combined to maintain tenderness.
-
Skipping Chilling: Not chilling the dough can cause cookies to spread too thin during baking, resulting in a flatter, less visually appealing cookie. Always allow for the chilling time specified in the recipe.
-
Ignoring Baking Time: Each oven may have slight variances in temperature accuracy. Avoid the temptation to open the oven too soon; instead, keep a close eye on the color of the edges and aroma.
-
Not Letting Cookies Cool Completely: Moving cookies too soon can lead to them falling apart. Allow them to cool on the baking sheet for several minutes before transferring to a cooling rack to ensure they set properly.
By staying mindful of these pitfalls, you can enhance your baking experience, resulting in perfect Peanut Butter Blossoms that delight friends and family alike.
Serving Occasions
Peanut Butter Blossoms are incredibly versatile, making them suitable for a variety of occasions. They shine brightly during holiday gatherings, where their festive appeal draws everyone in. For example, they make a great addition to holiday cookie platters, providing a balance of flavors that complements other cookie types beautifully.
They suit casual gatherings and potlucks, as they are easy to transport and serve. Thanks to their small size, they invite people to take just one or two (or three!) as they mingle. They also double as a delightful after-school snack or dessert for family dinners, providing a touch of nostalgia that many adults will appreciate while introducing younger generations to a classic.
Additionally, Peanut Butter Blossoms reign supreme at bake sales or charity events, as their popularity assures a quick sale. Their universal appeal means a wide audience will likely enjoy them, making it well worth the time and effort spent baking.
Why Make This Recipe?
What makes Peanut Butter Blossoms a worthy addition to your baking repertoire? Firstly, their distinctive blend of flavors combines the beloved richness of peanut butter with the sweetness of chocolate, creating a unique dessert for all palates. The balance of textures—crisp edges and a soft center—ensures a satisfying cookie every time.
Moreover, the recipe is approachable. With readily available ingredients and a simple process, even novice bakers can produce cookies that evoke memories and joy. Their flexible nature allows for a range of adaptations, making them perfect for any dietary requirements or flavor preferences.
Finally, Peanut Butter Blossoms are more than just a recipe; they represent a tradition. Whether baked with loved ones or gifted to friends, each batch you make continues a legacy of sharing delicious treats that bring smiles. This type of connection through food fosters a sense of community, enhancing the baking experience.
Make-Ahead Preparation
Planning ahead is always a smart strategy, especially with cookies that are as delightful as Peanut Butter Blossoms. Recipe flexibility allows certain steps to be prepared in advance, significantly easing the cooking process on the day of an event or gathering.
You can prepare the dough a day or two before baking, simply chilling it and storing it in an airtight container in the fridge. This allows the flavors to develop even more, resulting in a robust cookie. When you’re ready to bake, scoop the chilled dough directly onto the prepared baking sheets as outlined in the instructions.
Alternatively, you can also shape the cookie balls and freeze them before baking. Just roll them in granulated sugar then place them in a single layer on a baking sheet. Once frozen, transfer them to a freezer-safe container. Later, when you’re ready to bake, you can pop them straight from the freezer into the oven; simply add an additional minute or so to the baking time.
By employing these make-ahead strategies, you can enjoy freshly baked cookies with minimal stress, ensuring that any gathering is a success.
Equipment and Kitchen Preparation
Baking Peanut Butter Blossoms requires straightforward equipment that most home kitchens are likely already stocked with. Here’s what you’ll need:
-
Mixing Bowls: A set of mixing bowls is essential for blending ingredients. Medium and large sizes would be ideal for managing both wet and dry ingredients.
-
Electric Mixer: For ease and efficiency, a hand mixer or stand mixer with a paddle attachment will smoothly cream the butter and sugars, ensuring fewer lumps in the dough.
-
Measuring Tools: Accurate measuring cups and spoons are vital for ensuring the recipe’s success. Investing in a kitchen scale can also aid in precision, especially when measuring flour.
-
Baking Sheets: You’ll need a couple of flat, rimmed baking sheets for placing your cookies. Using parchment paper or silicone mats can prevent sticking and ease cleanup.
-
Cooling Rack: A wire cooling rack is great for allowing cookies to cool evenly after baking and helps maintain their texture, avoiding sogginess.
The preparation of your workspace can also play a significant role in the efficiency of your baking process. Before starting, it’s beneficial to clear a designated area for mixing, rolling, and shaping the cookies. Lay out all your ingredients and tools, so they’re easily accessible. This not only streamlines the process but encourages a more enjoyable baking experience.
FAQs
-
Can I use crunchy peanut butter instead of creamy?
Yes, crunchy peanut butter can be used, but it will change the texture slightly, adding more crunch. Be mindful that the additional pieces may alter the overall mouthfeel of the cookies. -
How long should I chill the dough?
A minimum of one hour chill time is recommended. You can chill it for longer if needed; chilling overnight will even intensify the flavors and improve texture. -
What if I don’t have Hershey Kisses?
If you don’t have Hershey Kisses on hand, other chocolate candies or chocolate chips can be used as a delicious alternative. Just prioritize options that can melt but hold their shape. -
How can I make these cookies gluten-free?
Substitute all-purpose flour with a gluten-free flour blend, ensuring it has a binding agent, such as xanthan gum, to help maintain the cookie’s structure. -
Can I freeze the dough?
Yes, you can freeze the dough. Shape the cookie dough into balls, then freeze them individually before transferring to an airtight container for longer storage. -
What’s the best way to store leftovers?
An airtight container is ideal for storing leftovers. Placing a slice of bread with the cookies will help retain moisture and keep them soft for longer. -
Can I use a different type of chocolate?
Absolutely! You can experiment with different types of chocolate, including dark or semi-sweet, white chocolate, or even flavored chocolates for a twist. -
How do I know when the cookies are done baking?
Look for the edges to be lightly golden, while the centers should still look soft but not raw. They will continue to firm up as they cool.
Disclaimer
Nutritional information is approximate and may vary based on ingredient brands, substitutions, portion sizes, and preparation methods.