
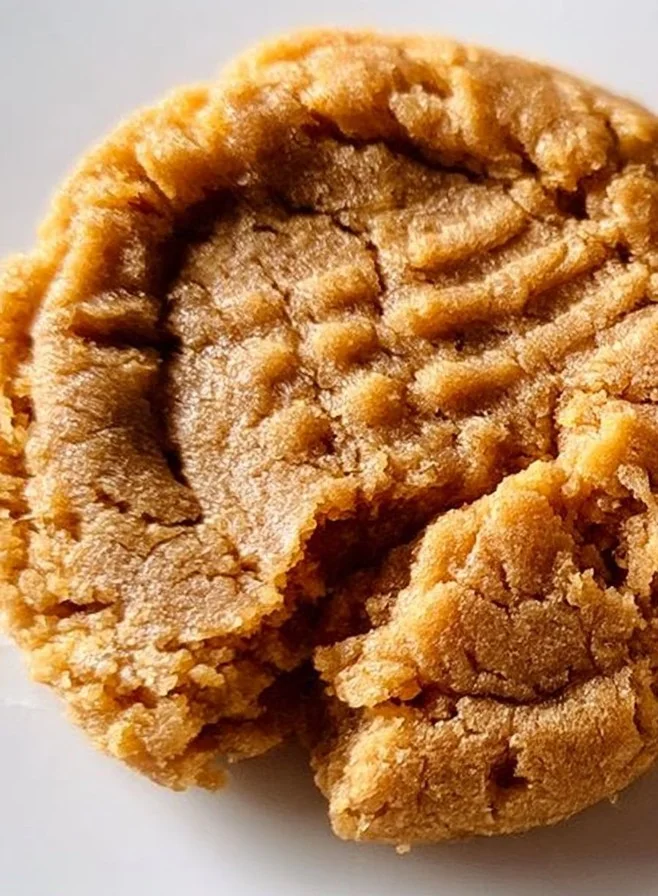
Cookies for 4 people | Cookies for two, Chocolate peanut butter cookies for 2, Best peanut butter cookies
When it comes to comfort desserts, cookies reign supreme in homes across the globe. They capture the essence of cozy moments, from quiet afternoons spent with a book to lively family gatherings filled with laughter and warmth. Chocolate peanut butter cookies embody this spirit perfectly, striking a delightful balance between rich chocolate and creamy peanut butter. These cookies are invitingly soft and chewy, with a rich, delectable flavor that leaves you wanting more. The moment you take your first bite, the delicious melding of sweet chocolate and nutty peanut butter creates an irresistible experience that will have you reaching for another.
Serving this cookie recipe is akin to sharing a warm hug. They are perfect as a quick snack, after-school treat, or delightful dessert for a family dinner. These cookies also make excellent gifts or a thoughtful homemade offering for potlucks. Their charming appearance, with the slightly crackled surface giving them a rustic feel, adds to their appeal. Each cookie is a promise of sweetness and satisfaction, making them suitable for various occasions, whether casual or more festive.
The ease of preparation adds to the allure, allowing both novice bakers and seasoned chefs alike to enjoy the process of making these delightful treats. With common ingredients found in most pantries, whipping up a batch requires no special preparation or advanced baking skills. Just a little patience as they cool, and soon enough, you’ll have a plateful of these delightful cookies ready to share, creating memories one bite at a time.
What Makes This Recipe Special
What makes these chocolate peanut butter cookies particularly special is the harmonious combination of peanut butter and chocolate. While many cookie recipes boast one flavor or the other, this one manages to seamlessly blend the two. The peanut butter provides a creamy richness that complements the deep, rich flavor of the chocolate, creating a standout cookie that is anything but ordinary. The cookies have a moist center thanks to the peanut butter, while the outer edges develop a slightly crisp texture, giving you the best of both worlds.
Another distinguishing aspect is the use of simple, readily available ingredients. This recipe emphasizes the joys of baking without compiling a long list of hard-to-find items. The straightforward approach allows the essential flavors of peanut butter and chocolate to shine through without being overpowered by complex flavorings. Additionally, the recipes also lend themselves well to personal adjustments. You can easily tweak the amounts or add nuts, chocolate chips, or candies to customize the cookies to your taste.
Moreover, these cookies cater to various occasions. Whether you’re enjoying them on a quiet Tuesday afternoon or serving them at a holiday gathering, their distinct flavor profile and inviting appearance are guaranteed to please any crowd. You’ll find that they’re an instant hit among friends and family alike, bringing smiles and satisfied cravings.
Ingredient Overview and Helpful Notes
The main ingredients in this chocolate peanut butter cookie recipe play a crucial role in defining the flavor, texture, and overall success of the cookies. Let’s break down the essential ingredients:
-
All-Purpose Flour: This is the backbone of the cookie, providing structure and stability. The right amount of flour affects the dough’s consistency, ensuring it holds shape during baking. It assists in creating a chewy texture when combined with fat and sugar.
-
Granulated Sugar: Sugar does more than sweeten; it also contributes to the cookie’s texture. The granulated variety aids in achieving a crisp edge while promoting browning, resulting in that pleasant contrast between soft and crunchy.
-
Brown Sugar: The use of brown sugar introduces moisture and a hint of caramel flavor, enriching the chocolate and peanut butter within the cookie. Its higher moisture content leads to a softer bite, balancing the texture created by the all-purpose flour.
-
Butter: A key player in this cookie recipe, butter adds richness and enhances flavor. Using softened butter allows for better incorporation of sugars, leading to a smoother dough. The fat from the butter also contributes to the beloved melt-in-your-mouth quality.
-
Peanut Butter: This is the star ingredient. The creamy texture of peanut butter provides indulgence and flavor, while its proteins help bind the cookies together. Opt for a natural or chunky peanut butter for added texture and authenticity.
-
Egg: Eggs act as a binding agent that holds the entire mixture together, providing critical moisture and support to the cookie structure. The protein in eggs helps achieve the chewy center of the cookies.
-
Cocoa Powder: Cocoa powder plays a significant role in providing the rich, chocolatey flavor. Be sure to use unsweetened cocoa for the best results, as this will allow you to control the sweetness of the cookie while adding depth to the chocolate flavor.
-
Baking Soda: This leavening agent gives the cookies their lift and helps achieve that delightful crackled top. It’s essential for creating a light texture without being overly dense.
When selecting ingredients, opt for high-quality options. Fresh flour, real butter, and quality peanut butter are fundamental to creating the best cookies possible. Check the freshness of your baking materials, as older ingredients can affect texture and flavor.
Ensure to prepare the ingredients correctly before mixing. For instance, if your butter is too cold, it will not integrate well with the sugars, leading to a gritty dough. Similarly, softening the peanut butter before incorporating it ensures even distribution throughout the mixture.
Nutrition & Recipe Details
Understanding the nutritional aspect of the recipe helps you tailor it to your dietary needs. However, keep in mind that the exact values can vary based on ingredient brands and preparation methods.
| Item | Value |
|---|---|
| Prep time | 10 minutes |
| Cook time | 10-12 minutes |
| Store time | Up to 1 week |
| Calories | Approximately 150 per cookie |
| Protein | 2g |
| Carbohydrates | 20g |
| Fat | 7g |
These values are approximations and will vary based on the specific brands of ingredients used and the size of the cookies. Remember to tailor serving sizes according to your dietary preferences.
How to Make Chocolate Peanut Butter Cookies
Making chocolate peanut butter cookies is an enjoyable process. First, gather all your ingredients and tools, including mixing bowls, a whisk, and a baking sheet lined with parchment paper. Preheat your oven to the appropriate temperature, allowing it to reach a consistent heat while you prepare the dough. This ensures even baking and helps achieve that perfect texture.
To start, it’s wise to organize your ingredients by measuring them out. This makes the process smoother and helps you avoid forgetting anything essential. Combining dry ingredients in one bowl and wet ingredients in another before mixing them together can help prevent overmixing, which is crucial for avoiding dense cookies.
Once everything is prepared, you’ll mix the dry ingredients first, then cream together the butter and sugars. This step is vital to achieving the right texture in your cookies. Ensuring that the butter is at room temperature will help create a fluffy consistency. Afterward, you’ll add the egg and peanut butter, followed by incorporation of the dry ingredients until just combined.
Let’s move on to the specifics of the ingredient list you’ll need to gather.
Ingredients
| Ingredient | Quantity |
|---|---|
| All-purpose flour | 1 ½ cups |
| Granulated sugar | ½ cup |
| Brown sugar | ½ cup |
| Butter, softened | ½ cup |
| Peanut butter | ½ cup |
| Cocoa powder | ¼ cup |
| Egg | 1 large |
| Baking soda | 1 tsp |
| Salt | ½ tsp |
Ensuring that you have all the ingredients measured out and at room temperature is key. For example, if your butter is too firm, it won’t cream together well with the sugars, leaving you with an uneven texture. Just before you begin, whisk the dry ingredients together in a bowl, ensuring that the cocoa powder is evenly distributed without any lumps. This will prevent any surprises in texture when rolling out the dough.
Next, you want to mix the softened butter and sugars in a separate bowl until light and fluffy. This process takes some time but is necessary for the perfect cookie texture. Adding in the peanut butter and egg will help bind everything together effectively.
Step-by-Step Instructions
-
Preheat your Oven: Set your oven to 350°F (175°C) to ensure it is warm and ready for baking.
-
Mix the Dry Ingredients: In a medium bowl, whisk together the all-purpose flour, cocoa powder, baking soda, and salt until well blended. Set aside.
-
Cream Butter and Sugars: In a large bowl, add the softened butter, granulated sugar, and brown sugar. Use a hand mixer or a whisk to beat the mixture until it becomes light and fluffy, about 2-3 minutes.
-
Incorporate Peanut Butter: Add the peanut butter to the butter and sugar mixture. Mix thoroughly until combined.
-
Add the Egg: Crack the egg into the mixture and blend until fully integrated, ensuring that the mixture has a uniform consistency without any lumps.
-
Combine Dry Ingredients: Gradually add the dry ingredients to the wet mixture. Stir until just combined. It’s important not to overmix, as this can lead to tough cookies. Stop mixing as soon as you see the flour and cocoa disappear.
-
Scoop onto Baking Sheet: Using a tablespoon or ice cream scoop, portion out the cookie dough and place it on a baking sheet lined with parchment paper, leaving some space between each scoop to allow for spreading.
-
Bake: Place the baking sheet in the preheated oven and bake for about 10-12 minutes. Look for a firm outer edge and a soft, slightly moist center. They will continue to firm up as they cool.
-
Cool: Once baked, remove the cookies from the oven and allow them to cool on the baking sheet for about 5 minutes before transferring them to a wire rack to cool completely.
-
Enjoy: Once cool, serve the cookies to your friends or family, or keep them in an airtight container for later indulgence.
Understanding the Flavor and Texture
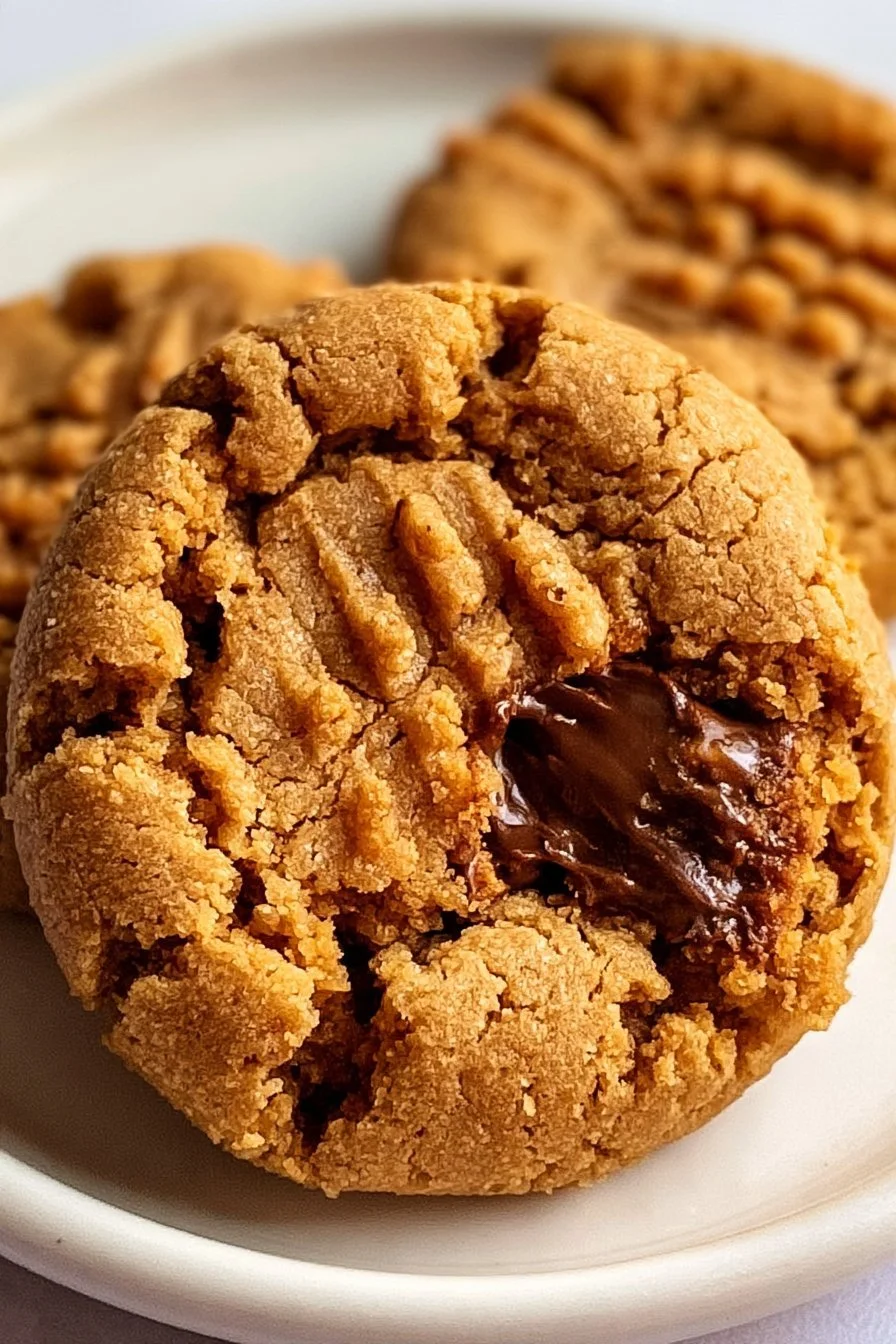
The finished chocolate peanut butter cookies deliver an incredible balance of flavors and textures. You’ll notice the deep and rich chocolate aroma wafting through your kitchen as they bake. Once cooled, the appearance of the cookies will show a subtly shiny exterior with crackly tops that hint at the delightful chewiness within.
Your first bite will introduce you to the contrasting yet complementary flavors of chocolate and peanut butter. The cookie itself is soft and chewy, with a tender crumb developed from the right balance of wet and dry ingredients. You’ll experience a slight crispness around the edges, which gives way to a melt-in-your-mouth center that is enhanced by the richness of peanut butter.
The interplay of sweet and nutty flavors creates a deliciously satisfying treat. The unsweetened cocoa powder adds depth, while the sugars bring forth a touch of sweetness that’s perfectly balanced. Recognizing a successful outcome is as simple as observing their golden edges and soft centers, a sure sign of perfectly baked cookies.
Pro Tips
A few small techniques can dramatically improve your chocolate peanut butter cookie results, leading to a batch that’s even more enjoyable. Here are some valuable tips:
| Tip | Description |
|---|---|
| Room Temperature Ingredients | Ensure butter, eggs, and peanut butter are at room temperature before mixing. This allows for better incorporation and a smooth dough, enhancing texture. |
| Don’t Overmix | Avoid overmixing the dough once the dry ingredients are added. This helps keep the cookies tender and chewy rather than dense. |
| Use Parchment Paper | Line your baking sheet with parchment paper to prevent sticking and ensure easier cleanup. This also helps to maintain the cookie shape as they bake. |
| Chill the Dough | If time allows, chill the dough for 30 minutes before baking. This results in thicker cookies with a richer flavor and helps prevent excessive spreading. |
In addition to these tips, use a cookie scoop for even size and uniform baking across the tray. This process minimizes baking time discrepancies and ensures a consistent texture for every cookie. Also, experiment with adding chocolate chips or chopped nuts for extra flavor benefits, leading to delightful variations on the original recipe.
Why You’ll Love This Recipe
There’s something special about chocolate peanut butter cookies that will capture the hearts of cookie lovers everywhere. Their rich, decadent flavor makes them a standout choice among typical cookie offerings. The combination of chocolate and peanut butter is beloved for a reason; it tantalizes the taste buds and satisfies cravings splendidly.
Moreover, the recipe offers simplicity and accessibility. Most ingredients are often found in a standard pantry, making this recipe approachable for both beginner bakers and seasoned cooks looking for a quick sweet fix. They come together quickly, requiring minimal preparation time, yet the results are impressive enough to impress anyone sharing your kitchen.
Additionally, these cookies are highly versatile. Whether served fresh out of the oven or stored for later enjoyment, they maintain their delightful flavor and texture. Perfect for lunchtimes, snack times, or as an after-dinner treat, they fit seamlessly into many occasions, making them a fantastic addition to any baking repertoire.
How to Serve Chocolate Peanut Butter Cookies
Presenting your baked chocolate peanut butter cookies is an opportunity to elevate the experience further. For a casual approach, stack them on a plate with a dusting of powdered sugar for an appealing presentation. Pair with a glass of cold milk for a classic experience that resonates even with adults.
For slightly more formal occasions, consider arranging the cookies on a beautiful serving platter and decorating them with fresh berries or a side of whipped cream. This not only makes for an attractive display but also adds a fresh contrast to the rich flavors of the cookies.
To enhance the flavor profile, you can serve these cookies alongside flavored dips, such as a chocolate ganache or a peanut butter sauce, allowing guests to indulge according to their preferences. These additions can make the cookie experience even more delightful.
If serving at a gathering, consider providing a warm and cold option. You can offer freshly baked cookies alongside a stack of cooled ones packed for guests to take home as a surprise treat.
How to Store Chocolate Peanut Butter Cookies
After enjoying these cookies, you’ll want to ensure they stay fresh for as long as possible. Begin by allowing them to cool completely on a wire rack. This step is crucial; if you pack them while they are still warm, steam will build up, leading to soggy cookies.
Once cooled, you can store them in an airtight container. They will remain fresh at room temperature for up to a week. For longer storage, consider placing them in the freezer, wrapped tightly in plastic wrap or stored in a freezer-safe container. They can last in the freezer for up to three months. Remember to label the container with the date so you can enjoy them at their best.
The texture of your cookies may change slightly during storage; they may become crisper over time, particularly if you live in a climate that is very dry. It may be helpful to place a slice of bread in the container with the cookies to help keep them soft, as the bread will share its moisture with the cookies.
Tips to Make Chocolate Peanut Butter Cookies
Baking chocolate peanut butter cookies can be an enjoyable venture filled with creativity. Here are handy tips to enhance your experience:
-
Use Quality Ingredients: The better the quality of your peanut butter and chocolate, the richer your cookies will be. Look for natural peanut butter without additives for the best flavor and texture.
-
Experiment with Mix-Ins: Adding ingredients like chopped nuts, toffee pieces, or a sprinkle of sea salt on top before baking can enhance both texture and flavor. These additions offer delightful variations on the classic cookie.
-
Correct Baking Temperature: Ensuring your oven is correctly preheated is vital. An oven that is too hot can burn the edges while leaving the centers undercooked. Consider using an oven thermometer to verify the temperature, as many household ovens can be off by several degrees.
-
Watch for Doneness: Pay attention to the visual cues that indicate doneness. The edges should appear firm while the center remains soft but not jiggly. Cookies will continue to cook slightly after being removed from the oven, so it’s better to take them out a minute or two before you think they’re fully done.
By focusing on ingredient quality and adapting the process to your preferences, you can refine your recipes further and enjoy the joy of baking to the fullest.
Variations and Substitutions
Exploring variations and substitutions for chocolate peanut butter cookies can lead to delightful new treat possibilities. Here are some ideas:
-
Gluten-Free Option: Replace the all-purpose flour with a gluten-free flour blend that you trust. Many of these blends can be swapped 1:1 with regular flour, allowing you to enjoy the same texture and taste.
-
Nut-Free Version: For those with nut allergies, simply omit the peanut butter and replace it with sunflower seed butter. This maintains a similar texture and flavor profile while ensuring safety for those with nut allergies.
-
Add Spices: Spice up your recipe by adding a pinch of cinnamon or a dash of vanilla extract, enriching the overall flavor without overwhelming the core taste that makes these cookies special.
-
Different Chocolates: For chocolate lovers, consider using a mixture of dark or milk chocolate chips for baking. This not only varies the sweetness but also adds different chocolate intensities.
Each variation or substitution you choose may slightly alter the flavor or texture, but they can also elevate the experience, allowing you to create a personalized treat that fits your palate or dietary needs.
Storage and Reheating
If you have leftover cookies or would like to prepare a batch for later enjoyment, follow these storage and reheating guidelines for the best results:
-
Proper Storage: As mentioned earlier, store cookies in an airtight container to preserve moisture and keep them fresh. If you want to freeze cookies, allow them to cool completely before packing them in a freezer-safe container. When you’re ready to enjoy them, let them thaw at room temperature or heat them gently in the microwave.
-
Reheating in the Oven: Preheat your oven to 350°F (175°C), place the cookies on a baking sheet, and warm them for about 5-10 minutes. This method revives their crispness and delivers that fresh-from-the-oven taste.
-
Reheating in the Microwave: If you’re using the microwave for reheating, place one cookie on a microwave-safe plate and microwave for about 10-15 seconds. This method is quick but can sometimes lead to overly soft results; be cautious to avoid overheating.
-
Preventing Dryness: To prevent cookies from becoming dry after reheating, consider placing a small cup of water in the microwave alongside the cookies. The steam created helps to maintain moisture while warming.
Utilizing these storage techniques ensures that your chocolate peanut butter cookies remain as enjoyable on day five as they were on day one.
Customization Ideas
Customizing these delicious cookies is a fantastic way to express your flavor preferences and creativity. Here are some ideas for leaving your unique mark on each batch:
-
Flavor Extracts: Experiment with different flavor extracts like almond or maple to enhance the cookie’s aroma and richness. Just a drop or two can significantly augment the overall flavor profile without overwhelming the palatable balance.
-
Texture Additions: For extra crunch, toss in some chopped peanuts or even pretzels for a sweet and salty contrast. This adds an unexpected layer of texture that complements the smoothness of the peanut butter.
-
Decorative Toppings: Before baking, a sprinkle of cinnamon sugar or sea salt on top of each cookie can provide a beautiful finish and an added burst of flavor. This subtle change can elevate the cookie experience even further.
-
Choco-Peanut Butter Swirl: For a richer chocolate experience, consider swirling in melted chocolate to the dough before baking. This can heighten the chocolate flavor and create a visually appealing marbled effect.
By embracing customization, you allow these cookies to cater to your tastes, leading to limitless possibilities and satisfying your sweet cravings in exciting new ways.
Common Mistakes to Avoid
Baking chocolate peanut butter cookies is generally straightforward, yet some common missteps can hinder your success. Here are five mistakes to watch for:
-
Using Cold Ingredients: Starting with cold butter or eggs can result in a dense cookie texture. Always aim for room temperature ingredients that blend more smoothly, leading to a fluffier baking result.
-
Overmixing the Dough: Mixing too much after adding the flour can activate gluten, causing cookies to be tough. Mix until just combined to achieve a tender texture.
-
Inaccurate Measurements: Not measuring ingredients precisely can drastically alter the final result. Use kitchen scales for accuracy, especially with flour and sugar, for the best outcomes.
-
Ignoring Cooling Time: Attempting to move cookies off the baking sheet while still warm can lead to breakage. Let them cool for a few minutes on the tray before transferring them to a wire rack, where they can firm up.
-
Overbaking or Undercooking: Baking for too long can yield hard cookies, while underbaking can lead to raw centers. Keep a close eye on the edges; they should appear set but not overly browned when you remove the cookies from the oven.
Learning from these common missteps can significantly improve your results, ensuring bakers of any level achieve deliciously satisfying cookies every time.
Serving Occasions
Chocolate peanut butter cookies are versatile enough to be enjoyed in many settings. Here are some suggestions for when to serve them:
-
Casual Afternoons: Ideal for a quiet afternoon snack alongside tea or coffee, these cookies bring a sense of warmth and comfort to any mid-day break.
-
Family Gatherings: Whether a weekend get-together or a holiday feast, cookies provide a comforting and nostalgic treat that everyone—young and old—will enjoy.
-
After-School Treats: Kids (and adults alike) will appreciate a sweet reward after a long day. Pack a few in a lunch bag or serve with a glass of milk for an all-time favorite.
-
Potluck Desserts: These cookies are a hit at potlucks or parties, easy to transport and always a crowd-pleaser.
Encourage guests to enjoy these cookies warm, or let them cool and serve with ice cream for a fun dessert twist.
Why Make This Recipe?
Creating chocolate peanut butter cookies is worth the effort because of the decadent flavor and enjoyable process. The combination of rich chocolate and creamy peanut butter sets it apart from other cookie recipes. The unique taste is not just about indulgence; it’s about celebrating familiar flavors that evoke warmth and comfort.
The recipe is simple yet yields impressive results, perfect for bakers of all skill levels. It invites creativity and personalization, making it a staple to return to time and again. Whether you are baking for family, friends, or just yourself, this recipe guarantees delicious rewards that satisfy cravings.
Moreover, keeping this recipe in your regular rotation makes sense, as it accommodates various occasions, whether a casual snack or a special dessert. The flexibility in presentation and flavors encourages exploration and experimentation, ensuring that you never tire of the same delightful treat.
Make-Ahead Preparation
Preparation can be streamlined by making certain aspects of this cookie recipe ahead of time. Here are strategies to follow for efficient cookie-making:
-
Cookie Dough: Prepare the cookie dough in advance and store it in the refrigerator for up to three days. This allows the flavors to develop, leading to a richer taste. Just bring it back to room temperature before scooping and baking.
-
Freezing: You can also freeze the scooped dough portions instead of baking them right away. They can be frozen for up to three months. When you’re ready to bake, just add a few extra minutes to the baking time, and enjoy fresh cookies straight from the oven.
-
Batch Baking: Consider doubling the recipe and baking one batch to enjoy immediately while freezing the remainder. Having a ready supply of frozen cookie dough on hand can be a delightful lifesaver for unexpected guests or a quick satisfying treat.
-
Ingredient Prep: If short on time, measure out dry ingredients ahead of time and store them in an airtight container. This can eliminate several minutes of prep time on a busy baking day.
Overall, the make-ahead options provide convenience and ensure that you can whip up a delightful batch of cookies on a whim with minimal fuss.
Equipment and Kitchen Preparation
Having the right equipment makes baking chocolate peanut butter cookies easier and more efficient. Here’s a checklist of the necessary tools:
-
Mixing Bowls: Invest in a set of mixing bowls in various sizes for ease of use. Glass and stainless steel are excellent choices to withstand the mixing process.
-
Whisk or Mixer: A hand mixer will make the job a breeze when creaming butter and sugar. However, a whisk and some elbow grease will also do the job if you prefer a manual approach.
-
Scoop and Spatula: A cookie scoop is a helpful tool for portioning out dough evenly. Using a spatula can help in transferring cookies from the baking sheet without breaking.
-
Baking Sheet: A sturdy baking sheet lined with parchment paper ensures even baking and easy removal. Avoid using dark pans, which can excessively brown the cookies.
-
Cooling Rack: Allow cookies to cool properly on a wire rack, ensuring air circulates around them for the best texture retention.
Taking the time to prepare your workspace and tools not only saves time but enhances the overall baking experience. It reduces cleaning up and ensures a seamless process from start to finish.
FAQs
1. Can I use creamy or crunchy peanut butter in this recipe?
Yes, both creamy and crunchy peanut butter can be used in this recipe. Creamy will yield a smooth texture, while crunchy will add extra bits of peanut for added texture and flavor.
2. How do I know when the cookies are done baking?
The cookies should have set edges and a slightly soft center when you take them out. They will continue to firm up while cooling on the baking sheet.
3. Can I use natural peanut butter?
Absolutely! Natural peanut butter will work fine, but you may want to stir it well before measuring, as the oil can separate. This may impact the moisture in the cookies slightly.
4. How should I store leftover cookies?
Store leftover cookies in an airtight container at room temperature for up to one week. For longer storage, place them in the freezer.
5. Can I freeze the cookie dough?
Yes, you can freeze the cookie dough for up to three months. Portion it into balls before freezing to allow for quick baking later—just adjust the baking time as needed when baking from frozen.
6. What can I substitute for cocoa powder?
If you want a chocolate-free version, you can omit the cocoa powder entirely and replace it with an extra ¼ cup of flour.
7. Can I add chocolate chips?
Definitely! Feel free to add chocolate chips for a double chocolate experience. A half cup works well and will enhance the chocolate flavor nicely.
8. How can I make these cookies more caramelized?
To increase the caramel flavor in your cookies, try increasing the amount of brown sugar slightly. Alternatively, you can also drizzle melted caramel on top once baked for a decadent finish.
Disclaimer
Nutritional information is approximate and may vary based on ingredient brands, substitutions, serving sizes, and preparation methods.