
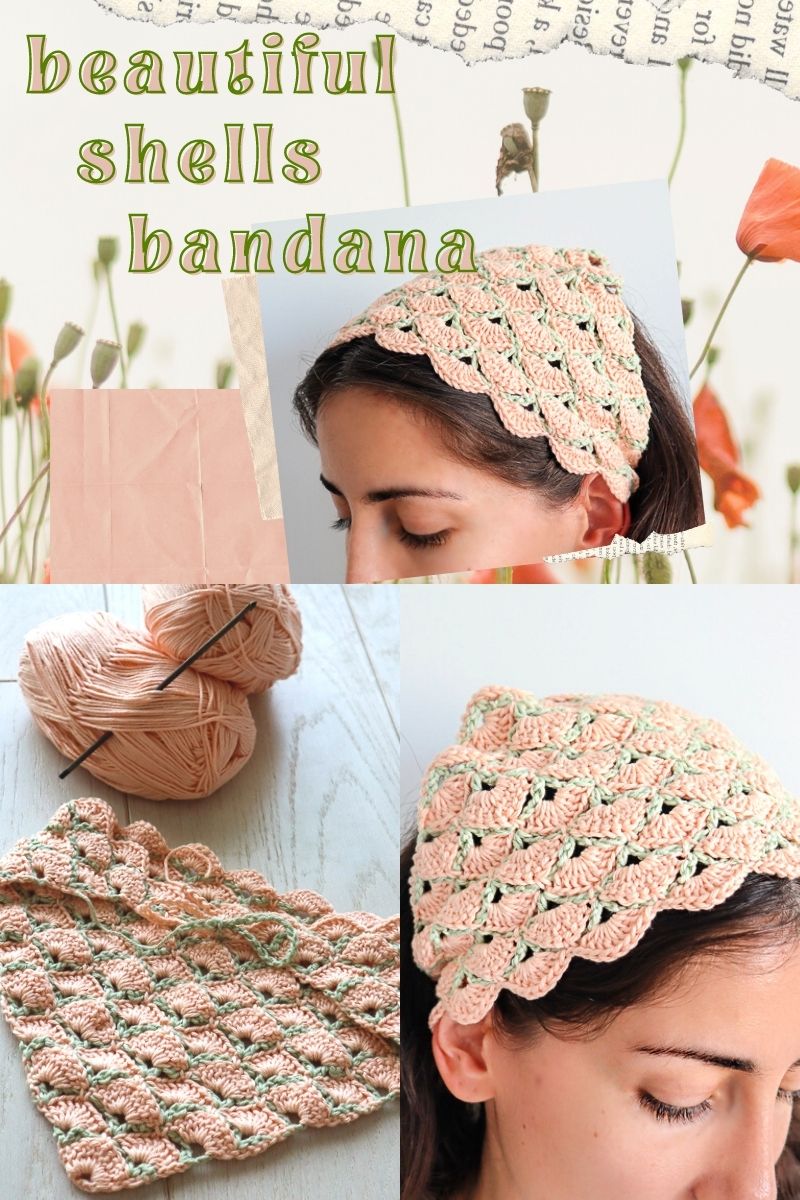
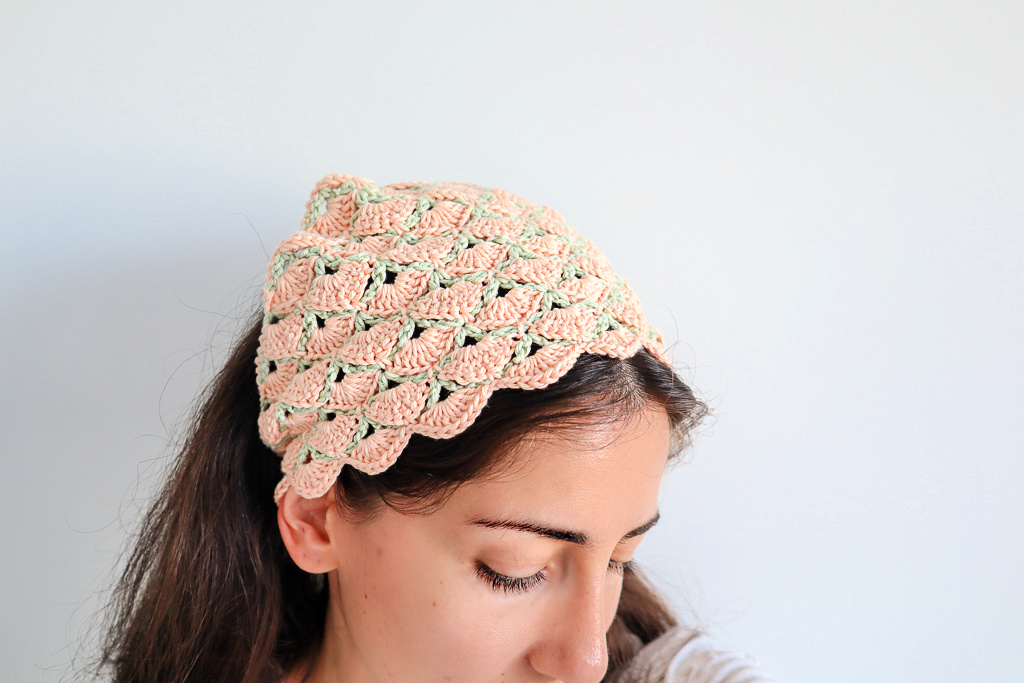
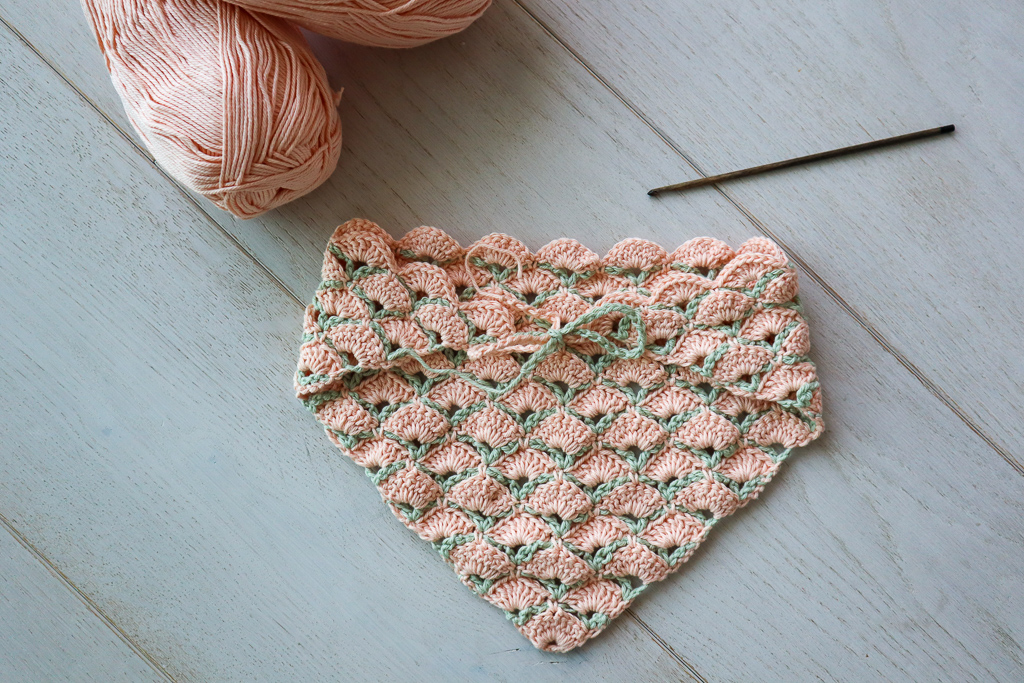
The Beautiful Shells Bandana is a small crochet project designed to introduce an especially interesting way of building fabric. Instead of creating every row directly on top of the previous row, this pattern alternates between thick shell rows and open framework rows. The framework acts almost like a crochet scaffold, creating spaces that the larger shells can be built into on the following row.
This technique has a connection to several intricate-looking crochet stitches, including the well-known Virus Stitch. However, the Beautiful Shells stitch is a simpler way to become familiar with the same general concept. Because the project starts at one small corner and grows outward, it is also easy to experiment with different yarn weights and hook sizes if you want to explore the construction beyond the original bandana.
The small size makes this project particularly useful when learning a new stitch. Rather than committing to a large shawl immediately, you can practice the framework, shell construction, color changes, and shaping on a manageable accessory. After a few rows, the stitch pattern begins to reveal itself, and the alternating colors make the structure even easier to see.
What Makes the Beautiful Shells Stitch Special?
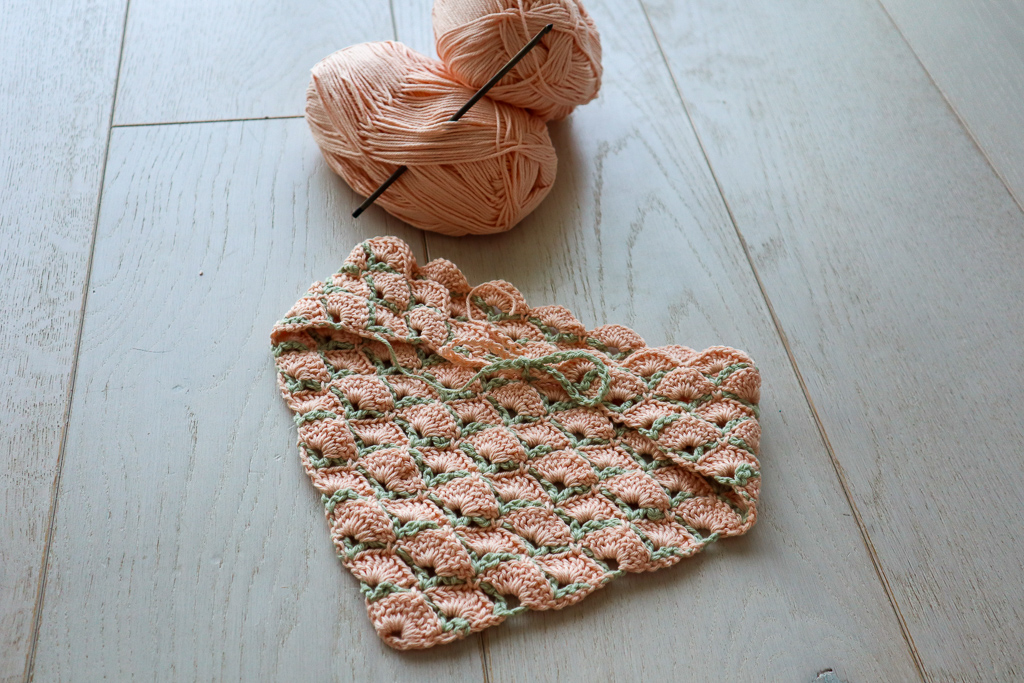
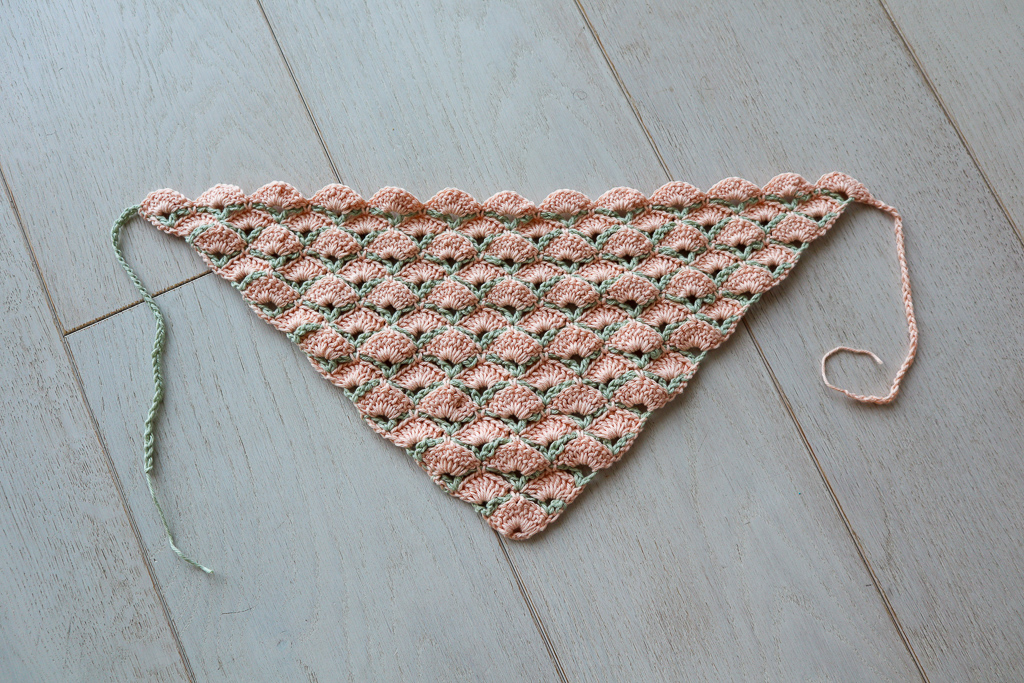
The defining feature of this crochet pattern is the relationship between the shell rows and the V-stitch framework rows. The framework does not simply decorate the finished fabric. It creates the spaces that the next shell row uses as its foundation.
On a shell row, multiple double crochet stitches are worked into a V stitch from the preceding framework row. This creates a full, fan-like shell. Between the shells, a single crochet is worked over the chain space from the previous row. The result is a combination of dense and open sections that gives the finished fabric its distinctive texture.
The following framework row reverses the visual effect. Instead of filling the V stitches with double crochet stitches, you create new V stitches connected by chain spaces. These new spaces become the scaffold for the next shell row.
Another appealing part of this method is the colorwork. The original project alternates two colors, using one color per row. Because the colors are changed every row, the shell-and-framework structure becomes very visible without requiring complicated stranded colorwork.
Project Overview
- Project: Beautiful Shells Bandana
- Construction: Bottom-up, beginning from the smallest corner
- Original yarn: DK weight cotton yarn
- Colors: Two colors, referred to as Color A and Color B
- Original yarn amount: Less than 50 yards of each color
- Crochet hook: 3.5mm
- Finished measurement: 18 inches (46cm) along the long side
- Original row count: 25 rows
- Finishing: Chains made from the available working yarn on either end to form ties
The original project uses Paintbox Yarns Cotton DK for the green color and Baby Cotton from Ice Yarns as an exact peach-color dupe. The pattern itself is flexible enough to experiment with yarn weight and hook size because the bandana grows from the bottom corner rather than being constructed around a fixed measurement from the beginning.
Materials You Will Need
Only a small amount of yarn is required for the original bandana. Less than 50 yards of each of two colors is used, making this an excellent project for leftover DK cotton yarn. Choose one yarn as Color A and the other as Color B before beginning so that the color-change instructions are easy to follow.
The original pattern uses DK weight cotton yarn. The green yarn is Paintbox Yarns Cotton DK, while the peach yarn is Baby Cotton from Ice Yarns. A 3.5mm crochet hook is used for the original version.
Although the pattern notes that you can experiment with other yarn weights and hook sizes, remember that changing your materials can affect the final dimensions, drape, and amount of yarn required. The stated finished measurement of 18 inches (46cm) along the long side applies to the original project, for which the designer reached that measurement in 25 rows.
Abbreviations and Important Stitch Terms
Understanding the basic stitch terminology makes the pattern much easier to follow. The most important stitches and techniques used in this project are chain stitches, slip stitches, single crochet, double crochet, and V stitches.
- ch: chain
- sl st: slip stitch
- sc: single crochet
- dc: double crochet
- V stitch: 1dc, ch1, 1dc worked into the same stitch or space
The starting chain-3 used at the beginning of a double crochet row counts as one double crochet. This detail is important because the first shell is counted as 9dc when the starting ch3 is included.
Before You Begin: Understanding the Construction
Before working the first stitch, it helps to understand the basic rhythm of the pattern. The project begins with a small chain ring. The first row creates a group of double crochet stitches inside that ring. The next row creates two V stitches connected by a chain-5 space. The following shell row fills those V stitches with double crochet stitches.
After that, the pattern continues by alternating shell rows and framework rows. The shell rows create the dense decorative sections, while the framework rows establish the V stitches and chain spaces needed for the next shell row.
The pattern is worked from the bottom upward. This is why the same stitch sequence can theoretically be continued beyond the size of a bandana. If you enjoy the stitch and continue increasing the piece, the construction can be used as the foundation for a much larger project such as a shawl.
Creating the Starting Ring
Begin with Color A. Chain 6, then join the chain into a ring by making a slip stitch into the first chain.
This small ring becomes the center of the first row. Take a moment to make sure the chain has not twisted before joining it. The goal is simply to create a closed chain-6 ring large enough to accommodate the first group of double crochet stitches.
Row 1: Building the Center
For Row 1, chain 3. This chain-3 counts as the first double crochet. Then work 8dc into the center of the chain-6 ring.
Including the starting chain-3, you should have 9dc total in Row 1.
At the end of this row, pull the last loop up long so that you do not accidentally lose it. Remove your hook from the loop. This loop will be returned to later as part of the special color-changing method.
The first row is intentionally simple, but counting it correctly is important. The starting ch3 is not an additional stitch outside the count; it represents the first double crochet. Therefore, the completed row contains 9dc total.
Row 2: Creating the First Framework
For Row 2, insert your hook into the top of the starting ch3 from the previous row.
With Color B, chain 4. This ch4 counts as 1dc and ch1. Then make 1dc into the same stitch. Together, these stitches create the first V stitch: 1dc, ch1, 1dc.
Next, chain 5. Then make one more V stitch, consisting of 1dc, ch1, 1dc, all worked into the last stitch of the row.
This row establishes the first scaffold for the shells. Unlike the dense first row, the V stitches and chain-5 space create open areas that will later be filled with double crochet stitches.
The Special Two-Color Change
One of the most useful features of this pattern is that you do not need to cut the yarn after every row. The technique is slightly tricky at first, but it allows the project to change color every row while keeping both yarn colors available.
With the live Color B loop on your hook, insert your hook into the live Color A loop. Chain 3 in Color A only. Pull the Color A loop through the Color B loop.
Then chain 3 again in Color A while carrying Color B up the chain. Turn your work.
This method allows the colors to remain connected without carrying the yarn across the row. It also means you can alternate Color A and Color B without cutting the yarn at the end of every row.
Because this is one of the more unusual parts of the pattern, work slowly the first time. The goal is to understand which loop is live and which color is being brought forward. Once the movement becomes familiar, the process becomes much more natural.
Row 3: Turning the Framework into Shells
Work Row 3 in Color A.
Make 8dc into the first V stitch. When the starting ch3 from the color-change instructions is included, this gives you 9dc in the first shell.
Next, make 1sc in the 5th dc from the previous shell stitch, working on top of the ch5 from the previous row.
Then make 9dc in the next V stitch.
Once the row is complete, pull the last loop long and remove your hook.
This is the first point where the scaffold concept becomes especially clear. The V stitches created in the previous row provide the spaces for the large groups of double crochet stitches. The chain-5 area is bridged by a single crochet, creating separation between the shells.
Row 4: Extending the Scaffold
Row 4 returns to Color B and establishes another framework row.
Insert your hook into the top of the starting ch3 from the previous row. With Color B, chain 4. The ch4 counts as 1dc, ch1. Make 1dc into the same stitch to complete a V stitch.
Chain 5, then make a V stitch into the single crochet from the previous row.
Chain 5 again and make one more V stitch, consisting of 1dc, ch1, 1dc, all into the last stitch of the row.
Repeat the established color-change instructions so that the work continues in the same direction every two rows without cutting the yarn.
Repeating the Beautiful Shell Sequence
After the first four rows, the basic rhythm of the pattern has been established. Continue making shells into each V stitch and V-stitch scaffold rows after the shell rows.
The important idea is to recognize what each row is designed to accomplish. A framework row creates the open V stitches and chain spaces. The next shell row uses those V stitches as the foundation for the large groups of double crochet stitches.
As the bandana grows, keep checking that the shell groups are being worked into the correct V stitches and that the framework rows are maintaining their chain spaces. This is more useful than simply rushing through the stitch instructions because the visual structure itself becomes a guide.
The color sequence also provides a helpful checkpoint. Since the project alternates colors, each row should visually contribute to the repeating two-color pattern. If a color appears to be attached to the wrong section or the fabric begins twisting unexpectedly, pause and inspect the most recent color change before continuing.
Keeping Track of Your Rows
The original bandana measures 18 inches (46cm) along the long side. For the original materials and tension, this measurement was reached at 25 rows.
Because the pattern can be made with different yarn weights and hook sizes, the row count and finished dimensions may change if you experiment. The source specifically notes that you can experiment with any yarn weight and hook size because the bandana grows from the very bottom corner upward.
If you are reproducing the original version, use the stated 3.5mm hook and DK weight cotton yarn and use 25 rows as the original project reference point. Measure the long side as you work so that you can compare your progress with the stated 18-inch (46cm) finished measurement.
Helpful Stitch Checkpoints
- Row 1: Confirm that you have 9dc total, including the starting ch3.
- Row 2: Confirm that the row contains the two initial V stitches separated by ch5.
- Row 3: Confirm that each shell contains 9dc when the starting ch3 is included.
- Row 3: Confirm that the 1sc is worked on top of the ch5 from the previous row as specified.
- Row 4: Confirm that the middle V stitch is worked into the single crochet from the previous row.
- Color changes: Keep the yarn connected rather than cutting after every row.
- Finished reference: The original version reaches 18 inches (46cm) along the long side at 25 rows.
How to Make the Color Changes Easier
The color-change method is probably the part that deserves the most patience when you first try this pattern. Traditional color changes often involve fastening off one color and attaching another. Here, the yarn remains available, allowing you to move between colors without cutting either strand.
The key is to carefully follow the sequence involving the live loops. After completing the framework or shell row, pull the final loop long and remove your hook. Insert the hook into the top of the starting ch3 as directed. Bring in the required color, complete the framework stitches, and then perform the special loop transfer.
Do not pull the loops aggressively while learning the method. Keeping the loops visible and relaxed makes it easier to see which color is active. The technique is designed to carry the inactive color upward through the chain rather than across the entire row, which helps prevent long strands from being carried across the back of the work.
Beginner Tips for This Stitch
If this is your first project using a chain scaffold, resist the temptation to judge the fabric too early. The framework rows can look unusually open compared with the finished fabric. The following shell row changes that appearance dramatically.
Count the important stitches rather than trying to memorize the entire visual pattern. In the early rows, pay particular attention to the 9dc total in Row 1 and the 9dc shell counts in Row 3. These counts give you reliable checkpoints before the project becomes larger.
Another useful habit is to identify every V stitch before beginning a shell row. These are the spaces where the large groups of double crochet stitches belong. If you can clearly see the V stitches, it becomes easier to place the shells accurately.
For the colorwork, keep the two yarn colors organized so that you can tell Color A from Color B immediately. The project depends on switching between these colors on alternating rows, so visual organization can make the process much smoother.
Common Troubleshooting Questions
Why does my framework row look too open?
The framework rows are intentionally open. They create the scaffold for the following shell row, so their appearance is very different from the dense shell rows. Do not try to fill the chain spaces prematurely.
Why is my shell not the right size?
Check the V stitch where the shell begins. The shell is built by making the specified double crochet stitches into the V stitch. Also remember that the starting chain-3 counts as one double crochet, giving the shell a total of 9dc when that starting chain is included.
Do I need to cut the yarn after every row?
No. The pattern specifically provides a color-change technique that allows you to work in the same direction every two rows without cutting the yarn. The live-loop method keeps the two colors connected while avoiding carrying the inactive yarn across the row.
Can I use another yarn weight?
Yes. The pattern notes that you can experiment with any yarn weight and hook size because the bandana grows from the very bottom corner upward. Keep in mind that different materials can change the appearance and finished size of the fabric.
How many rows did the original bandana use?
The original version measured 18 inches (46cm) along the long side at 25 rows.
Finishing the Bandana
Once your piece reaches the desired size, finish it by using the available working yarn on either end to make chains a few inches long. These chains serve as the ties for the headband.
The finishing method is deliberately simple because the main feature of the project is the beautiful shell fabric itself. Before tying or wearing the bandana, take a moment to inspect the edges and make sure the fabric has the shape and size you want.
If you followed the original materials and reached the stated dimensions, the long side should measure 18 inches (46cm), with the original project reaching this measurement in 25 rows.
Why This Small Project Is Worth Trying
The Beautiful Shells Bandana is more than a quick accessory. It is a practical introduction to a crochet construction technique that can be difficult to understand when first encountered in a much larger project. By starting with a small triangular piece, you can see how the chain framework and shells interact without having to commit to dozens of inches of fabric.
The alternating colors are another advantage. The shell rows and scaffold rows naturally produce visual stripes, so even a simple two-color palette creates a decorative result. At the same time, the color changes give you an opportunity to practice a technique that does not require cutting the yarn after every row.
Once you understand the repeating structure, the project also becomes an excellent foundation for experimentation. The original instructions explain that the piece can continue growing because it is worked from the bottom-up. A bandana can therefore be treated as a small introduction to a stitch that could eventually become part of a much larger shawl.
Quick Reference for the Original Pattern
- Starting chain: ch6, joined with a slip stitch to form a ring.
- Row 1: ch3, then 8dc into the center of the ring; 9dc total.
- Row 2: Color B; create V stitches and the ch5 framework.
- Color change: Use the live-loop method to connect the colors without cutting the yarn.
- Row 3: Color A; 9dc in the first V stitch, 1sc over the ch5 area as specified, then 9dc in the next V stitch.
- Row 4: Color B; continue the V-stitch scaffold, including the V stitch worked into the previous row’s single crochet.
- Repeat: Continue shell rows and V-stitch scaffold rows.
- Original finished measurement: 18 inches (46cm) along the long side.
- Original row count: 25 rows.
- Original hook: 3.5mm.
- Original yarn: DK weight cotton.
- Original yarn quantity: Less than 50 yards of each of two colors.
- Finishing: Use available working yarn on either end to make chains a few inches long for ties.
Frequently Asked Questions
Is the Beautiful Shells Bandana suitable for beginners?
It can be a good beginner learning project, especially for someone who already knows the basic crochet stitches and wants to learn a new construction technique. The unusual part is the scaffold-style construction and the special two-color change. Working carefully through the first few rows makes the repeating structure much easier to understand.
What hook size is used in the original pattern?
The original pattern uses a 3.5mm crochet hook.
What type of yarn should I use?
The original project uses DK weight cotton yarn in two colors. Less than 50 yards of each color is required for the bandana.
What size is the finished bandana?
The original bandana measures 18 inches (46cm) along the long side. For the original project, this measurement was reached in 25 rows.
Can this stitch become a larger project?
Yes. The project is worked from the bottom-up, and the source notes that you can continue the stitch pattern if you want to make a larger piece, potentially turning the construction into a shawl.
Why are there chain spaces between the shells?
The chain spaces are part of the framework that supports the shell construction. They are not accidental gaps. The alternating scaffold and shell rows are what create the characteristic Beautiful Shells stitch.
Final Thoughts
The Beautiful Shells Bandana offers a compact way to learn a surprisingly sophisticated-looking crochet technique. Its most important lesson is that a decorative fabric does not always have to be built by placing every stitch directly into the row beneath it. Here, chain spaces create a framework first, and the fuller shell stitches are built onto that structure afterward.
The project also combines this construction method with practical two-color crochet. Instead of cutting the yarn after each row, the special live-loop color-change technique keeps both colors connected and allows the work to continue in the same direction every two rows. Once mastered, this can make the alternating-color design much more efficient.
For the original version, use DK weight cotton yarn in two colors, a 3.5mm crochet hook, and follow the stated stitch counts and color-change sequence carefully. Continue the repeating shell and framework rows until the piece measures 18 inches (46cm) along the long side; in the original project, this required 25 rows. Finish with chains made from the available working yarn on either end to create the ties.
Whether you wear it as a lightweight summer accessory or use it as practice for a future larger project, the Beautiful Shells Bandana is a useful introduction to scaffold-based crochet. Once the first few rows make sense, the pattern settles into a satisfying rhythm of framework, shells, color changes, and gradual growth.