
If you are looking for a small knitting project that combines delicate lace details with a practical everyday shape, the Flower Bed Bandana is a beautiful project to add to your handmade wardrobe. This one-size knitted bandana features a triangular construction, repeated eyelet details, neat i-cord edges, and two long i-cord ties that make it easy to wear and adjust.
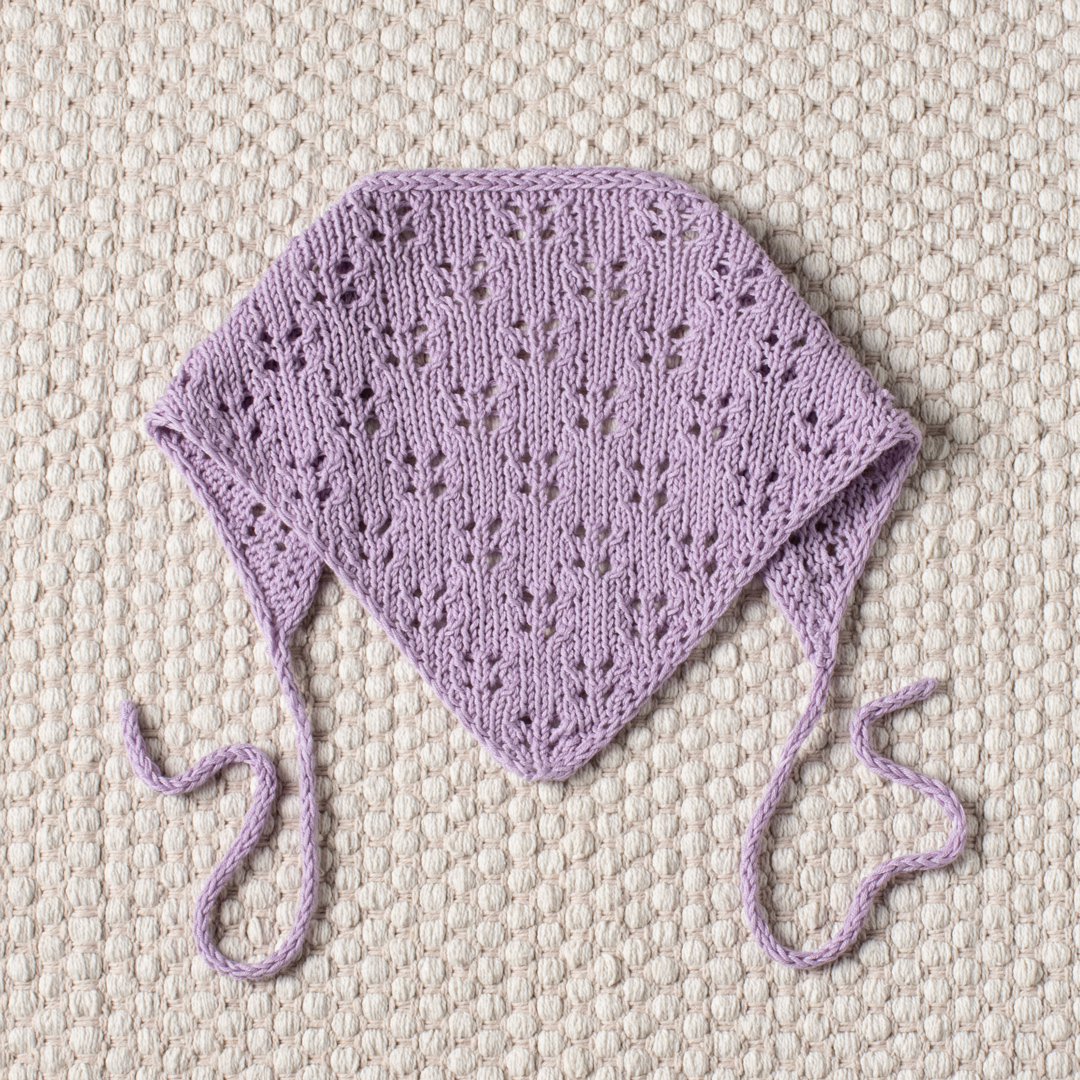
This pattern uses Drops Safran in the lavender uni color 05 and 3mm (US 2.5) knitting needles. The main fabric is worked flat while the ties are knitted as simple i-cords. The outer edges are formed with an i-cord technique throughout the bandana, creating a clean and polished finish without requiring a separate edging treatment afterward.
Although the finished piece is small, the project introduces several useful knitting techniques. You will work increases with M1R and M1L, create decorative eyelets with yarn overs, use k2tog and ssk decreases, maintain i-cord edges, and attach an i-cord tie directly to the live stitches of the bandana. These techniques make the project especially useful for knitters who want to practice lace construction in a manageable format.
Flower Bed Bandana at a Glance
The bandana is designed in one size. Its finished measurements are approximately 43cm/17in in length without the ties and 22cm/8.75in in height. The pattern is worked at a gauge of 24 stitches by 32 rows in stockinette stitch over 10 x 10 cm (4 x 4in) after blocking.
- Size: One size
- Finished length without ties: 43cm/17in
- Finished height: 22cm/8.75in
- Gauge: 24 sts x 32 rows in stockinette stitch over 10 x 10 cm (4 x 4in) after blocking
- Yarn: Drops Safran, lavender, uni color 05, 1 ball
- Main needles: 3mm (US 2.5) knitting needles
- Tie needles: A pair of 3mm (US 2.5) DPNs
The pattern also requires a tapestry needle, measuring tape, and scissors. Having these tools ready before beginning makes the project easier to manage, especially when you reach the finishing and i-cord stages.
Materials and Tools
Yarn
The specified yarn for this pattern is Drops Safran in lavender, uni color 05. The pattern calls for 1 ball. Using the stated yarn helps maintain the intended fabric character and makes it easier to work toward the stated finished measurements and gauge.
Knitting Needles
You will need 3mm (US 2.5) knitting needles for the bandana. A pair of 3mm (US 2.5) DPNs is used for making the i-cord ties. The ties are worked without turning the work in the usual back-and-forth manner, so DPNs are particularly convenient for this part of the project.
Notions
- Tapestry needle
- Measuring tape
- Scissors
A measuring tape is particularly useful when checking the approximately 30 cm length of each i-cord tie. A tapestry needle is used at the finishing stage for weaving in yarn tails.
Knitting Abbreviations
Keep the following abbreviations available while working through the pattern:
- k – knit.
- k2tog – knit 2 stitches together.
- M1L – make 1 left.
- M1R – make 1 right.
- p – purl.
- RS – right side.
- sl – slip stitch as if to purl with yarn in front.
- ssk – slip 1 stitch knitwise, slip the next stitch knitwise, return the 2 stitches back to the left needle, knit those 2 stitches together through the back loops.
- WS – wrong side.
- yo – yarn over.
- *-* – repeat the instructions in between the asterisks the number of times specified.
Understanding the Decorative Eyelet Pattern
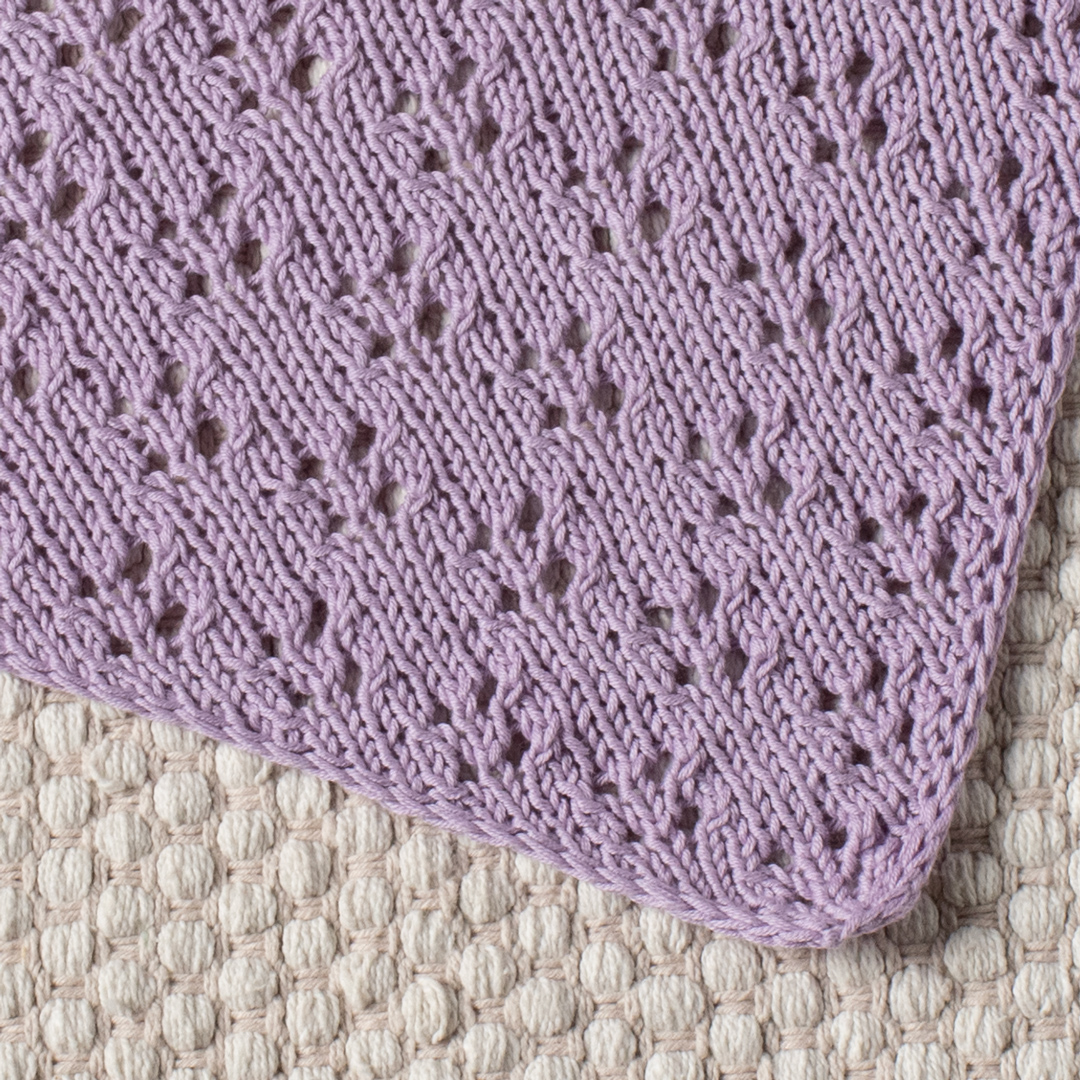
The floral-looking openwork effect in the Flower Bed Bandana is created using a compact five-stitch eyelet sequence:
Eyelet pattern: k2tog, yo, k1, yo, ssk.
This sequence combines decreases and yarn overs. The decreases help control the stitch count while the yarn overs create the intentional openings that form the decorative pattern.
Work the eyelet pattern only when the instructions direct you to do so. It is important not to substitute the eyelet sequence with a different lace repeat, because the placement of these stitches is part of the original construction.
How the I-Cord Edges Work
One of the defining details of this pattern is the i-cord edging. Rather than adding an edging after the triangular bandana has been completed, the edge is incorporated into every row.
The i-cord edging is created by knitting the first 2 stitches of every row and slipping the last 2 stitches of every row with yarn in front. The pattern specifically notes that the edge stitches should not be tightened.
Keeping these edge stitches relaxed is important for maintaining the intended shape and flexibility of the border. If you pull these stitches tightly, the edge can become restrictive and may affect the appearance of the triangular fabric.
Working the Increases Correctly
The bandana grows through two increases on every right-side row. These increases are positioned at the beginning and end of the working section, immediately before and after the two i-cord edge stitches.
The pattern uses M1R on the left side of the central fabric and M1L on the right side. The instructions also emphasize not tightening the increased stitches.
If you prefer a simpler increase method, the pattern notes that M1L and M1R may be replaced with yarn overs. However, if you make that substitution, remember that the visual and structural character of the increase can differ slightly from the specified M1 increases.
Starting the Bandana
Begin by casting on 5 stitches. The first section establishes the basic triangular construction while introducing the i-cord edges and the first increases.
Set-Up Row
Set-up row (WS): k2, p1, sl2.
This short wrong-side row establishes the edge treatment before the first increase row.
Rows 1–12
Row 1 (RS): k2, M1R, k1, M1L, sl2 (7sts).
Row 2: k2, p to last 2 sts, sl2.
Row 3: k2, M1R, k3, M1L, sl2 (9sts).
Row 4: k2, p to last 2 sts, sl2.
Row 5: k2, M1R, eyelet pattern, M1L, sl2 (11sts).
Row 6: k2, p to last 2 sts, sl2.
Row 7: k2, M1R, k to last 2 sts, M1L, sl2 (13sts).
Row 8: k2, p to last 2 sts, sl2.
Row 9: k2, M1R, k2, eyelet pattern, k2, M1L, sl2 (15sts).
Row 10: k2, p to last 2 sts, sl2.
Row 11: k2, M1R, k to last 2 sts, M1L, sl2 (17sts).
Row 12: k2, p to last 2 sts, sl2.
Notice the stitch-count progression on the right-side increase rows: 7 stitches after Row 1, 9 after Row 3, 11 after Row 5, 13 after Row 7, 15 after Row 9, and 17 after Row 11. These checkpoints are useful for confirming that both increases have been made correctly.
Beginning the Main Pattern Repeat
After the first 12 rows, the bandana moves into its repeating pattern section. The structure alternates right-side rows containing increases and lace instructions with wrong-side rows worked primarily in purl.
Pattern Rows 1–8
Row 1 (RS): k2, M1R, *eyelet pattern, k3* until 5sts left, eyelet pattern, M1L, sl2 (2sts increased).
Row 2 (WS): k2, p to last 2 sts, sl2.
Row 3: k2, M1R, k to last 2 sts, M1L, sl2 (2sts increased).
Row 4: k2, p to last 2 sts, sl2.
Row 5: k2, M1R, k2, *eyelet pattern, k3* until 7sts left, eyelet pattern, k2, M1L, sl2 (2sts increased).
Row 6: k2, p to last 2 sts, sl2.
Row 7: k2, M1R, k to last 2 sts, M1L, sl2 (2sts increased).
Row 8: k2, p to last 2 sts, sl2.
Repeat Rows 1–8 7 more times or until you reach your desired length.
This section is where the recognizable eyelet texture develops across the growing triangular fabric. The right-side rows control both the decorative pattern and the width increase, while the wrong-side rows maintain the established edge treatment.
Stitch-Count Checkpoints and Pattern Accuracy
Because two stitches are increased on every right-side increase row, counting can be a useful way to catch mistakes early. If the number of stitches does not seem to be growing as expected, stop and check the most recent right-side row before continuing.
The i-cord edge should remain clearly identifiable at both sides. On every row, the first 2 stitches are knitted and the final 2 stitches are slipped with yarn in front. These edge stitches are part of the construction rather than optional decorative finishing.
When working the eyelet pattern, pay attention to the sequence of decreases and yarn overs. The eyelet pattern is:
k2tog, yo, k1, yo, ssk.
The yarn overs create the openings, while k2tog and ssk provide the paired decreases. Avoid accidentally replacing a decrease with a knit stitch or missing a yarn over, since either error can change the lace structure.
Finishing the Bandana Fabric
Once you have repeated Rows 1–8 7 more times, or reached your desired length, break the yarn while leaving a 10cm (4″) long tail. Set the bandana aside with the stitches remaining on the needle as they are.
Do not remove or bind off the live bandana stitches at this point. They are needed for the i-cord edging process. Keeping these stitches live allows the first tie and the edge to be worked together in one continuous construction.
Making the First I-Cord Tie
The first tie is made using 3 stitches on a pair of 3mm (US 2.5) DPNs.
Cast on 3 stitches and do not turn.
*Slip the 3 stitches to the right side of the needle. Knit 3.*
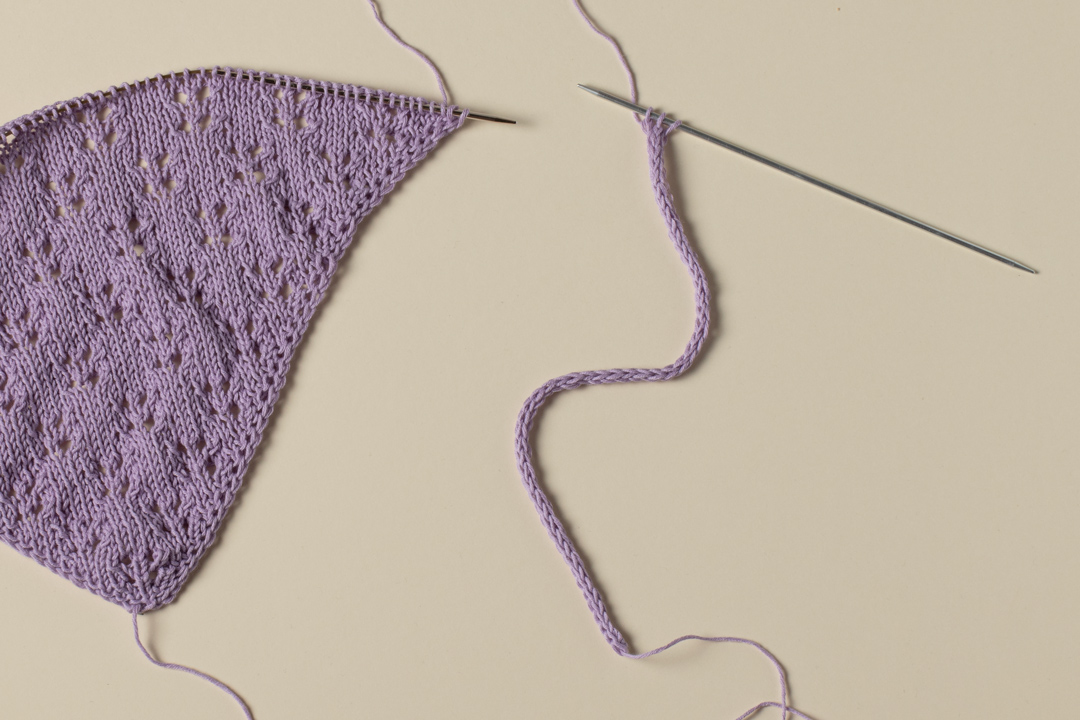
Continue this sequence until the i-cord tube measures approximately 30 cm. Do not cut the yarn at the end of the first tie.
The instruction to avoid turning is important. An i-cord is formed by repeatedly sliding the stitches to the opposite end of the needle and knitting across them, allowing the knitted tube to develop.
Joining the I-Cord to the Bandana
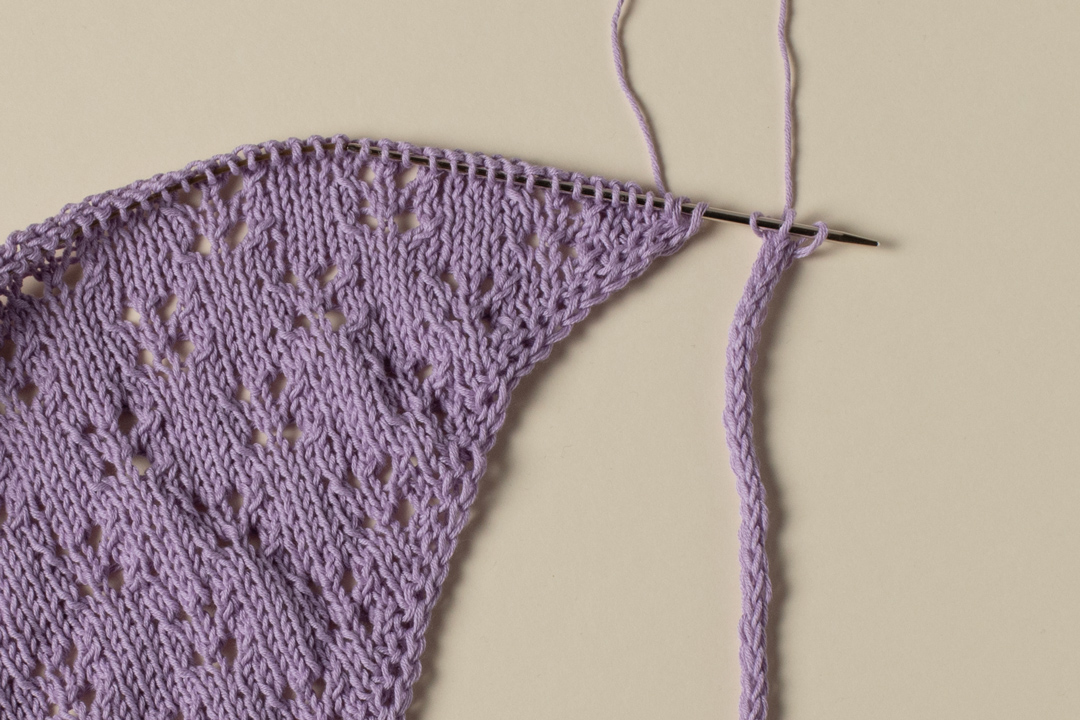
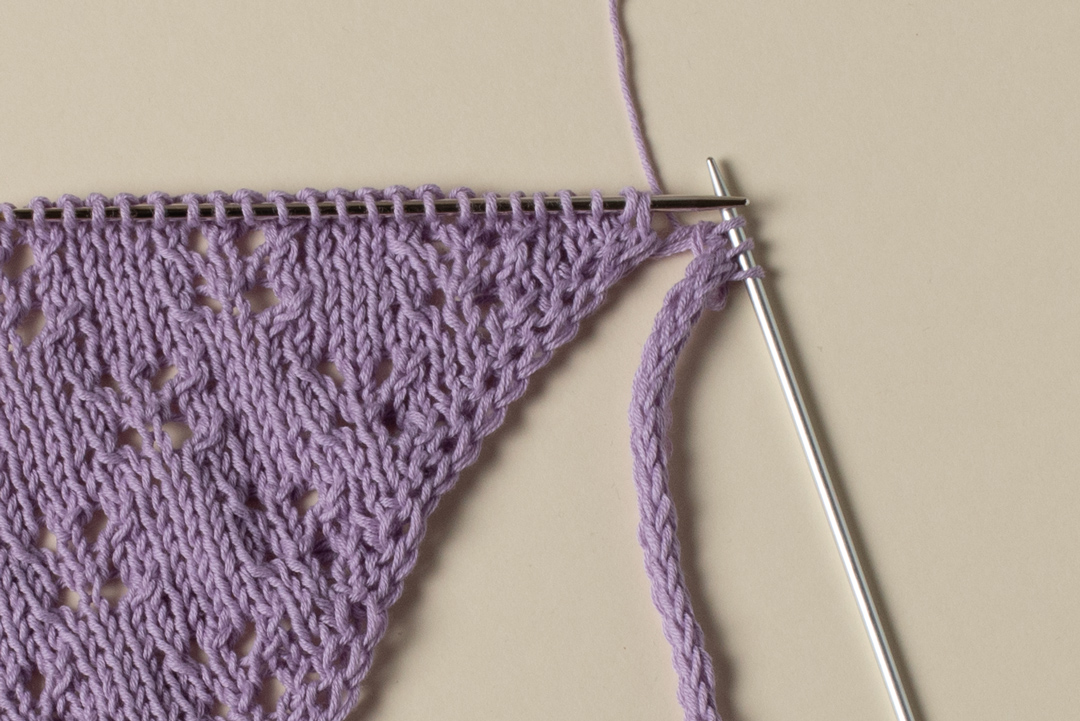
With the first i-cord complete, transfer the 3 i-cord stitches to the needle while holding the live bandana stitches. This is the transition between the tie and the decorative edging.
Knit the first two i-cord stitches. Then work an ssk by knitting the last i-cord stitch together with the first bandana stitch. This joins the i-cord to the live edge of the bandana.
The technique is then repeated across the bandana edge. Transfer the first 3 stitches to the needle while holding the live bandana stitches.
Repeat the following sequence:
*k2, ssk, transfer 3 stitches to the needle, holding the live bandana stitches*
Continue until you have 3 stitches left.
This method creates the finished i-cord edging while simultaneously working the live bandana stitches into the border. It is helpful to keep the work relaxed and avoid pulling the i-cord too tightly against the bandana edge.
Creating the Second Tie
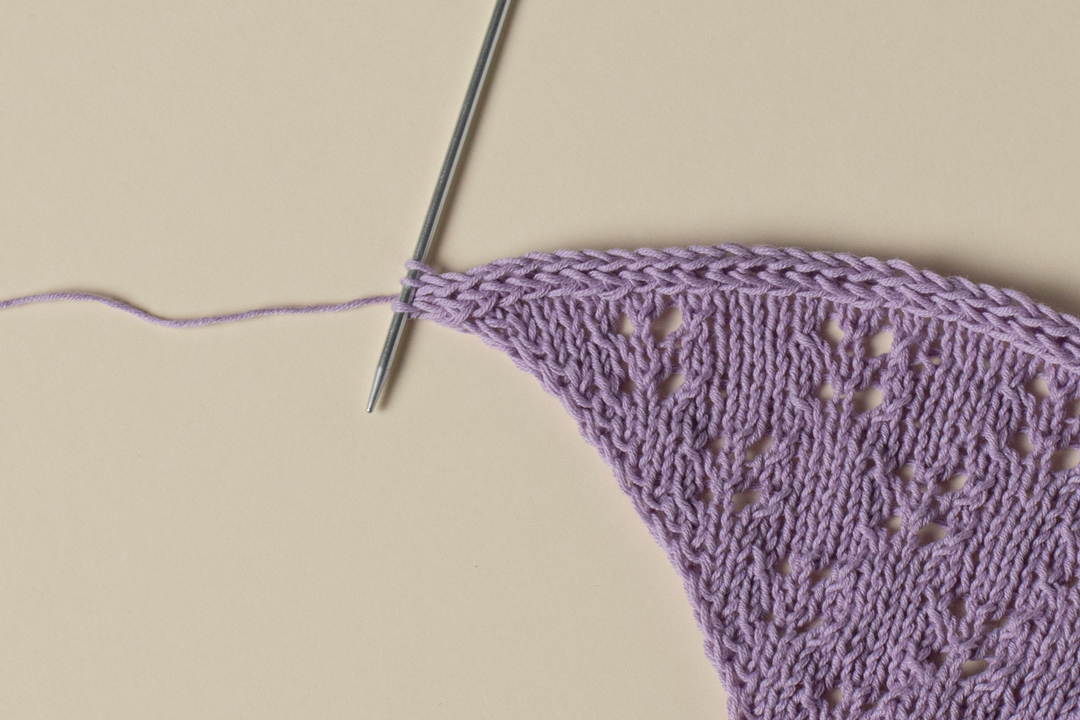
After working the edging, make the second i-cord tie in the same way as the first one.
Work the following sequence:
*Slip the 3 stitches to the right side of the needle. Knit 3.*
Continue knitting the i-cord until the tube measures approximately 30 cm.
This time, bind off, cut the yarn, and weave in the tails.
Helpful Tips for a Clean Finish
Keep the Edge Relaxed
The pattern specifically instructs you not to tighten the edge stitches or the increased stitches. This is especially important when working the i-cord edging because a tight border can pull on the triangular fabric.
Check the Eyelets as You Go
Rather than waiting until the end to inspect the lace pattern, look at each completed section. The eyelets should appear consistently positioned across the fabric. If one section looks noticeably different, checking the most recent eyelet row is usually easier than trying to identify the problem after many more repeats.
Measure the Ties
The first i-cord tie should measure approximately 30 cm before you begin attaching it to the bandana. The second i-cord is also worked to approximately 30 cm. Use your measuring tape instead of relying only on the number of repetitions, since knitting tension can affect the finished length.
Keep Track of the Live Stitches
When the main bandana section is complete, the stitches remain live on the needle. Handle them carefully while preparing the first i-cord and transferring the stitches. The live stitches are an essential part of the edging construction.
Troubleshooting Common Knitting Issues
My Stitch Count Is Incorrect
Start by checking the most recent right-side row. Every increase row in the pattern adds 2 stitches. Verify that both M1 increases were completed and that the edge stitches were handled correctly.
My Eyelet Pattern Looks Uneven
Check the five-stitch eyelet sequence: k2tog, yo, k1, yo, ssk. The yarn overs should be present on either side of the center knit stitch, while the decreases frame the opening. Compare the row against the written instructions rather than trying to correct the appearance by adding or removing stitches.
The I-Cord Edge Looks Tight
Review your tension. The pattern specifically says not to tighten the edge stitches. Allow the first 2 knitted stitches and the slipped final 2 stitches to form a relaxed edge.
My Ties Are Not Exactly 30 cm
The pattern specifies approximately 30 cm for each i-cord. Measure the tube as you work rather than relying solely on stitch counts. The stated length is an approximate measurement.
Quick Project Checklist
- Confirm the project is being worked in one size.
- Use Drops Safran in lavender, uni color 05, 1 ball.
- Use 3mm (US 2.5) knitting needles for the bandana.
- Use a pair of 3mm (US 2.5) DPNs for the ties.
- Check the gauge: 24 sts x 32 rows in stockinette stitch over 10 x 10 cm (4 x 4in) after blocking.
- Cast on 5 stitches.
- Work the set-up row.
- Complete Rows 1–12 with the specified stitch counts.
- Work the eight-row pattern repeat.
- Repeat Rows 1–8 7 more times or until the desired length is reached.
- Leave a 10cm (4″) yarn tail when breaking the yarn.
- Keep the bandana stitches live on the needle.
- Make the first approximately 30 cm i-cord tie.
- Join the i-cord to the live bandana stitches using the specified ssk edging technique.
- Continue the i-cord edging until 3 stitches remain.
- Make the second approximately 30 cm i-cord tie.
- Bind off, cut the yarn, and weave in the tails.
Final Measurements and Finished Look
The stated finished measurements are 43cm/17in in length without ties and 22cm/8.75in in height. Because the gauge is specified after blocking, blocking is part of achieving the intended fabric dimensions and appearance.
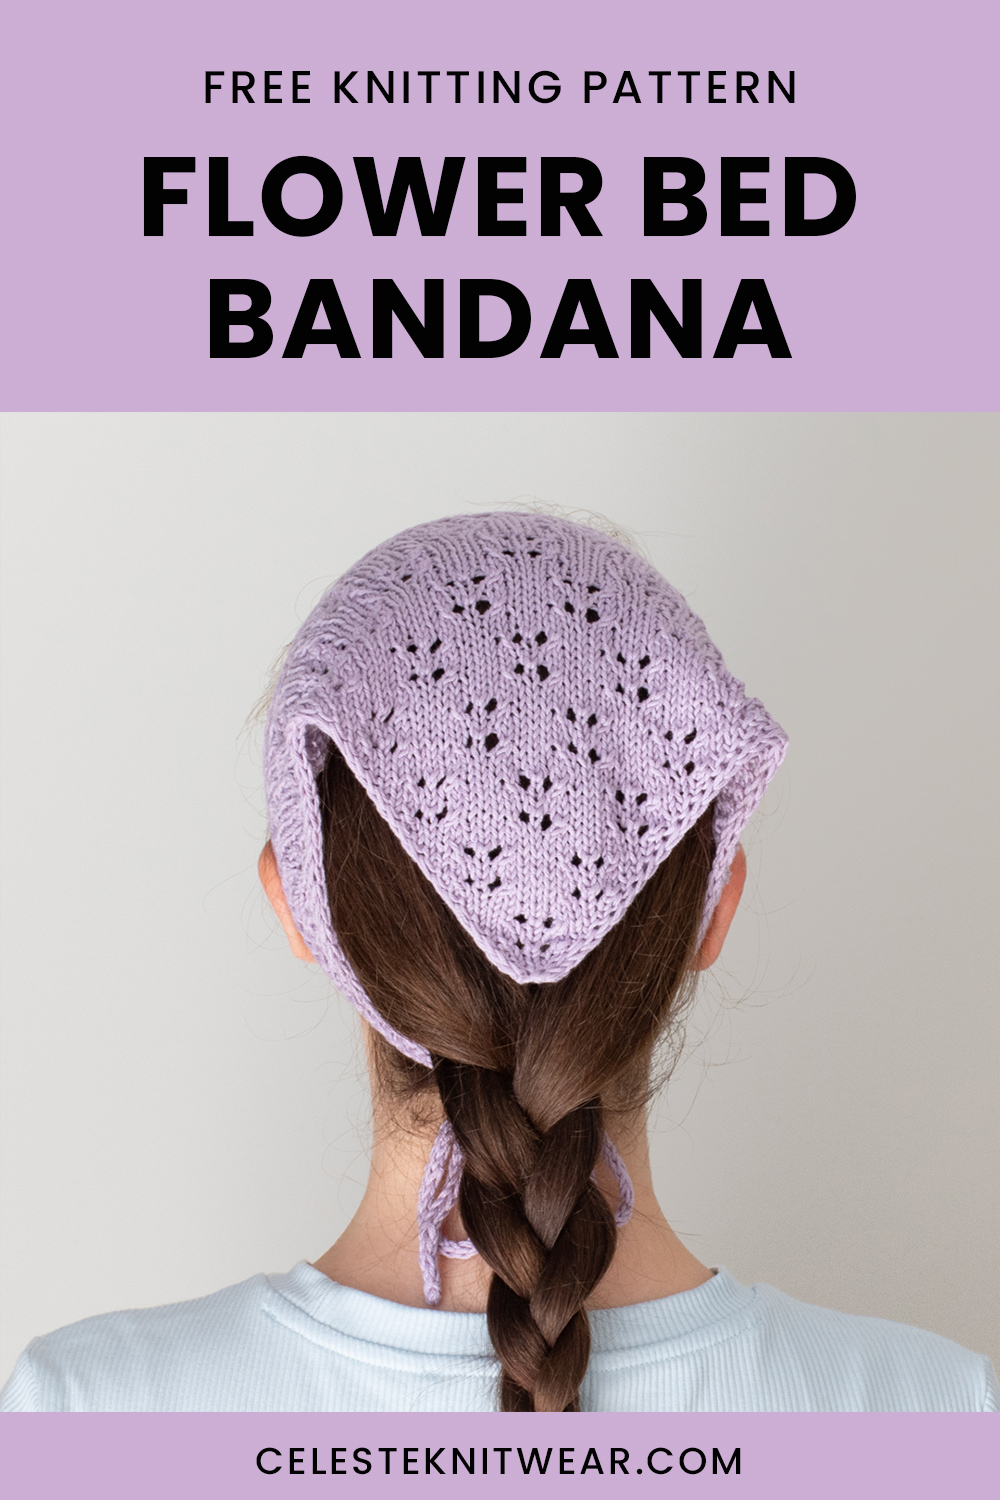
The finished bandana combines the open eyelet pattern with the clean lines of the i-cord border. The lavender yarn gives the project a soft floral character, while the triangular shape makes it suitable as a simple handmade accessory.
Frequently Asked Questions
What size is the Flower Bed Bandana?
The pattern is written for one size. The finished measurements are 43cm/17in in length without ties and 22cm/8.75in in height.
What yarn is required?
The specified yarn is Drops Safran in lavender, uni color 05, with 1 ball required.
What knitting needle size should I use?
Use 3mm (US 2.5) knitting needles for the main bandana and a pair of 3mm (US 2.5) DPNs for the i-cord ties.
What is the gauge?
The gauge is 24 stitches by 32 rows over 10 x 10 cm (4 x 4in) in stockinette stitch after blocking.
How long are the ties?
Each i-cord tie is worked until the tube measures approximately 30 cm.
Can M1L and M1R be replaced?
Yes. The pattern notes that if you want to simplify the pattern, you can replace M1L and M1R with yarn overs.
What creates the eyelet design?
The decorative openings are created with the eyelet pattern: k2tog, yo, k1, yo, ssk.
Why should the edge stitches not be tightened?
The i-cord edging depends on a relaxed edge. The pattern specifically instructs knitters not to tighten the edge stitches or the increased stitches, helping the border remain flexible and allowing the bandana to maintain its intended shape.
Final Finishing Advice
Once the second tie has been bound off, the yarn has been cut, and the tails have been woven in, take a moment to inspect the complete bandana. Check that both ties are approximately the intended length and that the i-cord border sits smoothly along the edge.
The most important part of finishing this project is maintaining the construction specified in the pattern. The triangular body grows through paired increases, the eyelet sections provide the decorative detail, and the i-cord technique creates the polished border and ties. Keeping these elements consistent from beginning to end gives the finished accessory its distinctive shape.
The Flower Bed Bandana is also a useful practice project for knitters who want to become more comfortable with small lace motifs without committing to a large shawl or complicated garment. The repeated eyelet pattern gives you regular opportunities to practice k2tog, ssk, and yarn overs, while the i-cord construction introduces another practical finishing technique.
With the correct yarn, 3mm (US 2.5) needles, careful attention to the stitch counts, and relaxed edge tension, you can work through the project systematically from the first 5-stitch cast-on to the final 30 cm i-cord tie.
Most importantly, use the written row instructions as your technical reference throughout the project. When in doubt, return to the specified row, verify the increases and eyelet sequence, and check your stitch count before continuing. This simple habit can prevent small mistakes from carrying through multiple pattern repeats.
Once complete, the Flower Bed Bandana offers a delicate handmade accessory with a distinctive triangular silhouette, decorative eyelets, and practical adjustable ties. It is a compact knitting project with enough technique and texture to remain interesting from beginning to end.