
Cheesy Garlic Chicken Wraps
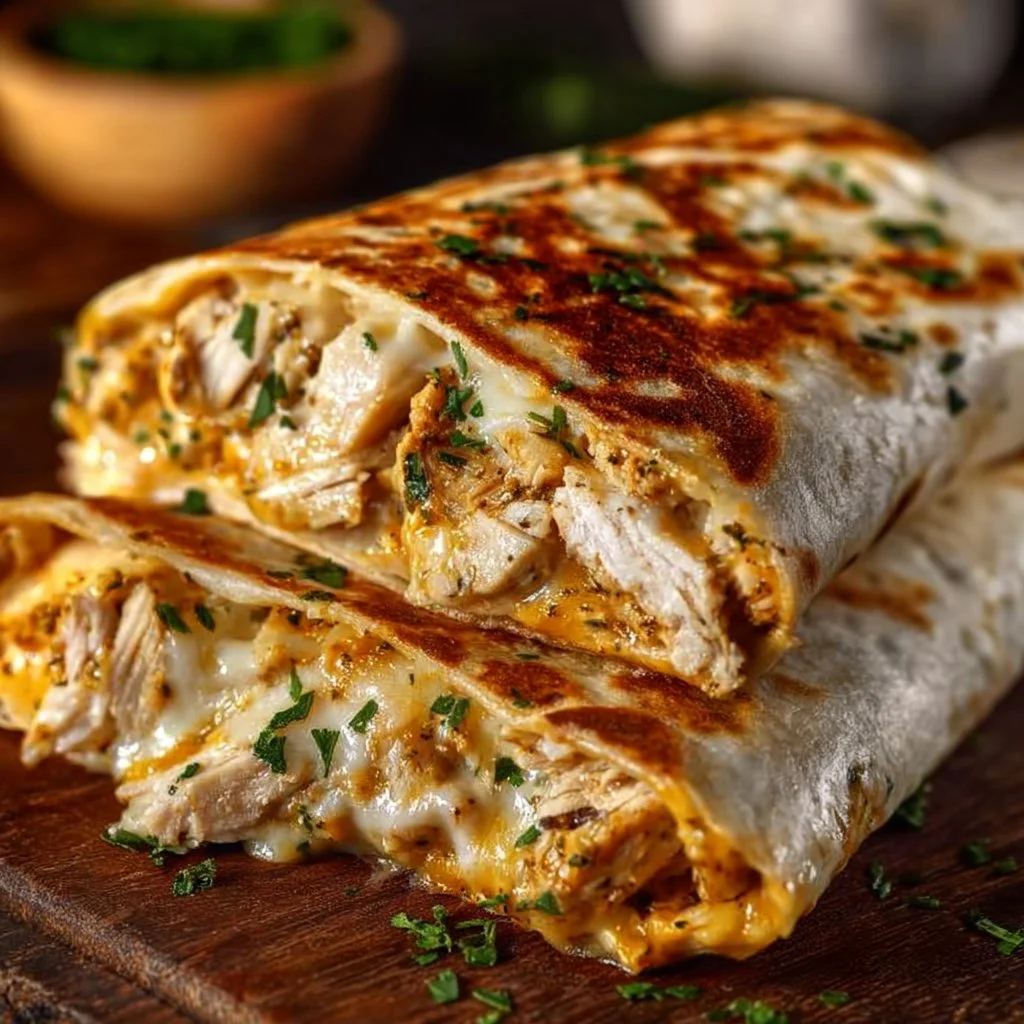
Cheesy Garlic Chicken Wraps are the ultimate comforting meal that brings together the rich flavors of garlic, creamy cheeses, and tender chicken in a soft tortilla. They offer a delightful crunch on the outside while maintaining a melty, savory filling that’s hard to resist. With each bite, you’ll experience the cheesy goodness combined with the aromatic hint of garlic, making it an irresistible treat.
These wraps are versatile! Whether you’re looking for a quick lunch, a hearty dinner, or a crowd-pleasing appetizer for a party, these wraps fit the bill. They can easily be prepared in advance, making them perfect for gatherings or busy weeknights when you crave something delicious yet uncomplicated.
Prep Time: 10 min | Cook Time: 25 min | Total Time: 35 min
How to Make Cheesy Garlic Chicken Wraps
Ingredients:
- 2 cups cooked shredded or chopped chicken
- 1 tablespoon olive oil
- 1 teaspoon garlic powder
- 1/2 teaspoon onion powder
- Salt and black pepper, to taste
- 1 1/2 cups shredded mozzarella cheese
- 1/2 cup shredded cheddar cheese
- 1/4 cup softened cream cheese
- 2 tablespoons mayonnaise
- 2 tablespoons chopped fresh parsley or 1 teaspoon dried
- 4 large flour tortillas
- 2 tablespoons melted butter
- 1 teaspoon minced garlic
- Optional: Baby spinach, shredded lettuce, or sliced tomatoes
Step-by-Step Instructions:
-
Combine the Filling: In a mixing bowl, combine the cooked chicken, garlic powder, onion powder, salt, pepper, mozzarella, cheddar, cream cheese, mayonnaise, and parsley. Mix until creamy and well-integrated. The combination of cheeses adds richness, while the mayonnaise helps bind everything together.
-
Prepare the Tortillas: Lay the tortillas flat on a clean surface. Spoon 1/4 of the chicken mixture into the center of each tortilla. For added freshness and nutrition, you can include optional vegetables like baby spinach or sliced tomatoes at this stage.
-
Roll the Wraps: Fold the sides of the tortillas inward and tightly roll them up from the bottom to form secure wraps. This step is crucial as it keeps the filling inside and makes them easier to handle.
-
Brush with Garlic Butter: In a small bowl, mix the melted butter with minced garlic. Brush the outside of each wrap generously with this mixture to give them a delicious golden color and enticing aroma when cooked.
-
Toast the Wraps: Heat a skillet over medium heat. Place the wraps seam-side down and toast for 2–3 minutes per side until golden brown and crisp, and the cheese is melted inside. This step adds a lovely crunch to the wraps, enhancing both texture and flavor.
-
Serve: Slice each wrap in half and serve warm with a dipping sauce of your choice, such as ranch or garlic aioli. Pairing them with a good sauce elevates the whole experience, giving you a creamy or tangy contrast with each bite.
Pro Tips
-
Cooked Chicken: Using leftover cooked chicken or rotisserie chicken can save time and enhance flavor. Just ensure it’s shredded finely for even mixing and easy eating.
-
Cheese Choices: Experiment with different cheese blends! Incorporating spicy pepper jack or tangy feta can add a new dimension of flavor that keeps things interesting.
-
Avoid Overfilling: While it can be tempting to add more filling, too much can make wrapping challenging and lead to leaks. Stick with the recommended portion for the best results.
-
Perfecting the Temperature: Make sure your skillet is at the right temperature. Too hot can burn the wraps before the cheese melts. A medium heat provides a nice balance for a crispy exterior and melted filling.
-
Veggie Add-Ins: If using fresh vegetables, consider sautéing them lightly before adding them to the wraps. This helps reduce moisture, preventing soggy wraps.
-
Melted Butter: Brushing the wraps with melted butter not only adds flavor but also helps achieve a beautifully crisp exterior. Don’t skip this step!
Why You’ll Love This Recipe
The flavor profile of Cheesy Garlic Chicken Wraps is simply incredible. The combination of flavors from the cheeses, garlic, and chicken is not only comforting but also satisfying. Each bite is filled with creamy textures and a savory richness that both kids and adults will enjoy.
Additionally, this recipe is super easy to whip up. In about 35 minutes, you can have a tasty meal ready to serve, making it perfect for busy weekdays or last-minute dinner plans. You can also customize it to fit various dietary needs, from adding veggies for extra nutrition to adjusting the spices for personal preferences.
How to Serve Cheesy Garlic Chicken Wraps
Presentation can elevate your meal! Consider arranging the wraps on a large platter, sliced diagonally to showcase the delicious fillings. A sprinkle of fresh parsley on top adds a pop of color.
Pair these wraps with side dishes like a fresh salad, baked sweet potato fries, or a light soup. For drinks, a chilled iced tea or lemonade complements the savory flavors beautifully. If you’re serving them at a party, setting out a variety of dipping sauces, such as salsa or a yogurt dip, can please a crowd.
How to Store Cheesy Garlic Chicken Wraps
For fridge storage, place the wraps in an airtight container. They will last for about 3-4 days. If you want to store them longer, you can freeze them wrapped tightly in plastic wrap and then placed in a freezer-safe bag. Frozen wraps will be good for up to 2-3 months.
When reheating, simply take them out of the fridge or freezer and follow the reheating instructions below.
Tips to Make Cheesy Garlic Chicken Wraps
-
Use Fresh Herbs: Fresh herbs can significantly enhance the flavor. Consider using basil or cilantro for a twist in flavor.
-
Season Well: Don’t be shy with seasonings. Taste your creamy chicken mixture while mixing, and adjust salt and pepper levels to ensure it’s flavorful.
-
Keep Ingredients Room Temperature: Allow your cream cheese and any other cold ingredients to come to room temperature before mixing. This will help them combine more smoothly.
-
Avoid Soggy Wraps: If you’re adding vegetables, make sure to pat them dry before mixing them in. Too much moisture can make your wraps soggy.
Variations
-
Vegan Option: Swap out the chicken for shredded jackfruit or chickpeas and use vegan cheese and mayonnaise. These alternatives will maintain the creamy texture with plant-based goodness.
-
Spicy Version: Add some chopped jalapeños or a dash of hot sauce to the filling for a kick of heat. You can also use spicy cheese varieties for an extra burst of flavor.
-
Low-Carb: For a low-carb option, use lettuce wraps instead of tortillas, and make sure to choose low-carb substitutions for the creamy fillings.
-
Gluten-Free: Use gluten-free tortillas to make this delicious recipe suitable for gluten-intolerant guests.
Nutrition Information
(Serving Size | Calories | Protein | Carbs | Fat | Fiber | Sugar)
Typical serving is about 1 wrap. This recipe is high in protein from chicken and cheese, making it a filling choice. However, it can be rich in calories and fat, so be mindful if you’re watching your intake. Enjoying this as part of a balanced diet can work well for many lifestyles.
Storage and Reheating
-
Microwave: Place the wrap on a microwave-safe plate and heat for about 1–2 minutes or until heated through. This is a quick method, but be careful not to make the wrap chewy.
-
Oven: Preheat your oven to 375°F (190°C). Wrap the wraps in foil to prevent drying out, and heat for 10-15 minutes.
-
Skillet: Reheat in a skillet on medium heat, flipping occasionally until heated through. This method preserves the crispiness of the tortilla.
Customization Ideas
You can tweak the flavors and textures to suit your preferences. For a tangy twist, add a splash of lemon juice or a zest of lime. Swap the type of cheese for something sharper or creamier according to your taste. Don’t hesitate to add more vegetables or use alternative spices for a distinct flavor palette.
Common Mistakes to Avoid
-
Soggy Tortillas: Avoid adding wet ingredients when mixing the filling. Stick to drier ingredients to maintain tortilla integrity.
-
Under-seasoning: Taste your filling before assembling to ensure it has enough flavor. A common mistake is not seasoning well enough.
-
Not Melting Cheese Properly: If your wraps aren’t browning well, check if your heat isn’t too high; it’s best to cook over medium heat for the right balance.
-
Filling Too Much: Over stuffing leads to messy wraps! Stick to the recommended portions for successful rolling.
Serving Occasions
These wraps are perfect for a variety of events. They make an excellent lunch for busy workdays, are fantastic for family dinner night, and lend themselves well to casual gatherings. They’re also a hit at parties, as they can be served warm or at room temperature, making them easy to enjoy anytime.
Why Make This Recipe
Cheesy Garlic Chicken Wraps stand out because they are comforting yet simple. They combine familiar flavors that evoke warm, cozy feelings, making them a great choice for any meal. Plus, they’re quick to prepare and customizable for different tastes and dietary restrictions. You can feel good serving a dish that appeals to many, making mealtime stress-free and enjoyable.
FAQs
-
Can I use raw chicken?
- It’s best to use cooked chicken to ensure the wraps are quick to prepare. If using raw chicken, cook it thoroughly first.
-
Can I make these wraps ahead of time?
- Yes! Prepare the filling and assemble the wraps, then store them in the fridge. Cook them just before serving.
-
What dipping sauces pair well?
- Ranch, garlic aioli, or a spicy chipotle sauce complement these wraps perfectly!
-
Are these wraps kid-friendly?
- Absolutely! Kids love the cheesy filling. You can also involve them in the preparation for added fun!
-
How can I make them healthier?
- Use whole wheat tortillas, reduce the cheese, or increase vegetable content for a more nutritious option.
Disclaimer: Nutrition information is approximate, and ingredient variations can affect calories and macronutrient content. Always check specific brands and products for precise data.
Print
Cheesy Garlic Chicken Wraps
- Total Time: 35
- Yield: 4 servings 1x
- Diet: None
Description
Comforting wraps filled with garlic, creamy cheeses, and tender chicken, delivering a delightful crunch and melty filling.
Ingredients
- 2 cups cooked shredded or chopped chicken
- 1 tablespoon olive oil
- 1 teaspoon garlic powder
- 1/2 teaspoon onion powder
- Salt and black pepper, to taste
- 1 1/2 cups shredded mozzarella cheese
- 1/2 cup shredded cheddar cheese
- 1/4 cup softened cream cheese
- 2 tablespoons mayonnaise
- 2 tablespoons chopped fresh parsley or 1 teaspoon dried
- 4 large flour tortillas
- 2 tablespoons melted butter
- 1 teaspoon minced garlic
- Optional: Baby spinach, shredded lettuce, or sliced tomatoes
Instructions
- In a mixing bowl, combine the cooked chicken, garlic powder, onion powder, salt, pepper, mozzarella, cheddar, cream cheese, mayonnaise, and parsley. Mix until creamy and well-integrated.
- Lay the tortillas flat and spoon 1/4 of the chicken mixture into the center of each tortilla. Optionally add fresh vegetables.
- Fold the sides of the tortillas inward and tightly roll them up from the bottom to form secure wraps.
- Mix melted butter with minced garlic and brush the outside of each wrap with this mixture.
- Heat a skillet over medium heat, place the wraps seam-side down, and toast for 2–3 minutes per side until golden brown and crisp.
- Slice each wrap in half and serve warm with a dipping sauce of your choice.
Notes
Use fresh herbs for flavor enhancement and consider varying the cheese types for different flavor profiles.
- Prep Time: 10
- Cook Time: 25
- Category: Main Course
- Method: Baking
- Cuisine: American
Nutrition
- Serving Size: 1 wrap
- Calories: 350
- Sugar: 2g
- Sodium: 600mg
- Fat: 18g
- Saturated Fat: 8g
- Unsaturated Fat: 8g
- Trans Fat: 0g
- Carbohydrates: 30g
- Fiber: 2g
- Protein: 25g
- Cholesterol: 70mg