

Ghost Brownies
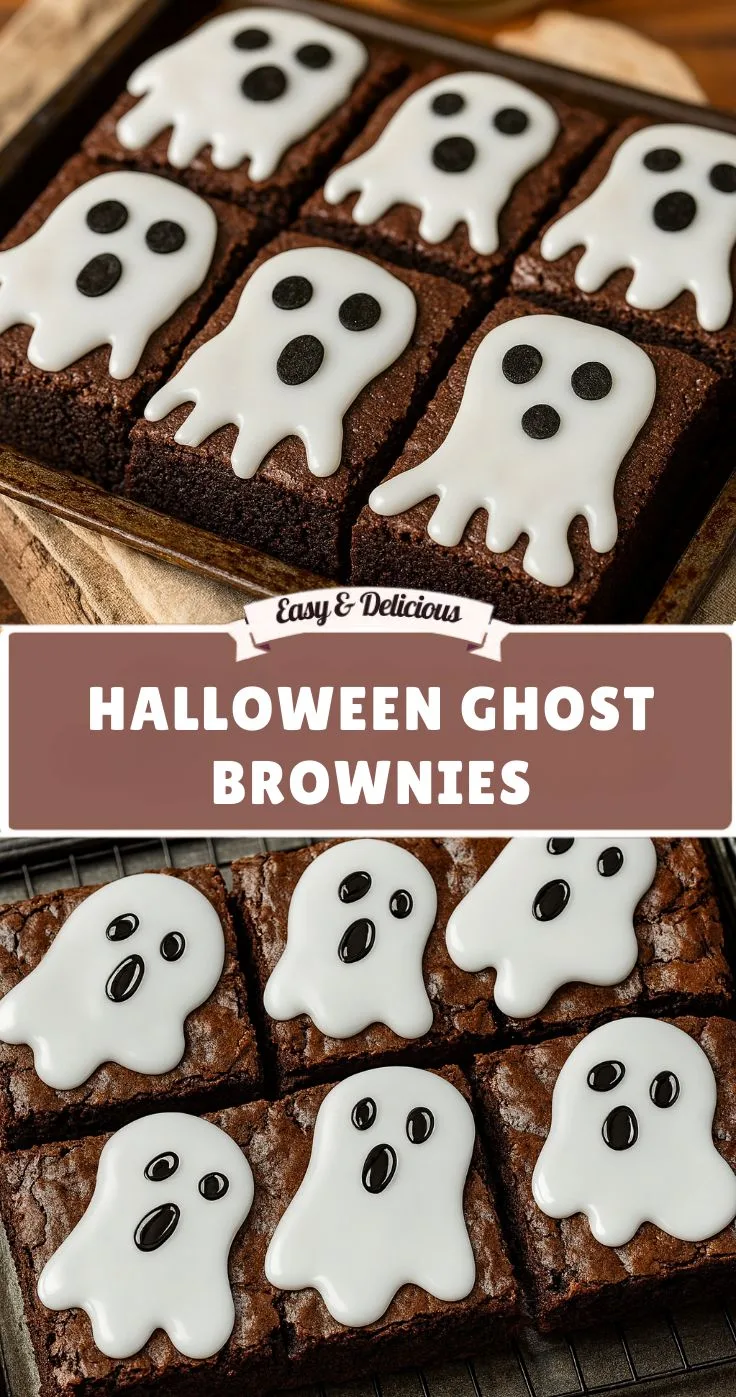
Halloween desserts are at their best when they are both delicious and fun to look at, and these Spooky Halloween Ghost Brownies deliver on both. Rich, fudgy chocolate brownies are topped with sweet white chocolate-coated marshmallow ghosts, each decorated with a simple spooky face.
The combination of dark chocolate brownies and bright white ghost toppings creates a dramatic Halloween look without requiring complicated cake-decorating skills. You only need a few simple ingredients and some basic decorating techniques to turn an ordinary pan of brownies into a haunted dessert everyone will want to try.
These ghost brownies are perfect for Halloween parties, school celebrations, family baking nights, fall gatherings, or a festive dessert table. Kids can also get involved by decorating the ghost faces with candy eyes or edible markers.
The brownies themselves are made from scratch with melted butter, granulated sugar, brown sugar, eggs, cocoa powder, and flour. The result is a rich chocolate base with a soft, fudgy texture. The marshmallows add a light, chewy contrast, while the white chocolate coating gives each ghost a sweet shell and a clean white appearance.
Whether you are an experienced baker or simply looking for an easy Halloween recipe with plenty of visual appeal, these Halloween Ghost Brownies are a fun addition to your seasonal baking list.
Why You’ll Love These Halloween Ghost Brownies
They Look Adorable and Spooky
The contrast between the dark brownies and white ghost toppings makes these treats instantly recognizable as a Halloween dessert. Simple black eyes and spooky mouths give every ghost its own personality.
Easy Decorating
You do not need professional piping skills. The ghost faces are simply made with two eyes and a small mouth. Even beginners can create them.
Rich and Fudgy Brownies
The homemade brownie base is rich, chocolatey, and fudgy. Using both granulated sugar and brown sugar adds sweetness and contributes to the satisfying texture.
Great for Halloween Parties
The brownies are easy to cut into individual portions and arrange on a serving platter. Each brownie gets its own marshmallow ghost, making them perfect for guests to grab and enjoy.
Fun for Kids
Children can help decorate the ghosts once the chocolate coating has set enough to handle. They can create different expressions, making each ghost unique.
Recipe at a Glance
| Detail | Information |
|---|---|
| Prep Time | 15 minutes |
| Cook Time | 30 minutes |
| Decorating Time | 15 minutes |
| Total Time | 1 hour |
| Pan Size | 9×13-inch |
| Yield | Approximately 12 brownies |
| Difficulty | Easy to Moderate |
Ingredients
The ingredient list is divided into two simple parts: the homemade brownie base and the marshmallow ghost topping.
For the Brownies
Unsalted Butter
You will need 1 cup, or 2 sticks, of unsalted butter, melted.
Melted butter makes the brownie batter easy to mix while contributing plenty of richness. Allow the butter to cool slightly after melting before combining it with the sugars.
Granulated Sugar
Use 2 cups of granulated sugar for sweetness and structure.
Brown Sugar
You will also need 1 cup of brown sugar. The combination of granulated and brown sugar gives the brownies a deep sweetness that works especially well with cocoa.
Eggs
Use 4 large eggs.
The eggs help bind the ingredients together and contribute to the texture of the brownies.
Vanilla Extract
Add 2 teaspoons of vanilla extract to enhance the chocolate flavor.
Unsweetened Cocoa Powder
You will need 1 cup of unsweetened cocoa powder. This provides the main chocolate flavor and gives the brownies their dark color.
All-Purpose Flour
Use 1 cup of all-purpose flour.
Avoid overmixing once the flour is added. Overmixing can result in a less tender brownie.
Salt
Add ½ teaspoon of salt to balance the sweetness and enhance the chocolate flavor.
Baking Powder
Use ½ teaspoon of baking powder.
For the Ghost Topping
Marshmallows
You will need 12 large marshmallows, ideally one for each brownie.
The marshmallows form the body of the ghosts.
White Chocolate Chips
Use 1 cup of white chocolate chips or white candy melts.
The melted white chocolate coats the marshmallows and gives them their ghostly appearance.
Black Decorating Gel
Use black decorating gel to draw the eyes and mouths.
Alternatively, you can use melted dark chocolate and a toothpick for the faces.
How to Make Halloween Ghost Brownies
Step 1: Prepare the Brownie Batter
Start by preheating your oven to 350°F (175°C).
Grease a 9×13-inch baking pan and line it with parchment paper. Leaving some parchment extending over the sides can make it easier to lift the cooled brownies from the pan later.
In a large mixing bowl, whisk together the melted butter, granulated sugar, and brown sugar.
Continue whisking until the mixture is smooth and well combined.
Add the eggs one at a time. Mix well after each addition before adding the next egg. Stir in the vanilla extract.
In a separate bowl, sift together the cocoa powder, all-purpose flour, salt, and baking powder.
Gradually add the dry ingredients to the wet mixture. Fold everything together until the ingredients are just combined.
Do not overmix the batter. Once you no longer see large streaks of dry flour or cocoa, stop mixing.
Keeping the mixing gentle helps maintain the soft, fudgy texture that makes these brownies so good.
Step 2: Bake the Brownies
Pour the brownie batter into the prepared 9×13-inch pan.
Use a spatula to spread the batter evenly into the corners.
Place the pan in the preheated oven and bake for approximately 28–32 minutes.
Start checking around the 28-minute mark. Insert a toothpick into the center of the brownies. You want to see moist crumbs, but not wet batter.
Avoid waiting until the toothpick comes out completely clean. That can indicate that the brownies have been baked longer than necessary and may become less fudgy as they cool.
Once baked, remove the pan from the oven and place it on a cooling rack.
Allow the brownies to cool completely before cutting or decorating.
Step 3: Prepare the Marshmallow Ghosts
While the brownies are cooling, prepare the marshmallow ghosts.
Line a baking sheet or flat work surface with parchment paper.
Place the white chocolate chips in a microwave-safe bowl.
Microwave the chocolate in 20-second intervals, stirring well after each interval.
Continue until the chocolate is smooth and fully melted.
Work gently and avoid overheating the chocolate. Short heating intervals help make it easier to control the texture.
Take one large marshmallow at a time and dip it into the melted white chocolate.
Coat the marshmallow as completely as possible.
Place each coated marshmallow on the parchment-lined surface.
Allow the white chocolate coating to set slightly before decorating the faces.
Step 4: Create the Ghost Faces
Once the white chocolate coating is semi-set, it is time to give the ghosts their personalities.
Using black decorating gel, carefully draw two eyes and a spooky mouth on each marshmallow.
The faces can be very simple.
Try small round eyes with an open oval-shaped mouth for a classic ghost expression. Alternatively, make the eyes slightly different sizes or vary the mouths so each ghost looks unique.
If you do not have decorating gel, melt a small amount of dark chocolate and use a toothpick to carefully create the faces.
Allow the faces to set for approximately 10 minutes.
Step 5: Cut the Brownies
Once the brownies have cooled completely, remove them from the pan if desired.
Cut the brownies into approximately 12 even squares or rectangles.
For clean cuts, use a sharp knife. Wiping the blade between cuts can help prevent excess chocolate from transferring from one brownie to another.
Try to make the pieces large enough to comfortably support a marshmallow ghost.
Step 6: Assemble the Ghost Brownies
Place one decorated marshmallow ghost on top of each brownie.
Press the marshmallow down gently so it sits securely on the brownie.
If the ghost needs extra support, drizzle a small amount of the remaining white chocolate around its base. This acts as edible “glue” and also creates a fun ghostly effect around the bottom.
Allow the chocolate to set before transferring the finished brownies to a serving platter.
Your Halloween Ghost Brownies are now ready to serve.
Tips for Making the Best Ghost Brownies
Do Not Overmix the Brownie Batter
Once the dry ingredients are added, mix only until combined.
Overmixing can affect the texture and make the brownies less tender.
Let the Brownies Cool Completely
This is especially important when adding marshmallow ghosts.
If the brownies are still warm, the ghost toppings can become unstable and the white chocolate may soften.
Cooling also makes it easier to cut clean brownie squares.
Melt the White Chocolate Slowly
White chocolate can be sensitive to heat. Using short microwave intervals and stirring frequently gives you better control.
If the chocolate becomes too thick, gentle reheating can help restore a smooth consistency.
Decorate Before the Chocolate Fully Sets
The black decorating gel or melted chocolate is easier to apply when the white coating is slightly set but still has a little surface tackiness.
Make Every Ghost Different
One of the easiest ways to make these brownies extra fun is to vary the expressions.
Some ghosts can look surprised, some can look happy, and others can have wide-open spooky mouths.
There is no need for perfect symmetry.
Easy Shortcut: Use Boxed Brownies
If you are short on time, you can replace the homemade brownie batter with a boxed brownie mix.
Prepare and bake the brownies according to the package instructions, then allow them to cool completely before decorating.
The marshmallow ghosts will still provide the main Halloween effect, so using a mix is a convenient option when you want to reduce preparation time.
This shortcut is especially useful when preparing desserts for a large Halloween party.
Fun Ways to Decorate the Ghost Brownies
The basic ghost design is already festive, but you can add additional details if you want to make the dessert table even more dramatic.
Add Chocolate “Graveyard” Details
Use leftover melted dark chocolate to create tiny lines or simple Halloween shapes on the brownie surface.
Add Candy Eyes
For a kid-friendly version, use candy eyes instead of drawing the eyes with decorating gel.
This makes the decorating process even easier.
Create Different Ghost Expressions
Use different combinations of eyes and mouths to make a whole group of individual ghost characters.
Add a Halloween Platter
Arrange the finished brownies on a dark serving tray and surround them with other Halloween treats for a themed dessert display.
Making Ghost Brownies With Kids
This recipe is a particularly fun choice for a family Halloween baking activity.
Adults can prepare and bake the brownies while children help with the decorating.
Once the marshmallows have been coated and are cool enough to handle, kids can add the faces.
Candy eyes are another easy option for younger children who may find decorating gel difficult to control.
You can even turn the decorating stage into a small creative challenge: give everyone a few marshmallows and let them create their own ghost expressions.
The result does not have to be perfect. In fact, slightly different faces can make the finished brownies look even more charming.
How to Make These Brownies Ahead
If you are preparing for a Halloween party, you can make the brownie base ahead of time.
Bake the brownies the day before and allow them to cool completely. Store them covered until you are ready to decorate.
The marshmallow ghosts can also be prepared ahead of serving.
For the best appearance, assemble the brownies once the ghosts are ready and keep the finished treats covered until serving.
This approach makes party preparation easier because the baking and decorating stages can be divided across different times.
How to Store Halloween Ghost Brownies
Store the finished brownies in an airtight container at room temperature for up to 3 days.
For longer storage, you can refrigerate them, although the marshmallows may become firmer when chilled.
If refrigerated, allow the brownies to sit at room temperature briefly before serving if you prefer a softer marshmallow texture.
Keep the brownies protected from moisture and heat so the white chocolate coating remains as neat as possible.
Serving Ideas
These ghost brownies are ideal for many Halloween occasions.
Halloween Parties
Place them on a large platter alongside other Halloween treats. Their individual portions make them easy for guests to pick up.
Family Movie Night
Serve the brownies during a Halloween movie night with other seasonal snacks.
School or Community Events
The brownies can be cut into manageable portions and arranged on a large tray for sharing.
Trick-or-Treat Gatherings
If you are hosting friends and family after trick-or-treating, these brownies make a fun dessert that fits naturally into the Halloween theme.
Frequently Asked Questions
Can I use candy melts instead of white chocolate chips?
Yes. White candy melts can be used in place of white chocolate chips for coating the marshmallows.
Can I use mini marshmallows?
The recipe is designed around 12 large marshmallows, which create more visible ghost shapes. Mini marshmallows will produce much smaller decorations and may be more difficult to place on individual brownies.
Can I use homemade brownies?
Absolutely. The recipe already uses homemade brownie batter, but you can also substitute your favorite homemade brownie recipe as long as it works well in a 9×13-inch pan.
How do I prevent the marshmallow ghosts from sliding?
Use a small amount of melted white chocolate around the base of each marshmallow. Once it sets, it helps secure the ghost to the brownie.
Why did my white chocolate become thick?
White chocolate can become thick if overheated or if moisture gets into it. Melt it gradually in short intervals and stir between each interval.
Can I decorate the ghosts with candy eyes?
Yes. Candy eyes are an easy and kid-friendly alternative to black decorating gel.
How long do the brownies last?
The brownies can be stored in an airtight container at room temperature for up to 3 days. Refrigeration can extend storage, but it may make the marshmallow topping firmer.
Nutrition Information
The estimated nutrition per brownie is:
| Serving Size | Calories | Protein | Carbs | Fat | Fiber | Sugar |
|---|---|---|---|---|---|---|
| 1 brownie | 380 | 4g | 52g | 18g | 3g | 40g |
Nutrition disclaimer: Nutrition values are estimates and can vary depending on the specific ingredients, brands, portion sizes, and preparation methods used. For specific dietary needs, calculate nutrition using the exact ingredients and quantities in your recipe or consult a qualified nutrition professional.
Why These Ghost Brownies Are Perfect for Halloween
Halloween desserts do not need complicated designs to make an impact. Sometimes the simplest decorations are the most effective, and these brownies are a great example.
The dark, fudgy brownie base provides the perfect contrast for the bright white marshmallow ghosts. Once the black eyes and mouths are added, the ghosts immediately become the centerpiece of the dessert.
They also offer the right balance between convenience and creativity. The brownie batter is straightforward, the marshmallows require only a simple white chocolate coating, and the faces can be created with just a few dots and lines.
That makes these brownies approachable for beginner bakers while still giving experienced bakers plenty of opportunities to personalize the presentation.
They are also easy to adapt for different Halloween celebrations. Make the ghosts cute for a children’s party, give them spooky expressions for an adults-only Halloween gathering, or create a mixture of different faces for a playful dessert table.
Final Thoughts
These Spooky Halloween Ghost Brownies combine everything you want in a festive Halloween dessert: rich chocolate brownies, sweet marshmallow ghosts, simple decorations, and plenty of visual appeal.
The homemade brownie base is fudgy and chocolatey, while the white chocolate-coated marshmallows create adorable ghosts that seem to float above each brownie. A few simple black details are all it takes to bring their spooky expressions to life.
Best of all, you do not need advanced decorating skills. If you can melt chocolate and draw two eyes and a mouth, you can make these Halloween treats.
Whether you are preparing a Halloween party, baking with your children, or simply looking for a fun seasonal dessert, these ghost brownies are sure to make your celebration feel a little more festive.
Bake the brownies, create the marshmallow ghosts, give each one a spooky face, and get ready for a Halloween treat that is almost too cute to eat.