
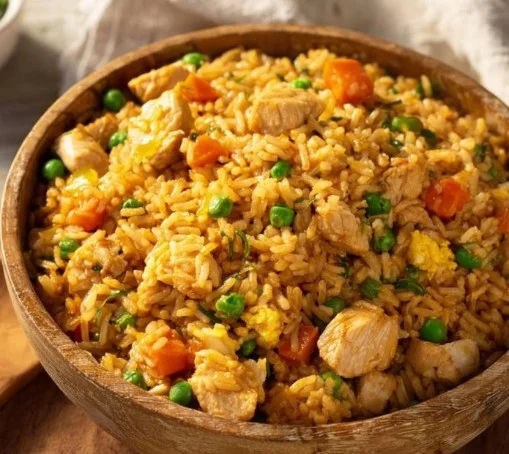
Hibachi Chicken Fried Rice Recipe
Hibachi Chicken Fried Rice is a delightful dish that brings the flavors of Japanese teppanyaki right to your kitchen. With tender diced chicken, vibrant mixed vegetables, and perfectly seasoned fried rice, it delivers a satisfying experience in every bite. The combination of sesame oil and soy sauce creates a savory, umami-rich flavor profile that’s both comforting and exciting. If you’re looking for a quick dinner option or a dish to impress friends at a gathering, this recipe won’t disappoint.
The recipe shines not only in its taste but also in its texture—often fluffy, yet slightly crispy rice contrasts beautifully with the tender chicken and crunchy vegetables. It’s a versatile meal that works great for dinner or as a side dish at parties. You’ll love how easy it is to prepare, making it perfect for weeknight dinners or special occasions alike.
Prep Time, Cook Time, Total Time:
Prep Time: 10 min | Cook Time: 25 min | Total Time: 35 min
How to Make Hibachi Chicken Fried Rice
Ingredients:
- 2 cups cooked rice
- 1 cup diced chicken
- 2 tablespoons soy sauce
- 1 tablespoon sesame oil
- 1 cup mixed vegetables (peas, carrots, corn)
- 2 eggs, beaten
- 2 green onions, sliced
- Salt and pepper to taste
Step-by-Step Instructions:
- Heat sesame oil in a large skillet or wok over medium-high heat. This helps the oil evenly coat the bottom of the pan, ensuring a non-stick surface for your ingredients.
- Add diced chicken and cook until browned and cooked through. It’s essential to give the chicken enough time to develop a nice golden-brown color, which adds flavor.
- Push the chicken to the side and scramble the eggs in the same pan. This technique makes sure the flavors merge and you don’t dirty an extra dish!
- Add the mixed vegetables and cooked rice to the skillet. Stir to combine everything well, letting the veggies soften a bit.
- Pour soy sauce over the mixture and stir everything together. This is where the savory flavor really comes alive, so make sure to mix well!
- Cook for an additional 3-4 minutes until the rice is heated through and well-combined. This step helps deepen the flavors.
- Stir in green onions and season with salt and pepper to taste. Green onions add a fresh crunch that brightens the dish.
- Serve hot as a main course or side dish. This dish is fantastic on its own or paired with your favorite proteins.
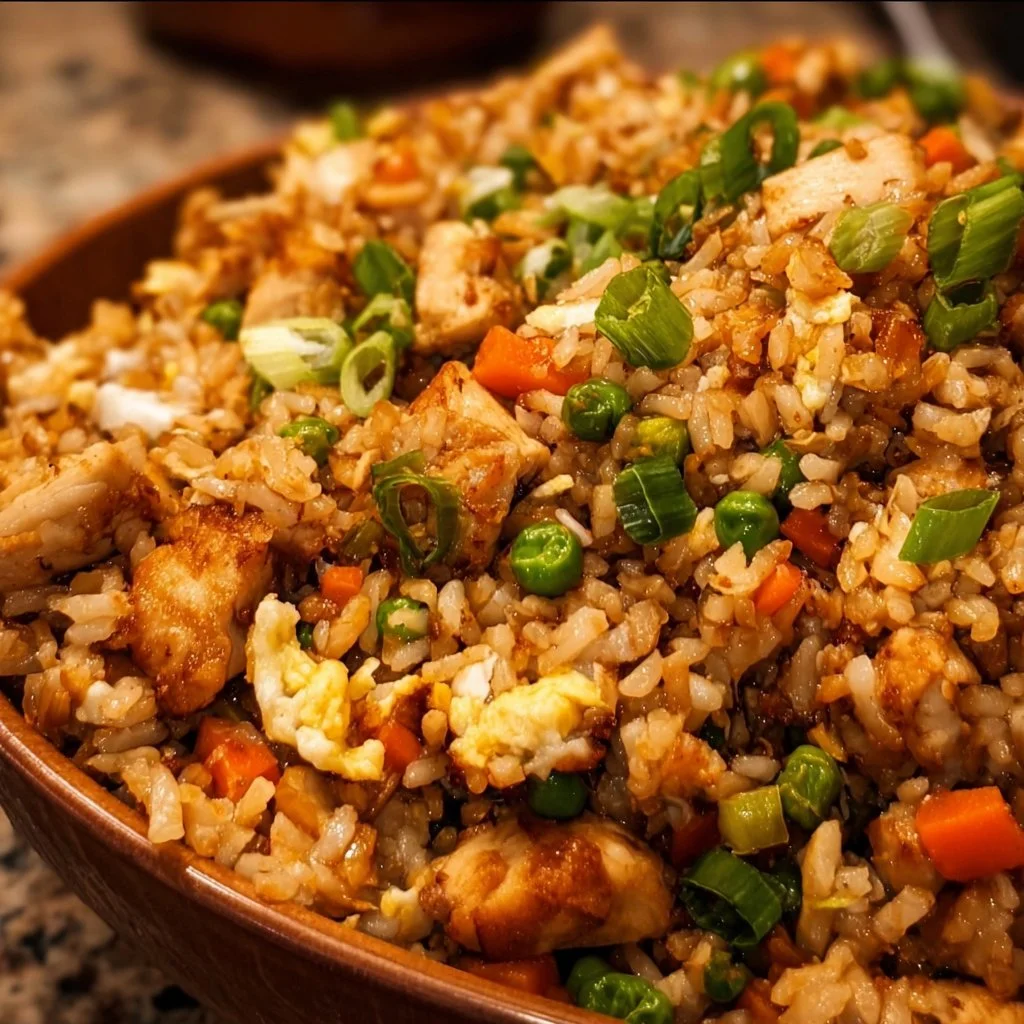
Pro Tips
- Use Day-Old Rice: For the best texture, use rice that was cooked and refrigerated the day before. Freshly cooked rice can make the dish mushy.
- Don’t Overcrowd the Pan: If you’re making a large batch, consider cooking in two separate batches. Overcrowding can lead to steaming rather than frying.
- Get Creative with Veggies: You can add or substitute your favorite veggies like bell peppers, broccoli, or snap peas. Each will bring a unique taste and color!
- Adjust the Seasoning: Start with less soy sauce, then gradually add more to taste, as it’s easier to add than to remove saltiness.
- Experiment with Proteins: If you want to mix things up, try using shrimp or tofu instead of chicken for a different take on the dish.
Why You’ll Love This Recipe
Hibachi Chicken Fried Rice is favored not only for its mouthwatering taste but for its simplicity. It perfectly melds together hearty ingredients; each bite delivers varied textures and flavors. It’s easy to customize to satisfy different dietary needs, making it a go-to option for many. Whether served as a solo meal or alongside grilled meats, it offers plenty of versatility.
This dish is also perfect for families and gatherings—everyone can tailor their plate to their preferences. Plus, it’s a fantastic way to use leftover ingredients, reducing food waste while ensuring a delicious meal.
How to Serve Hibachi Chicken Fried Rice
For a lovely presentation, serve your Hibachi Chicken Fried Rice in a vibrant bowl, garnished with additional sliced green onions or sesame seeds. Pair it with some grilled shrimp or beef, and a side of miso soup for an authentic hibachi experience. You can serve it alongside a crisp cucumber salad dressed with rice vinegar to round out the meal.
Drinks that complement this dish well include iced green tea or a light beer, both of which will enhance the overall dining experience.
How to Store Hibachi Chicken Fried Rice
When it comes to storing leftovers, you have multiple options:
- Fridge: Store the fried rice in an airtight container. It will stay fresh for about 3-4 days.
- Freezer: For longer storage, freeze it in a freezer-safe container, where it can last up to 2 months. Make sure to label the container for easy identification.
- Shelf: Fried rice is best consumed quickly, as it doesn’t store well on the counter.
Tips to Make Hibachi Chicken Fried Rice
- Timing is Key: Prepare all your ingredients beforehand to ensure a quick cooking process. The whole dish often comes together in about 10 minutes.
- Experiment with Oils: Consider using a blend of sesame oil and vegetable oil to balance flavor and prevent burning.
- Finishing Touches: Drizzling a bit of sriracha or adding chili flakes can give your fried rice an extra kick if you like it spicy!
Variation
- Vegan: Swap the chicken for tofu and use a vegan soy sauce alternative. Replace the scrambled eggs with chickpea flour for a plant-based protein boost.
- Spicy: Add sriracha or other hot sauce to the rice mix for a spicy kick.
- Low-Carb: Substitute rice with cauliflower rice for a lower-carb option that still satisfies.
Nutrition Information
- Serving Size: 1 cup
- Calories: 400
- Protein: 28g
- Carbs: 45g
- Fat: 14g
- Fiber: 3g
- Sugar: 2g
This dish is rich in protein, making it filling, while the carbs from the rice provide a good energy source. However, watch the portion sizes if you are monitoring carb intake.
Storage and Reheating
To reheat leftover Hibachi Chicken Fried Rice:
- Microwave: Place the rice in a microwave-safe bowl with a splash of water to create steam. Cover and heat for 2-3 minutes.
- Oven: Preheat to 350°F (175°C), spread the rice on a baking pan, and heat for about 15-20 minutes, stirring occasionally.
- Skillet: Heat a splash of oil in a skillet over medium heat. Add the rice, breaking up any clumps, and stir until heated through for about 5-7 minutes.
Customization Ideas
Feel free to adjust flavors by adding different sauces like teriyaki or hoisin. You can also top the dish with fried eggs or serve it with avocado slices for added creaminess. Use a variety of proteins according to what you have available or your personal preference.
Common Mistakes to Avoid
- Using Too Much Oil: While oil helps in frying, too much can make the dish greasy. Stick to the right amount for better texture.
- Not Allowing the Rice to Dry: Freshly cooked rice can clump together. Allow it to cool and dry out a bit before using.
- Ignoring Flavor Development: Make sure to season well throughout the cooking process to layer the flavors effectively.
- Overcooking the Chicken: Always ensure the chicken is cooked through but not overdone to keep it juicy.
Serving Occasions
This Hibachi Chicken Fried Rice is perfect for family dinners, especially on busy weeknights when you’re short on time. It’s also great for potlucks, and parties, or even as a quick lunch option to enjoy during the week.
Why Make This Recipe
Hibachi Chicken Fried Rice stands out because it’s not just a simple rice dish; it encapsulates a complete meal with protein, veggies, and carbs in one bowl. Unlike many fried rice recipes, this one emphasizes fresh flavors and the delightful crunch of vegetables, creating a more enjoyable and wholesome experience.
FAQs
-
Can I use instant rice?
Yes! Just make sure to cook it according to package instructions before using it. -
What’s the best type of rice to use?
Long-grain rice or jasmine rice works best for fried rice due to its fluffy texture. -
Can I add more vegetables?
Absolutely! You can mix in any veggies your heart desires. -
Is this dish gluten-free?
If gluten is a concern, make sure to use gluten-free soy sauce. -
Can I freeze the leftovers?
Yes! Just ensure they are in an airtight container and thaw properly before reheating.
Disclaimer:
Nutrition information is approximate, as ingredients may vary significantly. Always double-check if you have specific dietary needs or restrictions.
Print
Hibachi Chicken Fried Rice
- Total Time: 35 minutes
- Yield: 4 servings 1x
- Diet: Non-Vegetarian
Description
A delightful dish that brings the flavors of Japanese teppanyaki to your kitchen, featuring tender chicken, vibrant vegetables, and seasoned fried rice.
Ingredients
- 2 cups cooked rice
- 1 cup diced chicken
- 2 tablespoons soy sauce
- 1 tablespoon sesame oil
- 1 cup mixed vegetables (peas, carrots, corn)
- 2 eggs, beaten
- 2 green onions, sliced
- Salt and pepper to taste
Instructions
- Heat sesame oil in a large skillet or wok over medium-high heat.
- Add diced chicken and cook until browned and cooked through.
- Push the chicken to the side and scramble the eggs in the same pan.
- Add the mixed vegetables and cooked rice to the skillet.
- Pour soy sauce over the mixture and stir everything together.
- Cook for an additional 3-4 minutes until the rice is heated through.
- Stir in green onions and season with salt and pepper to taste.
- Serve hot as a main course or side dish.
Notes
Use day-old rice for best results and feel free to get creative with your choice of vegetables.
- Prep Time: 10 minutes
- Cook Time: 25 minutes
- Category: Main Course
- Method: Stir-Frying
- Cuisine: Japanese
Nutrition
- Serving Size: 1 cup
- Calories: 400
- Sugar: 2g
- Sodium: 800mg
- Fat: 14g
- Saturated Fat: 2g
- Unsaturated Fat: 8g
- Trans Fat: 0g
- Carbohydrates: 45g
- Fiber: 3g
- Protein: 28g
- Cholesterol: 220mg