
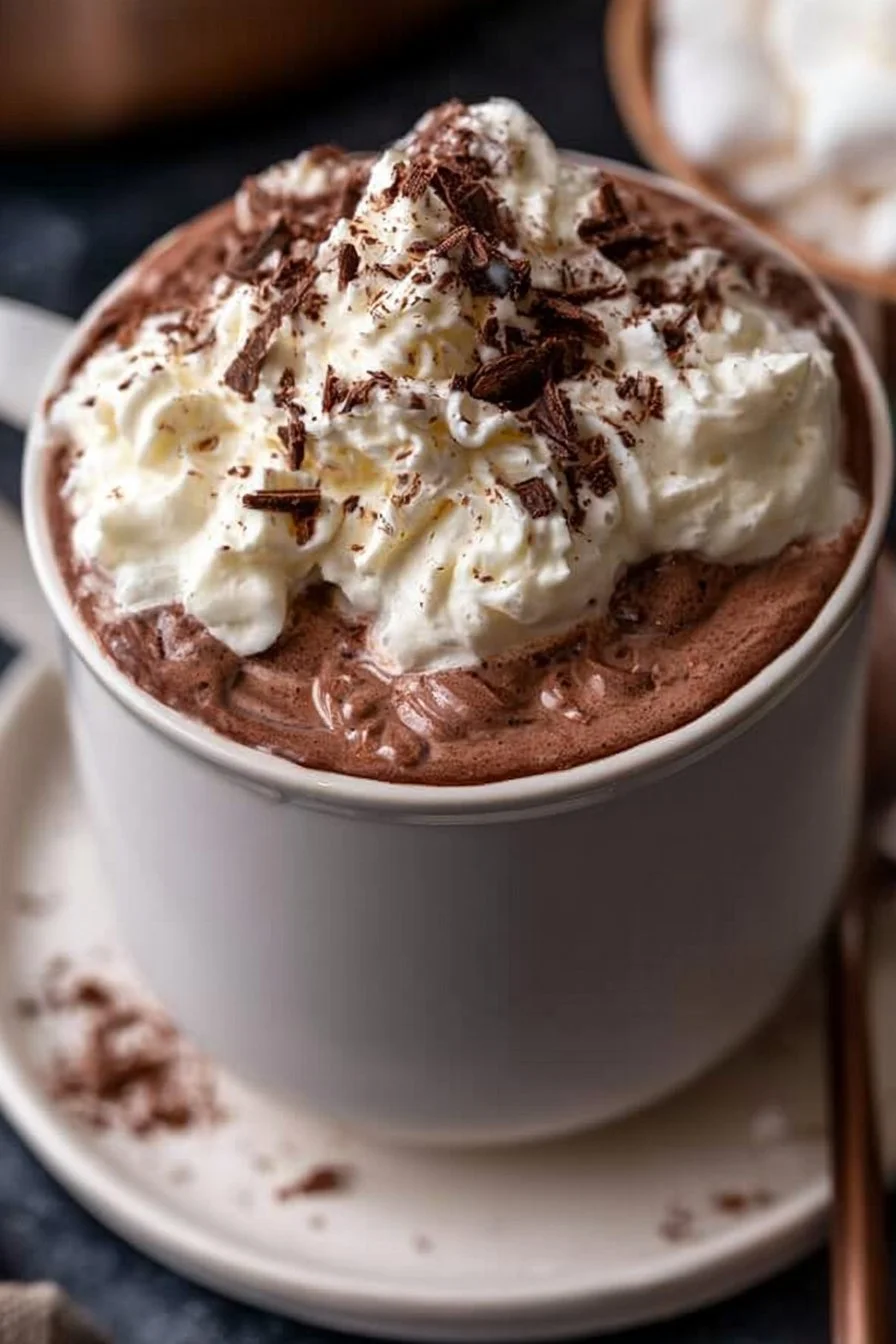
Homemade Hot Chocolate Recipe with Whipped Cream | Creamy hot chocolate recipe, Hot chocolate recipe homemade, Homemade hot cocoa
When the chill of winter settles in, few things are as comforting as a cup of homemade hot chocolate. This rich, creamy delight not only warms you from the inside out but also serves as a delightful treat that brings a sense of nostalgia for many. The combination of luscious chocolate, warm milk, and a touch of sweetness creates a flavor profile that is both indulgent and comforting. The addition of whipped cream on top makes it an irresistible experience, enhancing the richness of every sip. Whether enjoyed alone or shared with loved ones, this hot chocolate is perfect for cozy evenings or festive gatherings.
The beauty of homemade hot cocoa lies in its simplicity. You can control the sweetness, adjust the chocolate intensity, and even play with the toppings to suit your taste preferences. This recipe employs a blend of dark and milk chocolate for a balanced flavor that is neither too bitter nor overly sweet. The whipped cream adds a silky texture that complements the hot chocolate’s richness, making each sip a luxurious experience. Picture yourself nestled beneath a warm blanket, cradling a steaming mug of this deliciousness, feeling the warmth spread from your fingertips to your heart.
This homemade hot chocolate is ideal for various occasions. Serve it at family movie nights, holiday gatherings, or simply as a soothing drink after a long day. It’s also a fantastic choice to warm up with during holiday parties, making it an excellent addition to your beverage menu. The inviting aroma and rich taste will surely brighten the mood and engage everyone’s senses, leaving them asking for more.
In the following sections, we will dive deeper into this delightful hot chocolate recipe, exploring its unique features, the importance of each ingredient, and tips to customize and serve your creation, ensuring you have not just a drink, but a delicious experience to savor and share.
What Makes This Recipe Special
What sets this hot chocolate recipe apart from the myriad of alternatives is its careful balance of flavors and textures. Unlike those instant mixes that often lack depth, this homemade version offers a complex, indulgent taste built upon the richness of both dark and milk chocolate. The blending of these two types of chocolate allows for a delightful harmony between sweetness and bitterness, providing a satisfying flavor profile that will appeal to both children and adults alike.
Moreover, this recipe emphasizes the importance of using high-quality ingredients. The choice of chocolate greatly influences both the taste and creaminess of your hot chocolate. When using premium chocolate, you ensure that your beverage will have a luxurious mouthfeel and a deep, satisfying flavor. The same can be said for milk; whole milk or cream yields a richer result compared to low-fat alternatives. The experience of sipping this hot chocolate is not just about flavor; it’s about the overall sensory satisfaction it provides, from the inviting aroma to the silky texture.
Additionally, the process of preparing hot chocolate from scratch allows for customization at every level. If one prefers a bit of spice, a pinch of cinnamon or a drop of vanilla extract can elevate the experience. For those preferring a smoother experience, the use of a hand whisk or a milk frother can achieve a velvety consistency. Each cup can be adjusted to reflect personal tastes, ensuring that no two servings are ever the same.
Lastly, the method of preparation brings a tactile element to brewing your own hot chocolate that simply can’t be replicated with powdered mixes. Heating the milk slowly and watching as the chocolate melts creates an anticipatory moment that heightens the whole experience. There’s something inherently joyful about making hot cocoa that involves gathering ingredients, creating a blend of flavors, and enjoying the reward of your efforts.
Ingredient Overview and Helpful Notes
In the recipe for this creamy hot chocolate, there are several key ingredients that work together to create a warm, luscious drink. Let’s take a closer look at the main components and their roles:
Milk
Milk serves as the base of the hot chocolate, providing a creamy texture that enhances the drink’s body. Whole milk is recommended for the richest experience; however, if you prefer a lighter option, you can use 2% milk. The fat content in whole milk helps to create a velvety mouthfeel, while low-fat versions may result in a thinner consistency. For dairy-free alternatives, oat milk or almond milk can be used, though they will alter the flavor slightly.
Cocoa Powder
The cocoa powder is essential for providing the deep chocolate flavor. Use a high-quality unsweetened cocoa powder for the best results, as this will contribute depth and richness to the hot chocolate. Dutch-process cocoa can yield a smoother taste, while natural cocoa gives a slightly brighter chocolate flavor. Just like with chocolate bars, the quality of the cocoa powder you choose can significantly influence the overall flavor and quality of your hot chocolate.
Chocolate
This recipe integrates both dark and milk chocolate to achieve a delightful balance of sweetness and richness. The dark chocolate adds a complex flavor profile with hints of bitterness, while the milk chocolate lends its sweet, creamy attributes to create a harmonious blend. When selecting your chocolate, opt for real chocolate bars rather than chips, as they tend to melt more smoothly, imparting a luxurious texture to the drink.
Sugar
Sugar adds just the right level of sweetness, balancing out the bitterness of the cocoa and dark chocolate. The amount can be adjusted according to personal preference, but starting with two tablespoons is a good baseline. Consider using alternatives like honey or maple syrup, which can impart their unique flavors to the hot chocolate, though you may need to adjust the quantity based on sweetness levels.
Whipped Cream
While technically optional, whipped cream transforms this hot beverage into a comforting treat. Not only does it add a delightful layer of sweetness and creaminess, but it also allows for a visual appeal when it comes to serving. Using heavy cream results in a thicker, more stable whipped cream, while lighter creams may not hold their shape as well. You can enhance your whipped cream by adding a splash of vanilla extract to create a flavorful topping.
When working with these ingredients, fresh, high-quality options will yield the best results. Ensure that your milk is not nearing its expiration date, and check that your chocolate isn’t past its prime to avoid any off-flavors. The more care you take in selecting your components, the better your homemade hot chocolate will turn out.
Nutrition & Recipe Details
Nutritional values may vary depending on the ingredients, brands, portion sizes, and preparation methods you choose. Here’s a general breakdown of what you can expect:
| Item | Value |
|---|---|
| Prep time | 5 minutes |
| Cook time | 10 minutes |
| Store time | Up to 3 days in the fridge |
| Calories | Approximately 350 per serving |
| Protein | 8 grams |
| Carbohydrates | 45 grams |
| Fat | 15 grams |
How to Make Homemade Hot Chocolate
Creating homemade hot chocolate is not only simple but also a fun process that can engage even the youngest family members. Before diving into the cooking steps, ensure that your ingredients are gathered and measured out. Having everything prepared makes the process smoother.
You will need a small saucepan, a whisk (or a spoon if a whisk is not available), and perhaps a heat-resistant spatula for stirring the chocolate. A measuring cup will help in pouring milk, while a cutting board and knife will be necessary for chopping the chocolate.
Ingredients
Here are the ingredients you’ll need for this delicious hot chocolate:
| Ingredient | Quantity |
|---|---|
| Milk | 2 cups |
| Cocoa Powder | 2 tablespoons |
| Dark Chocolate, chopped | 2 ounces |
| Milk Chocolate, chopped | 2 ounces |
| Sugar | 2 tablespoons |
Before starting, make sure the chocolate is chopped into small pieces. This will help it melt evenly and quickly. Have a whisk ready to mix everything thoroughly, ensuring there are no lumps of cocoa powder or sugar.
Step-by-Step Instructions
Making homemade hot chocolate is as easy as following these straightforward steps. The process combines a few simple techniques to yield a velvety drink that is perfect for warming up on a cold day.
-
Heat the Milk: Begin by pouring 2 cups of milk into a small saucepan. Place the saucepan over medium heat. Monitor the milk closely; you’re looking for it to warm through, not boil. You should see steam rising and gentle bubbles forming along the edges.
-
Whisk in Cocoa Powder and Sugar: Once the milk is warmed to the desired level, take it off the heat and immediately whisk in 2 tablespoons of cocoa powder and 2 tablespoons of sugar. The goal here is to ensure that both the cocoa and sugar are fully dissolved into the milk. The result should be a uniform, chocolatey liquid without clumps. If necessary, return the saucepan to low heat to help the ingredients meld if they have trouble combining.
-
Add Chocolate: Next, add the chopped dark and milk chocolate to the saucepan. Stir continuously until the chocolate has completely melted and integrated into the mixture. This should create a creamy texture that is indicative of well-made hot chocolate. If you find that bits of chocolate are sticking to the bottom, don’t hesitate to return the saucepan to low heat briefly.
-
Serve Your Hot Chocolate: Once everything is melted and smooth, remove the saucepan from the heat again. Carefully pour the hot chocolate into mugs. This recipe typically serves 2, so adjust based on your needs! Top with whipped cream if desired, and perhaps sprinkle a little cocoa powder or chocolate shavings on top for a luxurious finish. Enjoy your rich, homemade hot chocolate!
Understanding the Flavor and Texture
When you prepare this homemade hot chocolate, you can expect a sumptuous experience that delights the senses. The rich aroma wafting from your mug is just the beginning—the flavors beautifully merge together to form a soothing symphony of chocolate notes complemented by the warmth of milk. The depth of flavor primarily comes from the balance of dark and milk chocolate, creating a beautifully rich drink that’s neither overly sweet nor heavy-handed.
Each sip should provide a silky texture that envelops your palate, indicating that you have properly melted the chocolate and fused it with the milk. The whipped cream on top adds an instant creaminess that contrasts wonderfully with the hot liquid beneath. A well-made cup of cocoa should feel luxurious and indulgent, leaving you wanting just one more sip.
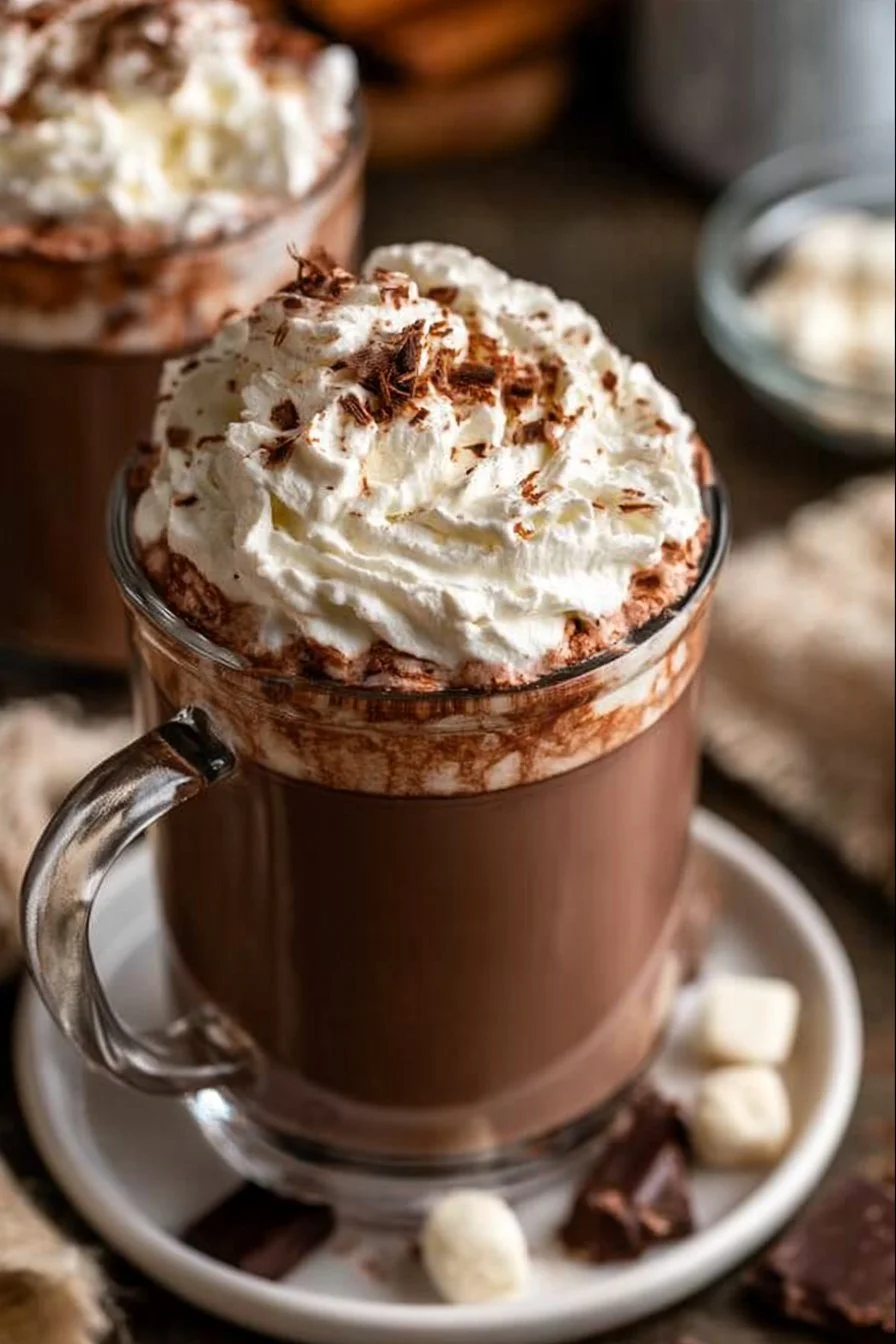
Visually, the drink is a deep, inviting brown that calls to mind the comfort of chilly winter evenings. A dollop of whipped cream adds a delightful white contrast that hints at the creaminess to come. The ribbons of melted chocolate mixed into the warm milk create streaks of darker color, offering an aesthetic charm that matches the drink’s deliciousness.
Recognizing the success of your hot chocolate relies on several factors: a smooth, homogenous consistency without clumps; a balanced flavor where no single element overwhelms the others; and that all-important rich and creamy mouthfeel. A well-executed hot chocolate will be a warm embrace in a mug, perfect for moments of relaxation or joy.
Pro Tips
Even small techniques can elevate your hot chocolate experience from good to sensational. Here are some valuable tips to keep in mind when preparing your homemade hot chocolate:
| Tip | Description |
|---|---|
| Use High-Quality Chocolate | The chocolate you choose can significantly impact the flavor of your hot chocolate. Opt for bars over chips to ensure a smooth melt. |
| Don’t Boil the Milk | Heating the milk too quickly can lead to scalding, which affects flavor. Heat it gently to ensure a pleasant taste and texture. |
| Experiment with Flavors | Add a pinch of sea salt, vanilla extract, or even a shake of cinnamon to elevate your hot chocolate’s flavor profile. |
| Whisk for Texture | A whisk helps to aerate the hot chocolate while mixing, contributing to a lighter texture and ensuring everything is well incorporated. |
When preparing your hot chocolate, remember to enjoy the process. Take your time, and feel free to experiment with flavors that resonate with you. These tips can enhance not only the flavor but also the enjoyment of making that quintessential winter beverage.
Why You’ll Love This Recipe
This homemade hot chocolate recipe promises more than just a tasty beverage; it offers a sensory experience that nourishes both body and soul. Its luxurious flavor, combined with the ability to easily customize according to taste preferences, makes it a versatile drink suitable for any occasion. You can make it richer with more chocolate or sweeten it according to your palate, ensuring it suits every individual’s enjoyment.
In terms of preparation, this chocolate drink can be whipped up quickly, making it perfect for busy weeknights or spontaneous get-togethers. You don’t need any special equipment or skills to succeed; just some basic cooking tools and a little patience as you heat your ingredients. It is an approachable recipe ideal for novice cooks who wish to impress friends and family alike. The end result is an undeniably decadent drink that feels more gourmet than home-cooked.
Additionally, this recipe wins in terms of accessibility. The ingredients are readily available at most grocery stores, and they require minimal prep time. It’s not just a drink; you can easily turn this hot chocolate into a substantial dessert by pairing it with cookies, whipped pies, or marshmellows. This adaptability encourages creativity and personalization, allowing everyone to enjoy a cup that feels uniquely theirs.
The instant gratification that comes from crafting your own hot chocolate adds to the overall joy. The process is uncomplicated yet satisfying, and there’s nothing quite like savoring a steaming mug of a drink you made with your own hands after a long day.
How to Serve Homemade Hot Chocolate
Serving homemade hot chocolate is an art that involves both visual appeal and tasty accompaniments. Begin with perfectly brewed cups of hot chocolate, making sure each serving looks inviting. Here’s how to elevate the presentation:
-
Garnish Thoughtfully: A dollop of freshly whipped cream is a classic topping that not only adds creaminess but also enhances the hot chocolate’s appearance. To add flair, drizzle chocolate or caramel sauce on top of the whipped cream, or sprinkle a hint of cocoa or cinnamon. You could also consider using chocolate shavings for an elegant touch.
-
Pair with Treats: When serving hot chocolate, consider complementing it with cookies, brownies, or even a slice of rich chocolate cake. The sweetness from these baked goods pairs wonderfully with the drink, creating a delightful indulgent experience.
-
Use Fun Mugs: Choose mugs that resonate with the season or your guests. Festive holiday mugs or quirky designs can make the hot chocolate experience feel more unique and fun. This little detail can enhance the overall enjoyment of the drink.
-
Create a Hot Chocolate Bar: For parties or gatherings, set up a hot chocolate bar where guests can customize their own drinks with toppings such as mini marshmallows, crushed candies, peppermint sticks, or flavored syrups. This interactive element makes it a fun social event, encouraging creativity while enjoying a warm beverage.
-
Pair with Beverages: For a more festive atmosphere, consider offering this hot chocolate alongside a light, sparkling drink or even freshly brewed coffee for those who want a caffeine boost. Complementary flavors can enhance your hot chocolate experience, making it even more enjoyable.
Presenting homemade hot chocolate beautifully not only enhances the appeal of the drink but also enriches the experience for your guests. Each small detail contributes to a delightful experience that is sure to leave a lasting impression.
How to Store Homemade Hot Chocolate
Storing homemade hot chocolate requires a bit of care to maintain its rich flavor and silky texture. Once you’ve finished brewing, if you have any leftover hot chocolate, it’s essential to cool it down gradually before storing it.
-
Cool Down: Allow the hot chocolate to reach room temperature. Avoid placing it directly in the fridge while still hot, as this could create condensation and affect the texture and taste.
-
Storage Options: Store leftover hot chocolate in an airtight container or resealable bag. Glass jars or food-safe plastic containers with lids work effectively. In general, homemade hot chocolate can be stored in the refrigerator for up to three days.
-
Freezing Alternative: If you happen to have a significant amount leftover, consider freezing it for later use. Pour the cooled hot chocolate into freezer-safe containers, leaving some space at the top for expansion. It can be frozen for up to a month. When ready to enjoy again, thaw it overnight in the refrigerator and reheat gently on the stove.
-
Reheating Tips: When you’re ready to enjoy your stored hot chocolate, reheat it gently over low heat on the stovetop while stirring to restore its creamy texture. Avoid overheating or bringing it to a boil, as this can affect the smoothness.
Keep in mind that reheated hot chocolate may require a touch of additional milk to restore the desired consistency. This will help reclaim the delicious richness as if it were freshly made.
Tips to Make Homemade Hot Chocolate
As you embark on creating your hot chocolate experience, here are some practical cooking tips to help you enhance the quality and flavor of your drink:
-
Quality Control: Ensuring you select high-quality cocoa powder and chocolate bars will have a significant impact on the overall flavor of your hot chocolate. Avoid processed alternatives that contain fillers or artificial flavors.
-
Precision in Heat: Manage the temperature of your cooking effectively. Heating milk too fast can produce scalded milk, which can lead to a slightly burnt taste. Always opt for low to medium heat and monitor closely.
-
Finishing Touches: Don’t forget that the final texture can be improved by whisking continuously while you mix the hot chocolate. This will incorporate air and create a frothy finish. You want every sip to feel light and smooth.
-
Taste as You Go: Throughout the process, feel free to taste and adjust sweetness as required. Everyone’s palate is different, and catering it to your preference will enhance enjoyment with every cup.
Paying attention to these details while preparing hot chocolate can make a significant difference in both taste and texture. Simple adjustments will lead to a richer, satisfying hot chocolate experience.
Variations and Substitutions
Exploring different variations and substitutions for this hot chocolate recipe allows for creativity and personal preferences to shine. Here are some ideas to consider:
-
Dairy-Free Version: For a dairy-free option, substitute regular milk with almond milk, oat milk, or coconut milk. Each option will impart a different flavor profile, adding dimension to the drink.
-
Sweetener Alternatives: Sugar can easily be replaced with natural sweeteners, such as agave syrup, honey, or even coconut sugar. Each one will provide a unique sweetness and character to the hot cocoa.
-
Spiced Hot Chocolate: If you enjoy a bit of warmth, consider adding spices like cinnamon, nutmeg, or even a pinch of chili powder for a spiced hot chocolate. This adds a delightful twist that can brighten your traditional cocoa.
-
Peppermint Variation: For a festive flair, infuse your hot chocolate with peppermint extract or serve it with crushed peppermint candy on top. This variation is particularly delightful around the holidays.
-
Marshmallow Swirl: Another fun twist involves mixing in mini marshmallows or topping the drink with a toasted marshmallow for a s’mores-inspired hot chocolate experience.
These variations allow you to serve hot chocolate that matches the season or your guests’ preferences. Feel free to mix components until you create a version that resonates best with you.
Storage and Reheating
When it comes to leftovers, proper storage and reheating techniques ensure that your homemade hot chocolate can be enjoyed again. Here’s how to approach this:
-
Portion Control: After cooling the hot chocolate to room temperature, divide it into serving-sized portions in airtight containers. This allows for easy reheating later without needing to defrost the entire batch.
-
Reheat Properly: When you are ready to consume your stored hot chocolate, reheat it slowly on the stovetop, stirring frequently. You can also use a microwave, but be cautious to heat in increments to avoid boiling over.
-
Add Moisture: If the hot chocolate seems thick after refrigeration, consider adding a small splash of milk or cream while reheating. This will help restore the smooth, creamy texture and enhance the overall flavor as it warms up.
-
Avoid Overheating: Always keep an eye on your hot chocolate when reheating. The goal is to warm it back to the drinking temperature without boiling, as excessive heat may alter its texture and flavor significantly.
By following these storage and reheating guidelines, you ensure that your homemade hot chocolate remains just as delicious when enjoyed later, preserving the quality of your original recipe.
Customization Ideas
Enhancing your homemade hot chocolate allows for personal touches, and helps create a drink that suits individual tastes. Here are some ideas to consider when looking to customize:
-
Flavor Adjustments: Experiment with flavor enhancements by incorporating flavored extracts. A drop of vanilla, hazelnut, or almond extract can provide interesting twists that diversify your usual hot chocolate.
-
Textural Adjustments: Mixing in heavy cream or a dollop of mascarpone cheese can elevate the creaminess level significantly. You can also blend in nut butters, adding not only creaminess but a nutty flavor dimension.
-
Garnishes and Toppings: Beyond the traditional whipped cream, you can consider using a chocolate drizzle, crushed cookies, or even a sprinkle of sea salt to add depth to your drink. Each topping transforms the presentation and adds a unique flavor burst.
-
Infusion Options: Infusing your hot chocolate with a variety of herbs and spices can yield delightful results. Fresh mint leaves, rosemary, or citrus zests can create intriguing flavor profiles that will surprise and delight.
The key is to explore and create a customized beverage that speaks to your preferences or the occasion, converting a simple cup of hot chocolate into a culinary experience.
Common Mistakes to Avoid
Navigating the intricacies of homemade hot chocolate may come with its challenges, but being aware of common missteps can help. Here are five to look out for, plus how to effectively avoid or correct them:
-
Scalding Milk: Allowing the milk to reach a boil can burn it, impacting the flavor of your hot chocolate. Keep heat on medium or low, and always monitor closely to avoid scalding.
-
Insufficient Mixing: Failing to thoroughly combine cocoa, sugar, and chocolate can lead to a lumpy texture. Make sure to whisk until everything is fully dissolved; if needed, return to low heat until incorporated.
-
Poor Chocolate Selection: Using low-quality chocolate or chocolate syrup can lead to an underwhelming flavor. Opt for higher-quality chocolate, opting for bars that melt smoothly into the milk.
-
Underestimating Sweetness: Not tasting the mixture before serving might result in a lack of desired sweetness. Always taste and adjust sweetness to your preference before serving.
-
Ineffective Storage: Allowing hot chocolate to cool improperly can lead to a watery consistency upon reheating. Always give it time to reach room temperature before storing it in airtight containers.
By being vigilant about these common mistakes, you can ensure a consistently excellent result every time you make hot chocolate, leading to a comforting experience worth indulging in.
Serving Occasions
Homemade hot chocolate is versatile and fits perfectly into various occasions throughout the year. Here are some ideal moments to serve this comforting drink:
-
Cozy Winter Evenings: Many people enjoy hot chocolate while snuggling up by the fireplace or watching movies on cold nights. It’s an excellent way to warm up and unwind after a chilly day outdoors.
-
Festive Gatherings: During the holiday season, a steaming pot of hot chocolate can enhance holiday festivities. Consider offering it at Christmas parties or family gatherings alongside seasonal treats and desserts.
-
Casual Get-Togethers: Planning a casual coffee date or get-together? Hot chocolate can serve as a warm beverage option that appeals to everyone, regardless of age, making it a perfect addition.
-
Post-Outdoor Activities: After a day of sledding, skiing, or just enjoying winter activities, hot chocolate is the perfect beverage to serve. It refreshes and replenishes energy levels, making for a rewarding end to fun-filled days.
With its capability to enhance various gatherings and provide warmth in different settings, this drink becomes more than just another warm beverage; it becomes a centerpiece of comfort and tradition.
Why Make This Recipe?
Choosing to make homemade hot chocolate is more than simply preparing a drink; it is an invitation to indulge and enjoy a culinary creation of your own making. The recipe shines due to its unique combination of rich chocolate flavors, the simplicity in preparation, and the ability to customize to personal taste. This versatility allows it to stand out compared to store-bought options.
Additionally, preparing this hot chocolate offers a gratifying experience. The process of slow-heating and melting creates an engaging moment rather than just a chore. There’s also the chance to experiment with flavors and gain confidence in your cooking skills, especially for beginners.
This recipe provides a sense of nostalgia that brings family and friends together as they gather to enjoy decadent flavors and warm memories. Whether recalling childhood memories of cozy evenings or creating new ones, serving your family and friends homemade hot chocolate creates lasting bonds and joyful experiences.
Finally, the make-it-your-own quality signifies that you will always have a recipe ready to satisfy cravings or entertain guests with a hospitable touch. This presence makes it a staple worth keeping in your household repertoire.
Make-Ahead Preparation
When time is of the essence, preparing ahead for hot chocolate is both feasible and beneficial. Here are some considerations for making this recipe in advance:
-
Ingredients Preparation: You can measure out cocoa and sugar ahead of time, storing them in airtight containers until ready to use. Separately chop the chocolate and store it in a cool, dry place, ready to be added when it’s time to prepare your drink.
-
Batch Cooking: If you’re expecting guests or planning a DIY hot chocolate bar, consider making a larger batch ahead of time. The hot chocolate can be made completely and stored in the refrigerator, allowing you to simply reheat it when you are ready to serve.
-
Servings Setup: For a gathering, you can prepare whipped cream in advance by whipping it with a little sugar and vanilla. Store it in the fridge until it’s needed for topping. This allows for a lovely presentation without much hassle at the moment.
-
Freshness Considerations: While the bulk of the preparation can be done in advance, whisking it fresh with your preferred toppings right before serving ensures a delightful texture and experience.
By approaching hot chocolate preparation with organization and foresight, you ensure that both you and your guests can enjoy a delicious drink without the last-minute pressure that sometimes comes with entertaining.
Equipment and Kitchen Preparation
The right kitchen tools can significantly improve the process of making homemade hot chocolate. Here are some essentials to consider:
-
Saucepan: A small to medium-sized saucepan is necessary for heating your milk and combining the ingredients. Non-stick or heavy-bottomed saucepans work best, as they allow even heating and minimize the risk of burning.
-
Whisk or Spoon: A whisk is invaluable for blending the cocoa and sugar into the milk, helping to achieve a smooth consistency. If a whisk isn’t available, a regular spoon works in a pinch; just ensure to mix thoroughly.
-
Measuring Cups and Spoons: Accurate measurement of your ingredients ensures the right ratios are maintained and consistencies achieved. A simple set of measuring cups and spoons will be sufficient.
-
Heat-Proof Containers: Depending on your storage plans for leftovers, ensure you have glass or BPA-free plastic containers that are heat-proof if you plan on storing hot chocolate directly.
-
Cutting Board and Knife: If you’re using chocolate bars, having a cutting board and a sharp knife handy for chopping facilitates ease of preparation.
Preparing your space with the necessary tools laid out makes the experience much smoother and enjoyable, allowing for a focus on the craftsmanship rather than logistical challenges.
FAQs
1. Can I use water instead of milk for hot chocolate?
Using water can create a thinner, less creamy texture since milk adds richness and creaminess. However, if you must avoid dairy, combining water with a small amount of dairy-free milk can help balance the flavors.
2. Can I use unsweetened almond milk?
Yes, unsweetened almond milk can be a great alternative to traditional milk. It will impart a slightly different flavor but will still yield a delicious hot chocolate.
3. How long can I store homemade hot chocolate in the fridge?
You can store homemade hot chocolate in the fridge for up to three days. Be sure to place it in an airtight container to maintain freshness.
4. Can I freeze homemade hot chocolate?
Yes, it can be frozen for up to one month. Make sure to store it in freezer-safe containers, leaving space for expansion. Thaw it in the fridge when ready to use.
5. What’s the best way to reheat leftover hot chocolate?
The best way to reheat hot chocolate is on the stovetop over low heat. Stir frequently to ensure even heating. You can also reheat it in the microwave but do so in short increments to prevent boiling.
6. Is it possible to make hot chocolate without cocoa powder?
While cocoa powder is a primary ingredient, you can make hot chocolate with all chocolate bars. Simply melt additional chocolate in your milk, adjusting sweetness to your taste.
7. How do I make my hot chocolate more chocolatey?
To enhance the chocolate flavor, either add more cocoa powder or a greater quantity of chocolate bars. You can also consider different types of chocolate for varied flavor profiles.
8. Can I add flavors to my hot chocolate?
Absolutely! Adding vanilla extract, peppermint extract, or spices such as cinnamon or nutmeg can enhance the flavor profile beautifully.
Disclaimer
Nutritional information is approximate and may vary based on ingredient brands, substitutions, portion sizes, and preparation methods.