
Indulge in Homemade Honey Buns: A Sweet Delight to Make Today!
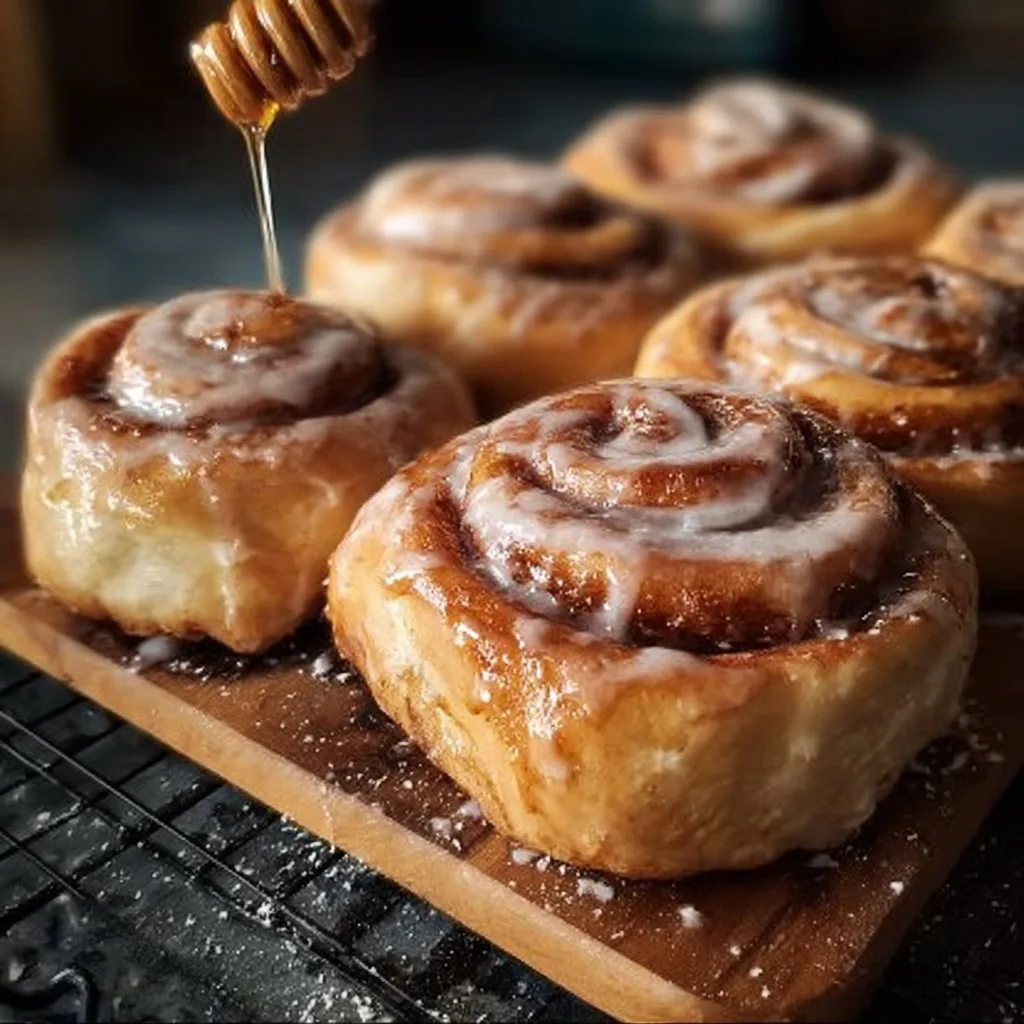
There’s something truly magical about homemade honey buns. They offer a burst of sweetness that dances on your palate, with a soft and fluffy texture that feels oh-so-good with every bite. Imagine pulling a freshly fried honey bun from the pan, coated in a glossy honey glaze, the warm center melting in your mouth. These delightful treats are perfect for any occasion, whether it’s a cozy breakfast with your loved ones or a sweet addition to your next gathering. When served warm, they provide comfort and joy—making them a beloved recipe to whip up any time you want a little sweetness in life.
Prep Time, Cook Time, Total Time:
Prep Time: 10 min | Cook Time: 25 min | Total Time: 35 min
How to Make Homemade Honey Buns
Ingredients
- 3 cup all-purpose flour
- 3 tablespoon granulated sugar
- 1 tablespoon instant yeast
- 1/2 teaspoon salt
- 1/2 cup warm water
- 1/3 cup honey
- 1 large egg
- 1 teaspoon vanilla extract
- 1/4 cup shortening (melted)
- Vegetable or peanut oil (for frying)
- 1/4 cup granulated sugar
- 1 1/2 teaspoon cinnamon
- 4 2/3 cup powdered sugar
- 2 1/2 tablespoon honey
- 1 tablespoon melted butter
- 1/2 teaspoon vanilla extract
- 1/4 teaspoon salt
- Warm water (as needed)
Step-by-Step Instructions
-
Activate the Yeast: In a bowl, combine the warm water, honey, and yeast. Let it sit for 5-10 minutes until it develops a nice frothy surface—this shows that the yeast is active and ready to work its magic!
-
Make the Dough: Once activated, mix in the egg, vanilla extract, melted shortening, sugar, salt, and flour into the yeast mixture. Stir until a soft, pliable dough forms. This is where the sweetness begins to take shape.
-
Knead and Rise: Knead the dough for 5-7 minutes until smooth and elastic. Cover it and let it rise in a warm place for 1-2 hours until it doubles in size. Allowing the dough to rise is essential for those fluffy honey buns!
-
Prepare the Rolls: Once risen, roll the dough into a rectangle and sprinkle the cinnamon-sugar mixture on top. Tightly roll it up from one long side, slice it into individual buns, and arrange them on a baking sheet or in a greased dish.
-
Fry the Buns: Heat vegetable or peanut oil in a deep skillet to 350°F. Carefully lower the buns into the hot oil, frying them for 2-3 minutes per side until golden brown. Drain on paper towels to remove excess oil.
-
Glaze and Serve: While the buns cool, make the honey glaze by whisking together powdered sugar, honey, melted butter, vanilla extract, and salt. Add warm water as necessary for your desired glaze consistency. Once the buns have cooled slightly, dip them into this heavenly glaze before serving!
Pro Tips
- Check Yeast Freshness: Always use fresh yeast for the best rise. If unsure, perform the water and yeast test before starting.
- Temperature Matters: Ensure the warm water is around 100-110°F. Too hot might kill the yeast, while too cold won’t activate it properly.
- Don’t Over-knead: Kneading is vital for elasticity, but over-kneading can make your buns tough. Aim for smooth and pliable—about 5-7 minutes should suffice.
- Frying Technique: Maintain oil temperature. If the oil is too cool, the buns will absorb excess oil, making them greasy. Use a thermometer for the best results.
- Glaze Variation: Adjust glaze thickness by adding a bit more powdered sugar for a thicker coat or more water for a drizzle effect, depending on your preference.
Why You’ll Love This Recipe
Homemade honey buns are a delightful fusion of sweet and comforting flavors. With their fluffy texture and rich honey glaze, they embody the perfect way to start your day! They’re not only delicious but also simple to prepare, making them a great recipe for beginner bakers looking to impress everyone. Whether enjoyed solo or shared with family and friends, they leave a lasting impression.
This recipe is also versatile, making it easy to accommodate different diets or preferences. It can serve as a lighter breakfast option, a sweet afternoon snack, or even dessert. Honey adds a natural sweetness that pairs perfectly with morning coffee or evening tea, making honey buns a treat for any time of day.
How to Serve Homemade Honey Buns
Serve these delightful honey buns warm for the best experience! They can be presented on a large platter dusted with powdered sugar or drizzled with extra honey glaze for a visually stunning presentation. Pair them with fresh fruits or a side of whipped cream to enhance the sweetness.
Beverages also play a huge role in the enjoyment of honey buns. They pair wonderfully with coffee, tea, or a glass of milk, balancing the rich flavors with something refreshing. Consider offering a hot cup of cinnamon-spiced coffee for a cozy brunch.
How to Store Homemade Honey Buns
To enjoy your honey buns beyond the initial bake, store them in an airtight container at room temperature for up to 3 days. If you want to keep them longer, you can freeze them! Wrap each bun in plastic wrap and place them in a freezer-safe bag. They can last up to 3 months in the freezer.
When you are ready to enjoy them again, simply thaw them at room temperature or microwave one for a few seconds to warm it up. For those who prefer a fresh-out-of-the-oven experience, you can warm them in a preheated oven at 350°F for a few minutes.
Tips to Make Homemade Honey Buns Better
- Chill Your Dough: Chilling the dough for about 30 minutes before rolling can help you work with it more easily, especially if you find it too sticky.
- Use a Quality Honey: The honey you use will directly impact the flavor. Choose a high-quality, pure honey for the best sweetness.
- Experiment with Spices: Add nutmeg or cardamom to the cinnamon mixture for a delightful twist on the traditional flavor.
- Don’t Rush the Rising: Allow the dough sufficient time to rise, as this contributes to the fluffiness of the final product.
Variations
- For a vegan option, swap the egg for flaxseed meal mixed with water and use a plant-based shortening.
- Consider making gluten-free honey buns using a gluten-free flour blend. Just ensure that the measurement is consistent.
- Want a spicy kick? Add a little cayenne or chili powder to the glaze for a sweet and spicy combination.
Nutrition Information
- Serving Size: 1 Bun
- Calories: 250
- Protein: 3g
- Carbs: 40g
- Fat: 10g
- Fiber: 1g
- Sugar: 15g
These honey buns are high in carbohydrates due to the flour and honey, making them a great energy source. However, they are also relatively high in sugar, so enjoy them in moderation!
Storage and Reheating
To reheat your leftover honey buns, opt for the microwave for a quick fix—just heat for about 10-15 seconds. For a crispier exterior, place them in a preheated oven at 350°F for about 5-8 minutes. Alternatively, you can warm them in a skillet over low heat for a few minutes until warmed through.
Customization Ideas
Feel free to infuse these honey buns with different flavors! Consider adding chocolate chips, dried fruit, or nuts to the dough before rolling to create a unique variation. Toppings can also be adjusted—try sprinkling toasted coconut or chopped nuts on the glaze for added texture and flavor.
Common Mistakes to Avoid
- Not Measuring Ingredients Accurately: Baking is a science. Always use a kitchen scale if possible for precise measurements.
- Skipping the Rise: Don’t rush! Allow the dough time to rise properly, or the buns can turn out dense.
- Frying at Incorrect Temperature: Using oil that’s too cold or too hot can ruin the batch. Use a thermometer for accuracy.
- Not Cooling Before Glazing: Glaze can slide off if the buns are too hot. Ensure they cool slightly first.
Serving Occasions
Homemade honey buns are perfect for a variety of occasions! They make a delightful breakfast treat during lazy weekends, a sweet indulgence at brunch gatherings, or even a charming dessert for holiday celebrations.
Why Make This Recipe
What makes this recipe special is the combination of its simplicity and the homemade comfort it delivers. Unlike store-bought options, these honey buns are made from scratch, offering freshness in every bite. There’s a real sense of accomplishment in crafting them from the ground up—turning basic ingredients into something truly delectable. Plus, who can resist the enchanting aroma of fried dough wafting through the kitchen?
FAQs
-
Can I use active dry yeast instead of instant yeast?
Yes, you can. Just activate the active dry yeast in the warm water with honey before adding it to the dough. -
Can I bake these instead of frying?
Absolutely! Shape the buns, place them on a greased baking sheet, and bake at 375°F for about 20-25 minutes or until golden brown. -
What can I use instead of shortening?
Butter or a plant-based butter alternative can work well. You may want to adjust the quantity slightly since the water content varies. -
How can I make these honey buns healthier?
You can substitute half the all-purpose flour with whole wheat flour and reduce the amount of sugar or use a sugar substitute. -
Can these honey buns be made ahead of time?
Yes, you can prepare the dough ahead of time and let it rise in the fridge overnight. Then continue with the rolling and frying the next day.
Disclaimer
Please note that the nutrition information is approximate, and ingredient content may vary. Always check labels and measurements for the most accurate details.
Print
Homemade Honey Buns
- Total Time: 35
- Yield: 12 servings 1x
- Diet: Vegetarian
Description
Delightful homemade honey buns with a sweet and fluffy texture, perfect for breakfast or as a sweet treat.
Ingredients
- 3 cups all-purpose flour
- 3 tablespoons granulated sugar
- 1 tablespoon instant yeast
- 1/2 teaspoon salt
- 1/2 cup warm water
- 1/3 cup honey
- 1 large egg
- 1 teaspoon vanilla extract
- 1/4 cup shortening (melted)
- Vegetable or peanut oil (for frying)
- 1/4 cup granulated sugar
- 1 1/2 teaspoons cinnamon
- 4 2/3 cups powdered sugar
- 2 1/2 tablespoons honey
- 1 tablespoon melted butter
- 1/2 teaspoon vanilla extract
- 1/4 teaspoon salt
- Warm water (as needed)
Instructions
- Activate the Yeast: Combine warm water, honey, and yeast in a bowl. Let it sit for 5-10 minutes until frothy.
- Make the Dough: Mix in the egg, vanilla extract, melted shortening, sugar, salt, and flour until a soft dough forms.
- Knead and Rise: Knead for 5-7 minutes until smooth. Cover and let rise in a warm place for 1-2 hours until doubled.
- Prepare the Rolls: Roll the dough into a rectangle, sprinkle with cinnamon-sugar, roll up, slice into buns, and arrange on a baking sheet.
- Fry the Buns: Heat oil to 350°F, fry buns for 2-3 minutes per side until golden brown, and drain on paper towels.
- Glaze and Serve: Whisk together powdered sugar, honey, melted butter, vanilla extract, salt, and warm water. Dip the cooled buns in the glaze before serving.
Notes
Serve warm for the best experience. Pair with coffee, tea, or a glass of milk.
- Prep Time: 10
- Cook Time: 25
- Category: Dessert
- Method: Frying
- Cuisine: American
Nutrition
- Serving Size: 1 bun
- Calories: 250
- Sugar: 15g
- Sodium: 100mg
- Fat: 10g
- Saturated Fat: 3g
- Unsaturated Fat: 4g
- Trans Fat: 0g
- Carbohydrates: 40g
- Fiber: 1g
- Protein: 3g
- Cholesterol: 30mg