
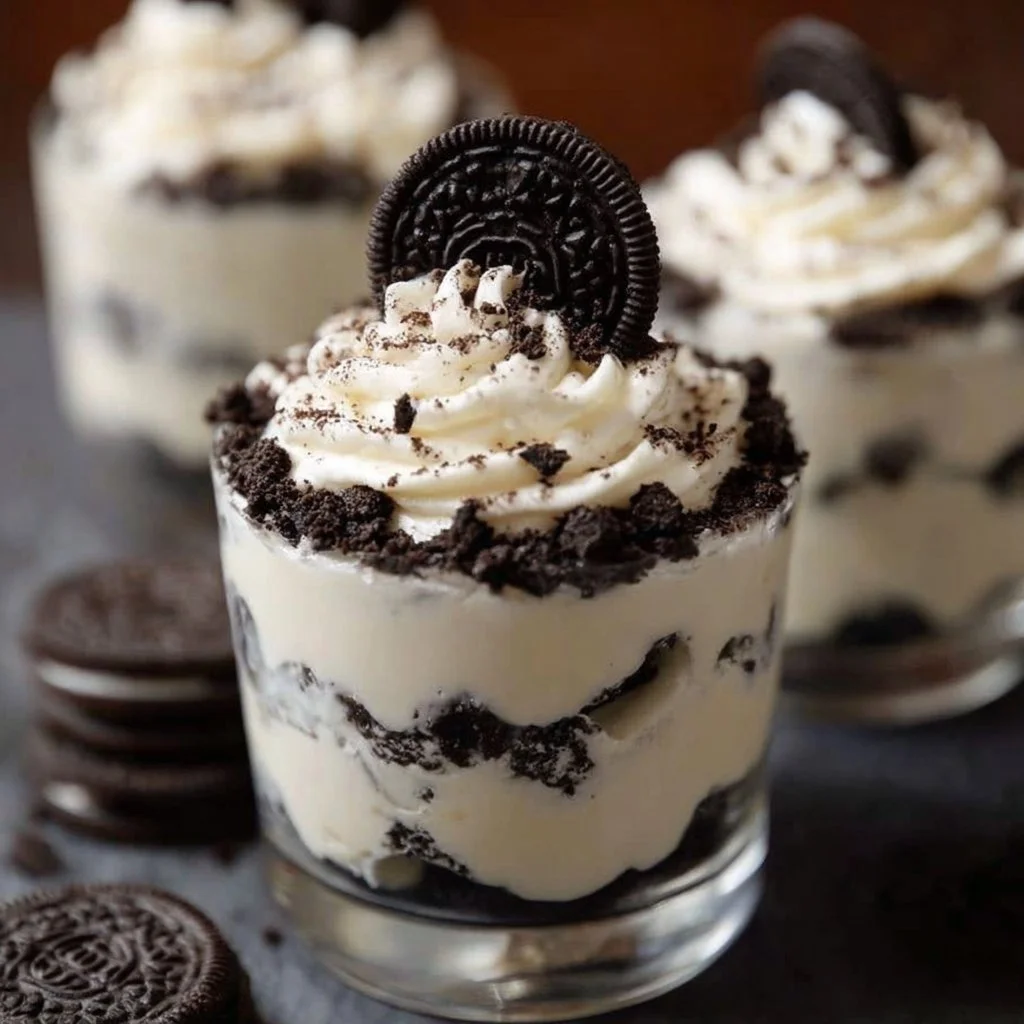
Simple and Delicious Oreo No-Bake Cheesecake Cups
Oreo No-Bake Cheesecake Cups are a delightful treat that combines the rich, creamy flavor of cheesecake with the beloved crunch of Oreo cookies. The dessert has a smooth, velvety texture that melts in your mouth, making it utterly irresistible. These individual cups are perfect for sharing at parties or enjoying as a sweet snack after dinner, and they bring a nostalgic element to any gathering.
Whether you’re celebrating a special occasion or simply want to satisfy your sweet tooth, these cups are the way to go. With no baking required, they’re incredibly easy to whip up and can be prepared ahead of time, allowing you to focus on enjoying the moment rather than stressing in the kitchen.
Prep Time, Cook Time, Total Time
Prep Time: 10 min | Cook Time: 0 min | Total Time: 1 hr 10 min (includes chilling time)
How to Make Oreo No-Bake Cheesecake Cups
Ingredients:
- 1 (8 oz) block of cream cheese, softened
- 1 (8 oz) container Cool Whip or whipped topping
- 2/3 cup powdered sugar
- 1 teaspoon vanilla extract
- 24-26 Oreo cookies
Step-by-Step Instructions:
- Start by crushing the Oreo cookies. Place them in a sealed plastic bag and use a rolling pin to crush them until they are finely ground. This forms the delicious crust for your dessert.
- Spoon about 1.5 to 2 tablespoons of these crushed Oreos into the bottom of small dessert dishes or cups. This layered base sets the tone for your cheesecake cups.
- In a mixing bowl, combine the softened cream cheese and powdered sugar. Beat them together until the mixture is completely smooth — this is key for a creamy texture.
- Next, stir in the vanilla extract for flavor, then gently fold in the Cool Whip and any remaining crushed Oreos. Be careful not to overmix to maintain lightness in the filling.
- Divide the creamy filling evenly over the Oreo crusts, gently pressing down on each layer. This ensures that each cup is perfectly packed with flavor.
- Chill the cups in the refrigerator for at least one hour to let them set before serving. For the finishing touch, top with whipped cream and a sprinkle of more crushed Oreos if desired.
Pro Tips
- Softening Cream Cheese: Make sure your cream cheese is softened to room temperature. This helps it blend smoothly without lumps, creating that creamy texture everyone loves.
- Cool Whip Alternatives: If you want a lighter option, consider using Greek yogurt as a substitute for Cool Whip. It adds protein and a tangy flavor.
- Crushing Oreos: Crushing Oreos can get messy. Make sure your bag is tightly sealed to avoid leaks, and apply even pressure to get uniform crumbs.
- Chilling Time: Don’t skip the chilling time! It’s essential for the cheesecake to firm up and hold its shape.
- Serving Size: Depending on how rich you want your servings to be, you can adjust the size of your dessert cups. Smaller portions can turn this treat into perfect finger food.
Why You’ll Love This Recipe
Oreo No-Bake Cheesecake Cups deliver a fantastic balance of flavors. The chocolatey crunch of Oreos perfectly complements the rich, sweet cream cheese filling. What makes it even better is the simplicity of making it; all you need are a few key ingredients and minimal prep time.
Additionally, this recipe can cater to various dietary preferences. It’s a hit among cheesecake lovers and those who appreciate no-bake desserts alike. You’ll find it’s a versatile addition to dessert menus, whether for casual afternoons or festive gatherings.
How to Serve Oreo No-Bake Cheesecake Cups
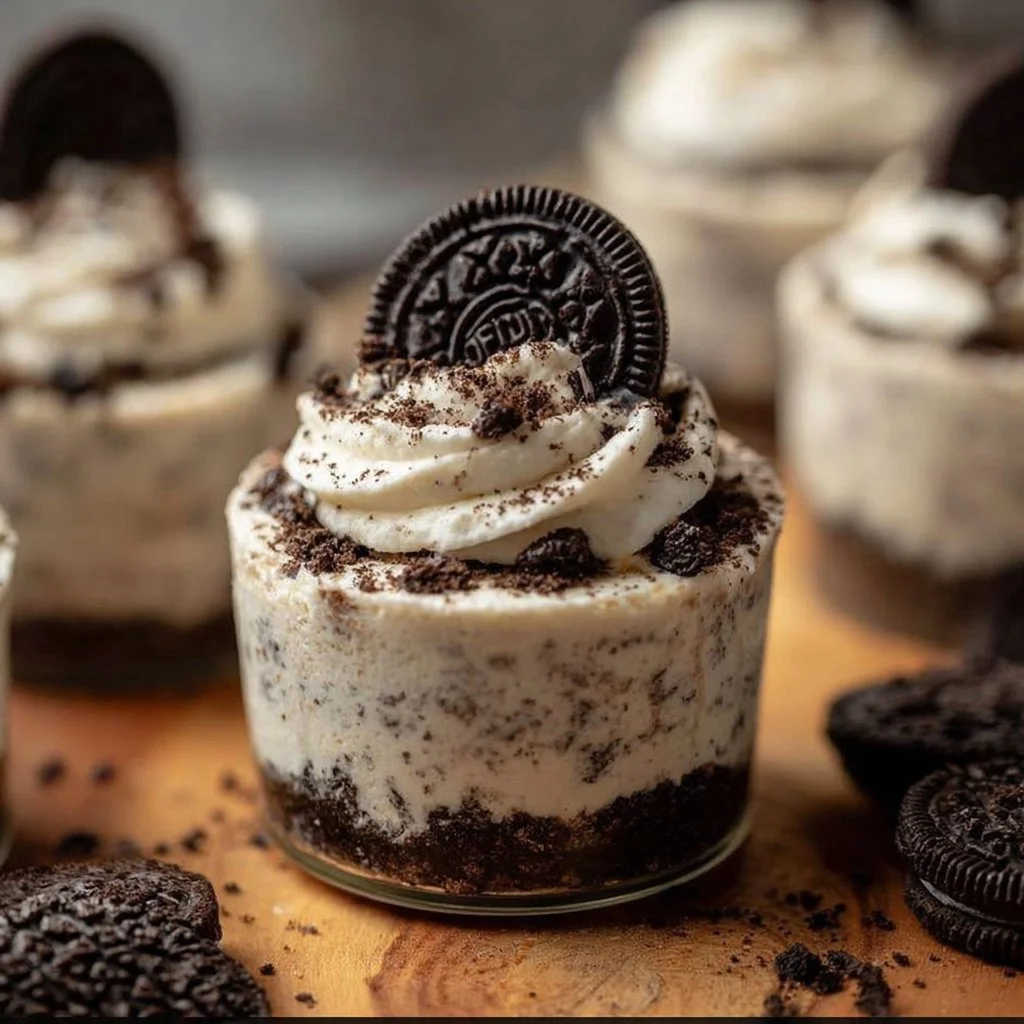
Presentation is key for these delectable cups. You can serve them in pretty glass jars or colorful dessert cups to showcase the beautiful layers. Add a dollop of whipped cream on top, then sprinkle some crushed Oreo cookies for that extra touch.
For a complete dessert experience, consider pairing these cups with a scoop of vanilla ice cream or a side of fresh berries. Beverages like a glass of cold milk or a rich hot chocolate complement the flavors beautifully.
How to Store Oreo No-Bake Cheesecake Cups
These cheesecake cups can be kept in the refrigerator for up to 3 days. Make sure to cover them with plastic wrap or store them in an airtight container to keep them fresh. If you want to save them for a longer period, they can also be frozen for up to 1 month. Just remember that the texture may change slightly once thawed.
Tips to Make Oreo No-Bake Cheesecake Cups
- Mixing Tips: When mixing your cream cheese and powdered sugar, start at a low speed to prevent sugar from flying everywhere! Gradually increase the speed until smooth.
- Balance Sweetness: Taste your mixture before adding all the powdered sugar. If you prefer a less sweet dessert, you can adjust to your taste.
- Layering Style: Get creative with the layers. You can alternate between the cookie crust and cheesecake mixture to create beautiful layers.
Variations
- Vegan Option: Use dairy-free cream cheese and whipped coconut cream for a vegan-friendly version.
- Gluten-Free Version: Make sure to use gluten-free Oreos, and you’ll have a dessert that everyone can enjoy.
- Flavor Additions: Consider adding a hint of peppermint extract for a holiday twist or some peanut butter for a rich flavor combination.
Nutrition Information
- Serving Size: 1 cup
- Calories: 290
- Protein: 4g
- Carbs: 36g
- Fat: 15g
- Fiber: 1g
- Sugar: 19g
With a relatively high carbohydrate and sugar count, this treat should be considered an occasional indulgence rather than an everyday dessert.
Storage and Reheating
If you have leftovers, they can be stored in the fridge. Simply grab one and enjoy it cold, or if you prefer a different texture, let it sit at room temperature for a few minutes before serving again.
Customization Ideas
Want to put your spin on this recipe? Try adding toppings like chocolate sauce, fruit, or even sprinkling on some crushed nuts for additional crunch. You can also play with the flavors by using different varieties of crushed cookies or flavored cream cheese.
Common Mistakes to Avoid
- Not Softening Cream Cheese: This leads to lumps in your filling, so always allow it to reach room temperature first.
- Skipping Chilling Time: If you serve them immediately, they may not hold their shape, so patience is key!
- Overmixing the Filling: This will deflate the mixture. Fold gently to maintain its light texture.
- Inadequately Crushing Oreos: Ensure your Oreos are ground into fine crumbs; larger chunks might impact the texture of your crust.
Serving Occasions
These Oreo No-Bake Cheesecake Cups are ideal for a multitude of occasions. They work wonderfully as a dessert at birthday parties, summer barbecues, and holiday gatherings. Plus, they can be enjoyed on cozy afternoons when you need a little sweetness to pick up your day.
Why Make This Recipe
This recipe stands out because of its simplicity and the universal appeal of Oreo cookies. Unlike traditional baked cheesecakes, these no-bake cups require far less time and can be made ahead of time, freeing you up to enjoy your event. They provide that creamy, indulgent cheesecake experience without hours of baking, making it easier for everyone to enjoy this classic dessert.
FAQs
-
Can I use different cookies instead of Oreos?
Yes! While Oreos are iconic for this recipe, you can use any chocolate cookie you prefer. -
How long do these desserts last in the fridge?
They typically stay fresh for about 3 days when properly stored in an airtight container. -
Can I make these in advance?
Absolutely. You can prepare them a day or two ahead of serving, which is perfect for parties! -
What if I can’t find Cool Whip?
You can substitute it with homemade whipped cream or any whipped topping of your choice. -
Can this recipe be halved?
Yes, you can easily adjust the quantities to suit your needs. Just keep an eye on the mixing process for consistency.
Disclaimer
Please note that nutrition information provided is approximate and may vary based on specific ingredients and brands used. Always check labels for the most accurate information.
Print
Oreo No-Bake Cheesecake Cups
- Total Time: 70 minutes
- Yield: 4 servings 1x
- Diet: Vegetarian
Description
Delightful Oreo No-Bake Cheesecake Cups featuring rich, creamy cheesecake topped with a crunchy Oreo crust.
Ingredients
- 1 (8 oz) block of cream cheese, softened
- 1 (8 oz) container Cool Whip or whipped topping
- 2/3 cup powdered sugar
- 1 teaspoon vanilla extract
- 24–26 Oreo cookies
Instructions
- Start by crushing the Oreo cookies. Place them in a sealed plastic bag and use a rolling pin to crush them until they are finely ground.
- Spoon about 1.5 to 2 tablespoons of these crushed Oreos into the bottom of small dessert dishes or cups.
- In a mixing bowl, combine the softened cream cheese and powdered sugar. Beat them together until the mixture is completely smooth.
- Next, stir in the vanilla extract for flavor, then gently fold in the Cool Whip and any remaining crushed Oreos.
- Divide the creamy filling evenly over the Oreo crusts, gently pressing down on each layer.
- Chill the cups in the refrigerator for at least one hour to let them set before serving.
Notes
Serve with whipped cream and a sprinkle of crushed Oreos. You can also pair with vanilla ice cream or fresh berries.
- Prep Time: 10 minutes
- Cook Time: 0 minutes
- Category: Dessert
- Method: No Bake
- Cuisine: American
Nutrition
- Serving Size: 1 cup
- Calories: 290
- Sugar: 19g
- Sodium: 150mg
- Fat: 15g
- Saturated Fat: 8g
- Unsaturated Fat: 6g
- Trans Fat: 0g
- Carbohydrates: 36g
- Fiber: 1g
- Protein: 4g
- Cholesterol: 30mg