
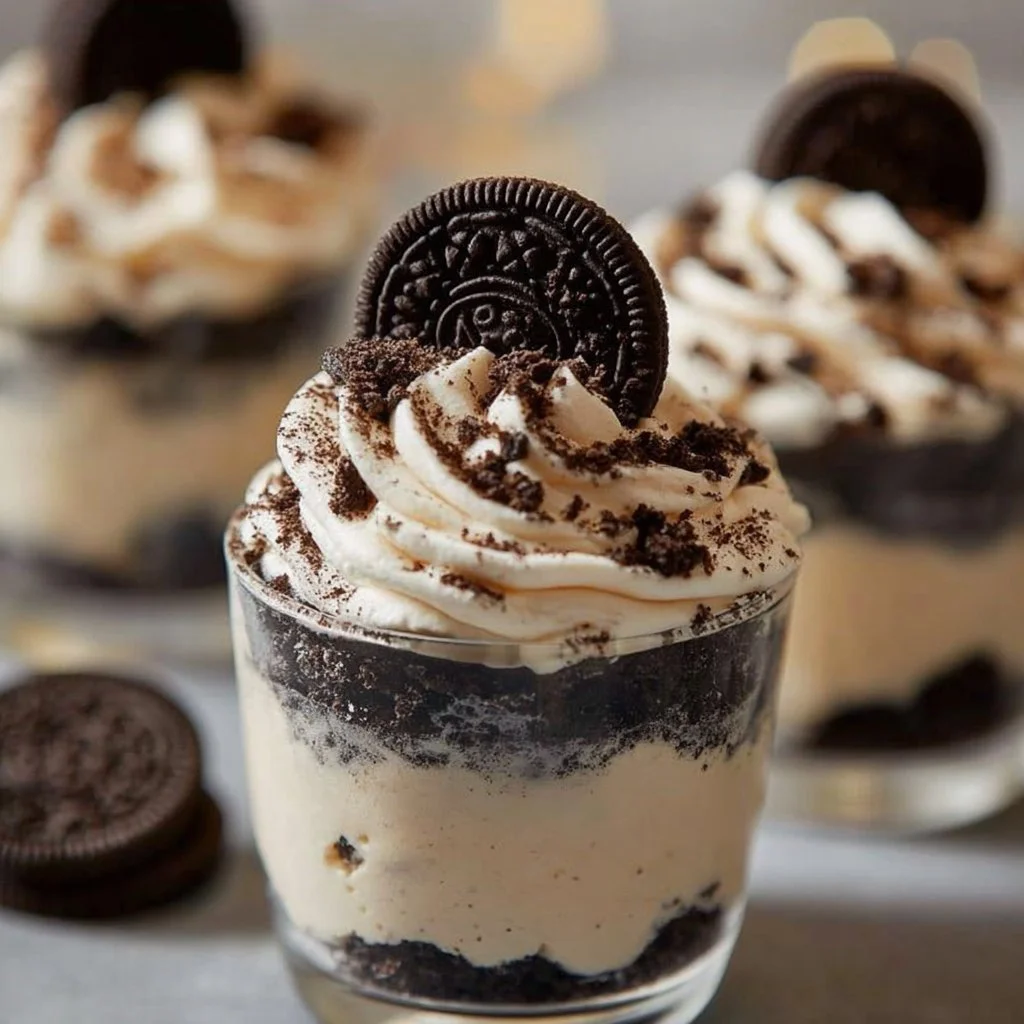
Prep Time: 20 min | Chill Time: 1 hour | Total Time: 1 hour 20 min
how to make Oreo No-Bake Cheesecake Cups
Ingredients:
- 1 (8 oz) block of cream cheese, softened
- 1 (8 oz) container Cool Whip or whipped topping
- 2/3 cup powdered sugar
- 1 teaspoon vanilla extract
- 24-26 Oreo cookies
Step-by-Step Instructions:
- Begin by crushing the Oreo cookies. Place them in a sealed plastic bag and use a rolling pin to crush them until they are finely ground. This creates the delicious crust for your cheesecake cups.
- Take small dessert dishes and scoop about 1.5 to 2 tablespoons of the crushed Oreos into the bottom of each dish. This will form a solid and tasty base.
- In a mixing bowl, beat the softened cream cheese and powdered sugar together until the mixture is smooth and creamy. This is where your cheesecake filling starts to come together!
- Next, add the vanilla extract to your cream cheese mixture. This adds essential flavor, enhancing the overall taste of your cheesecake.
- Gently fold in the Cool Whip and any remaining crushed Oreos until everything is well combined. This step ensures a light, airy texture in the filling.
- Divide the cheesecake filling among the dessert dishes, spooning it over the Oreo crusts and gently pressing down on the filling to keep it in place.
- Chill the cheesecake cups in the refrigerator for at least one hour before serving. If you want to get fancy, top with whipped cream and more crushed Oreos if desired.
Pro Tips
-
Softening the Cream Cheese: Make sure your cream cheese is at room temperature. This helps it blend smoothly without lumps. You can speed this up by cutting it into smaller pieces or microwaving it for about 10-15 seconds.
-
Crushing Oreos: Instead of a rolling pin, you can use a food processor for quicker and finer results. Just keep an eye on it; you don’t want dust but rather some nice cookie crumbs.
-
Chilling Time: Don’t skip the chilling step! It’s crucial for the cheesecake to set properly, giving you that perfect texture. If you’re in a hurry, consider placing the cups in the freezer for about 30 minutes instead of the fridge.
-
Customization: Feel free to mix in different flavors by adding a bit of cocoa powder or crushed fruit to the filling for a twist. You can also use gluten-free Oreo cookies to accommodate dietary restrictions.
-
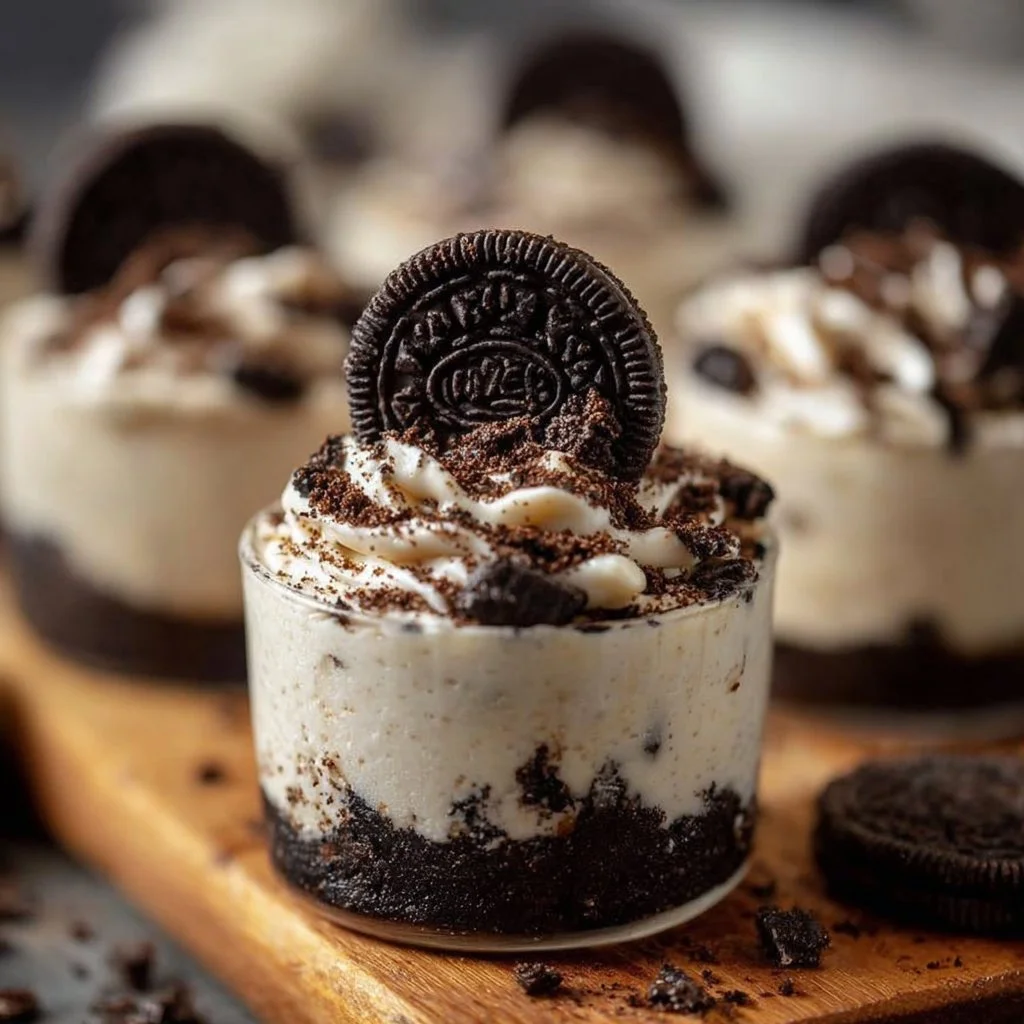
Presentation Tips: Use clear dessert cups or small mason jars to showcase the beautiful layers of crust and filling. It adds a nice touch to your dessert display.
-
Quality of Ingredients: Use high-quality cream cheese and Cool Whip for the best flavor. Organic versions can be worth the investment, especially for a special occasion.
Why You’ll Love This Recipe
The Oreo No-Bake Cheesecake Cups are the perfect blend of creamy, sweet, and crunchy—offering a delightful experience with every bite. The smoothness of the cheesecake filling on top of the crunchy Oreo crust creates a signature texture that is both satisfying and irresistible.
One of the best parts? They are incredibly easy to make! With simple steps and no baking required, even novice cooks will feel confident in whipping these up. Whether it’s a family gathering or just a treat for yourself, these cheesecake cups hit the spot.
Plus, they can fit a variety of dietary needs, especially with options to substitute for gluten-free or dairy-free ingredients. So, there’s no excuse not to dive into this delicious dessert.
how to serve Oreo No-Bake Cheesecake Cups
When it comes to presenting your cheesecake cups, consider using clear glass dishes or mason jars for a charming look. Add a dollop of whipped cream on top and sprinkle with additional crushed Oreos for a final touch. A fresh mint leaf can also add a pop of color.
For a complete dessert experience, these cups pair well with fresh berries, which can balance out the richness of the cheesecake. As for drink pairings, a cold glass of milk or a cup of coffee would complement the flavors beautifully.
how to store Oreo No-Bake Cheesecake Cups
You can store these cheesecake cups right in the refrigerator. They will stay fresh for up to 3 days. Just make sure to cover them with plastic wrap or place them in an airtight container to maintain their texture and prevent them from absorbing refrigerator odors.
If you want to keep them longer, consider freezing them for up to a month. Just remember to thaw in the refrigerator before serving—they may need a little time to get back to their creamy state.
tips to make Oreo No-Bake Cheesecake Cups
For an even more robust flavor, consider adding a pinch of salt to your cream chees mixture. It elevates the sweetness and balances the flavors nicely. Also, be sure not to overfold the Cool Whip; this will keep the texture light and airy.
Mix in other flavors with your cream cheese base. Think lemon zest for a citrus touch or pumpkin spice for autumn vibes. Just remember to adjust the sweetness accordingly if you add any extra ingredients.
variations
- Vegan Version: Substitute cream cheese with a vegan cream cheese alternative and use coconut whipped topping instead of Cool Whip.
- Gluten-Free Version: Use gluten-free Oreo cookies to make this dessert more accessible for those with gluten sensitivities.
- Chocolate Lovers: Add melted chocolate to the cream cheese mixture for a rich, chocolate version.
- Fruit Variations: Mix in or top with fresh fruit like strawberries or raspberries for a fruity twist.
Nutrition Information
(Serving Size: 1 cup | Calories: 250 | Protein: 4g | Carbs: 28g | Fat: 14g | Fiber: 1g | Sugar: 18g)
This dessert tends to be higher in sugars due to the powdered sugar and Oreos, making it a sweet treat to enjoy occasionally. It’s a delightful indulgence but not necessarily a daily choice for low-sugar diets.
Storage and Reheating
There’s no need to reheat these cheesecake cups; they are best enjoyed chilled. Just ensure they are covered and stored in the fridge.
If you do find yourself wanting to enjoy a cup later on, simply take it out, let it sit at room temperature for a few minutes, then dig in!
Customization Ideas
Adjust toppings based on personal preference. Instead of crushed Oreos, you can use chocolate shavings or nuts for added texture. If you want a swirl effect, consider swirls of fruit puree in the cream cheese filling before serving.
Common Mistakes to Avoid
- Not Softening Cream Cheese: Using cold cream cheese can lead to lumps; ensure it’s softened first.
- Overmixing the Filling: Mixing too much can deflate the whipped topping; fold gently to keep it airy.
- Skipping the Chill Time: This is essential for achieving the right texture, so don’t rush it!
- Using Stale Cookies: Ensure your Oreos are fresh to maintain the right flavor and crunch.
- Not Covering Properly in Storage: If left uncovered, the cheesecake can absorb odors from the fridge.
Serving Occasions
Oreo No-Bake Cheesecake Cups are perfect for any occasion! From family dinners to kid’s birthday parties, or even as a sweet treat for movie nights. They also make excellent desserts for potlucks or gatherings since they’re easy to transport and serve.
why make this recipe
What makes this Oreo No-Bake Cheesecake Cups unique is the ease of making a classic dessert without needing an oven. It combines the beloved flavor of Oreos with creamy cheesecake, creating a nostalgic treat loved by adults and kids alike. The individual cups also allow for portion control, making it easier to enjoy just the right amount.
They also lend themselves well to customization, so you can easily alter the flavors to fit various moods or themes, ensuring you can make them your own every time!
FAQs
-
Can I use regular whipped cream instead of Cool Whip?
Absolutely! Just whip heavy cream until soft peaks form and fold it in gently. -
Can I make these cheesecake cups ahead of time?
Yes! They can be made a day ahead. Just keep them covered in the fridge until ready to serve. -
What can I use instead of Oreos?
You can try any crushed cookie, such as chocolate wafers or even graham crackers for a different flavor. -
How can I change the flavor?
You can add various extracts like almond or lemon, or mix in ingredients like peanut butter for a new take on the classic flavor. -
Are these gluten-free?
They are not unless you use gluten-free Oreos. Always check labels to ensure the other ingredients are gluten-free.
Disclaimer: Nutrition values are approximate and may vary based on ingredient choices.
Print
Oreo No-Bake Cheesecake Cups
- Total Time: 80 minutes
- Yield: 4 servings 1x
- Diet: Vegetarian
Description
Quick and easy Oreo No-Bake Cheesecake Cups with a creamy filling and crunchy cookie crust.
Ingredients
- 1 (8 oz) block of cream cheese, softened
- 1 (8 oz) container Cool Whip or whipped topping
- 2/3 cup powdered sugar
- 1 teaspoon vanilla extract
- 24–26 Oreo cookies
Instructions
- Begin by crushing the Oreo cookies.
- Take small dessert dishes and scoop about 1.5 to 2 tablespoons of the crushed Oreos into the bottom of each dish.
- In a mixing bowl, beat the softened cream cheese and powdered sugar together until smooth and creamy.
- Next, add the vanilla extract to your cream cheese mixture.
- Gently fold in the Cool Whip and any remaining crushed Oreos until well combined.
- Divide the cheesecake filling among the dessert dishes, spooning it over the Oreo crusts.
- Chill the cheesecake cups in the refrigerator for at least one hour before serving.
Notes
For best results, ensure cream cheese is softened and do not skip the chilling time for proper set.
- Prep Time: 20 minutes
- Cook Time: 0 minutes
- Category: Dessert
- Method: No-Bake
- Cuisine: American
Nutrition
- Serving Size: 1 cup
- Calories: 250
- Sugar: 18g
- Sodium: 250mg
- Fat: 14g
- Saturated Fat: 7g
- Unsaturated Fat: 5g
- Trans Fat: 0g
- Carbohydrates: 28g
- Fiber: 1g
- Protein: 4g
- Cholesterol: 30mg