
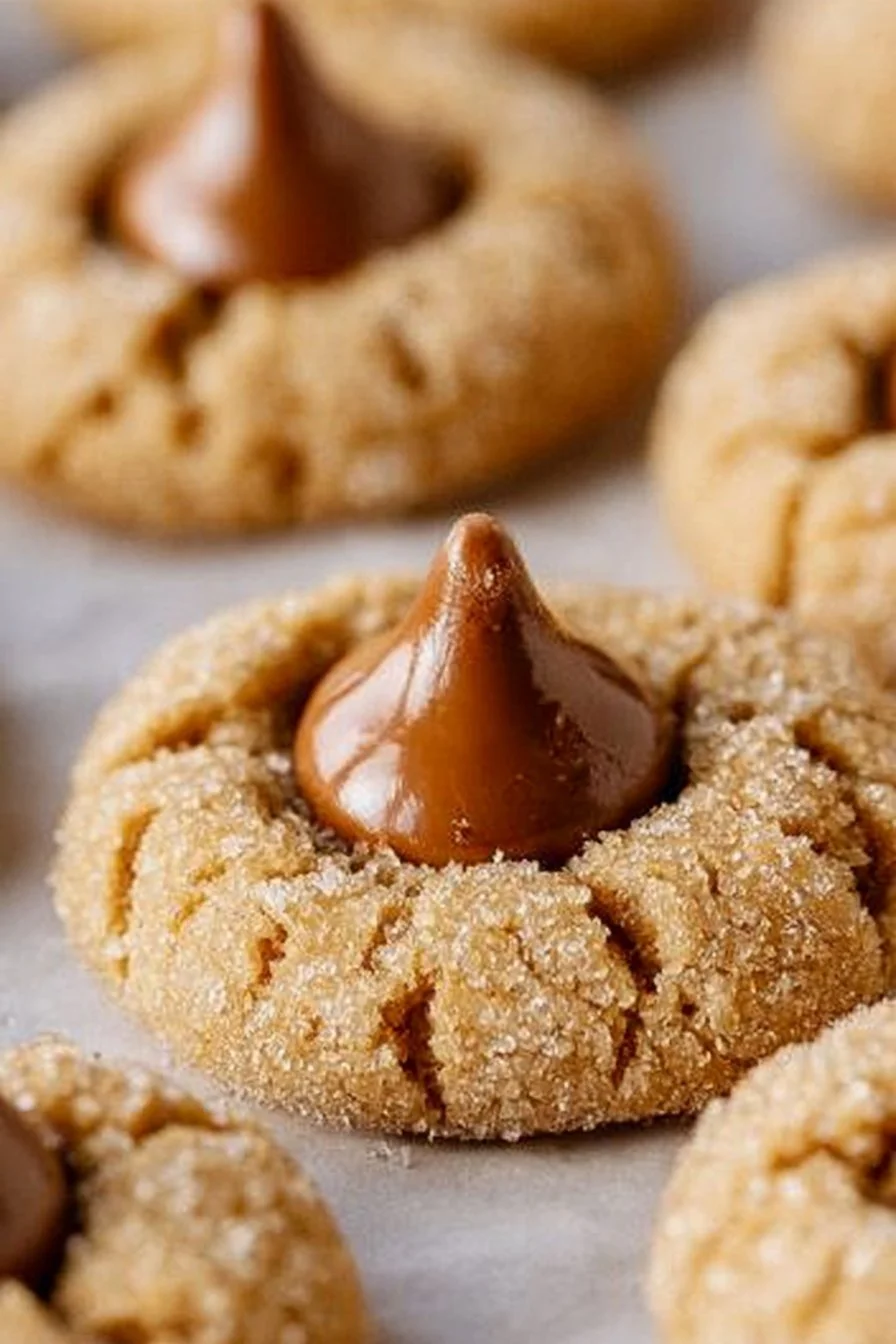
Classic Peanut Butter Blossoms
Peanut Butter Blossoms are a delightful confection that marries the delightful nuttiness of creamy peanut butter with the irresistible sweetness of chocolate. These cookies are well-loved for their unique combination of textures—a soft, chewy center surrounded by a slightly crisp edge, finished with a decadent milk chocolate kiss on top. The balance of flavors is simply impeccable: the rich, savory taste of peanut butter balances beautifully with the sweet, creamy chocolate, creating a mouthwatering experience that will satisfy any sweet tooth.
When baked to perfection, Peanut Butter Blossoms take on a golden-brown hue, with the signature crinkled top that forms as they bake. The warm aroma of freshly baked cookies fills the kitchen, inviting everyone to gather and enjoy this delightful treat. It’s a fun cookie recipe that not only perks up any gathering but also serves as a nostalgic favorite for many families. Perfect for holidays, casual get-togethers, or just a cozy night in, these cookies are sure to be a hit among both kids and adults alike.
Making Peanut Butter Blossoms is relatively straightforward. With basic ingredients that you might already have at home, this recipe becomes a go-to for spontaneous baking endeavors. Each bite offers an explosion of flavor that’s hard to resist, making it the perfect choice for cookie exchanges, bake sales, or simply satisfying your sweet cravings at home.
What Makes This Recipe Special
What sets Peanut Butter Blossoms apart from other cookies is their unique blend of familiar flavors and textures. While traditional peanut butter cookies have a loving reputation, the addition of a chocolate kiss elevates these cookies to something truly special. The contrast between the soft cookie and the mildly firm chocolate creates an inviting experience that keeps you reaching for just one more cookie.
Moreover, this cookie serves as a great canvas for creativity. The ability to customize the type of chocolate—whether opting for dark chocolate, milk chocolate, or even caramel-filled varieties—means that each batch can cater to different tastes. Also, compared to more complex baked goods, the straightforward ingredient list and preparation method allows even novice bakers to shine in the kitchen.
These cookies also bring a sense of nostalgia. Many home bakers fondly remember making them with family during the holidays or special occasions. The shared experience of assembling these cookies, rolling them in sugar, and placing the chocolate kiss on top becomes a cherished memory that many families recreate year after year.
Ingredient Overview and Helpful Notes
When preparing Peanut Butter Blossoms, it’s important to be mindful of the ingredients, as each plays a critical role in achieving the desired texture, taste, and overall quality.
1. All-Purpose Flour: This is the foundation of the cookie. It provides structure and helps create a soft yet chewy texture. When measuring flour, it’s crucial to avoid packing it down in the measuring cup, as this can lead to dry cookies. Instead, spoon the flour into the cup and level it off for accurate measurement.
2. Baking Soda: This ingredient acts as a leavening agent, helping the cookies rise and develop their characteristic texture. Baking soda provides a slight lift that pairs perfectly with the heavy peanut butter.
3. Creamy Peanut Butter: Opt for a good quality creamy peanut butter to ensure smooth dough. The fat content in peanut butter adds richness and contributes to the soft texture of the cookie. Avoid natural peanut butter that separates, as it may lead to unpredictable results in baking.
4. Unsalted Butter: The butter adds flavor and moisture to the cookies. Using unsalted butter allows you to control the salt levels in your recipe better, ensuring that the sweetness is not overshadowed.
5. Sugars: A combination of granulated sugar and light brown sugar provides the perfect sweetness and moisture balance. The brown sugar contributes to a denser texture and enhances the cookie’s chewiness.
6. Egg and Milk: The egg serves as a binding agent, while milk adds moisture to the dough. Using a large egg ensures a good balance and consistency throughout the cookies.
7. Vanilla Extract: A splash of vanilla extract enhances the cookie flavor profile, bringing an aromatic richness that complements the peanut butter.
8. Hershey Kisses: At the heart of the recipe, these chocolate candies create a delightful surprise on top of each cookie. They add an indulgent sweetness that makes these cookies iconic!
When selecting these ingredients, always prioritize quality over expense. Good quality ingredients lead to better baked goods, and that’s especially true for flavors that shine through in simpler recipes like this one. Also, make sure to bring all refrigerated ingredients, particularly the butter and egg, to room temperature before starting for the best blending results.
Nutrition & Recipe Details
Nutritional values for baked goods can vary significantly based on specific ingredients, brands, and portions. The following table provides an estimate of the nutritional values for these delightful cookies:
| Item | Value |
|---|---|
| Prep time | 20 minutes |
| Cook time | 10 minutes |
| Store time | Up to 1 week |
| Calories | 90 per cookie |
| Protein | 2g |
| Carbohydrates | 11g |
| Fat | 4g |
These values are estimations and can change based on specific brands chosen and portion sizes. Always adjust according to individual tastes and dietary requirements.
How to Make Classic Peanut Butter Blossoms
To make delicious Peanut Butter Blossoms, begin by gathering your ingredients and organizing your workspace. Ensure you have measuring cups, spoons, mixing bowls, a baking sheet lined with parchment paper, and a few mixing utensils handy before you dive in. Set your oven to preheat at 375°F so it’s ready when your cookie dough is prepared.
Begin by first measuring out all your ingredients. This will help streamline the process and make sure you won’t forget anything once you start mixing. It’s wise to have your peanut butter, butter, and egg at room temperature before starting to promote even blending.
Ingredients
| Ingredient | Quantity |
|---|---|
| All-Purpose Flour | 1 3/4 cup |
| Baking Soda | 1 tsp |
| Salt | 1/2 tsp |
| Creamy Peanut Butter | 1/2 cup |
| Unsalted Butter (room temperature) | 1/2 cup |
| Granulated Sugar | 1/2 cup |
| Light Brown Sugar (lightly packed) | 1/2 cup |
| Large Egg | 1 |
| Milk | 2 tbsp |
| Vanilla Extract | 1 tsp |
| Granulated Sugar (additional for coating cookies) | 1/2 cup |
| Hershey Kisses | 11 oz Bag |
With the ingredients measured and prepared, you’re ready to start mixing.
Step-by-Step Instructions
-
Mix Dry Ingredients: In a medium bowl, whisk together the all-purpose flour, baking soda, and salt. Setting this mixture aside ensures that the leavening agents will be evenly distributed when combined with the wet ingredients later.
-
Cream Together Butter and Sugars: Using a hand mixer or stand mixer fitted with a paddle attachment, cream together the creamy peanut butter, unsalted butter, granulated sugar, and light brown sugar on medium-high speed until the mixture is smooth and well-combined. This step is crucial as it incorporates air into the dough, creating a light texture.
-
Incorporate Egg and Wet Ingredients: Add in the large egg, milk, and vanilla extract. Mix well, scraping down the sides of the bowl as necessary until fully incorporated. This ensures everything is evenly combined and contributes to the overall flavor.
-
Combine Dry and Wet Ingredients: Reduce the mixer speed to low, gradually adding in the flour mixture until completely blended. Be careful not to overmix, as this can lead to tougher cookies.
-
Chill the Dough: Place the cookie dough in a well-sealed food container or tightly wrap the top of the mixing bowl with plastic wrap, and chill the cookie dough for a minimum of 1 hour. Chilling allows the flavors to develop and makes it easier to handle when shaping.
-
Preheat Oven and Prepare Baking Sheets: After the dough has chilled, line two baking sheets with parchment paper or silicone mats. Adjust the oven rack to the second level mark (just above the center) and preheat the oven to 375°F.
-
Shape the Cookies: Using a spoon and your clean hands, shape the cookie dough into 1-inch balls, then roll them in the granulated sugar. Ensure that they are placed about 1 ½ – 2 inches apart on the lined baking sheets to allow for spreading.
-
Bake the Cookies: Bake for about 7-8 minutes. The cookies should look just set but slightly underbaked. Remove them from the oven and immediately place a milk chocolate kiss on top of each cookie, pressing down gently to create the crackly edges.
-
Finish Baking: Return the cookies to the oven and bake for an additional 2 minutes. This step ensures that the cookies are perfectly baked around the edges while maintaining a soft center.
-
Cool the Cookies: Allow the cookies to cool on the baking sheets for about 5-10 minutes before transferring them to a cooling rack to cool completely. This is vital for maintaining their shape.
-
Store Leftovers: Store any remaining cookies in an airtight container with a slice of bread for up to a week. This helps to keep them fresher longer.
Understanding the Flavor and Texture
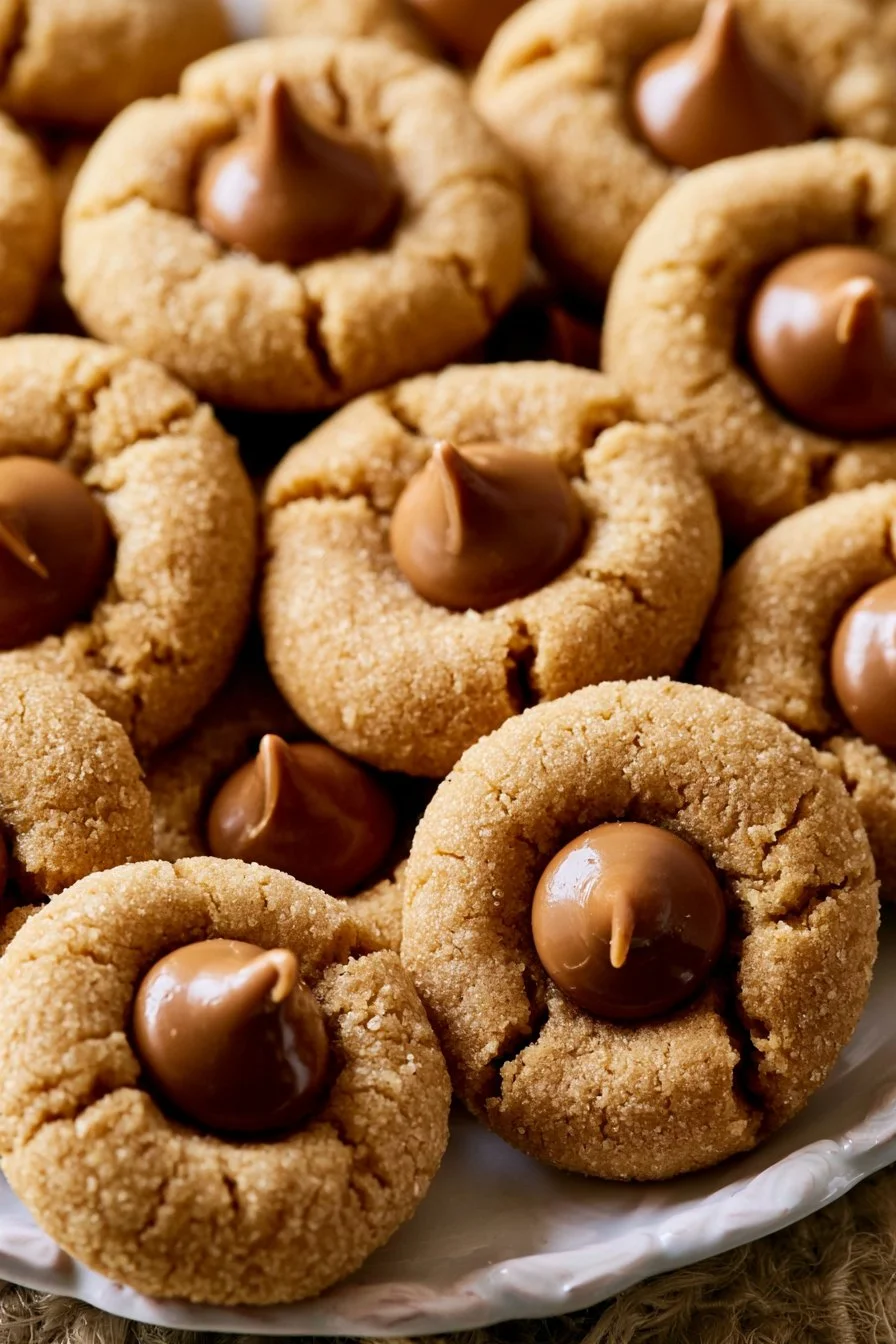
When you first take a bite of a Peanut Butter Blossom, the rich flavor of the peanut butter hits immediately, followed by the subtle sweetness of both sugars. The addition of the chocolate kiss not only provides another layer of flavor; it also adds a creamy texture that contrasts beautifully with the chewy cookie beneath. The cookies themselves should be slightly crisp at the edges, while remaining soft and chewy in the center.
A hallmark of a well-baked Peanut Butter Blossom is the appearance of the lightly crackled top, which occurs as they bake and expand. This visual cue is indicative of the right amount of blending, chilling, and baking—each critical to maintaining that perfect texture. As they cool, the kisses melt a little, creating a delightful ganache-like layer that enhances the overall indulgence of this cookie.
The cooking method, including pre-chilling the dough and managing the baking time, plays a significant role in achieving the desired result. Underbaking slightly allows the cookies to maintain moisture and chewiness while still ensuring they hold their shape beautifully with the chocolate kiss, making every bite consistent and delightful.
Pro Tips
Mastering the art of baking Peanut Butter Blossoms is all about finesse and attention to detail. Here are some pro tips to ensure your cookies turn out perfectly every time.
| Tip | Description |
|---|---|
| Chill the Dough | Chilling the cookie dough is essential to prevent spreading and to allow flavors to meld. Aim for a minimum of 1 hour, or up to overnight for even better results. |
| Monitor Baking Time | Keep an eye on the baking time; each oven is unique. You want the cookies to be faintly golden while still soft. Overbaking will lead to drier cookies. |
| Quality Chocolate | Use high-quality chocolate kisses to enhance the flavor of your cookies. A more premium chocolate will bring a richness that elevates the entire cookie. |
| Mixing Techniques | When creaming butter and sugars, mix until just smooth. Overmixing can lead to tougher cookies. Incorporate dry ingredients gently for the best texture. |
By keeping these tips in mind, you can ensure your Peanut Butter Blossoms come out perfectly every time.
Why You’ll Love This Recipe
The appeal of Peanut Butter Blossoms lies in their flavor, the simplicity of their preparation, and their suitability for various occasions. This cookie is not just a treat; it has a nostalgic appeal that resonates with many. Ideal for both seasoned bakers and novices, the straightforward nature of this recipe makes it accessible while still allowing room for creativity.
In addition, the ingredients are generally easy to find, making this recipe convenient for spontaneous baking sessions or planning ahead for holiday goodies. Servings can easily be adjusted for small gatherings or large batches, making them perfect for any occasion from casual get-togethers to festive celebrations.
Moreover, these cookies are incredibly versatile. They can stand alone as a sweet snack, be packaged as gifts, or prominently feature at dessert tables. And if there are leftovers, they maintain their deliciousness for days—if they last that long!
How to Serve Classic Peanut Butter Blossoms
Serving Peanut Butter Blossoms is more than just placing them on a plate; it’s about presentation and pairing. For an elegant touch, arrange the cookies in a decorative tin or box that can be gifted, especially during the holiday season. Alternatively, stack them neatly on a serving platter, interspersed with mini chocolate or peanut butter cups for an eye-catching display.
These cookies pair wonderfully with a glass of cold milk, a hot cup of coffee, or even a warm tea. Their richness complements both warm beverages for a cozy moment or a chilled glass of milk for that classic combination. Additionally, they can serve as a delightful dessert option after a hearty meal, adding a sweet finish without overwhelming the palate.
You might also consider serving these cookies alongside scoops of vanilla ice cream. The warm cookie paired with cold ice cream creates a dessert experience that takes you back to childhood summers. For an added twist, drizzle them with chocolate or caramel sauce to elevate the sweetness further.
As with any cookie, the presentation can enhance the experience. Consider using colorful plates or garnishing with a light dusting of powdered sugar for an inviting look. Peanut Butter Blossoms are versatile enough to match various themes, from festive holiday gatherings to casual family meals.
How to Store Classic Peanut Butter Blossoms
Proper storage techniques are vital to maintaining the texture and flavor of Peanut Butter Blossoms in the days following baking. Once the cookies have cooled completely, they can be stored in an airtight container to keep them fresh. If you have a slice of bread handy, placing it in the container with the cookies can help retain moisture, ensuring they stay soft.
For those planning to keep their cookies longer, refrigeration is an option a week’s worth of cookies can safely be stored at room temperature. Use a wax paper or parchment layers between the cookies to prevent them from sticking together. This technique also helps maintain the structure of their delicate chocolate kiss topping.
If you’d like to store cookies long-term, freezing is a good option. Place cookies in a single layer on a parchment-lined baking sheet to freeze them individually before transferring them to a freezer bag. This method preserves their shape and texture. For optimal quality, consume frozen cookies within three months.
When reusing stored cookies, consider that their texture may change slightly over time, so always check for freshness before serving. Keeping them in a controlled environment makes a significant difference, and ensuring they are stored properly can extend their delightful taste for days.
Tips to Make Classic Peanut Butter Blossoms
Making the perfect Peanut Butter Blossom cookie takes a combination of attention to detail and a bit of love. Here are tips to aid your cookie-baking endeavor:
-
Use the Right Ingredients: Always opt for high-quality peanut butter. The flavor will be more pronounced, and the texture will impact the outcome.
-
Room Temperature Ingredients: Ensure eggs and butter are at room temperature before mixing. This helps create a smoother dough, improving consistency and blend quality.
-
Test the Dough: If in doubt about the texture, bake a test cookie. This allows you to gauge if adjustments in sugar, flour, or baking time are necessary.
-
Don’t Overmix the Dough: When adding dry ingredients to wet, mix until just combined. Overmixing introduces too much air, leading to a denser cookie.
Each step you take in the preparation process can significantly influence the quality of your cookies. The balance of flavors and textures should align perfectly, reflecting the unique beauty of Peanut Butter Blossoms.
Variations and Substitutions
There are numerous ways to customize your Peanut Butter Blossoms, allowing you to explore different flavors and ingredients without losing the essence of the original recipe.
-
Nut Variations: For added texture and flavor, consider folding in chopped nuts, such as pecans or walnuts, into the cookie dough. This results in a rich, nutty flavor that pairs beautifully with peanut butter.
-
Healthy Alternatives: If looking to lighten your recipe, substitutes like almond flour instead of all-purpose flour can reduce carbs. However, this may alter the texture, making the cookies denser.
-
Vegan Option: To create a vegan version, substitute unsweetened applesauce for the egg, and use a plant-based butter. Keeping an eye on the moisture will ensure they bake properly.
-
Chocolate Variations: Instead of using Hershey’s kisses, try different types of chocolate, such as white chocolate or dark chocolate, for a unique taste. You can also add chocolate chips directly into the dough.
-
Flavor Infusions: Experiment by adding flavor extracts such as almond or coconut to diversify the taste profile. These variations can introduce exciting new dimensions to your favorite classic while keeping the integrity of the original cookie intact.
By thinking creatively about your recipe, you can adjust or entirely reinvent Peanut Butter Blossoms to suit various dietary needs or flavor preferences.
Storage and Reheating
When it comes to leftovers, knowing how to store and reheat them properly can ensure your Peanut Butter Blossoms remain delightful. The best approach for storing cookies is to separate layers with parchment paper and place them in an airtight container. This step prevents them from becoming sticky or stale.
For an extended lifespan, consider freezing the baked cookies. Wrap individual cookies in plastic wrap and place them in a freezer bag, removing as much air as possible to avoid freezer burn. These cookies can be frozen for up to three months and still retain their delightful flavors.
When it comes to reheating, the microwave is the quickest option; however, it can sometimes result in chewy cookies that are less appealing. It’s best to reheat in an oven. Preheat the oven to 350°F, place the cookies on a baking sheet, and heat for about 5 minutes or until warmed through. This method helps restore the cookies’ original texture while refreshing their taste.
If you’d like a soft and warm cookie right off the bake, consider reheating them with a chocolate kiss already placed on top. This technique melts the kiss just slightly, creating a small chocolate puddle that enhances the overall cookie experience.
Customization Ideas
When making Peanut Butter Blossoms, personalizing the recipe can turn a simple treat into something that reflects your tastes. Here are several customization ideas:
-
Different Coatings: Roll the cookie dough balls in crushed nuts or cocoa powder instead of granulated sugar for a unique outer texture.
-
Stuffed Variation: Try stuffing each cookie with a small piece of caramel or chocolate before baking for a gooey center.
-
Decorative Toppings: After baking, drizzle melted chocolate or peanut butter over the top of each cookie for an added visual appeal and flavor enhancement.
-
Cookie Size: Depending on preference, experiment with shaping smaller or larger dough balls. Just ensure to adjust the baking time accordingly to avoid overcooking.
-
Seasonal Twists: Infuse seasonal flavors by adding spices like cinnamon or pumpkin spice for a warm twist in the fall, or peppermint extract during the holidays.
Customizing allows you to enjoy a classic recipe while introducing your favorite flavors and textures, ensuring your cookies become personal favorites.
Common Mistakes to Avoid
While making Peanut Butter Blossoms, certain missteps can lead to less than ideal results. Here are some common pitfalls to steer clear of:
-
Using Old Ingredients: Fresh ingredients are essential for the best flavor and texture. Always check for the expiry dates on baking soda, flour, and peanut butter to ensure their efficacy.
-
Skipping the Chilling Step: Chilling the dough helps prevent overspreading and allows for better flavor melding. Skipping this step can lead to flatter, more cookie-like shapes.
-
Overmixing the Dough: Mixing too much after adding the flour can lead to tough cookies. Stir gently and stop as soon as there are no streaks of flour.
-
Overbaking: Cookies should be soft in the center when removed from the oven. Overbaking can lead to dried-out cookies. It’s better to err on the side of caution.
-
Incorrect Proportions: Ensure that the measurements of ingredients are correct. Baking is a science, and even slight variations can change the outcome.
By keeping these common mistakes in mind, you’ll be better equipped to execute this beloved recipe without encountering unwanted outcomes.
Serving Occasions
Peanut Butter Blossoms are not just versatile in terms of customization; they are also perfect for numerous occasions. Their timeless appeal makes them an ideal choice for family gatherings, potlucks, and holiday celebrations. The enchanting aroma of freshly baked cookies can create a cozy atmosphere for any event, from casual meet-ups with friends to larger family affairs.
Additionally, they make a delightful dessert option for simple weeknight dinners, adding a touch of sweetness without required sophistication. The kid-friendly nature of these cookies makes them suitable for parties, school events, or bake sales; their nostalgic quality always draws attention.
For festive occasions, these cookies can be adorned with festive sprinkles or colors to fit the seasonal themes. Given their chocolate-peanut butter pairing, they can easily transition from a humble homemade treat to an exceptional dessert centerpiece at special occasions like birthdays or holidays.
Why Make This Recipe?
Choosing to transform a kitchen staple like peanut butter into fresh cookies can be both rewarding and enjoyable. The distinctive combination of flavors—nutty peanut butter, sweet chocolate, and buttery cookies—is what makes these treats stand out. They are a memorable treat that can evoke feelings of nostalgia and warmth, making them perfect for creating family memories.
Peanut Butter Blossoms also require minimal preparation and can be made quickly, inviting an air of ease in baking. The balance of accessible ingredients and flexible method makes them a reliable choice for new bakers and seasoned chefs alike.
Furthermore, they can be easily modified to meet dietary preferences while still delivering that classic flavor, meaning they can fit into any household’s recipe rotation. Their irresistible taste and convenient preparation make these cookies a valuable addition to any baker’s repertoire.
Make-Ahead Preparation
Preparing Peanut Butter Blossoms ahead of time can be both convenient and simple. The dough can be made in advance and stored in the refrigerator for up to three days or frozen for up to three months. This method allows for spontaneous baking sessions without requiring extensive ingredient prep.
If choosing to freeze the dough, portion it into balls and layer them between sheets of parchment paper in a sealed container or freezer bag. This way, you will have easy access to raw cookie dough whenever a craving strikes; simply bake them from frozen, adjusting the time slightly.
For the best results, prepare the cookie dough the day before a planned event and allow it to chill overnight. This helps enhance the flavor and leads to an even better texture in the final bake.
Making Peanut Butter Blossoms ahead can open up opportunities for last-minute gatherings while ensuring that you always have a treat at hand.
Equipment and Kitchen Preparation
Having the right tools on hand makes baking Peanut Butter Blossoms more manageable and enjoyable. Essential equipment includes:
-
Mixing Bowls: A set of nesting bowls is invaluable for measuring and mixing ingredients. A medium bowl is generally suitable for combining dry ingredients, while a larger bowl is best for wet ingredients.
-
Hand or Stand Mixer: Either a hand mixer or a stand mixer fitted with a paddle attachment will make creaming the wet ingredients easier. These tools help incorporate air into the dough, leading to a better texture.
-
Baking Sheets: A couple of sturdy baking sheets lined with parchment paper or silicone mats are vital. These surfaces help prevent cookies from sticking and are easy to clean.
-
Measuring Cups and Spoons: Accurately measuring ingredients is crucial for baking success. Use separate sets for liquid and dry ingredients.
-
Cookie Scoops: A cookie scoop or spoon makes it easy to form uniformly sized cookie dough balls, ensuring even baking.
Make sure to prepare your workspace by having everything within reach. Having your ingredients and tools laid out can streamline the baking process and reduce errors in the recipe.
FAQs
-
Can I use crunchy peanut butter instead of creamy?
Yes! Crunchy peanut butter can be used for a different texture, offering more bite and crunch in your cookies. -
How can I ensure my cookies don’t spread too much?
Chilling the dough helps prevent spreading, as does ensuring that the dough is tightly rolled into balls before placing them on the baking tray. -
What should I do if my dough seems too dry?
If your dough appears dry or crumbly, add a teaspoon of milk at a time until it reaches the desired consistency without overmixing. -
Can I make these cookies gluten-free?
Yes, you can substitute all-purpose flour with a gluten-free flour blend, keeping in mind that some adjustments may be needed for texture. -
How should I store leftover cookies?
Store cooled cookies in an airtight container at room temperature or in the fridge with a slice of bread to maintain softness. -
Can these cookies be frozen?
Yes, baked cookies can be frozen for up to three months. Ensure they are well-wrapped to prevent freezer burn. -
Is it possible to prepare the dough ahead of time?
Absolutely! You can make the dough a few days in advance and keep it refrigerated or even freeze it for longer storage. -
How do I reheat leftover cookies?
Reheat cookies in the microwave for about 10 seconds or in a preheated oven at 350°F for 5 minutes for the best results.
Disclaimer
Nutritional information is approximate and may vary based on ingredient brands, substitutions, portion sizes, and preparation methods.