
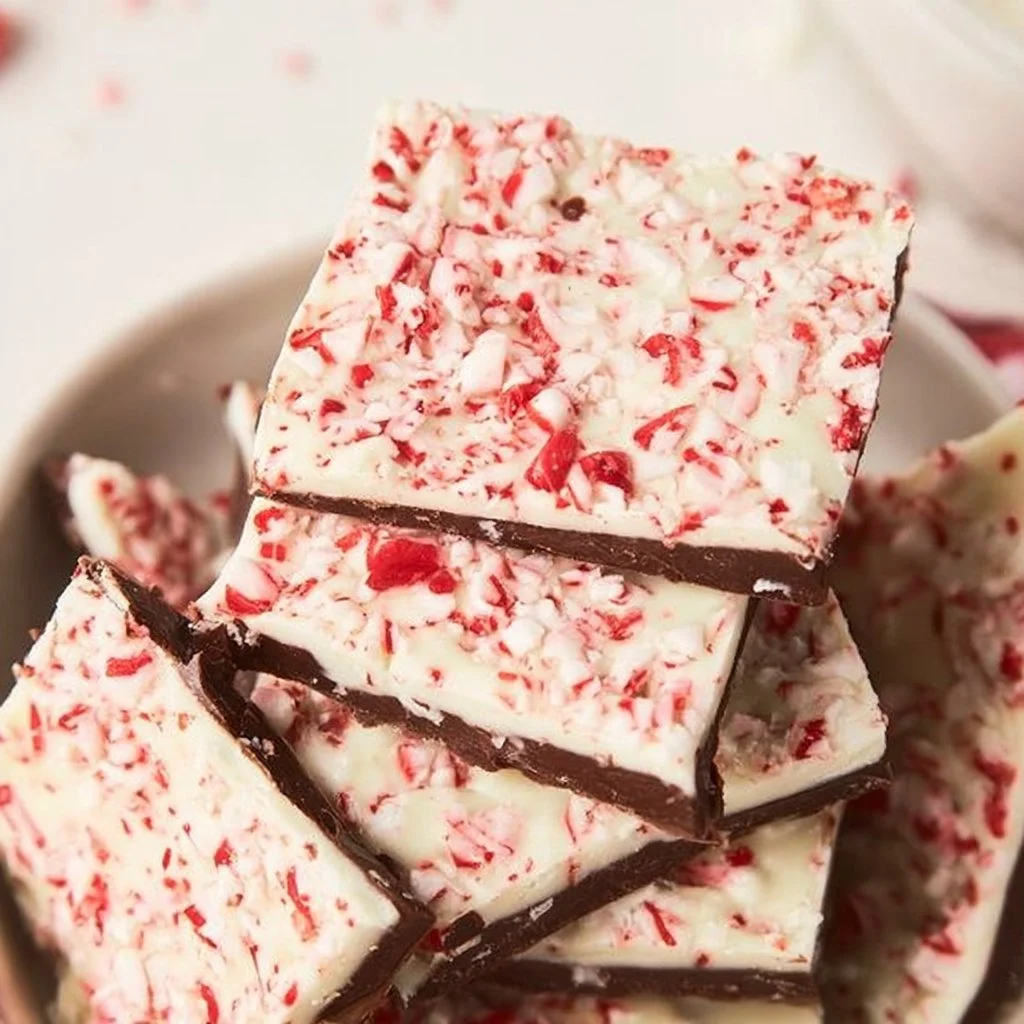
3 Ingredient Peppermint Bark
Peppermint bark is a delightful holiday treat that embodies the spirit of winter festivities with its refreshing flavor and striking appearance. This irresistible confection combines rich dark chocolate with creamy white chocolate, all harmoniously infused with a hint of peppermint. Topped with eye-catching crushed candy canes, it offers a delightful contrast in both flavor and texture. The contrasting layers of chocolate create a beautiful marbled effect that is both appealing to the eye and delicious to the palate. This sweet treat can be enjoyed during holiday celebrations, gifted as a homemade present, or savored simply as an indulgent snack on chilly evenings.
The process of making peppermint bark is incredibly straightforward, making it accessible for even novice bakers. With just three primary ingredients, you can whip up this festive treat in no time. The final product is a delectable combination of smooth, creamy chocolate and crunchy, minty candy canes, appealing to those who love a mixture of flavors and textures. Perfect for sharing with loved ones, peppermint bark is a favorite during holiday gatherings and can also be packaged neatly for gifts, making it a versatile addition to any holiday spread.
Whether you’re hosting a holiday party or simply looking to satisfy a sweet tooth, peppermint bark fits the bill perfectly. It is an ideal dessert to share with family and friends, and its vibrant colors and flavors make it a great addition to any festive occasion. Enjoying a piece of peppermint bark alongside a warm cup of cocoa or coffee is a delightful way to celebrate the holiday season, evoking cozy memories and joyful gatherings.
What Makes This Recipe Special
What sets peppermint bark apart from other holiday confections is its simplicity combined with incredible taste. The recipe requires minimal effort while delivering maximum flavor satisfaction. Each ingredient plays a crucial role: the dark chocolate provides depth and richness, while the white chocolate brings creaminess, balancing the candy cane’s crisp and minty crunch. This appealing contrast of flavors and textures is what makes peppermint bark truly special.
In comparison to other holiday treats, peppermint bark stands out as an easy-to-make option that requires little hands-on time. Many complex desserts involve intricate layer baking, but peppermint bark can be achieved in just a few simple steps. The festive visual appeal of the colorful candy cane toppings and the glossy chocolate layers adds to its charm, making it an attractive centerpiece on any dessert table.
Additionally, this recipe is wholly customizable. While it is delicious as-is, peppermint bark can easily adapt to various flavors and toppings. You might experiment with different chocolate combinations, such as using milk chocolate or even adding flavors like almond extract or orange zest. This versatility allows home cooks to make the recipe their own, tailoring it to their preferences or seasonal inspiration.
Ingredient Overview and Helpful Notes
Peppermint bark is made with just three main ingredients: dark chocolate, white chocolate, and peppermint extract, along with a topping of crushed candy canes. Each ingredient adds its own unique qualities to the final product, contributing to its delightful taste and texture.
The dark chocolate serves as the foundation of the bark, providing a rich, slightly bitter contrast to the sweet white chocolate. When selecting dark chocolate, opt for high-quality chocolate chips or bars with a cocoa content between 60% to 70%. This ensures a rich flavor profile without being overwhelmingly sweet. Look for brands that list cocoa butter and cocoa mass among the primary ingredients, as these are crucial for a smooth melting and setting process.
White chocolate, while inherently sweeter, complements the earthy notes of dark chocolate. Because white chocolate lacks cocoa solids, it is essential to choose a high-quality brand that contains cocoa butter—this will ensure proper melting and contribute to a smooth consistency. When melted, white chocolate should have a velvety texture and a rich, creamy flavor that harmonizes beautifully with dark chocolate.
Peppermint extract lends a fresh and invigorating burst of flavor. It’s best to use pure peppermint extract rather than imitation, as the latter can have artificial and less enjoyable flavors. The amount of extract can be adjusted depending on your personal preference; you can start with a small quantity and increase it if you prefer a stronger minty taste.
For the crushed candy canes, look for those that are vibrant in color and free from any unwanted off-marks. You can crush them into different sizes, depending on how much crunch you desire. Fine crumbs can be sprinkled delicately, while larger chunks provide more visible texture and a satisfying crunch when bitten into.
Nutrition & Recipe Details
Nutrition values for peppermint bark may vary depending on the specific brands of ingredients used or portion sizes, though general estimates can provide a helpful guide. These values reflect standard ingredients and serving sizes so that you can understand the potential impact on your meal planning.
| Item | Value |
|---|---|
| Prep time | 15 minutes |
| Cook time | 10 minutes |
| Store time | 2 weeks |
| Calories | 210 per 2 oz |
| Protein | 2g |
| Carbohydrates | 30g |
| Fat | 10g |
How to Make Peppermint Bark
Making peppermint bark involves simple steps that lead to a delicious result. The most critical aspect is preparing your workspace: gather your ingredients and tools—such as microwave-safe bowls, a spatula, and a baking sheet lined with parchment paper. This will ensure that the process runs smoothly without needing to search for items midway.
Start with high-quality chocolate chips for the best results. You can choose to melt the chocolate in a microwave or on a stovetop using a double boiler. Both methods have their pros, but microwaving is quicker and requires less equipment. Ensure that your baking sheet is lined with parchment paper or a silicone baking mat, which prevents sticking and makes cleanup easy.
Ingredients
| Ingredient | Quantity |
|---|---|
| Dark chocolate chips | 1 cup |
| White chocolate chips | 1 cup |
| Peppermint extract | 1/2 teaspoon |
| Crushed candy canes | For topping |
Before you start melting the chocolate, ensure all ingredients are measured out and ready to go. This approach allows for seamless transitions between each step and prevents any mishaps or unnecessary delays. You might also want to crush the candy canes beforehand to have them ready for sprinkling as soon as the white chocolate is spread over the dark chocolate layer.
Step-by-Step Instructions
-
Line a baking sheet with parchment paper. This step is crucial as it helps the peppermint bark to remove easily once set. Ensure that the paper covers the entire surface and extends slightly beyond the edges of the baking sheet for easy handling later.
-
Melt the dark chocolate chips in a microwave-safe bowl. Heat in the microwave in 30-second increments, stirring in between until smooth. Be cautious not to overheat, as this can cause the chocolate to seize; it’s better to melt until just melted with a few small lumps remaining that will melt upon stirring.
-
Pour the melted dark chocolate onto the prepared baking sheet. Use a spatula to spread it evenly into an even layer, about 1/4 inch thick. Make sure the chocolate reaches the edges of the pan for uniform thickness, which will contribute to even textures once set.
-
Melt the white chocolate chips in the same manner as the dark chocolate. After completely melted, stir in the peppermint extract, ensuring it’s fully incorporated. This infusion adds that signature minty flavor to the bark, enhancing the overall experience.
-
Pour the melted white chocolate over the dark chocolate layer and spread it evenly. Utilize the spatula to cover the dark chocolate completely; this may take a bit of maneuvering but results in a beautiful contrasting layer.
-
While the chocolate mixture is still warm, sprinkle the crushed candy canes evenly over the top. The warmth helps the candy canes adhere to the bark. Ensure that you distribute them evenly, so every piece of bark has a touch of minty crunch.
-
Refrigerate until set. Allow the bark to chill in the refrigerator for about 1 hour or until completely firm. Once set, remove from the fridge, and carefully break it into pieces using your hands or by scoring with a knife for more uniform pieces.
Understanding the Flavor and Texture
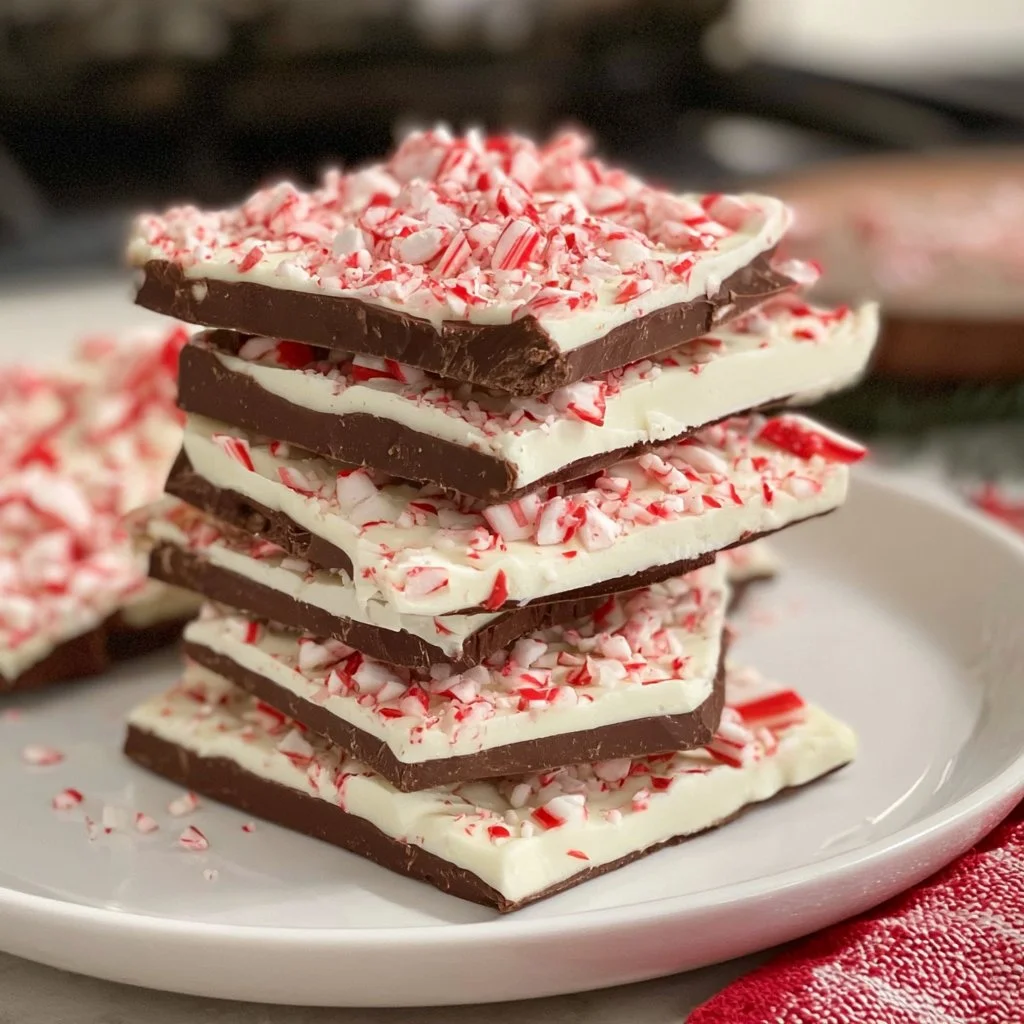
The combination of dark and white chocolate creates a luscious and creamy texture that melts in your mouth. The richness of the dark chocolate is beautifully offset by the sweetness of the white chocolate, which ensures that the snack remains indulgent without becoming overly sweet. The peppermint extract infuses the chocolate with a refreshing, cool bite that evokes the feeling of winter holidays, making each piece feel festive.
As you bite into the finished bark, you’ll first taste the creamy chocolate layer, followed quickly by the crisp crunch of candy canes, which adds an enjoyable texture contrast. This delightful play between smooth chocolate and sharp mint creates an unforgettable experience. The bark’s appearance—layered with a glossy finish and colorful toppings—makes it visually tempting and adds to its overall appeal.
Indeed, the combination of flavors—the rich bitterness of dark chocolate, the creamy sweet notes of white chocolate, and the coolness of peppermint—work in a symbiotic manner to create a complex and satisfying dessert. Each layer brings something unique to the table, ensuring that peppermint bark is fulfilling in both fashion and flavor.
Pro Tips
In the kitchen, small techniques can significantly improve your results. Here’s a guide to a few tips that can enhance your peppermint bark-making experience.
| Tip | Description |
|---|---|
| Use Quality Chocolate | Opt for high-quality chocolate chips or bars. Brands that use cocoa butter provide a better melting quality and taste, elevating your bark’s overall flavor. |
| Don’t Overheat Chocolate | When melting chocolate, avoid overheating it, which can lead to the chocolate seizing. Stir regularly and pull it from the microwave when it still has a few lumps. |
| Customize Your Bark | Feel free to switch up the toppings! Instead of candy canes, consider using nuts, dried fruits, or other festive candies to create your unique version. |
| Be Mindful of Topping Placement | Sprinkle toppings while your chocolate is still soft to ensure they adhere properly. If the chocolate sets before adding the toppings, they might not stick as well. |
Additionally, ensuring that all tools are clean and dry before they come into contact with chocolate is essential—this prevents unwanted moisture that can spoil the melting process.
Why You’ll Love This Recipe
This peppermint bark promises to be a favorite for parties, family gatherings, and even cozy nights at home. Its flavor profile—marrying rich chocolate with refreshing mint—is universally appealing, making it a sweet treat that people of all ages can enjoy. The ease of preparation allows even novices in the kitchen to create something special without fussing over complicated techniques or lengthy ingredients lists.
Moreover, its minimal set-up and clean-up requirements make it practical for busy schedules. You can easily prepare peppermint bark in under 30 minutes, allowing you to focus on spending quality time with loved ones during the festive season. For those who enjoy gift-giving, peppermint bark makes for an excellent homemade present wrapped in festive cellophane or presented in a decorative tin. It’s a thoughtful and delicious way to share the spirit of the holidays.
The aesthetic appeal of decorated peppermint bark adds to its charm. Its striking layers and festive colors make it an impressive centerpiece for holiday parties. Serving it is effortless, as you can simply break it into pieces and present them on a beautiful platter, allowing everyone to enjoy the treat at their leisure.
How to Serve Peppermint Bark
When serving peppermint bark, presentation can enhance the enjoyment of this festive dessert. Slice the bark into uniform pieces that are easy to pick up. For gatherings, consider displaying the bark on a decorative platter or in individual treat bags for a fun, grab-and-go style.
The fresh peppermint flavor of the bark pairs beautifully with a variety of beverages. Hot cocoa, spiced cider, or even peppermint tea can complement the dessert perfectly, enhancing the overall experience. Many also find that a warm cup of coffee or espresso provides a delightful contrast to the sweetness of the bark, making it an excellent after-dinner treat.
For an impressive display, consider layering the peppermint bark with other holiday treats. For instance, serve alongside assorted cookies, fudge, or even homemade truffles for an enticing dessert table. Not only does this provide variety, but it can impress guests with your extensive baking repertoire.
Lastly, if you are celebrating a holiday, you can add a little flair to your presentation. Using holiday-themed platters or decorative serving bowls can add to the festive atmosphere of your gatherings and create a cozy environment that encourages sharing and enjoyment.
How to Store Peppermint Bark
Proper storage of peppermint bark is crucial to maintain its texture and prevent any unwanted moisture from ruining your delicious treat. After the bark has fully set, transfer it to an airtight container. If it’s well-sealed, the bark can be stored in the refrigerator for about two weeks.
Alternatively, peppermint bark can also be stored at room temperature if kept in a cool, dry place away from direct sunlight. Make sure the container is kept well-sealed; otherwise, exposure to air can cause it to lose its freshness or become stale.
If you wish to prolong the lifespan of your peppermint bark, consider freezing it. Wrap the bark pieces tightly in plastic wrap and place them in a freezer-safe container. It will last for about three months in the freezer. When you’re ready to enjoy, thaw the bark in the refrigerator before serving to retain its texture.
It’s important to note that while refrigeration prevents spoilage, it can slightly change the texture of chocolate, rendering it less crisp over time. For the best experience, enjoy your peppermint bark while it’s fresh, but know that with proper storage, you can still enjoy many delightful pieces days later.
Tips to Make Peppermint Bark
For a perfect peppermint bark experience, there are several practical cooking tips to enhance your results.
First, be attentive when melting chocolate. Using a microwave, do so in short increments and stir often. This method provides better control and ensures that the chocolate doesn’t overheat. Another option is to use a double boiler for a more controlled melting experience.
Additionally, be aware of temperature variations when adding toppings. If your chocolate has begun to cool and thicken, consider warming it slightly before adding crushed candy canes. This will help ensure that the toppings adhere better.
Moreover, when breaking the bark, aim for irregular shapes—a rustic approach adds to the appeal of the finished product. You can use a large knife or simply use your hands to break it into pieces. This irregularity in size and shape contributes to the homemade charm and character of the treat.
Lastly, keep an eye on the peppermint extract. Start with the recommended amount and adjust to your palate if you desire a stronger peppermint flavor. This customizability is part of what makes this bark unique to your preferences, allowing you to create a treat that perfectly suits your taste.
Variations and Substitutions
While peppermint bark is delightful as is, there are numerous ways to put a personal twist on the classic recipe. Here are some variations you might consider.
You can switch the dark chocolate for milk chocolate if you prefer a sweeter, creamier flavor profile. This choice pairs wonderfully with the white chocolate and mint, creating an even more indulgent dessert.
For a more complex flavor, consider incorporating flavored extracts. Adding almond or vanilla extract can introduce subtle yet delightful notes that complement the peppermint. Such variations can create a well-rounded flavor depth and make each piece interesting.
Additional toppings could include chopped nuts, mini marshmallows, or dried fruit. These inclusions can add unique textures and flavors, allowing for a customization that makes each batch of peppermint bark personal. You might even try different sweets like toffee bits for a crunchy element.
Lastly, consider making a layer of Nutella instead of dark chocolate for a hazelnut spin. This can create a delicious layer that pairs beautifully with the white chocolate and peppermint, providing a different flavor profile suitable for nut lovers.
Storage and Reheating
When it comes to storage, dividing leftover peppermint bark into small portions can help maintain its freshness and facilitate easy access during the holiday season. By wrapping individual pieces in parchment paper and storing them in an airtight container, you preserve their flavor and prevent them from merging into a sticky mess.
When reheating peppermint bark, it’s best to do so gently to ensure that the chocolate remains smooth without compromising the texture. However, in most cases, peppermint bark is best enjoyed at room temperature as melting it again may lead to undesirable changes in texture and appearance.
If you want to use peppermint bark in recipes later, consider finely chopping it for use in desserts like brownies, pancakes, or even as toppings for ice cream. This way, you can add a holiday twist to various dishes while minimizing food waste.
Customization Ideas
Personalizing your peppermint bark opens up a world of opportunities to infuse your unique style into this delightful treat. Here are a few suggestions for customizing your peppermint bark.
Experimenting with different types of chocolate can yield exciting results. In addition to dark and white chocolate, consider using milk, semi-sweet, or even flavored chocolate, like orange chocolate. Each variant will bring a distinct flavor with an enchanting pairing to the mint.
Decorative toppings can also elevate the visual appeal of your peppermint bark. Beyond crushed candy canes, you might opt for colored sprinkles, edible glitter, or even drizzles of colored chocolate. These additions allow for creativity, especially when preparing gifts or serving at parties.
Intriguing flavor combinations are another avenue to explore. Pairing chocolate with nut butter swirls can create richness, while ingredients like sea salt or chili flakes can give a pleasant kick. This contrast can elevate the overall experience of the bark and surprise your taste buds.
Ultimately, the goal is to enjoy the flavors that resonate with you. Don’t be afraid to experiment with combinations that you love! Each time you make this treat, consider the qualities that you enjoy the most and focus on those.
Common Mistakes to Avoid
Creating peppermint bark can be a straightforward process, but there are a few common mistakes that can hinder the final result.
One mistake is melting the chocolate too quickly or at too high a temperature, which can cause it to seize. Always microwave in short bursts and stir frequently to check on the consistency.
Another common error is not allowing enough time for the layers to set. Impatience can lead to layers mixing when they are poured, ruining the beautiful appearance. Ensure sufficient time is given for both the dark and white chocolate layers to solidify.
Overdoing the peppermint extract can overpower the bark, leading to an unpleasantly strong mint flavor. It’s best to start with less and increase gradually, tasting as you go.
Lastly, storage mistakes can salvage or ruin your peppermint bark. Always ensure it’s stored in an airtight container to prevent moisture absorption. This is especially vital to keep the chocolate’s snap and freshness intact.
Serving Occasions
Peppermint bark is perfect for a multitude of occasions, from holiday gatherings to casual weeknight treats. The festive nature of the treat makes it an ideal addition to Christmas parties, where guests can enjoy it as a sweet end to their meals.
For New Year’s Eve, peppermint bark can provide a festive and easy dessert option. Its vibrant colors and cheerful flavors make it a go-to choice for parties, buffet tables, or as a ‘midnight snack’ treat.
It’s also a lovely homemade gift option for neighbors and friends. Wrapping individual pieces in decorative packaging adds a personal touch and showcases your thoughtfulness during the holiday season.
Additionally, peppermint bark makes an excellent sweet treat for cozy nights in. It pairs wonderfully with tea or hot cocoa while reading a favorite book or watching holiday movies. This simplicity keeps it relatable and achievable for everyday enjoyment.
Why Make This Recipe?
There are numerous reasons to include peppermint bark in your holiday repertoire. It’s the perfect blend of ease and delightful flavor, allowing even novice bakers to shine in the kitchen. Its simplicity encourages creativity while being forgiving, ensuring a favorable outcome even on your first attempt.
Moreover, the ingredients are readily available and usually already present in many pantries during the festive season, minimizing extra shopping trips. High-quality chocolate may be slightly pricier, but the significant difference in flavor and final results is worth it.
Another aspect to consider is that peppermint bark provides great versatility. It serves as a delightful stand-alone treat, a component for decadent desserts, or a decorative element to a larger dessert spread. Its adaptability makes it valuable beyond just a seasonal sweet; you can include it in various baked goods or serve it alongside other delightful confections.
Ultimately, peppermint bark is more than just a sweet; it’s a gesture of sharing and care during the holiday season. The flavors, the preparation, and the gift aspect all contribute to a delightful experience worth cultivating in your tradition.
Make-Ahead Preparation
Preparing peppermint bark in advance is not only advisable but can also help alleviate the hustle and bustle during the holidays. You can make peppermint bark a week or even several days before an event, as it stores well. This allows for a less stressful experience leading up to big gatherings.
Chopping and measuring the ingredients can be done in advance. Melting the chocolate and assembling the bark can then be done the day before an event. Additionally, chilling it overnight can help ensure that it sets properly, yielding a crisp texture and a beautiful presentation.
If you do decide to make it ahead of time, ensure you store it properly as mentioned earlier. The bark can be wrapped tightly in plastic wrap and placed in an airtight container; this prevents any moisture or odor absorption and keeps it fresh.
Allowing peppermint bark to set fully before slicing or breaking helps ensure a cleaner appearance and makes serving more manageable when it’s time to indulge. Thus, preparing ahead can lend itself well to not only quality flavor but also visual appeal.
Equipment and Kitchen Preparation
Selecting the right tools can greatly ease the process of making your peppermint bark. Start with two microwave-safe bowls: one for melting the dark chocolate and one for the white chocolate. Using glass or ceramic vessels is ideal as they can handle the heat without warping.
For spreading the melted chocolate evenly onto the baking sheet, a flexible spatula is invaluable. This tool allows for smooth and consistent spreading, which is essential for achieving an even layer.
A baking sheet lined with parchment paper or a silicone baking mat is also recommended. This prevents the bark from sticking and facilitates easy removal once it has set. An empty counter space helps organize and stage all ingredients, ensuring that the cooking process can flow smoothly.
Lastly, having a reliable pair of scissors on hand can come in handy for cutting open bags of chocolate chips, candy canes, or other ingredients. Proper preparation minimizes unnecessary mess and makes the cooking experience enjoyable.
FAQs
Can I use white chocolate chips instead of pure white chocolate?
Yes, but ensure the white chocolate chips you choose contain cocoa butter. This will impact the melting quality and overall texture.
Can I substitute peppermint extract with peppermint oil?
Yes, you can use peppermint oil, but you should use a much smaller amount, given its potency. One drop can be enough due to its concentrated flavor.
How do I prevent the chocolate from seizing?
To prevent chocolate from seizing, make sure it stays dry without any water. Additionally, heat gently and stir frequently while melting.
Can I use crushed mint candies instead of candy canes?
Absolutely! Crushed mint candies can add a similar flavor and texture. Just ensure they are chopped appropriately and evenly distributed.
What’s the best way to break the bark into pieces?
You can break the bark by hand for rustic pieces or use a sharp knife to score it into squares or rectangles before breaking.
How long does peppermint bark last?
When stored correctly in an airtight container, peppermint bark will last for about two weeks at room temperature or three months in the freezer.
Can I make this recipe dairy-free?
Yes, you can use dairy-free chocolate chips for both dark and white chocolate. Check the labels to ensure they are dairy-free.
What if my chocolate won’t melt properly?
If your chocolate does not melt properly, it’s likely overheated. You may try adding a small amount of shortening or coconut oil to help it become smoother.
Disclaimer
Nutritional information is approximate and may vary based on ingredient brands, substitutions, portion sizes, and preparation methods.