
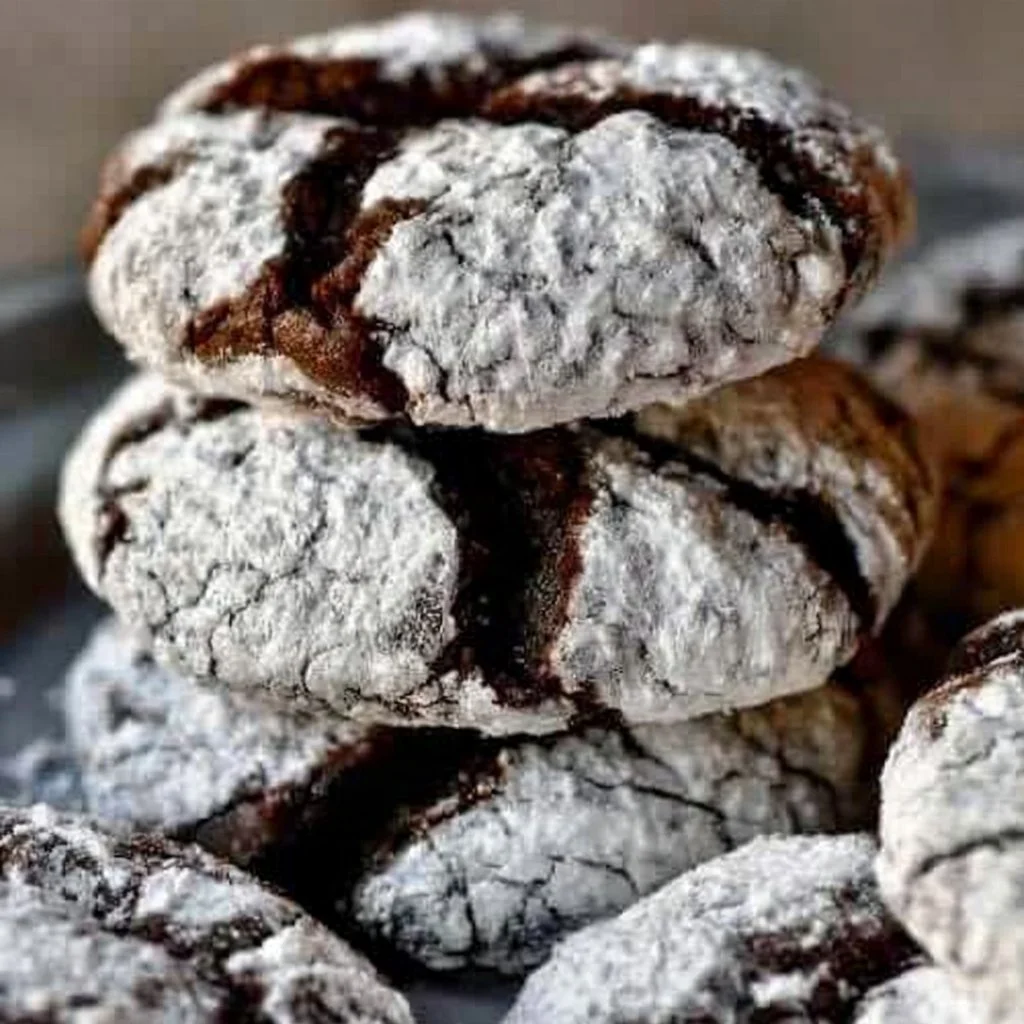
Red Velvet Crinkle Cookies Recipe – Soft & Chewy Cookies from Scratch | Easy crinkle cookies recipe, Best chocolate crinkle cookies recipe, How to make chocolate crinkle cookies
There’s something undeniably charming about a good cookie—especially when it embodies the festive vibrance of red velvet. Red Velvet Crinkle Cookies are the perfect blend of soft, chewy texture paired with the gloss of powdered sugar, giving them an inviting appearance that beckons you to indulge. These delightful treats are not just beautiful to look at; they bring together rich cocoa flavor with the subtle tang of cream cheese, making every bite an experience worth savoring.
The incredible color and crinkly appearance stem from a simple yet effective baking method. As the cookies bake, the dough expands and then collapses slightly, forming those signature cracks on the surface while maintaining a delectable softness inside. These cookies are soft to the bite with a slight chew, perfectly balanced with just the right amount of sweetness. Imagine sinking your teeth into a bite that’s both cozy and indulgent, a cookie that feels like a hug wrapped in festive flair.
Perfect for intimate gatherings, family celebrations, or just satisfying your sweet tooth, these cookies can be enjoyed any time of year. Whether you’re preparing for a holiday gathering, a picnic in the park, or simply want to indulge in a homemade treat, Red Velvet Crinkle Cookies are versatile enough to serve at various occasions. Pair them with a glass of cold milk or a warm cup of cocoa for a delightful afternoon snack or dessert.
Now, let’s delve deeper into what makes this recipe special and how you can create these delicious cookies right from the comfort of your kitchen.
What Makes This Recipe Special
The uniqueness of Red Velvet Crinkle Cookies lies in their intriguing combination of flavors and textures. Unlike a standard chocolate chip cookie or classic sugar cookie, the distinct flavor profile of red velvet—blending cocoa with a hint of vanilla and buttermilk—is what sets these cookies apart. The crinkle effect not only enhances their visual appeal but also offers a textural contrast; the lightly crinkled exterior gives way to a soft, cake-like interior that melts in your mouth.
Another standout feature of this recipe is its simplicity. Unlike some baking endeavors that require elaborate procedures or rare ingredients, this cookie recipe employs common pantry staples and straightforward methods. The ease of mixing wet and dry ingredients allows bakers of any skill level to embark on the journey of creating these delightful confections without feeling overwhelmed.
Moreover, they evoke a sense of nostalgia and celebration, often associated with special gatherings or joyous holidays. The vibrant red color is particularly fitting for festive occasions like Valentine’s Day, Christmas, or birthdays, ensuring they are more than just a treat but also a statement piece at any gathering.
To put it simply, whether you’re a novice baker or an experienced one, these cookies promise satisfaction and charm, making them a delightful addition to your baking repertoire.
Ingredient Overview and Helpful Notes
Understanding the role of each ingredient in Red Velvet Crinkle Cookies is vital for achieving the best flavor and texture. Here’s an in-depth look at the main ingredients and why they matter:
-
Granulated and Brown Sugar: The combination of these two sugar types introduces a balanced sweetness to the dough. Granulated sugar helps achieve the sturdy structure of the cookie, while brown sugar, with its molasses content, adds moisture and contributes to the chewiness of the final cookie. Together, they ensure that each cookie is soft yet slightly crisp at the edges.
-
Vegetable Oil: Using oil instead of butter in this recipe keeps the cookies moist and soft. Oil provides a gentle texture and richness without overpowering the cookie’s other flavors. It allows for a light chewiness and ensures that the cookies do not dry out quickly.
-
Cocoa Powder: This ingredient is essential for that classic rich chocolate flavor that complements the red velvet. Unsweetened cocoa powder is preferred, as it strikes the right balance of bitterness that enhances the overall sweetness and richness of the cookies.
-
Eggs: They serve as binding agents, helping to create a cohesive dough while also contributing to the tenderness of the cookie. The eggs contribute moisture, making the cookies soft and chewy after baking.
-
Vanilla Extract: Adds depth of flavor and aroma, making the cookies not just taste sweet but also fragrant and appealing. It enhances the overall baking experience, allowing the cookies to carry a pleasant taste that lingers.
-
All-Purpose Flour: A crucial ingredient for structure, flour provides that firmness we’re looking for in cookies. It also balances out the moisture content from the other ingredients.
-
Baking Powder: This ingredient acts as a leavening agent, allowing the cookies to rise slightly as they bake, helping to achieve that desirable texture.
-
Salt: A small yet vital component, salt enhances flavor and minimizes sweetness. It adds a touch of contrast, enhancing the cookie’s overall deliciousness.
-
Powdered Sugar: The final touch—rolled on just before baking—gives these cookies both their lovely white cap and a delightful sweetness that complements the chocolate flavor beautifully.
Understanding how to choose quality ingredients can greatly affect the final outcome. When selecting cocoa powder, for instance, opt for a high-quality brand for maximum chocolate flavor. It’s also important to use fresh baking powder to ensure the cookies rise correctly. Quality matters, so take a moment to consider each element as you gather your supplies.
Nutrition & Recipe Details
Nutritional values will vary depending on specific brands and measurements, so keep this in mind when making your calculations. Below are estimates for this Red Velvet Crinkle Cookie recipe.
| Item | Value |
|---|---|
| Prep time | 15 minutes |
| Cook time | 10-12 minutes |
| Store time | Up to 1 week |
| Calories | 140 per cookie |
| Protein | 1.2 grams |
| Carbohydrates | 22 grams |
| Fat | 5 grams |
Keep in mind that these values are estimates and can vary based on specific brands of ingredients, portion sizes, and preparation methods.
How to Make Red Velvet Crinkle Cookies
Baking cookies can be a truly rewarding experience, especially when you craft these lovely Red Velvet Crinkle Cookies. Before embarking on this journey, ensure that you are organized—having all your ingredients measured out and ready to go will streamline the process. Prepping ahead of time allows you to focus on the mixing and baking, making it enjoyable and less stressful.
When you start, having a few essential kitchen tools will help. A mixing bowl, measuring cups, mixing spoons, a whisk, cookie scoop, and a lined baking sheet are all you need. Ensure your oven is preheated to the right temperature before you begin mixing, as the dough should be ready to go straight into the oven when it’s mixed.
Ingredients
| Ingredient | Quantity |
|---|---|
| Granulated Sugar | 1 cup |
| Brown Sugar | 1 cup |
| Vegetable Oil | 1/2 cup |
| Eggs | 2 large |
| Vanilla Extract | 2 teaspoons |
| All-Purpose Flour | 1 cup |
| Cocoa Powder | 1/2 cup |
| Baking Powder | 1 teaspoon |
| Salt | 1/2 teaspoon |
| Powdered Sugar | 1 cup |
Before you dive into mixing, it is essential to prepare the ingredients properly. The granulated and brown sugars should be measured precisely, packed for the brown variety to ensure that moisture is included. Room temperature eggs will incorporate more easily, so take them out in advance to ensure proper blending. Sifting the cocoa powder can help prevent clumping, making for a smoother batter, while also allowing for easier blending with the other dry ingredients.
Step-by-Step Instructions
Creating Red Velvet Crinkle Cookies is a straightforward process, allowing even novice bakers to enjoy success. Follow these steps to ensure beautiful, delicious cookies every time.
-
Preheat your oven to 350°F (175°C) and line a baking sheet with parchment paper. This preparation minimizes sticking and allows for easy removal of cookies after baking.
-
In a large bowl, mix together granulated sugar, brown sugar, and vegetable oil until well combined. Aim for a smooth mixture that blends the sugars and oil together seamlessly. This step generally takes a minute or two with a mixing spoon or a hand mixer.
-
Add the eggs and vanilla extract, mixing until smooth. Be sure not to overmix here; just blend until you see a uniform consistency.
-
In another bowl, whisk together flour, cocoa powder, baking powder, and salt. This ensures that the dry ingredients are evenly distributed, vital for achieving consistent flavor and texture throughout the cookies.
-
Gradually add the dry ingredients to the wet ingredients, mixing until just combined. Avoid overmixing, as this can lead to tough cookies.
-
Chill the dough in the refrigerator for about 30 minutes. Chilling helps the cookies maintain their shape while they bake, preventing excessive spreading and enhancing texture.
-
Using a cookie scoop, scoop tablespoon-sized portions of dough and roll them into balls. This step is key for ensuring even baking and uniformity in size.
-
Roll each ball in powdered sugar until well coated. This step will create the signature crinkled appearance, so make sure they’re generously coated.
-
Place the cookies on the prepared baking sheet about 2 inches apart to allow for spreading while baking.
-
Bake for 10-12 minutes, watching for the edges to set but ensuring the centers remain soft. This balance is crucial for achieving the soft and chewy texture characteristic of these cookies.
-
Let the cookies cool on the baking sheet for a few minutes before transferring them to a wire rack to cool completely. This helps them set up without breaking apart.
Understanding the Flavor and Texture
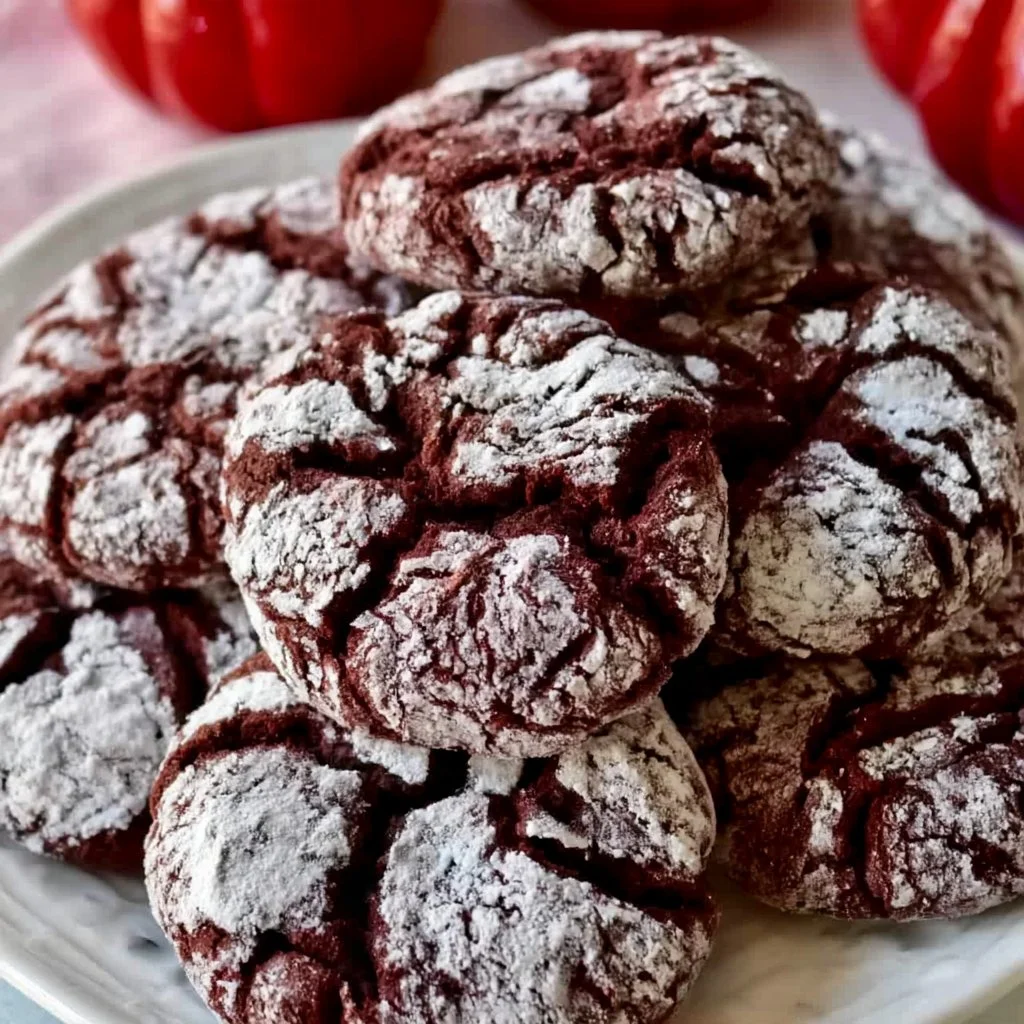
Upon finishing your Red Velvet Crinkle Cookies, you can expect a delightful mix of flavors and textures. The inviting aroma of chocolate wafts through the air, while the vibrant red color brings cheer just from its appearance. Each cookie will flaunt its attractive crinkles, which form during baking, creating a visual appeal that prompts anticipation.
When you take a bite, the initial crispness of the sugary surface gives way to a soft, moist interior that showcases a subtle cocoa flavor, perfectly complemented by the warm notes from the brown sugar. The combination of granulated and brown sugars lends complexity to the sweetness, while the texture is both chewy and tender, reminiscent of cake in cookie form.
As the cookies cool and set, they maintain that perfect balance of softness with slightly crisper edges, making each cookie an indulgent yet comforting treat. When enjoyed warm from the oven, the texture becomes even more delightful, evoking a sense of coziness and nostalgia that only home-baked goods can provide.
Pro Tips
In baking, small adjustments can lead to significant improvements in the result. Here are some expert tips to ensure your Red Velvet Crinkle Cookies turn out perfectly every time.
| Tip | Description |
|---|---|
| Chill the Dough | This is essential for controlling spread. Chilling helps ensure the cookies maintain their shape and creates a chewy texture. If possible, chill the dough overnight for even better results. |
| Use a Cookie Scoop | A cookie scoop ensures that all cookies are the same size, which promotes even baking. This is particularly important for achieving consistency in both appearance and texture. |
| Don’t Overbake | Cookies may appear underdone when you take them out. They will continue to firm up as they cool. Aim for soft centers to retain that chewy texture. |
| Experiment with Flavor Add-ins | While these cookies are delightful as is, consider adding chocolate chips or chopped nuts for extra flavor and texture. Just make sure to maintain balance so that they don’t overpower the red velvet profile. |
Implementing these strategies can elevate your baking skills and enhance the quality of your cookies. Trying out these tips means you can make adjustments based on your personal preferences or experience to create a batch of cookies that are undeniably delightful.
Why You’ll Love This Recipe
This recipe for Red Velvet Crinkle Cookies is a keeper for many reasons. Firstly, the blend of textures and flavors makes for an irresistible treat that combines the rich essence of chocolate with the festive allure of red velvet. Baking these cookies not only results in deliciousness but also feels therapeutic—watching the dough transform into delightful cookies is satisfying.
The preparation process is simple, making it easy even for beginner bakers. Accessible ingredients mean you likely already have everything on hand, requiring little planning or frustration to whip up a batch. Cleanup is minimal too, making it a manageable endeavor.
These cookies are versatile enough to adapt to various occasions. With vibrant colors and an enticing flavor profile, they’re perfect for celebrations, holiday treats, or everyday snacks. The fact that they can be made ahead of time, stored, and still taste amazing makes them a winning recipe that you’ll want in your rotation.
How to Serve Red Velvet Crinkle Cookies
When it comes to presentation and serving, Red Velvet Crinkle Cookies have a natural charm that makes them delightful for any occasion. Their deep red color and distinctive crinkles create an eye-catching display on any dessert platter. Here are some creative serving suggestions:
-
With Milk or Hot Chocolate: These cookies pair wonderfully with a tall glass of cold milk or a steaming mug of hot chocolate. Their sweetness meshes beautifully with the creamy textures, enhancing the overall indulgence.
-
Dessert Platters: Create a dessert spread for a gathering by combining these cookies with other baked goods, such as brownies, cheesecake bars, or festive cakes. Their striking color adds vibrancy to the platter, making it visually appealing.
-
As Ice Cream Sandwiches: If you want to get creative, use two cookies to sandwich your favorite ice cream flavors. This transforms them into a delectable dessert that is sure to impress guests and keep people coming back for more.
-
Decorative Display: You can place them in a glass jar tied with a festive ribbon or stack them on a decorative plate as a centerpiece. Presentation can elevate even the simplest of treats, turning these cookies into a show-stopping dessert.
Overall, serving these cookies is as much about the enjoyment as it is about the presentation. Let’s not forget about the fun of sharing them—pack them in little treat bags for friends or family, ensuring loved ones also get to savor this delightful confection.
How to Store Red Velvet Crinkle Cookies
Storing your Red Velvet Crinkle Cookies properly is essential to maintaining their delightful texture and flavor. Here are some guidelines to follow:
-
Cooling: Allow your cookies to cool completely on a wire rack before packaging them. This ensures they do not trap moisture, which can lead to a soggy texture.
-
Room Temperature Storage: Store cookies in an airtight container at room temperature. This method is perfect for maintaining freshness for up to a week. If the weather is humid, consider adding a piece of bread to the container to absorb moisture.
-
Refrigeration: While it’s not typically necessary, you can refrigerate these cookies if you live in a very warm climate. Just ensure they’re in a tightly sealed container to prevent them from drying out or absorbing other odors.
-
Freezing for Longevity: If you want to keep the cookies for longer, freeze them! Place them in a single layer on a baking sheet initially to firm up before transferring them to a freezer-safe bag or container. They can be stored this way for up to three months. When ready to eat, it’s best to let them thaw at room temperature.
The Red Velvet Crinkle Cookies may harden slightly in the refrigerator or freezer, but allowing them to rest at room temperature will usually bring back their structure and softness.
Tips to Make Red Velvet Crinkle Cookies
Creating consistently delicious Red Velvet Crinkle Cookies is attainable with the right techniques. Here are additional tips to refine your baking process:
-
Use Room Temperature Eggs: This simple step ensures that eggs mix seamlessly into your batter, providing a richer consistency. Cold eggs can cause the dough to become lumpy, which may affect the texture of the final cookies.
-
Measure Flour Accurately: Flour can easily be overmeasured, which may lead to dry cookies. Spoon flour into the measuring cup without packing it down, and level off with a knife for the best results.
-
Don’t Skip the Chilling Time: Chilling the dough helps control the spread during baking. Cold dough will yield thicker, chewier cookies, while warm dough tends to spread excessively, leading to flatter cookies.
-
Check Cookie Doneness Visually: Instead of relying just on a timer, keep an eye on your cookies. When the edges appear set and firm, but the center still looks slightly soft, it’s time to pull them from the oven. They will continue to bake a bit on the tray once removed, achieving that perfect chewy center.
These steps contribute to the overall quality of your cookies, ensuring that you create batches that are consistently enjoyable and satisfying.
Variations and Substitutions
There are countless ways to adapt Red Velvet Crinkle Cookies for different tastes or dietary needs. Consider these variations and substitutions:
-
Gluten-Free Option: To make these cookies gluten-free, swap out the all-purpose flour for a high-quality gluten-free flour blend. Ensure that the blend contains a binding agent like xanthan gum to maintain structure, which is especially important in cookie recipes.
-
Dairy-Free Changes: Substitute vegetable oil with a dairy-free butter or a neutral flavored oil. Always verify that other ingredients like vanilla extract are dairy-free to abide by dietary needs.
-
Chocolate Variants: For an even richer chocolate flavor, add semi-sweet chocolate chips or chunks into the batter or swap some cocoa powder for melted dark chocolate to enhance the chocolate profile.
-
Cream Cheese Filling: Embed a dollop of cream cheese frosting inside each cookie before sealing them. This variation creates a surprise creamy center that elevates the cookie experience and provides an indulgent twist.
-
Decorative Toppings: Experiment with toppings by rolling the dough balls in crushed nuts or sprinkles in addition to powdered sugar before baking. This adds visual appeal and additional flavor and texture to your cookies.
Incorporating these variations allows you to personalize the recipe to fit your preferences or explore new flavor profiles while maintaining the cookies’ essence.
Storage and Reheating
When it comes to leftovers, proper storage and reheating techniques can make all the difference. Here’s how to handle your Red Velvet Crinkle Cookies to keep them fresh:
-
Portion Control: Consider dividing your cookies into smaller groups when storing. This way, you can remove just what you need without exposing the rest to air and moisture, which can lead to staling.
-
Wrap Individually: For long-term storage, wrap each cookie in plastic wrap or foil before placing them in a container or bag. This creates a barrier from air exposure.
-
Reheating in the Microwave: To revive the soft texture of a previously baked cookie, a brief stint in the microwave (around 8-10 seconds) will help restore warmth and softness. Be cautious not to overheat, as this can make them too chewy.
-
Reheating in the Oven: For an even heating method, preheat your oven to 350°F (175°C) and bake the cookies on a baking sheet for about 5 minutes. This method helps get the edges crisp while keeping the centers soft and chewy.
Utilizing these tips ensures that your Red Velvet Crinkle Cookies stay delightful long after baking, allowing you to enjoy them fresh, even if they’ve been stored for a while.
Customization Ideas
One of the joys of baking is customizing recipes to fit your taste. Here are a few suggestions for adjusting flavors or presentations when it comes to Red Velvet Crinkle Cookies:
-
Spices and Flavorings: Consider adding a pinch of cinnamon or nutmeg to the dry ingredients to give your cookies a warm depth of flavor. A dash of almond extract could also complement the vanilla and cocoa beautifully.
-
Mix Up the Sugars: If you prefer a lighter sweetness, reduce the granulated sugar and increase the amount of brown sugar. The molasses in brown sugar contributes to moisture and can create a slightly different flavor profile.
-
Add Fruit Zest: For a refreshing lift, experiments with lemon or orange zest can add a bright flavor that pairs wonderfully with the richness of the cocoa.
-
Enhance the Topping: After coating in powdered sugar, sprinkling a touch of cocoa nibs or additional powdered sugar can create a more sophisticated presentation.
Allowing for such adaptations can lead to delightful surprises each time you make them, making the experience of baking a new adventure every time.
Common Mistakes to Avoid
Baking cookies might seem simple, but there are frequently encountered pitfalls that can turn a perfect batch into a disappointment. Here are some common mistakes to be aware of:
-
Under-measuring Ingredients: Failing to level off ingredients like flour can lead to a dry cookie. Always use a dry measuring cup and spoon it in rather than scooping directly from the bag.
-
Overmixing the Dough: Mixing too heavily can develop gluten, making cookies tough rather than tender. Mix just until the dry ingredients are incorporated to maintain a soft texture.
-
Ignoring Chilling Time: Skipping or shortening the chilling phase can lead to cookies that spread too much during baking, ruining the desired texture. Always chill for the recommended time.
-
Not Monitoring Doneness: Cookies can quickly transition from perfectly baked to overdone. Check them a couple of minutes before the timer goes off; the edges should be set while the centers look soft.
-
Storing Improperly: Failing to cool cookies completely before storing can create moisture buildup, leading to soggy cookies. Allow them to cool on a wire rack first to maintain texture.
By being mindful of these potential errors, you can enhance your cookie-making skills, resulting in red velvet crinkles that are perfectly baked every time.
Serving Occasions
Red Velvet Crinkle Cookies are wonderfully versatile when it comes to serving occasions. Their festive color and rich taste make them ideal for several scenarios:
-
Holiday Gatherings: The vibrant red color makes them perfect for Christmas or Valentine’s Day celebrations. Their unique appearance adds to the festive atmosphere while offering guests a treat they’re likely to remember.
-
Family Celebrations: If you’re hosting a family gathering, these cookies can be a delightful addition to the dessert table. They pair well with coffee or tea, making for a charming after-meal treat.
-
Casual Snack: Even when it’s not a holiday, these cookies are a fantastic go-to for an afternoon snack. Enjoying them with a glass of milk or as an after school treat maintains their comforting nature.
-
Gift Giving: Wrapping a batch of these cookies in a festive tin or treat bag makes for an excellent homemade gift. Friends and family will appreciate the effort and love that went into baking them.
No matter the occasion, these cookies are sure to stand out and bring a sense of joy and warmth to everyone who enjoys them.
Why Make This Recipe?
The allure of Red Velvet Crinkle Cookies goes beyond their delicious taste—they embody a unique fusion of flavor and fun that stands apart from other cookie recipes. The combination of rich cocoa with a gentle sweetness, along with a soft texture creates an irresistible experience not typically found in traditional cookies.
This recipe also offers simplicity, making it accessible to both beginners and seasoned bakers. The straightforward method means you can enjoy the process without feeling overwhelmed, encouraging a sense of culinary accomplishment.
With their charming appearance and flavorful profile, these cookies also remain incredibly adaptable to personal tastes and dietary preferences. Whether you stick to the classic recipe or mix in your own twists, you’re sure to find satisfaction in each crispy, chewy bite.
This recipe not only provides a delightful treat but also serves as a delightful way to create connections through shared experiences. It encourages simple joys and encourages creativity in the kitchen, making it a worthy addition to any baking repertoire.
Make-Ahead Preparation
For those eager to bake but seeking to plan efficiently, there are several steps that you can prepare in advance when making Red Velvet Crinkle Cookies:
-
Dough Preparation: The cookie dough can be made ahead of time and refrigerated. Once prepared, wrap it tightly in plastic wrap or store it in an airtight container, allowing the flavors to meld overnight for an enhanced taste when you eventually bake them.
-
Ready to Bake: If you prefer not to chill the dough before baking, you can scoop the dough into balls and freeze them instead. Place the dough balls onto a lined baking sheet until they firm up, then transfer them to a freezer-safe bag for later use. When ready to bake, you can direct from the freezer to the oven, simply adding a minute or two to the overall baking time.
-
Storing Baked Cookies: Once baked, cooled, and stored properly, these cookies can last for an extended period. You can prepare a batch in advance, ensuring that you have a sweet treat on hand whenever cravings strike.
-
Flavor Factor: Allowing the dough to sit for a bit enhances the flavor, making it even more delicious once baked. This step means you can satisfy your sweet tooth instantly once cookie cravings hit, while still enjoying a freshly-baked cookie experience.
Efficiently organizing your baking process with these make-ahead techniques allows you to enjoy beautiful Red Velvet Crinkle Cookies whenever the craving arises, without the rush of last-minute preparations.
Equipment and Kitchen Preparation
To create the best Red Velvet Crinkle Cookies, it’s essential to be equipped with the right tools and prepare your kitchen effectively:
-
Baking Sheet: Use a rimmed baking sheet for baking your cookies. A rimmed design helps contain any mess and gives enough surface area for multiple cookies.
-
Parchment Paper or Silicone Mats: Lining your baking sheet with parchment paper or silicone mats ensures that the cookies do not stick and allows for easy removal once baked.
-
Mixing Bowls: Prepare to have both large and medium mixing bowls on hand. A large bowl is ideal for mixing the main dough, while a smaller bowl is useful for whisking together the dry ingredients.
-
Measuring Cups and Spoons: Accurate measuring is crucial in baking. Use dry measuring cups for flour and sugar, while liquid measuring cups work for oil and other wet ingredients.
-
Whisk and Spoon: A whisk helps combine dry ingredients smoothly, while a sturdy mixing spoon or spatula is crucial for incorporating all ingredients effectively.
By gathering your essential baking tools ahead of time, you create an organized workspace that fosters a smooth baking process. Having everything set and ready allows you to focus entirely on creating those beautiful Red Velvet Crinkle Cookies.
FAQs
-
Can I use cocoa powder instead of Dutch-process cocoa?
Yes, you can use unsweetened cocoa powder in place of Dutch-process cocoa in this recipe. Just be aware that Dutch-process cocoa has a slightly different flavor profile and can result in a different color, so your cookies may not be as bright red. -
Why do my cookies spread too much during baking?
Excessive spreading can occur if the dough is not chilled long enough. Ensure you chill the dough for at least 30 minutes, and consider longer chilling times for best results. Also, check that your measurements are accurate. -
Can I replace vegetable oil with butter?
Yes, but this may change the texture of the cookies, making them denser and less chewy. If using butter, ensure it’s softened to room temperature for easy creaming with the sugars. -
What should I do if my cookies are too dry?
If your cookies turn out dry, consider a few adjustments next time, such as slightly reducing the amount of flour or increasing the fat content. To save slightly dry cookies, pair them with a glass of milk or ice cream. -
How can I customize these cookies?
You can add chocolate chips, nuts, or even replace some sugar with spices like cinnamon for a twist. Consider rolling the dough in crushed candy canes for festive flair or adding food coloring for additional vibrancy. -
How long do these cookies last?
When stored in an airtight container, Red Velvet Crinkle Cookies usually remain fresh for up to one week at room temperature. If freezing, they can last for about three months. -
Can I freeze the cookie dough?
Yes! Cookie dough can be frozen after rolling into balls. Place them on a baking tray to freeze individually and then store in a freezer-safe bag for longer-term storage. -
What’s the best way to thaw frozen cookies?
When ready to enjoy frozen cookies, allow them to thaw at room temperature for about 15-20 minutes. If you’d like them warm, you can pop them in the oven for a few minutes to rediscover that fresh-baked softness.
Disclaimer
Nutritional information is approximate and may vary based on ingredient brands, substitutions, portion sizes, and preparation methods.