

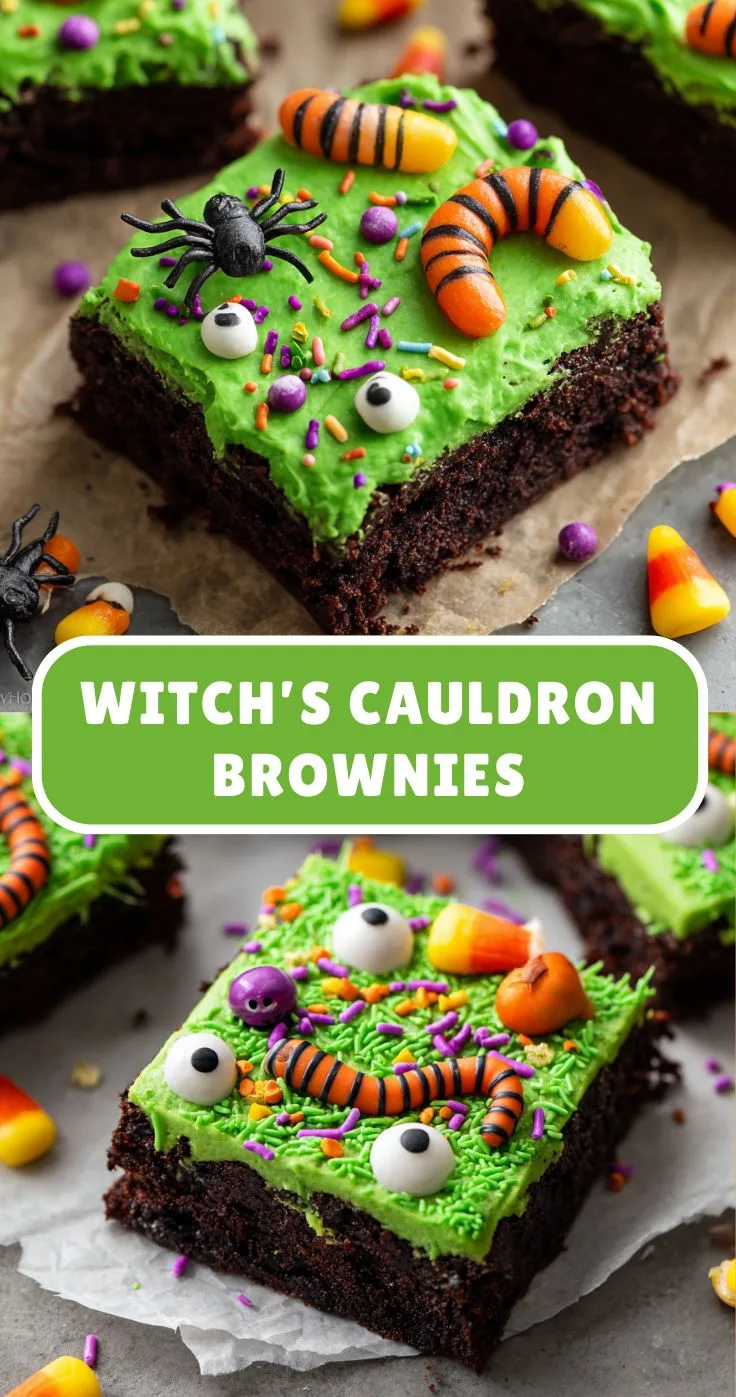
Halloween is the perfect time to turn an ordinary dessert into something magical, and these Witch’s Cauldron Brownies are a fun way to do exactly that. Rich, fudgy brownies become miniature witch’s cauldrons topped with chocolate frosting, vibrant green “potion,” fluffy marshmallows, candy eyeballs, and colorful Halloween sprinkles.
The result is a dessert that looks like it came straight from a bubbling witch’s kitchen. The bright green candy coating creates the illusion of magical potion spilling over the edge of each chocolate cauldron, while the candy eyeballs and marshmallows add a playful, slightly creepy touch.
Despite their impressive appearance, these brownies are surprisingly easy to make. The recipe starts with a boxed brownie mix, so you do not need to prepare a complicated homemade brownie batter. Once the brownies are baked and cooled, the decorating process does most of the work.
These treats are perfect for Halloween parties, children’s celebrations, school events, bake sales, or a spooky movie night at home. They are also a great project to make with kids because everyone can create their own unique cauldron.
Why You’ll Love These Witch’s Cauldron Brownies
These brownies are more than just a Halloween dessert. They are a fun food craft that brings plenty of personality to your dessert table.
Easy to Make
The recipe begins with a boxed brownie mix, which keeps the preparation quick and simple. You can focus your energy on the fun decorating instead of spending a long time preparing the brownie batter.
Perfectly Spooky
Green “potion,” candy eyeballs, black licorice, and Halloween sprinkles create an unmistakable witch’s cauldron appearance.
Fun for Kids
Children can help decorate the brownies by adding marshmallows, candy eyes, and sprinkles. They can even choose how much “potion” goes into each cauldron.
Great for Parties
The brownies are individually portioned, making them easy to serve at Halloween gatherings. Each guest gets their own little chocolate cauldron.
Recipe Details
Prep Time: 15 minutes
Cook Time: 25 minutes
Total Time: 40 minutes
Yield: 12 brownies
Pan: 9×13-inch baking pan
Ingredients
Brownie Base
1 box brownie mix:
Use your favorite brownie mix and prepare it according to the package instructions.
The brownie mix provides the rich chocolate foundation for the cauldrons. A fudgy-style mix works particularly well because the brownies need enough structure to support the toppings.
Chocolate Frosting
1 cup chocolate frosting helps attach the peanut butter cups to the brownies while adding an extra layer of chocolate flavor.
You can use homemade chocolate frosting or your favorite prepared frosting.
Reese’s Peanut Butter Cups
You will need 12 Reese’s Peanut Butter Cups or a similar chocolate-covered peanut butter candy.
These form the base of the miniature cauldrons.
The combination of chocolate and peanut butter also adds a delicious flavor contrast to the brownie.
Green Candy Melts
1 cup green candy melts creates the magical potion.
The vibrant green color makes the brownies immediately recognizable as witch’s cauldrons.
If you cannot find green candy melts, green icing or tinted white chocolate can be used instead.
Mini Marshmallows
½ cup mini marshmallows help create the bubbling potion effect.
Their white color also provides a nice contrast against the dark chocolate and green topping.
Candy Eyeballs
½ cup candy eyeballs add a playful spooky detail.
Some can be placed directly into the green topping while it is still soft.
Halloween Sprinkles
½ cup Halloween sprinkles add additional color and texture.
Use bones, bats, stars, pumpkins, spiders, or a combination of your favorite Halloween designs.
Black Licorice Laces or Pretzel Sticks
These create the miniature “stirring spoons.”
Black licorice gives a traditional spooky appearance, while pretzel sticks provide a salty crunch.
How to Make Witch’s Cauldron Brownies
Step 1: Prepare the Brownie Batter
Begin by preparing the brownie mix according to the instructions on the package.
Different brands require different amounts of eggs, oil, and water, so use the exact quantities specified by your brownie mix.
Mix until the batter is smooth and well combined.
Avoid excessive mixing once all the ingredients are incorporated. Overmixing can affect the final texture.
Step 2: Prepare the Pan
Line a 9×13-inch baking pan with parchment paper or grease it thoroughly.
If using parchment paper, leave some overhang along two sides. This will make it easier to lift the brownie slab from the pan once it has cooled.
Step 3: Bake the Brownies
Pour the brownie batter into the prepared pan and spread it evenly.
Bake according to the package directions. The original recipe uses approximately 25 minutes, but the exact time can vary depending on the brownie mix and your oven.
You want the brownies to be fudgy and set.
Avoid overbaking because dry brownies are more difficult to cut cleanly and do not provide the same rich texture.
Remove the pan from the oven and allow the brownies to cool completely.
Why the Brownies Need to Cool Completely
Do not rush the cooling process.
Warm brownies are soft and fragile, and attempting to decorate them while they are hot can cause the pieces to break apart.
The toppings can also become unstable when placed on warm brownies.
Allow the entire brownie slab to cool before cutting and decorating.
For especially clean cuts, you can place the cooled brownies in the refrigerator for a short period before cutting them.
Step 4: Cut the Brownies
Once the brownies have cooled completely, cut the slab into 12 equal squares.
A sharp knife will help create clean edges.
For the neatest pieces, wipe the knife between cuts to remove excess brownie crumbs.
Do not worry if the brownies are not perfectly identical. The toppings will cover much of the surface, and slight differences can make the finished cauldrons look homemade and charming.
Step 5: Create the Cauldron Bases
Unwrap the 12 Reese’s Peanut Butter Cups.
Place one peanut butter cup upside down on top of each brownie square.
The peanut butter cup forms the raised base of the miniature cauldron.
Position each one approximately in the center of the brownie.
Step 6: Secure the Cauldrons
Spread a small amount of chocolate frosting on the brownie underneath each peanut butter cup.
The frosting acts like edible glue and helps keep the candy securely attached.
You do not need a thick layer. A small amount is enough to hold the peanut butter cup in place.
If your peanut butter cups are already stable on the brownies, you can still use a little frosting for extra security.
Step 7: Melt the Green Candy
Place the green candy melts in a microwave-safe bowl.
Heat them according to the package instructions, stirring between intervals until completely smooth.
If using a microwave, short heating intervals are generally easier to control than one long heating period.
Stir thoroughly after each interval.
The melted candy should be smooth enough to spoon easily but not so thin that it immediately runs off the brownies.
If you are using green icing instead, make sure it has a consistency that can be spread or drizzled over the cauldrons.
Step 8: Add the Magical Potion
Spoon some melted green candy onto the top of each peanut butter cup.
Allow a small amount to drip over the edges.
The drips are an important part of the design because they make the cauldron look as though the magical potion is bubbling over.
You do not need perfectly controlled drips. Natural-looking irregular edges actually create a more convincing potion effect.
Work while the green candy is still soft so you can immediately add the decorations.
Step 9: Add the Bubbles
Now decorate the green potion with mini marshmallows.
Place a few mini marshmallows around the top of each cauldron.
Some can be partially pressed into the green coating while others can sit on top.
This creates the appearance of bubbles rising from the magical brew.
You can use more or fewer marshmallows depending on how dramatic you want the bubbling effect to be.
Step 10: Add the Candy Eyeballs
While the green candy is still soft, press candy eyeballs into the topping.
Place them randomly for a playful look.
You can use one large eye in the center or several smaller eyes scattered across the potion.
The candy eyeballs are what give these brownies their slightly creepy Halloween personality.
Step 11: Add Halloween Sprinkles
Sprinkle Halloween-themed decorations over the top.
Black and orange sprinkles create a traditional Halloween color combination, while purple and green can give the cauldrons a more magical appearance.
Bones, bats, spiders, stars, pumpkins, and other shapes can all work.
Add the sprinkles before the green candy sets so they stick securely.
Step 12: Add the Stirring Spoon
Finish each cauldron with a piece of black licorice lace or a pretzel stick.
Insert it gently into the green topping at an angle.
The pretzel stick works especially well if you want a salty contrast to the sweet brownie and candy.
Black licorice creates a darker, more traditional witch-inspired appearance.
If using pretzel sticks, make sure they are long enough to resemble a miniature spoon or stirring stick without becoming difficult to handle.
Step 13: Let Them Set
Allow the decorated brownies to sit at room temperature until the green candy firms up slightly.
This allows the marshmallows, candy eyeballs, sprinkles, and stirring sticks to stay in place.
If you are short on time, you can place the brownies in the refrigerator briefly to help the coating set faster.
Once firm, they are ready to serve.
Tips for Perfect Witch’s Cauldron Brownies
Use Fudgy Brownies
A dense, fudgy brownie provides the best foundation for the peanut butter cup and decorations.
Avoid overbaking the brownies.
Let the Brownies Cool Completely
This makes cutting and decorating much easier.
Warm brownies can crumble when you try to attach the candy.
Do Not Overheat the Candy Melts
Green candy melts can become thick or difficult to work with if overheated.
Heat them gradually and stir frequently.
Work While the Green Candy Is Soft
The marshmallows, candy eyeballs, and sprinkles need to be added before the coating sets.
Prepare all your decorations ahead of time so you can work efficiently.
Do Not Overdecorate
It can be tempting to add every Halloween decoration you have, but too many toppings can make the cauldrons difficult to eat.
Choose a few key elements and arrange them thoughtfully.
How to Make the Potion Extra Spooky
The bright green color is already eye-catching, but you can make the potion look even more mysterious.
Use different sizes of candy eyeballs to create a variety of creatures.
Add purple or black Halloween sprinkles alongside the green coating.
Use a combination of mini marshmallows and candy eyeballs to create an uneven bubbling effect.
You can also let some of the green candy drip farther down the sides of the peanut butter cup to make the potion appear as though it is overflowing.
Halloween Sprinkle Ideas
There are many options for customizing the cauldrons.
Try:
- Black and orange sprinkles
- Purple sugar crystals
- Candy bats
- Tiny candy bones
- Spider-shaped sprinkles
- Star sprinkles
- Pumpkin sprinkles
- Green and black nonpareils
A mixture of colors and shapes can make each brownie look slightly different.
Make-Ahead Instructions
These brownies are convenient for Halloween parties because they can be prepared ahead of time.
Bake the brownies and allow them to cool completely.
Cut them into squares and add the peanut butter cups.
The brownies can be prepared to this stage ahead of time and decorated later.
For the freshest appearance, add the green potion and delicate decorations a few hours before serving.
This also allows you to organize the decorating process without rushing.
How to Store Witch’s Cauldron Brownies
Store the finished brownies in an airtight container for up to 3 days.
Keep them in a cool, dry place away from direct sunlight and heat.
If you need to stack them, use parchment paper between layers to help protect the decorations.
Because the candy toppings can soften in warm temperatures, refrigeration may be useful if your kitchen is particularly warm.
Allow refrigerated brownies to sit briefly before serving so the brownie texture can soften.
How to Serve Them
These brownies are designed to be individual desserts, making them ideal for parties.
Arrange them on a large Halloween platter with the cauldrons facing upward.
For an extra magical presentation, scatter additional Halloween sprinkles around the brownies.
You can also place them alongside other Halloween treats such as:
- Ghost brownies
- Pumpkin cookies
- Halloween cupcakes
- Chocolate-covered pretzels
- Caramel apples
- Candy corn
The variety of shapes, colors, and textures will make your dessert table much more visually interesting.
Making Them With Kids
Witch’s Cauldron Brownies are an excellent Halloween food craft for children.
Adults can handle baking the brownies and melting the candy while children can help with the decorating.
Give them small bowls of marshmallows, candy eyeballs, and sprinkles and let them design their own cauldrons.
Each child can choose how many eyes to add and which Halloween decorations to use.
Some cauldrons might have a single eyeball while others might be filled with several. Some might have lots of bubbles, while others can have a simple green potion.
The lack of strict rules makes this recipe especially fun for kids.
Always supervise children around hot pans, melted candy, and kitchen appliances.
Frequently Asked Questions
Can I use homemade brownies?
Yes. You can replace the boxed brownie mix with your favorite homemade brownie recipe.
Bake it in a 9×13-inch pan so the brownies can be divided into approximately 12 squares.
Can I use another candy instead of Reese’s Peanut Butter Cups?
Yes. You can use another similar chocolate-covered peanut butter candy or another sturdy round chocolate candy.
The important thing is to choose a candy that can support the green topping.
What can I use instead of green candy melts?
Green icing or white chocolate tinted green can work as alternatives.
If using white chocolate, make sure the food coloring is suitable for chocolate.
Can I use pretzels instead of black licorice?
Absolutely. Pretzel sticks are an excellent alternative and add a salty crunch.
Can I make these ahead?
Yes. They can be prepared ahead and stored in an airtight container for up to three days.
Why is my green candy too thick?
The candy may have been overheated or may need an appropriate thinning product. Follow the instructions for your specific candy melt brand and avoid adding water.
Can I use different colors?
Definitely. Green creates the classic witch-potion appearance, but purple, orange, or even bright blue can create a different magical theme.
Nutrition Information
The estimated nutrition per brownie is:
| Serving Size | Calories | Protein | Carbs | Fat | Fiber | Sugar |
|---|---|---|---|---|---|---|
| 1 brownie | 390 | 6g | 48g | 20g | 3g | 34g |
Nutrition information is estimated and may vary depending on the brownie mix, peanut butter cups, frosting, candy melts, marshmallows, and other ingredients used. Portion size and preparation methods can also affect the final nutritional values.
Why These Brownies Are Perfect for Halloween
Halloween is all about creativity, and these Witch’s Cauldron Brownies turn a simple chocolate dessert into an edible Halloween centerpiece.
The dark brownie and chocolate peanut butter cup create the base of the cauldron, while the bright green topping looks like a bubbling potion. Candy eyeballs add a creepy touch, marshmallows create the appearance of bubbles, and Halloween sprinkles complete the magical theme.
The individual portions also make them practical for parties. Guests can simply pick up a brownie and enjoy their own miniature cauldron without needing plates or complicated serving utensils.
They are especially fun for children’s Halloween parties because decorating them can become part of the celebration. Set out the toppings and let everyone create their own magical brew.
Final Thoughts
These Witch’s Cauldron Brownies are a delicious combination of fudgy chocolate brownies, peanut butter cups, creamy chocolate frosting, and colorful Halloween decorations.
The recipe is simple enough to prepare with a boxed brownie mix, yet the finished treats look much more elaborate. Each brownie becomes a tiny witch’s cauldron filled with bright green potion, bubbling marshmallows, candy eyeballs, and festive sprinkles.
Whether you are hosting a Halloween party, preparing treats for children, organizing a school event, or simply looking for a fun dessert for a spooky movie night, these brownies are an excellent choice.
Let everyone get creative with the decorations, make each cauldron unique, and serve them on a festive platter. With their rich chocolate flavor and playful Halloween appearance, these Witch’s Cauldron Brownies are sure to bring plenty of spooky fun to your celebration.