
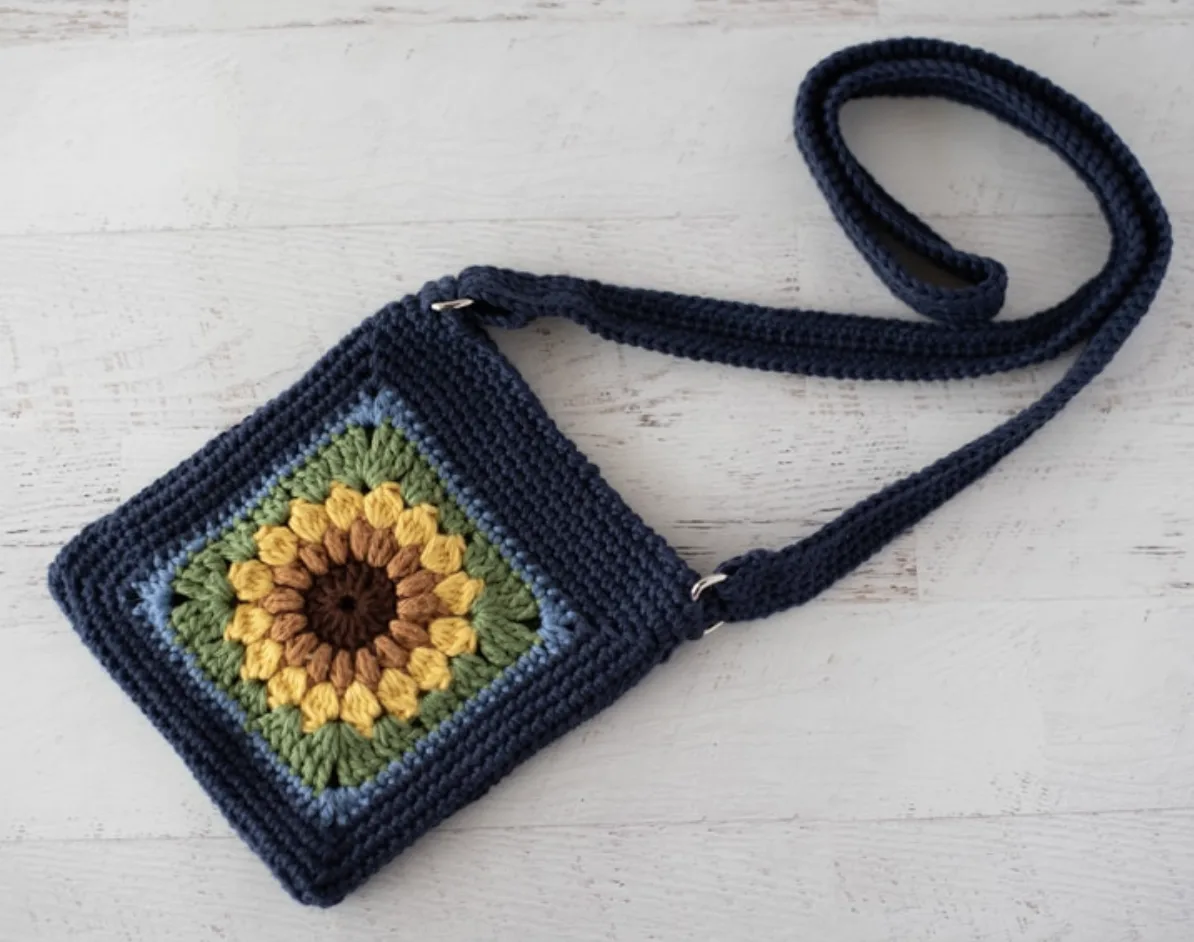
If you love crochet projects that are practical, cheerful, and full of personality, this Sassy Sunflower Crochet Crossbody Bag is a wonderful project to add to your handmade collection. It is small enough for everyday essentials such as a phone, keys, and a little cash, while the sunflower-inspired squares give the finished bag a bright, playful character.
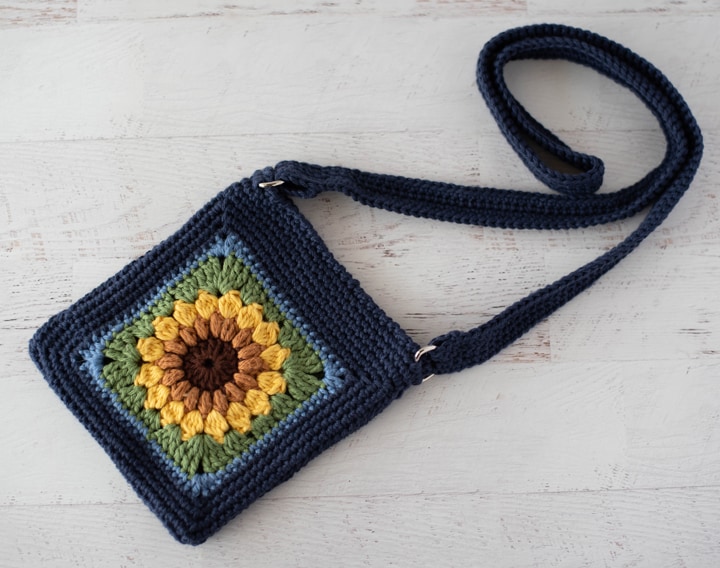
This crochet crossbody bag combines a sunflower-inspired center with a sturdy dark blue crochet body and a long handmade strap. The finished crossbody bag is approximately 6.5 inches wide by 29 inches tall, including the strap. The bag portion itself, without the strap, measures approximately 6.5 inches wide by 7.5 inches tall.
The construction begins with two identical sunflower squares. Each square starts as a circle and is transformed into a square through a round that uses stitches of different heights. The two squares are then sewn together on three sides before the upper edge, D-rings, and crocheted strap are added.
This guide keeps the original construction sequence and technical details intact while organizing the project into a practical step-by-step tutorial. Because the fourth round of the sunflower square uses several stitch heights, it is especially helpful to pay attention to stitch placement and corner construction.
Project Overview
This is a fun and relatively quick crochet bag project with a strong visual centerpiece. The sunflower squares provide most of the decorative character, while the dark blue yarn creates a simple frame around the floral design.
- Finished size: Approximately 6.5 inches wide by 29 inches tall, including the strap.
- Bag portion: Approximately 6.5 inches wide by 7.5 inches tall.
- Hook: US G6/4mm crochet hook.
- Yarn: Worsted weight cotton yarn.
- Squares: Make 2 sunflower squares.
- Hardware: Two 1-inch D-rings.
- Strap foundation: Chain 200.
The original design is open at the top. A lining and magnetic closure can be added as an optional finishing idea. If a magnetic closure is used, heavy-duty interfacing should be placed beneath the closure area because the magnet can be strong enough to pull through the fabric without reinforcement.
Materials You Will Need
Gather all of the materials before beginning. Having the yarn colors separated and the hardware ready makes the color changes and finishing stages easier to manage.
- US G6/4mm crochet hook
- Tapestry needle
- Scissors
- Worsted weight cotton yarn
- Two 1-inch D-rings
The sample uses Hobby Lobby I Love This Cotton in the following amounts and colors:
- 2-1/2 oz Denim, dark blue
- 1/2 oz Curry, yellow
- 1/4 oz Antique Gold, caramel color
- 1/4 oz Brown
- 1/2 oz Sage, green
- 1/4 oz Stonewash, light blue
The original materials list includes tapestry needles and scissors as well as the crochet hook and D-rings. Keep a tapestry needle nearby throughout the project because several finishing steps require sewing and weaving in ends.
Special Stitches Used in the Sunflower
The sunflower squares use two special textured stitches: the puff stitch and the bobble stitch. Understanding these before beginning the squares will make the color changes and floral center much easier to follow.
Puff Stitch
Yarn over, insert the hook into the next stitch and pull up a loop to the height of a double crochet, giving you 3 loops on the hook. Yarn over again, insert the hook into the same stitch and pull up another loop, giving you 5 loops on the hook. Yarn over again, insert the hook into the same space and pull up another loop, giving you 7 loops on the hook. Pull the yarn through all loops. Chain 1 to lock in the stitch.
Bobble Stitch
Yarn over, insert the hook into the space between 2 puff stitches and pull up a loop. Yarn over and pull through 2 loops, leaving 2 loops on the hook. Make 3 more incomplete double crochet stitches. There will now be 5 loops on the hook. Yarn over and pull through all 5 loops. Chain 2 to lock in the bobble stitch.
The bobble round is an important visual stage because it builds the raised texture around the sunflower center before the circular shape is converted into a square.
Make the Two Sunflower Squares
Make two identical sunflower squares. Work through all six rounds for the first square, then repeat the same process to create the second square.
Round 1: Brown Center
Using brown color and a G hook, chain 5 and join with a slip stitch to the first chain to form a loop.
Chain 3, which counts as the first double crochet, then make 15 double crochet stitches into the loop. Slip stitch to the top of the first stitch in the row to join. Fasten off.
Stitch count: 16 stitches.
At this point you have a small brown crochet circle. Keep the center neat because the following puff-stitch round will be worked into these stitches.
Round 2: Antique Gold Puff Stitches
Attach the Antique Gold color in any stitch and chain 2.
Make the first puff stitch in the same stitch as the joining point. Yarn over, insert the hook into the same stitch, and pull up a loop to the height of a double crochet. You will have 3 loops on the hook. Yarn over again, insert the hook into the same stitch, and pull up another loop for 5 loops. Yarn over again, insert the hook into the same space and pull up another loop for 7 loops. Pull the yarn through all loops, then chain 1 to lock the puff stitch.
Continue making puff stitches in every stitch of the previous round using the same construction. At the end of the round, slip stitch to the top of the first puff stitch and fasten off.
Stitch count: 16 puff stitches.
Round 3: Yellow Bobble Stitches
Attach the yellow color. This round is worked in bobble stitches. The new color can be started in one of two ways: attach the yarn between two stitches and chain 3, or begin with a standing stitch.
Continue working bobbles across the round into the spaces in the previous round. At the end of the round, slip stitch to the top of the first bobble stitch.
Stitch count: 16 bobble stitches.
Fasten off the yellow yarn after completing the round.
Round 4: Turning the Circle Into a Square
Round 4 is where the circular sunflower center becomes a square. This is the most varied round because stitches of different heights are used to create the corners and straight sides.
Join the green color in any space in the previous round. Chain 3, counting as the first double crochet, then make 2 double crochet stitches in the same space.
In the next space, work all of the following: 3 triple crochet, chain 1, 3 triple crochet. This creates a corner.
Then work 3 double crochet in the next space, 3 half double crochet in the next space, and 3 double crochet in the next space.
Repeat this sequence from the corner through the side three more times. At the end, work 3 double crochet in the next space, 3 half double crochet in the last space, and join with a slip stitch to the top of the first double crochet in the row.
An invisible join can be used instead of the slip-stitch join for a neat finish. Fasten off and weave in the ends.
Take your time on this round. The changing stitch heights are what create the square shape, so maintaining the stated sequence is important.
Round 5: Light Blue Border
Join the light blue color in a stitch on the side of the square. Chain 1 and work a single crochet in the same stitch as the joining point.
Single crochet in every stitch across to the next corner space. In the corner space, work 2 half double crochet, chain 2, and 2 half double crochet. This creates the corner.
Continue around the square in the same manner. After the final corner, single crochet in every stitch until reaching the starting single crochet. Slip stitch to the starting single crochet and fasten off.
Rounds 6–9: Dark Blue Border
Join the dark blue color to any stitch on the side of the square. Chain 1 and work a single crochet in the same stitch as the joining point.
Single crochet in every stitch across to the next corner space. In the corner space, work single crochet, chain 2, single crochet. Continue around the square using the same corner construction.
After the final corner, single crochet in every stitch until reaching the starting single crochet. Slip stitch to the starting single crochet, then chain 1 to begin the next row.
Repeat this construction for Rounds 6–9. At the end of Round 9, fasten off.
Check Your Sunflower Squares
Before moving on, make sure both squares are worked through Round 9. The two pieces should use the same color sequence and construction because they will form the front and back of the finished bag.
This is also a useful point to weave in any remaining loose ends that are easier to handle while the squares are still separate. Keeping the edges tidy now can make the sewing stage less frustrating later.
Sew the Sunflower Squares Together
Thread a tapestry needle with a long strand of dark blue yarn. Hold the right sides of the squares together.
Whip stitch along three sides of the square. Make sure the corners and side edges are aligned as you work. The fourth side remains open because it will become the top of the crossbody bag.
Fasten off and weave in all ends. Then turn the bag right side out before proceeding.
Build the Top Edge of the Crossbody Bag
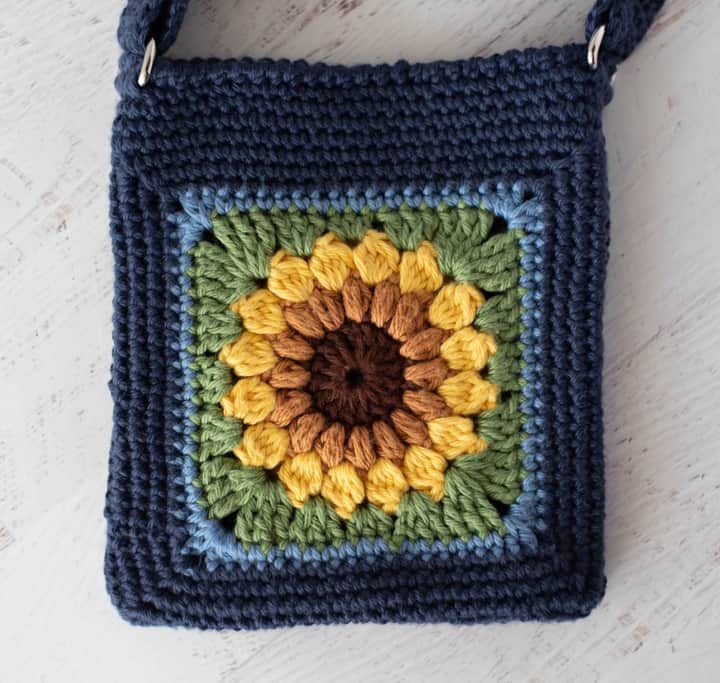
The top edge is worked in dark blue yarn and includes the two D-rings that will hold the crochet strap.
Rounds 1–2
Attach dark blue yarn to any stitch along the top edge of the bag.
Chain 1 and single crochet in the same stitch as the joining point. Continue with single crochet around the top edge of the bag.
Pay attention to the way the fabric sits while working. If needed, add an additional stitch or two at each seam point to help keep the sides of the bag straight.
Round 3: Attach the D-Rings
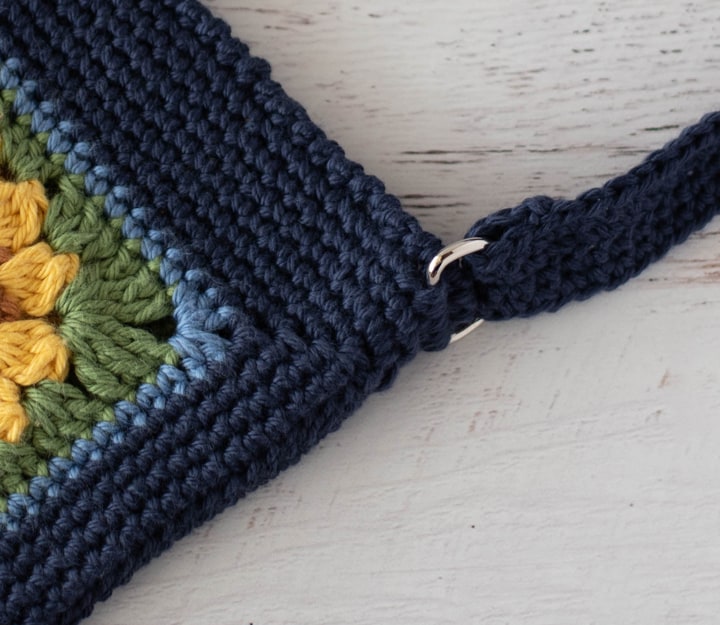
The D-rings are crocheted directly into the work during Round 3. Before beginning this round, mark the center 5 stitches on each side of the bag. These marked stitches determine where the D-rings will be attached.
Chain 1 and single crochet in the same stitch as the joining point. Single crochet around the edge until reaching the marked 5 stitches on the side of the bag.
Hold the D-ring so that the flat edge of the metal is even with the stitches. Work a single crochet over the D-ring and the stitch below for 5 stitches.
Continue single crocheting across the bag until reaching the opposite side. Attach the second D-ring in the same manner. Then continue single crochet to the starting single crochet and slip stitch to join.
Round 4: Crab Stitch Finish
Work one round of reverse single crochet, also called crab stitch, around the top edge.
Fasten off.
The reverse single crochet gives the upper edge a finished look while keeping the construction simple and consistent with the dark blue border.
Make the Crossbody Strap
The strap is crocheted separately and is then sewn onto the curved edges of the D-rings. The original strap begins with a long foundation chain.
Foundation Chain
With dark blue yarn, chain 200.
Round 1
Single crochet in the second chain from the hook and single crochet across the chain. Turn at the end of the row.
Round 2
Chain 1 and single crochet in the same stitch. Single crochet across the row. At the end of the row, fasten off.
Round 3
Reattach the yarn on the opposite side of the starting chain. Chain 1 and single crochet in the same stitch. Single crochet across the row. Turn at the end of the row.
Round 4
Chain 1 and single crochet in the same stitch. Single crochet across the row. At the end of the row, fasten off.
The strap is now ready to be attached to the D-rings.
Attach and Finish the Strap
Fold over the end of the strap and sew it onto the curved edge of the D-ring. Repeat the same process on the opposite side.
Once both ends are secure, weave in any remaining yarn ends.
Check that the strap is lying flat and that both attachment points are positioned evenly. A careful final inspection at this stage helps the finished bag hang naturally when worn.
Optional Lining and Magnetic Closure
The original bag is open at the top, which may be exactly what you want for a quick, casual crossbody bag. However, an easy cloth lining and magnetic closure can be added if you prefer a more enclosed bag.
If you add a magnetic closure, reinforce the fabric underneath the closure with heavy-duty interfacing. This reinforcement is important because a strong magnet can pull through the cloth if the area is not supported.
The lining and closure are optional finishing additions and are not part of the crochet construction described in the pattern itself.
Beginner Tips for a Smoother Crochet Experience
- Prepare your colors first: Keep Brown, Antique Gold, Curry, Sage, Stonewash, and Denim separated so color changes are easy to identify.
- Watch Round 4 closely: This is the round where the circular center becomes a square, and it uses triple crochet, double crochet, and half double crochet stitches in a specific sequence.
- Count the textured centers: Round 2 should contain 16 puff stitches, while Round 3 should contain 16 bobble stitches.
- Keep both squares consistent: Since the squares are sewn together to create the bag, making them identical helps the finished piece look balanced.
- Mark the D-ring stitches: Mark the center 5 stitches on each side before Round 3 of the top edge.
- Keep the strap flat: When sewing it to the D-rings, make sure it has not twisted.
- Weave in ends as you go: Completing some finishing work before the final assembly can make the project easier to manage.
Construction Checkpoints
Use these checkpoints to make sure the project is progressing according to the original pattern.
- Two sunflower squares are completed.
- Each sunflower square has 16 stitches in Round 1.
- Each sunflower square has 16 puff stitches in Round 2.
- Each sunflower square has 16 bobble stitches in Round 3.
- Round 4 converts the circular center into a square.
- Round 5 adds the light blue border.
- Rounds 6–9 create the dark blue outer border.
- The two squares are whip stitched together along three sides.
- Rounds 1–2 of the top edge are worked in dark blue.
- The center 5 stitches on each side are marked before attaching the D-rings.
- Two 1-inch D-rings are crocheted into Round 3 of the top edge.
- Round 4 of the top edge is finished with reverse single crochet.
- The strap begins with a chain of 200.
- The finished strap is sewn to the curved edges of the D-rings.
Troubleshooting the Sunflower Square
Why does Round 4 look unusual?
Round 4 intentionally uses stitches of varying heights to transform the circular sunflower center into a square. The corners use triple crochet stitches, while other sections use double crochet and half double crochet stitches. The changing heights are part of the design.
What should I do if the bag sides do not look straight?
During the first two rounds of the top edge, be mindful of the work and add an additional stitch or two at each seam point if needed to keep the bag straight on the sides.
Where should the D-rings go?
Before starting Round 3 of the top edge, mark the center 5 stitches on each side of the bag. The D-rings are crocheted over these marked stitches for 5 stitches.
Should I close the top of the bag?
The original crochet crossbody bag is open at the top. A cloth lining and magnetic closure can be added if desired, but these are optional finishing modifications.
Ways to Customize the Finished Bag
Once you are comfortable with the original construction, the design can inspire several variations. The easiest way to change the size of the crochet bag is to change the yarn weight and corresponding crochet hook size.
A bulky or super bulky weight yarn with a larger crochet hook can produce a larger crochet bag. On the other hand, DK or thinner yarn can be used for a smaller crochet purse or a crochet crossbody phone bag.
The strap is another area where the finished style can be changed. A pre-made adjustable strap can replace the crocheted strap, or a shorter crocheted strap can be made for a handcrafted handbag style.
These variations change the look and scale of the finished project, while the original pattern remains based on the two sunflower squares, dark blue top edge, D-rings, and crocheted strap.
Final Finishing Checklist
- Both sunflower squares are complete.
- All required color changes are finished.
- Loose yarn ends are woven in.
- The squares are aligned correctly before sewing.
- Three sides are whip stitched together.
- The bag is turned right side out.
- The top edge is completed through Round 4.
- Both 1-inch D-rings are securely crocheted into the marked 5-stitch sections.
- The 200-chain strap is completed.
- Both ends of the strap are securely sewn to the D-rings.
- The strap is not twisted.
- Any optional lining or magnetic closure is reinforced appropriately.
Frequently Asked Questions
What size crochet hook is used?
The pattern uses a US G6/4mm crochet hook.
What type of yarn is recommended?
The sample uses worsted weight cotton yarn, specifically Hobby Lobby I Love This Cotton in Denim, Curry, Antique Gold, Brown, Sage, and Stonewash.
How many sunflower squares are needed?
Two sunflower squares are required to construct the bag.
What size are the D-rings?
The pattern calls for two 1-inch D-rings.
How long is the strap foundation?
The strap begins with a chain of 200.
How large is the finished crochet crossbody bag?
The finished bag is approximately 6.5 inches wide by 29 inches tall, including the strap. The bag portion without the strap measures approximately 6.5 inches wide by 7.5 inches tall.
Is the bag lined?
The original crochet construction is open at the top and does not require a lining. A cloth lining and magnetic closure may be added as an optional finishing step.
Enjoy Your Finished Sunflower Crossbody Bag
The Sassy Sunflower Crochet Crossbody Bag brings together textured crochet stitches, colorful sunflower squares, a practical dark blue border, and a handmade strap. The project is small enough to be approachable while still offering several useful crochet techniques to practice, including puff stitches, bobbles, color changes, shaping a circle into a square, whip stitching, crocheting around hardware, and reverse single crochet.
The sunflower squares are the heart of the design, while the dark blue border gives the project structure and helps the bright center stand out. Once the two squares are joined and the D-rings are securely incorporated into the top edge, the crocheted strap completes the crossbody construction.
Whether you keep the original open-top style or add an optional lining and magnetic closure, the result is a handmade accessory with plenty of personality. The finished bag is sized for those moments when you only need a few essentials, making it a cheerful companion for a quick trip out, a casual day, or any occasion where you want to carry a little handmade sunshine with you.