
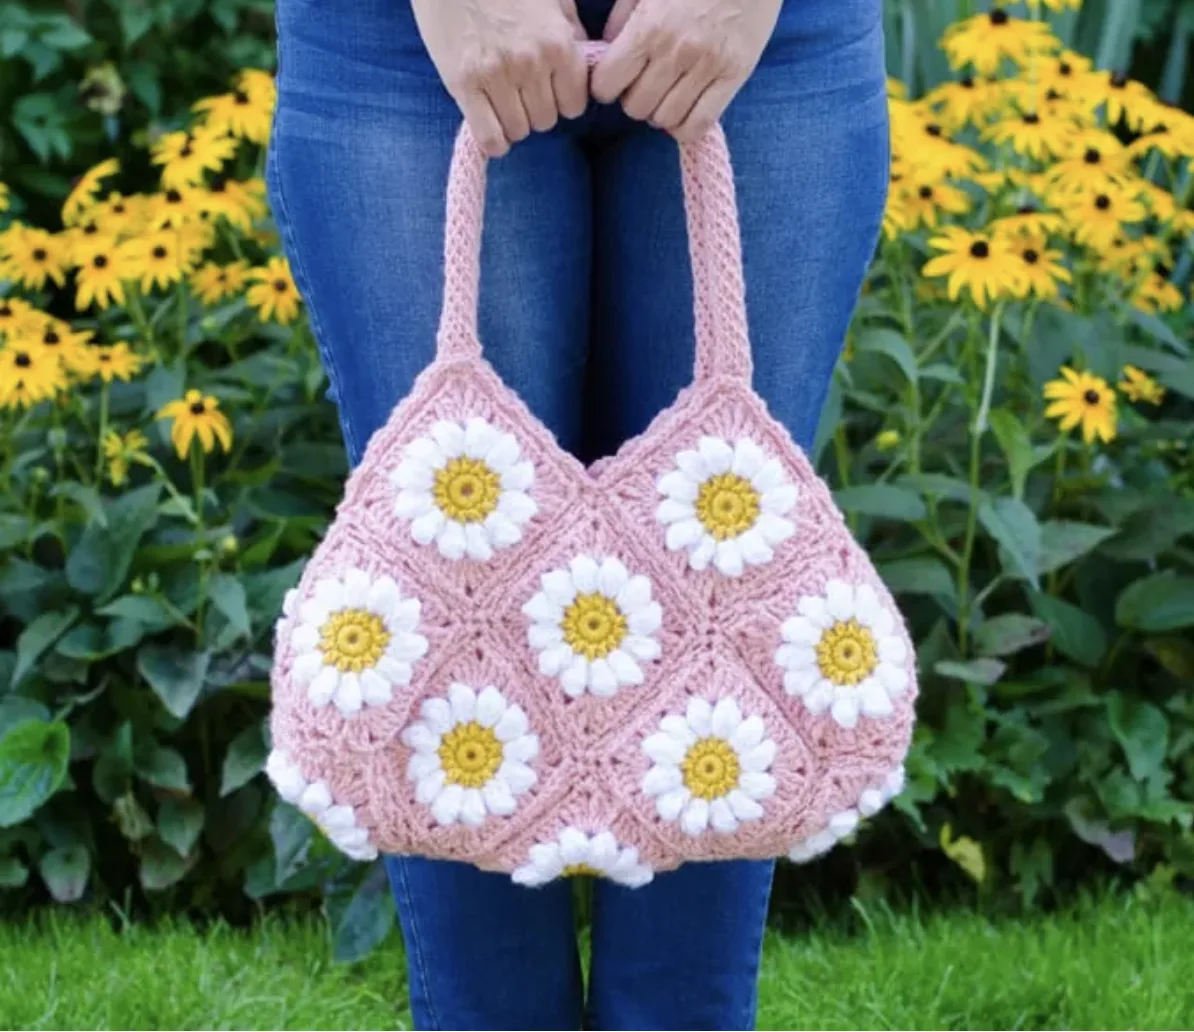
There is something especially cheerful about crocheting with flowers, and this Crochet Daisy Bag brings that feeling into a practical handmade accessory. The Daisy Mae Crochet Bag combines soft, puffy flower centers, white crochet petals, colorful granny-style borders, and distinctive spiral handles to create a roomy purse with plenty of personality.
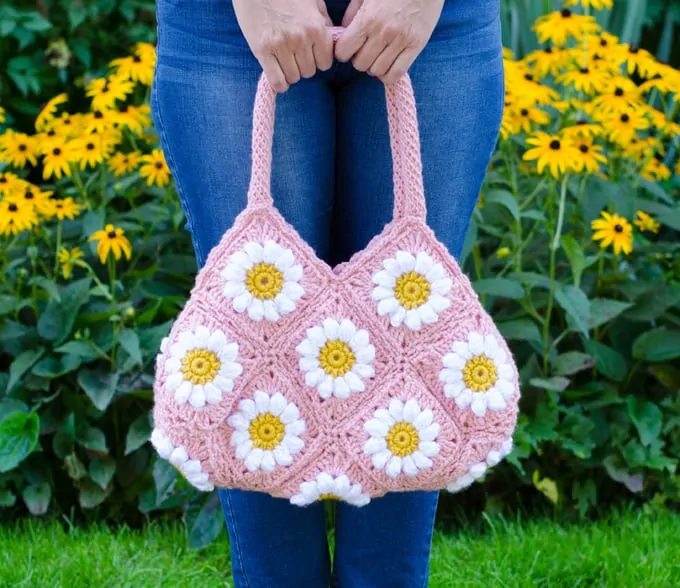
This project is built from 17 individual Daisy Granny Squares. Each square begins with a yellow flower center, continues with white puff-style petals, and is then transformed into a square with the main pink color. After the squares are prepared, they are joined with a Faux Braid Join, folded into the purse shape, edged around the opening, and finished with two crochet spiral handles.
The construction is a wonderful example of how a relatively simple crochet motif can become something much larger when the pieces are arranged thoughtfully. If you enjoy granny squares, this project also gives you an opportunity to practice color changes, treble crochet, joining, shaping, edging, and finishing techniques in one project.
Project Overview
The finished bag measures approximately 17.5 inches wide by 18.5 inches tall, including the handles. Before joining, each completed square measures approximately 4.5 inches by 4.5 inches, including the final round that prepares the square for joining.
The bag uses three main yarn colors. Pink is the main color, white creates the flower petals, and mustard yellow forms the flower centers. The sample uses worsted weight #4 yarn, specifically Lion Brand Vanna’s Choice.
- Project: Daisy Mae Crochet Bag
- Number of squares: 17
- Square size before joining: Approximately 4.5 inches x 4.5 inches
- Finished bag size: 17.5 inches wide x 18.5 inches tall, including handles
- Hook: US H8/5 mm crochet hook
- Yarn weight: Worsted Weight #4
- Main color: 5 oz Pink
- Flower petals: 3.5 oz White
- Flower centers: 2 oz Mustard yellow
- Handles: 2, each 16 inches long
Materials You Will Need
Gather everything before beginning so that the project can move smoothly from the individual flower motifs to the final assembly. The sample was made with Lion Brand Vanna’s Choice in worsted weight #4 yarn.
- Worsted Weight, #4 yarn
- 5 oz Pink for the main color
- 3.5 oz White for the flower petals
- 2 oz Mustard yellow for the flower centers
- US H8/5 mm crochet hook
- Tapestry needle
- Scissors
A lining and closure are optional. If you choose to line the bag, the source pattern specifies a sewing machine, 1/2-3/4 yard of fabric, and a magnetic closure. The bag can also be used without a lining and/or closure.
Abbreviations for the Pattern
These are the abbreviations used throughout the Daisy Mae Bag instructions:
- ch = chain
- sc = single crochet
- hdc = half double crochet
- sl st = slip stitch
- st = stitch(es)
- tr = treble crochet
Before You Begin the Daisy Squares
The most important part of this project is consistency. You will be making 17 squares, so keeping the same tension and following the same round structure for every motif will make the joining stage much easier.
Each square has five rounds. The first two rounds create the yellow center, the third round forms the white puffy petals, and the fourth and fifth rounds turn the flower into a square and prepare its edges for joining.
The flower petals use a special technique in which the completed loop is removed from the hook, the hook is inserted into the top of the first treble crochet of the petal, and the loose loop is pulled through. This creates the characteristic puffy appearance of the daisy petals.
How to Crochet the Daisy Granny Square
You will make 17 Daisy Granny Squares in total. Follow the five rounds below for each square.
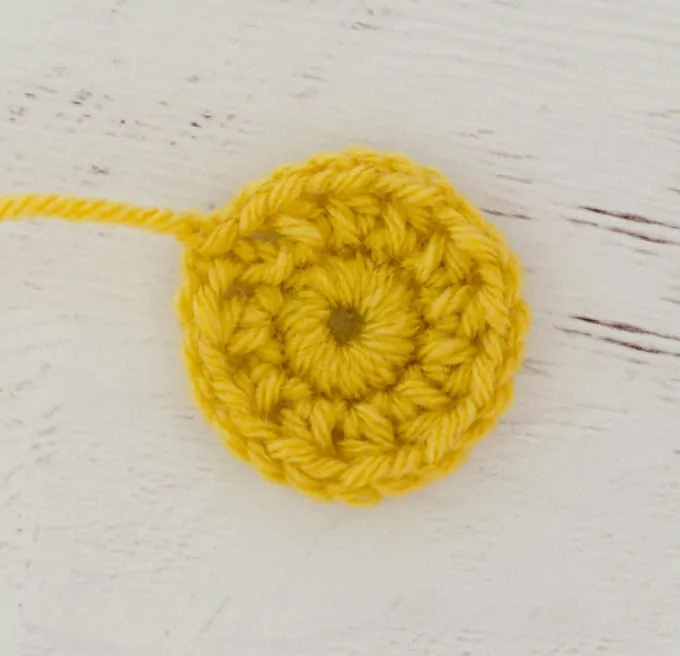
Round 1: Create the Yellow Center
With yellow yarn, chain 4 and join with a slip stitch to form a ring.
R1: Ch 1, 12 sc into ring, join with sl st to first st. (12 sts).
At the end of this round, you should have 12 single crochet stitches forming the small center of the flower.
Round 2: Build the Center Spaces
Continue with the yellow yarn for the second round.
R2: Ch 3 (counts as 1st hdc plus 1st ch), *hdc in next st, ch 1. Repeat from * around (12 hdc and 12 ch-1 sp). Join with sl st in top of first st. Fasten off yellow.
Round 3: Form the Puffy Daisy Petals
The third round changes to white yarn and creates all 12 petals. This is the most distinctive part of the motif.
R3: Join white with a slip stitch in any ch-1 sp. Ch 4 (counts as 1st tr). 3 tr in same stitch.
After making the four treble crochet stitches of the first petal, remove the hook from the loop. Insert the hook into the top of the first stitch in the petal, grab the loop in its new position, and pull the loop through the stitch on the hook. The petal is now made.
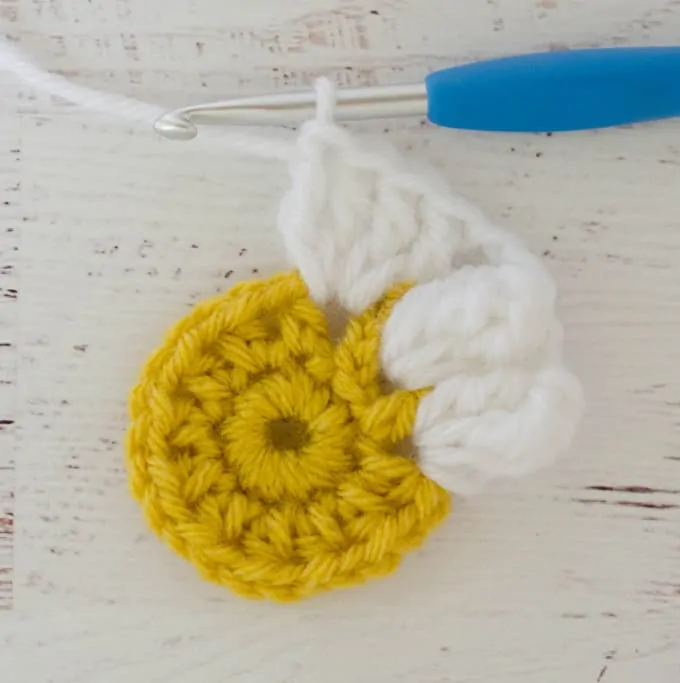
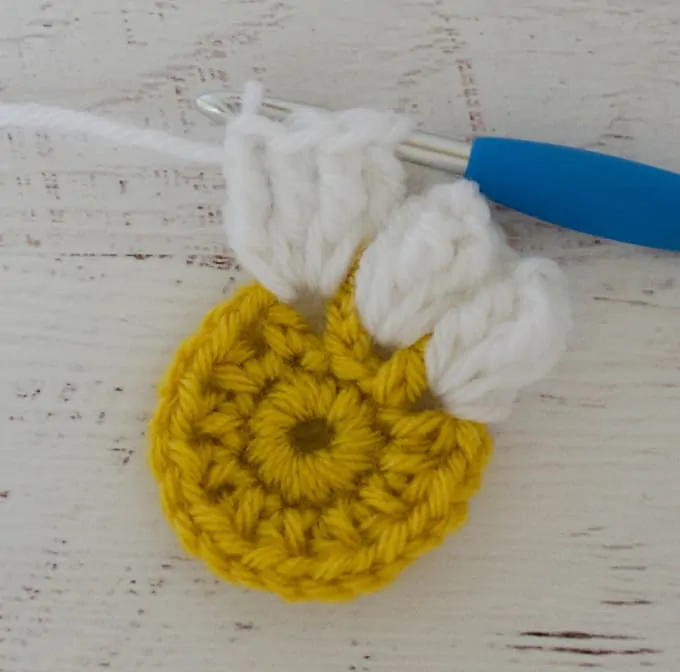
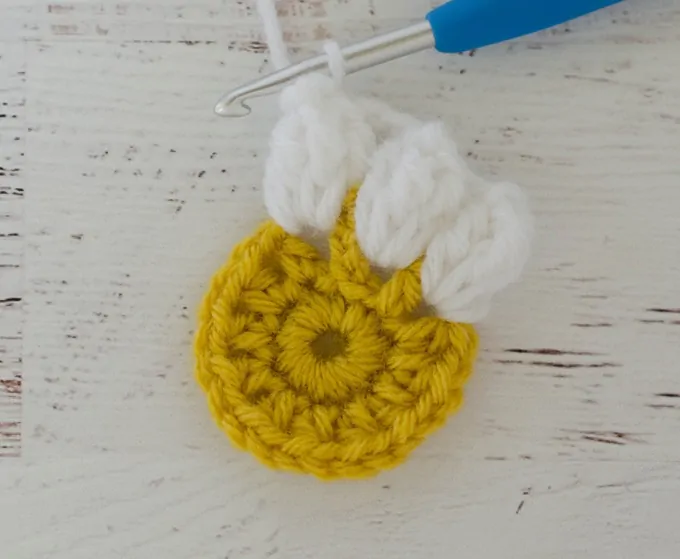
Continue the remaining petals using the same technique.
Petal repeat: *ch 2, 4 tr in next ch-1 space, remove hook from loop, insert into the top of the 1st tr of the petal and pull the last loop through. Petal made. Repeat from * 10 more times for 12 total petals. Ch 2 after last petal and join with a slip stitch to the top of the first petal. Fasten off White.
Make sure the chain-2 spaces remain between the petals. These spaces will be important when the pink square-building round is worked.
Turning the Flower into a Square
Once the white petals are complete, the flower needs two more rounds to become a usable granny square. The pink yarn establishes the square shape, while the final round prepares the edges for the Faux Braid Join.
Round 4: Shape the Four Corners
R4: Join pink in any space between petals with a sl st. Chain 4 (counts as 1st tr), 2 tr, ch 2, 3 tr (1st corner made), *skip to next space, work 3 dc, skip to next sp, work 3 dc, in next space work 3tr, ch 2, 3 tr (2nd corner made). Repeat from * around. Join with sl st to start of round.
The treble crochet groups placed in the corners help square off the flower. Take your time around this round because keeping the four corners clearly defined will make the finished group of 17 squares easier to assemble.
Round 5: Prepare the Square for Joining
The fifth and final round gives each square its chain spaces and single crochet points for the joining process.
R5: ch 1 and sc in same space as joining. *Ch 3, (sc, ch 2, sc) (1st corner made), [ch 3, sc in next space] 3 times. Repeat from * around, working a sc and chain 3 in each space (formed between the 3 stitch clusters from the previous round) along the sides, as well as the following sequence in each corner: (sc, ch 2, sc). Join with sl st to start of round. Fasten off.
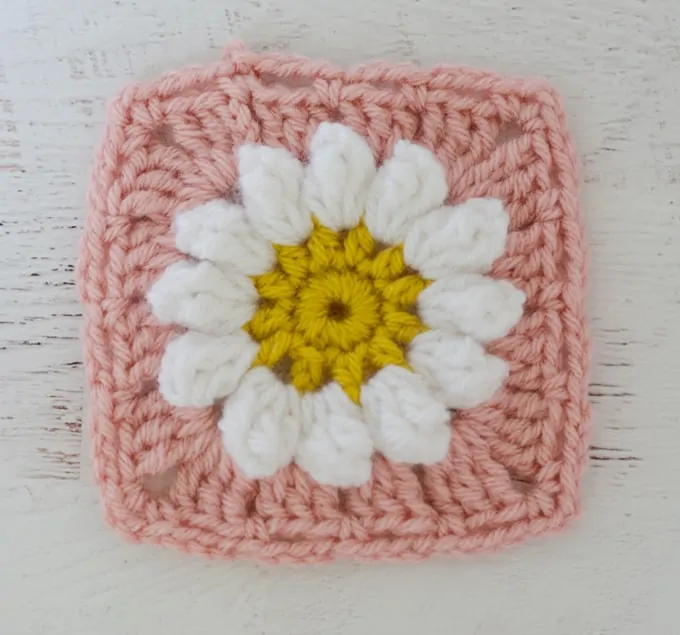
A Practical Way to Make 17 Squares
Making 17 complete squares can sound like a large task, but the repetitive construction makes it easy to work in batches. Instead of completing one square from beginning to end, you can work all 17 yellow centers first, then make all the white petals, and finally complete the last two pink rounds.
This assembly-line approach can be particularly useful when you are traveling or working in short sessions. One practical storage trick is to thread a spare piece of yarn through the centers of the unfinished squares and loosely tie them together. When you want to continue, untie the bundle, remove the next square, and loosely tie the remaining pieces back together.
The most important checkpoint is to make sure all 17 squares are complete before beginning the joining stage. Consistent square size will help the purse maintain a balanced shape.
Joining the Daisy Squares into the Bag
The squares are joined using a Faux Braid Join. This technique is especially suitable for the project because the fifth round of each square was designed to prepare the edges for this type of connection.
The join is different from simply sewing squares together. It creates a decorative connection while also allowing the individual flower motifs to become one continuous three-dimensional bag.
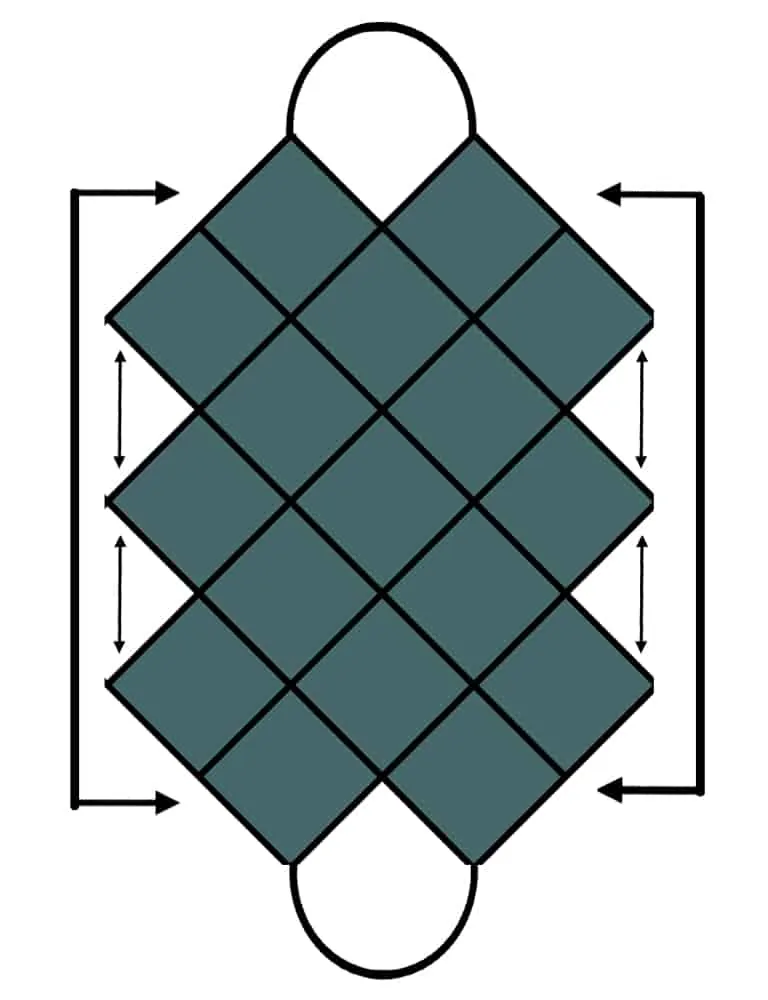
Follow the Layout Carefully
The arrangement matters because the project becomes a three-dimensional purse rather than a flat rectangle. It can be easier to turn the layout slightly so that you can see recognizable rows before assembling it row by row.
Once the squares have been joined in the same general shape as the diagram, fold the purse according to the arrows to identify which sides need to connect. Starting at the bottom center can make the folding process easier to understand. Pins or clips can also help hold sections in place while you determine the correct connections.
Pay special attention to the arrows showing individual side connections. In a three-dimensional project, it is easy to assume that every neighboring edge should be connected, but the layout does not work that way.
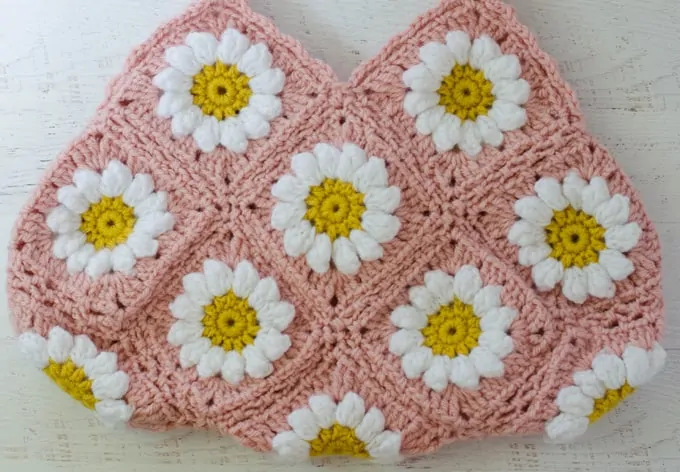
The two topmost squares are attached on only two sides. This leaves the upper opening in an M-like shape so that the bag can open properly.
Joining the Corners
One detail deserves extra attention: the locations where four squares meet. At these points, the finished joining area is worked into the corner spot twice, once for each side. It is easy to overlook a corner stitch when joining rows together.
To keep the construction correct, connect each corner to its adjacent piece. At a four-square meeting point, the corner square is connected twice: once to the square beside it and once to the square connected above or below it.
Once all the squares are joined, this is an excellent time to weave in loose yarn ends before continuing with the edging and handles.
Make the Two Crochet Spiral Handles
The Daisy Mae Bag uses two unusual crochet spiral handles. Each finished handle should be 16 inches long.
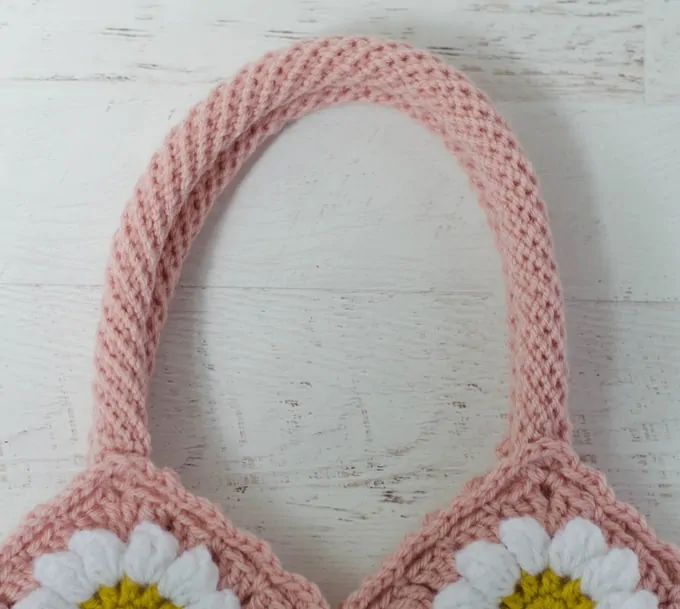
The handle construction uses a special crochet method. Work each handle until it measures exactly 16 inches long, then set both handles aside until the edging and finishing stages are ready.
If the spiral handle method feels too difficult or confusing, the source pattern also gives an alternative: make simple handle straps by chaining to the desired length and then working single crochet stitches along each side of the chain until the desired width is reached.
Shape the Top Edge with Crochet Edging
Before starting the edging, look carefully at the joined purse. The granny square blocks should be attached everywhere except the upper half of the two squares on either side of the bag opening. This creates the opening of the purse.
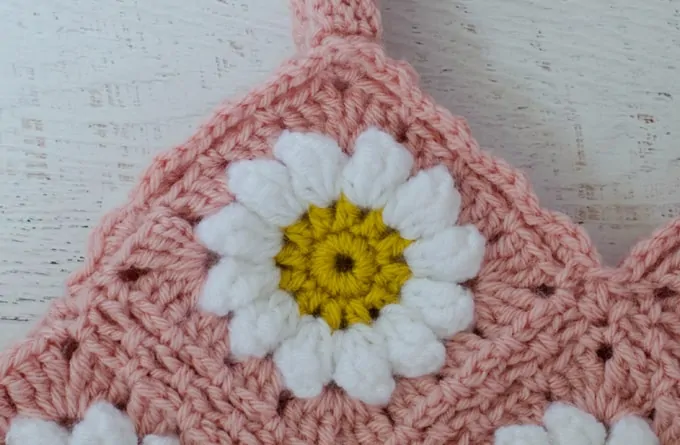
The top edge resembles two mountains, with peaks where the handles will be attached and valleys at the center front, center back, and sides.
The fifth round of the granny squares has already prepared the edge with chain-3 spaces separated by single crochet stitches. The corners contain the (sc, ch 2, sc) structure.
Attach the main-color yarn with a slip stitch to the 2nd chain space after one of the side valleys. Work around the open edge as follows:
- In each ch-3 space, work a (sc, hdc, sc).
- Work a sl st in the sc stitches that separate the ch-3 spaces.
- At each peak where a handle will attach, work 3 hdc.
- At the center front valley and center back valley, sc 3 together to cinch the inside corner.
- At the side valleys, sc 2 together TWICE.
If you want to use a button-and-loop closure, the back valley can include a chain long enough to stretch across the front of the bag to the future button location. Slip stitch the chain back to the last stitch worked to create the loop. If you are not using a button and loop, work the back valley the same way as the front.
When you reach the end of the edging round, use an invisible join and weave in the yarn end.
Keep the Border Laying Flat
The goal of the edging is to create a clean opening that lays nicely without pulling or rippling. Since crochet tension can vary from person to person, the source pattern allows some adjustment to the valley decreases so that the individual purse lays flat.
This is one of the few areas where the finished fabric itself gives you useful feedback. If the edge is pulling, examine the shaping around the valleys. If it ripples, the decrease arrangement may need attention. The purpose is not to change the technical construction arbitrarily, but to help the finished edge sit naturally according to how your joined squares came together.
Should You Add a Fabric Lining?
The bag can be used without a lining, but the decision depends on how you intend to use it and how tightly your crochet fabric is worked.
If your crochet has noticeable gaps, small objects such as pens may be able to slip through. A lining can also help support the weight of the items you carry. When a crocheted bag carries heavier contents, the crochet fabric can stretch. A fabric lining can absorb some of that weight and reduce stretching.
For a lightweight project bag carrying yarn, notes, and other relatively light items, you may prefer to leave the crochet unlined.
If you add a lining, you can choose whether to include an interior pocket. You can also add a magnetic closure to the lining. The source pattern describes a lining with a pocket and magnetic closure as one finished option.
Plan the Lining Before Sewing the Handles
If you are adding a fabric lining, trace around the completed crochet bag to create the lining pattern before sewing the handles onto the purse. Sew the lining and then attach the handles.
This order matters because the handle attachment is easier to complete before the lining is permanently sewn into place. If you are not using a lining, you can move directly to attaching the handles.
Attach the Handles Securely
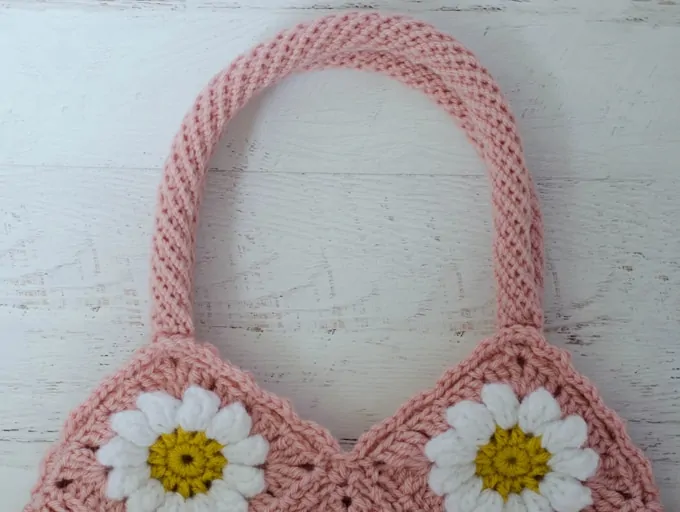
The two 16-inch handles are sewn onto the bag using yarn. Position them securely behind the crocheted edging at the prepared peaks of the purse opening.
If you are making a lined bag, complete the lining first. If no lining is being used, sew the handles onto the finished crochet bag after completing the edging.
Take your time with this stage because the handles are one of the areas that will receive repeated tension when the purse is carried. Secure sewing and careful placement help preserve the intended appearance of the top edge.
Beginner Tips for a Smoother Project
- Count the center carefully: Round 1 finishes with 12 stitches, and Round 2 contains 12 hdc and 12 chain-1 spaces.
- Watch the petal count: Round 3 creates 12 total puffy petals.
- Keep the colors organized: Use yellow for the center, white for the petals, and pink for the square-building rounds.
- Keep all 17 squares consistent: Similar tension makes the joining process much easier.
- Use the diagram during assembly: The purse is three-dimensional, so not every neighboring edge is joined.
- Check four-square corners: These locations require careful attention because the corner is connected on two sides.
- Weave in ends before final finishing: Completing this task after joining but before the edging and handle attachment keeps the finishing stage more manageable.
- Check the top edge before finishing: The mountains and valleys should form the intended opening shape.
Common Construction Problems to Watch For
The Squares Do Not Look the Same Size
If some squares are noticeably different from others, check your tension and make sure every round has been completed exactly as written. Because 17 motifs are combined into one bag, small differences can become more visible during assembly.
The Petals Do Not Look Puffy
Review the special loop technique in Round 3. After making 4 tr, remove the hook from the loop, insert it into the top of the first treble crochet, grab the loop, and pull the loop through the stitch on the hook. The same technique is repeated for every petal.
The Bag Is Difficult to Fold into Shape
Return to the joining diagram and identify the center bottom first. Pins or clips can help hold the squares while you work out which edges correspond. Remember that the purse is being transformed from a flat arrangement into a three-dimensional shape.
The Top Edge Ripples
Check the shaping around the valleys. The edging instructions use specific decreases at the side valleys and sc 3 together at the center valleys. The source pattern notes that these areas can be adapted so the completed purse lays nicely and flat according to the way your bag was joined.
Quick Project Checklist
- Gather worsted weight #4 yarn.
- Prepare 5 oz Pink, 3.5 oz White, and 2 oz Mustard yellow.
- Use a US H8/5 mm crochet hook.
- Make 17 Daisy Granny Squares.
- Check that each square is approximately 4.5” x 4.5” before joining.
- Join the squares using the Faux Braid Join.
- Follow the joining diagram carefully.
- Pay attention to four-square corners.
- Weave in loose ends.
- Make 2 crochet spiral handles, each 16 inches long.
- Work the edging around the open top.
- Decide whether to add a lining and closure.
- Attach the handles securely behind the edging.
Frequently Asked Questions
How many granny squares are needed for the Daisy Mae Bag?
The bag requires 17 Daisy Granny Squares.
How large is each completed square?
Each square is approximately 4.5” x 4.5” before joining, including the final round that prepares it for joining.
How large is the finished bag?
The finished purse is approximately 17.5” wide by 18.5” tall, including the handles.
What crochet hook size is used?
The pattern uses a US H8/5 mm crochet hook.
What yarn weight is recommended?
The sample uses Worsted Weight #4 yarn, with Lion Brand Vanna’s Choice specified as the sample yarn.
Are the handles difficult to make?
The spiral handles use an unusual crochet method and have their own tutorial in the source pattern. Each handle is worked until it reaches 16 inches. A simpler alternative is also described: chain to the desired length and work single crochet along both sides until the desired width is reached.
Does the bag require a lining?
No. The purse can be used without a lining. A lining is optional and may be useful if you want to prevent small objects from slipping through the crochet or reduce stretching when carrying heavier items.
Does the purse need a closure?
No. A closure is optional. The source pattern describes options including no closure, a magnetic purse snap installed in the lining, or a button-and-loop closure incorporated into the back valley of the edging.
Final Finishing Guide
Once the 17 squares have been carefully joined, the edging is complete, and the two 16-inch handles have been securely attached, the Daisy Mae Bag is ready to become a practical handmade accessory.
The beauty of this project comes from the combination of details: the puffy white petals, mustard centers, pink square borders, decorative Faux Braid Join, shaped opening, and distinctive crochet handles. Although the project contains several construction stages, each one has a clear purpose in building the final purse.
For the best result, focus on consistency during the 17-square stage, accuracy when following the joining layout, and careful shaping around the top edge. These checkpoints will make the final assembly much easier.
Finished Daisy Mae Crochet Bag
The completed Daisy Mae Bag is an example of how granny-square crochet can be transformed into something far beyond a traditional flat motif. Seventeen coordinated flower squares become a roomy purse with a distinctive three-dimensional shape, decorative edging, and practical handles.
Once you understand how the flower motif, square construction, joining method, edging, and handles work together, the project also opens the door to creative experimentation. The source pattern notes that different granny-square motifs can potentially be used with different layouts, while the puffy daisy square itself can inspire other bag arrangements.
For this version, however, the key is to preserve the five-round Daisy Granny Square structure, make all 17 motifs, follow the intended joining arrangement, complete the shaped edging, and finish with the two 16-inch handles. The result is a cheerful crochet bag that combines decorative flower motifs with a useful everyday form.