
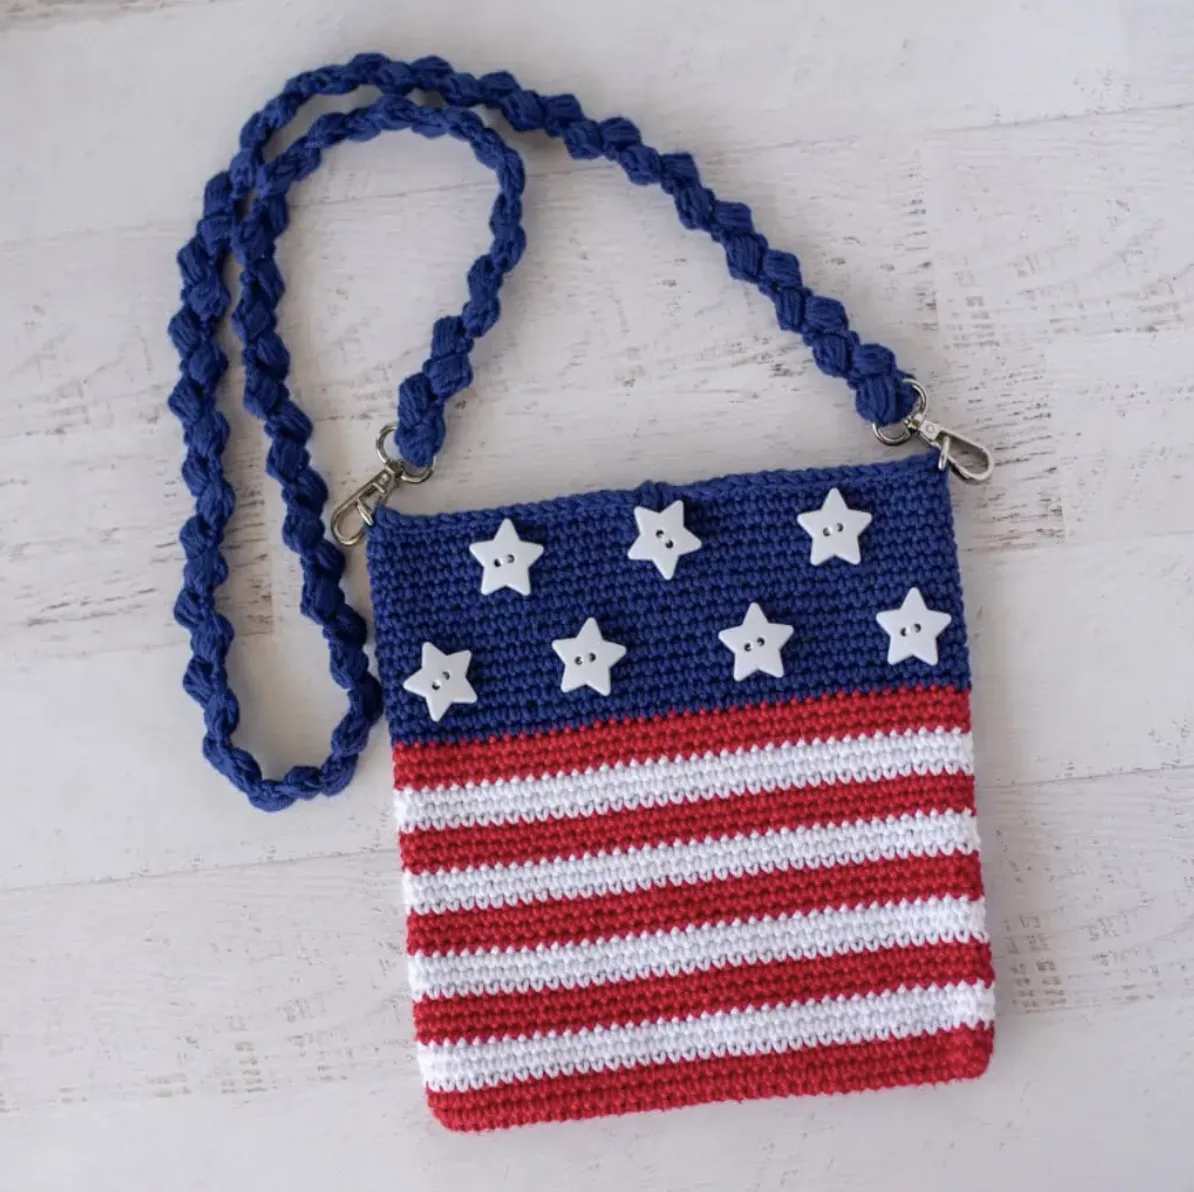
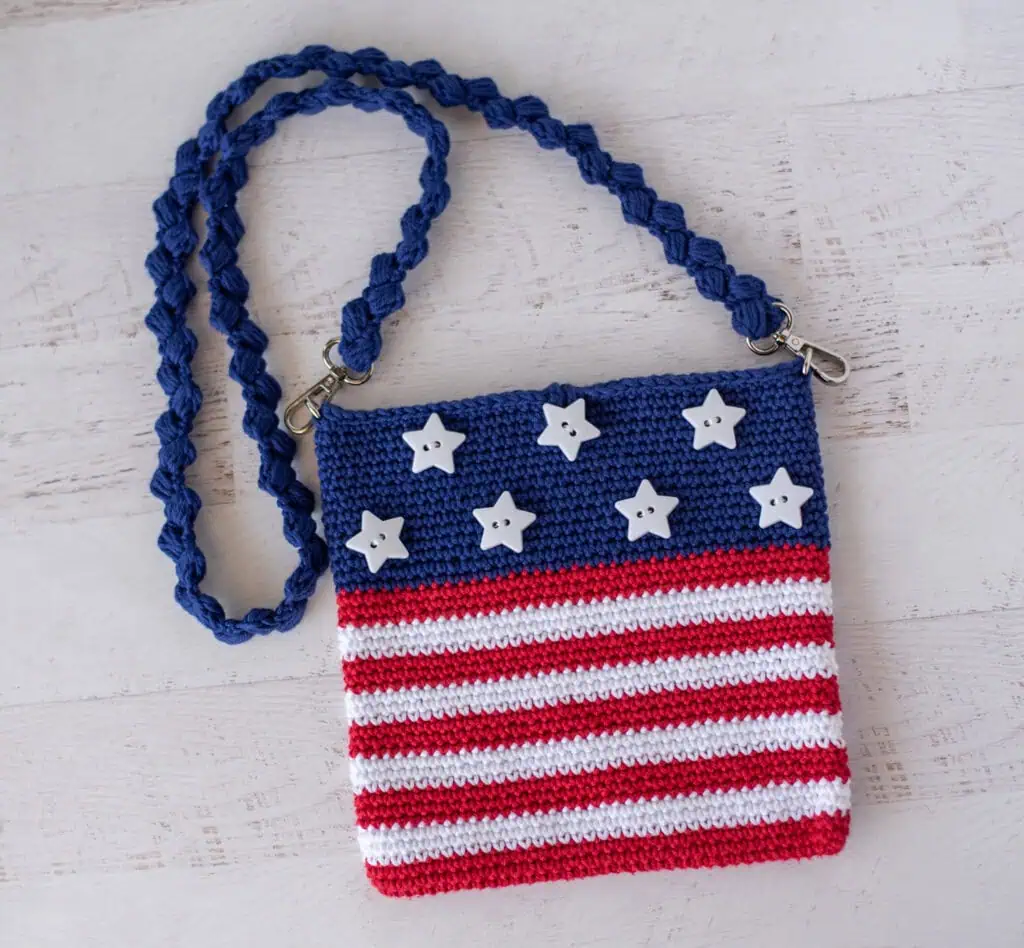
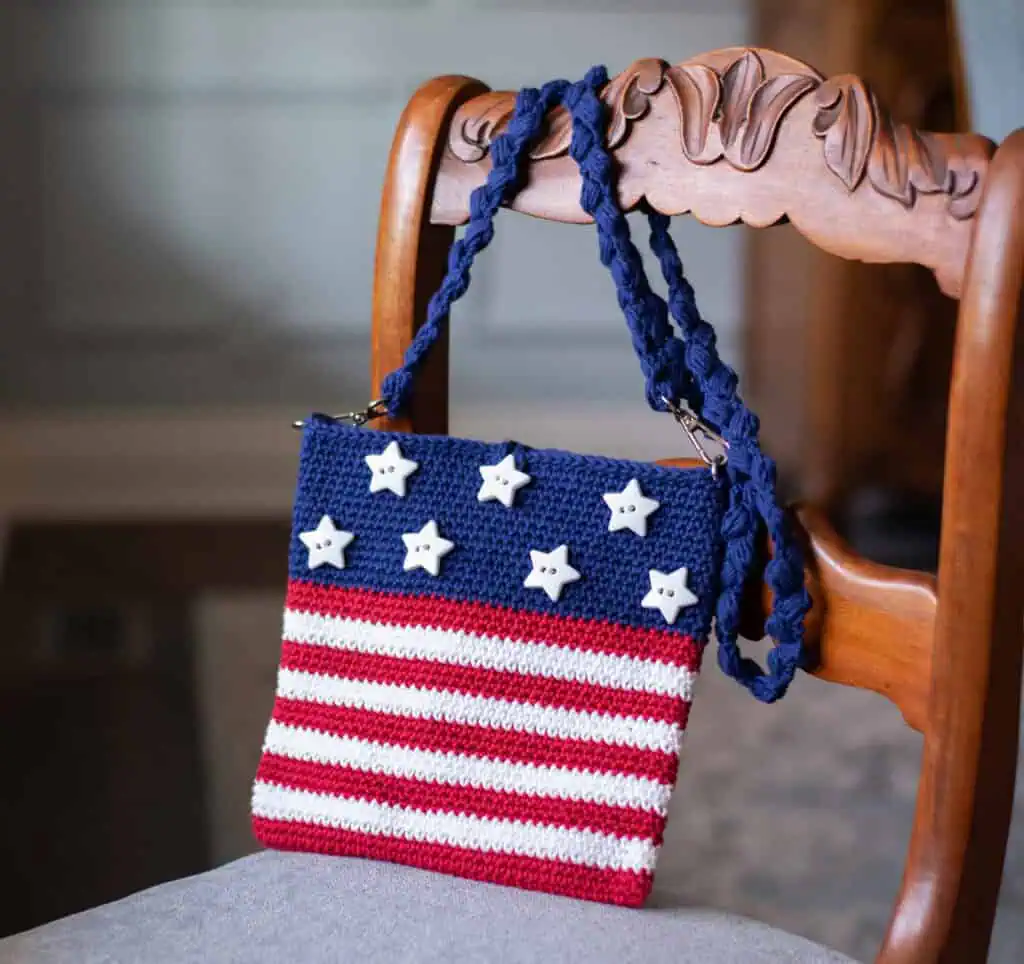
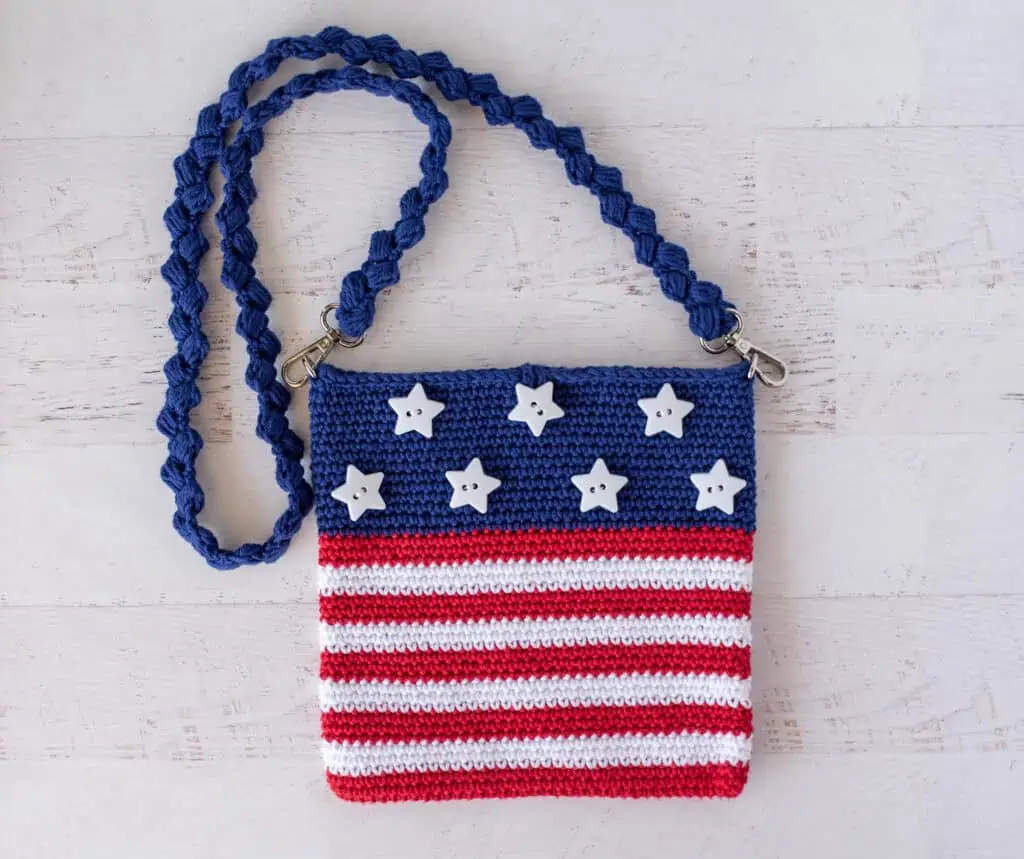
If you love crochet projects that combine practical use with a festive design, this Star Spangled Crochet Flag Bag is a wonderful project to add to your handmade collection. The finished bag has a classic red, white, and blue striped appearance, decorative star buttons, sturdy hardware, and a braided-looking crochet strap made with puff stitches. Although the finished design has a patriotic flag-inspired appearance, the construction is simple enough to adapt to many different color combinations.
This crochet bag is worked primarily with single crochet, making the main body straightforward to construct. The interesting visual details come from the color changes, the arrangement of the stripes, the star-shaped buttons, the D rings, and the distinctive puff-stitch strap. The bag is worked in continuous rounds, so understanding how to keep track of rounds and how to make clean color changes will be especially helpful before beginning.
Project Overview
The finished bag measures approximately 8.5 inches tall by 8.5 inches wide, excluding the strap. The body is made from worsted-weight 100% cotton yarn and uses a US G6/4mm crochet hook. The pattern begins with a foundation chain and builds the bag by crocheting around both sides of the chain. From there, the body is worked in continuous rounds with carefully planned stripe changes.
The lower portion of the bag uses red and white stripes. Once the striped section is complete, the project transitions to blue yarn for the upper section. The D rings are incorporated directly into Round 42 by crocheting over them while working through the stitches of the bag. Round 43 creates the button loop at the center back of the bag.
The final decorative stage involves sewing the remaining star-shaped buttons onto the bag. The separate strap is made from large puff stitches worked in a repeating construction that creates a braided appearance. The strap is then attached to swivel hooks and connected to the D rings.
Materials You Will Need
The original pattern uses two cotton yarn brands. Queensland Coastal Cotton is used for the red section, while Cascade Yarns Nifty Cotton is used for the white and blue sections. All of these yarns are size 4 worsted weight and 100% cotton.
- Queensland Coastal Cotton, size 4 worsted weight, 100% cotton, 185 yards/170m per 3.52 oz skein.
- Garnet red yarn: 63 yards.
- Cascade Yarns Nifty Cotton, size 4 worsted weight, 100% cotton, 185 yards/169.5m per 3.5 oz skein.
- White, Color 5: 50 yards.
- Sapphire blue, Color 14: 115 yards.
- US G6/4mm crochet hook.
- Two 1/2 inch D rings, nickel finish.
- Two 3/4 inch oval gate swivel snap hooks, nickel finish.
- One stitch marker for keeping track of rows.
- Fourteen Sewology 812024, 1-1/8 inch star-shaped buttons.
- Tapestry needle.
- Sewing needle.
- White thread.
If the exact yarn brands are unavailable, the original pattern notes that WeCrochet Dishie or Lily Sugar ’n Cream are suitable substitutes. The important point when substituting is to stay with a comparable size 4 worsted-weight cotton yarn so the finished fabric and gauge remain as close as possible to the intended design.
Gauge and Finished Measurements
The stated gauge for this project is 9 single crochet stitches to 2 inches. Checking gauge before beginning can help you understand how your tension compares with the original pattern. Since the finished bag has a stated measurement of approximately 8.5 inches tall by 8.5 inches wide, excluding the strap, maintaining the recommended gauge is useful if you want a result close to those dimensions.
The strap is separate from the stated finished bag measurements. The original strap was worked to 45 inches, but the pattern specifically explains that cotton makes the strap somewhat stretchy. The strap should therefore be considered in relation to the intended wearer and the amount of stretch in the finished piece.
Crochet Abbreviations
- ch = chain
- PS = Puff Stitch
- sc = single crochet
- sl st = slip stitch
- st = stitch(es)
Understanding the Puff Stitch
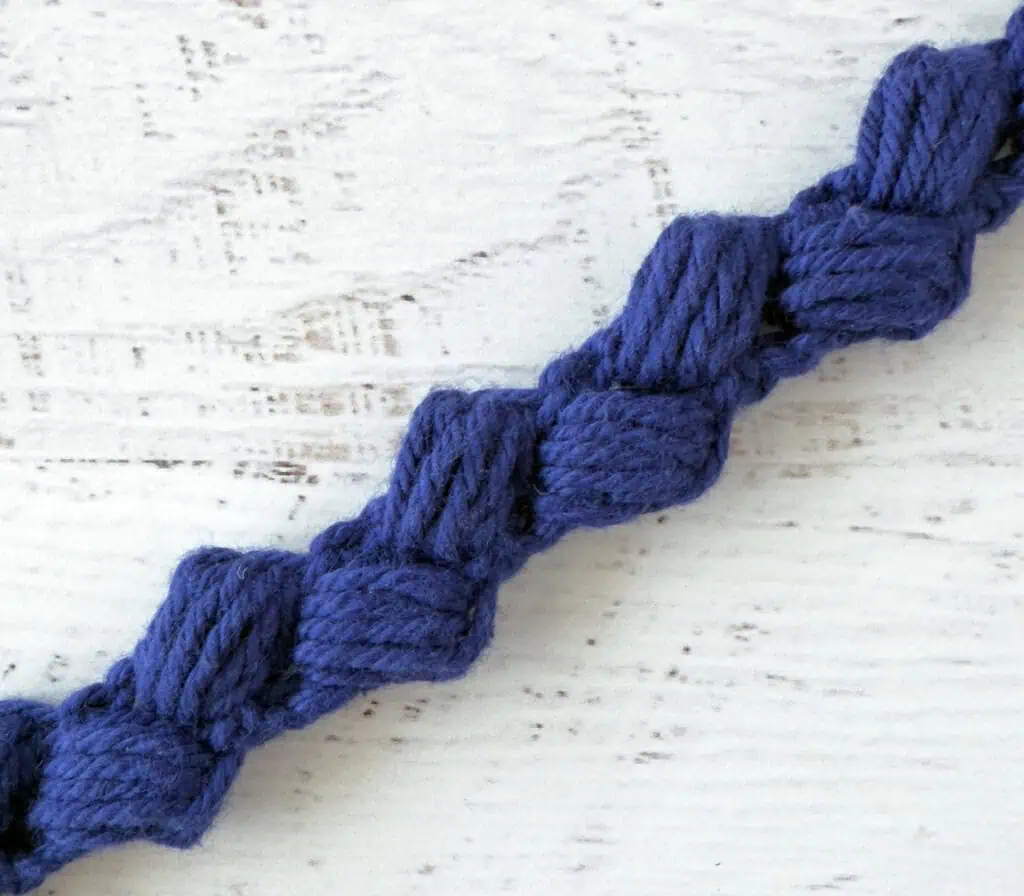
The puff stitch used for the strap is slightly different from a basic puff stitch because of the way the final loops are handled. The special puff stitch is worked as follows: yarn over, insert the hook into the indicated stitch, and pull up a long loop five times. At this point, there are 11 loops on the hook. Yarn over and pull through 10 loops on the hook, then yarn over and pull through the final 2 loops.
This construction is important because the final pull-through helps keep the puff stitch in place. The placement of the puff stitches and the way the work is turned also contribute to the braided appearance of the finished strap.
Before You Begin the Bag
This project is worked in continuous rounds rather than joined rounds. That means you do not join at the end of every round. Because the work continues around the bag without a traditional join, using a stitch marker can be especially helpful for keeping track of the round position.
The pattern also recommends using a jogless join technique when changing colors. This is particularly useful for a striped project worked in continuous rounds because it can reduce the visibly stepped or jogged appearance that can happen where one color meets another.
Before beginning, prepare the red, white, and blue yarn, your 4mm hook, and a stitch marker. Keep your stitch counts visible as you work. The body maintains 76 stitches throughout the specified rounds, so checking that count regularly is one of the simplest ways to catch an accidental increase or decrease early.
Building the Base of the Crochet Flag Bag
Begin with the red yarn and chain 38. The first round creates an oval-shaped foundation by crocheting along one side of the chain, working three single crochet stitches into the final chain, rotating the work, and then crocheting back along the opposite side of the foundation chain.
For R1, work a single crochet in the second chain from the hook and in each chain until the last chain. Work 3 sc in the last chain. Rotate the work and continue along the opposite side of the chain. Work one single crochet in each chain across until the very last chain, then work 2 stitches in the last chain. The completed round totals 76 stitches, including the 3 stitches worked at either end.
Do not join the round. The body continues in continuous rounds.
Creating the Red and White Stripes
Rounds 2 and 3 are worked in single crochet around. At the end of R3, change to white yarn. These first rounds establish the beginning of the striped portion while keeping the 76-stitch count consistent.
With white yarn, work R4 through R6 in single crochet around. At the end of R6, change back to red yarn.
With red yarn, work R7 through R9 in single crochet around. At the end of R9, change to white yarn again.
At this stage, the repeating three-round color blocks begin to establish the recognizable flag-inspired stripe pattern. Keep the stitches even and pay attention to the color change at the specified round ending rather than changing color at an arbitrary point in the round.
Continuing the Stripe Sequence
For R10 through R27, repeat the established R4-R9 stripe sequence. The pattern specifies that the color changes should continue according to that sequence, with the project changing to blue yarn at the end of R27.
At the end of R27, the bag contains 5 red stripes and 4 white stripes, with 76 stitches in the round. This is an important checkpoint. If your stitch count is not 76, pause before proceeding so you can identify where the discrepancy occurred.
After the final red and white stripe section, the project transitions into the blue upper portion of the bag.
Working the Blue Section
R28 through R41 are worked entirely with blue yarn, using single crochet around. Each round contains 76 stitches.
This blue section creates the upper portion of the bag and provides the background for the star buttons. It is also the area where the D rings will later be incorporated. For that reason, keeping the fabric even and checking the stitch placement becomes especially important as you approach R42.
Preparing for the D Rings
Before working R42, stop and mark 3 stitches on each side of the bag. The original instructions emphasize that these marked stitches will not necessarily correspond to the very first stitch of the round because the stitches shift slightly when working continuously around the bag.
The easiest approach is to lay the bag flat and identify the three stitches at the top of each side. These are the stitches where the D rings will be crocheted into position.
This step is more about visual placement than simply counting from the beginning of the round. Make sure the bag is lying naturally and that the two sides are positioned symmetrically before marking the stitches.
Attaching the D Rings During R42
Continue with blue yarn and work single crochet around until reaching the first marked side stitches. Hold the flat side of the D ring against the stitches. Then work a single crochet over the D ring and through both loops of the bag at the same time over the next 3 stitches.
Continue crocheting around in single crochet until reaching the second marked side. Repeat the same process with the second D ring, working a single crochet over the ring and through both loops of the bag for 3 stitches.
Finish the round by working single crochet in the remaining stitches. The completed round remains at 76 stitches.
Creating the Button Loop
Before working the final round, sew one star button to the top center of the front of the bag. Also use a stitch marker to mark the center back stitch.
For R43, slip stitch to the center back stitch. Then work the button loop by making a slip stitch, chain 10, and slip stitch into the center back stitch. Check the loop against the button. If it does not fit comfortably over the button, adjust the number of chains as necessary.
After checking the loop, slip stitch around the remainder of the round. Fasten off using an invisible join to finish. The round remains at 76 stitches.
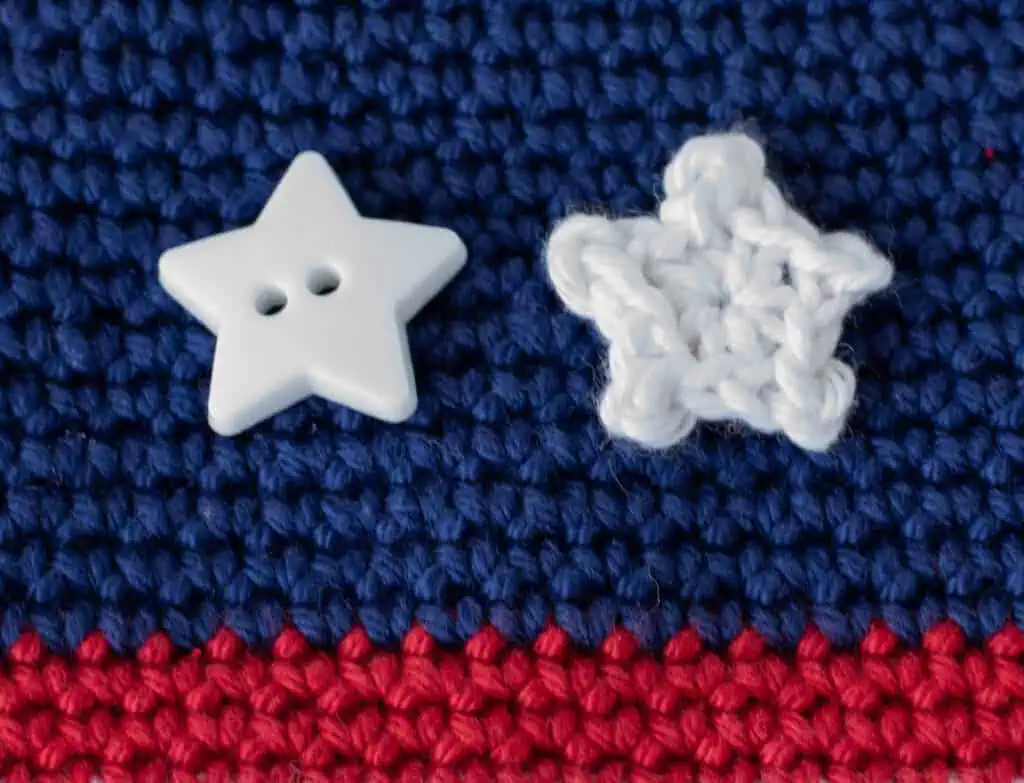
Once the body is finished, sew the remaining star buttons in place on the bag. The original design uses 14 star-shaped buttons in total. An alternative is to crochet stars using the referenced Christmas Tree Coasters pattern. If crocheted stars are used instead of buttons, the original instructions note that the bag will need either an open top or a magnetic closure rather than the button-and-loop closure described here.
Making the Puff Stitch Braid Strap
The strap is worked separately with blue yarn. Its unusual construction is one of the defining details of this bag because the puff stitches and turning direction create a braided effect.
Begin by leaving a long tail for sewing later. Using blue yarn, chain 4 and slip stitch in the third chain from the hook to form a loop.
For R1, work in the loop. Chain 2, then work one puff stitch. Chain 2 and rotate the work to the left.
For R2, work in the chain-2 space. Make one puff stitch, chain 2, and rotate the work to the left.
Repeat R2 until the strap reaches the desired length. The original strap was worked to 45 inches. Because the cotton strap has some stretch, the original instructions recommend taking that stretch into account when deciding on the best length for your body.
After the final puff stitch, do not make the final chain 2. Fasten off, leaving a long strand for joining.
Attaching the Strap to the Swivel Hooks
Use the long yarn strand to sew the strap to a swivel hook. Insert the end of the strap into the metal loop on the swivel hook, fold the bag strap over, and sew it securely down. Knot off and bury the knot end inside the strap so that the finishing work is not visible. Cut away the excess yarn.
Repeat the same process for the opposite end of the strap and the second swivel hook. The completed strap can then connect the swivel hooks to the D rings attached to the sides of the bag.
Helpful Stitch Checkpoints
- R1: 76 stitches.
- R2-R3: 76 stitches.
- R4-R6: 76 stitches.
- R7-R9: 76 stitches.
- R10-R27: 76 stitches, with 5 red stripes and 4 white stripes at the end of R27.
- R28-R41: 76 stitches in blue.
- R42: 76 stitches, with both D rings incorporated over 3 stitches each.
- R43: 76 stitches, including the center-back button loop.
These checkpoints are useful when working a project in continuous rounds. A small mistake in an early round can otherwise carry forward into the rest of the bag. Regularly confirming the stitch count gives you a chance to correct an issue before it affects the shape or the hardware placement.
Tips for Clean Color Changes
The striped section is worked in continuous rounds, so color changes can create a visible jog. The original pattern specifically recommends a jogless join technique to minimize this effect. If the stripe transition is an important visual feature for your finished bag, taking care with the color changes can make the finished fabric look cleaner and more consistent.
It is also helpful to change colors exactly where the pattern specifies. The red, white, and blue sections are based on specific groups of rounds, so changing early or late can alter the stripe proportions.
Tips for the Strap
The strap deserves special attention because its construction differs from the main bag. The puff stitch is intentionally worked with the specified pull-through sequence, and the work is rotated to the left after each chain-2 section. These details create the distinctive braided look.
Do not judge the final strap length only by measuring it while it is relaxed. Cotton has some stretch, and the original pattern recommends giving the strap a little tug before measuring it against a bag strap you already use comfortably. This provides a practical reference for determining a suitable length.
Finishing Checklist
- Confirm that the bag body measures approximately 8.5 inches tall by 8.5 inches wide, excluding the strap.
- Confirm the body has the specified 76-stitch count.
- Check that both D rings are securely crocheted into R42.
- Check that the button loop fits over the front star button.
- Confirm that all 14 star-shaped buttons are sewn securely if using the original button option.
- Check that the strap has been finished with secure stitching at both swivel hooks.
- Bury yarn ends so they are not visible.
- Check that the swivel hooks connect correctly to the D rings.
Frequently Asked Questions
Is this crochet bag made with single crochet?
Yes. The main body is worked in single crochet. The decorative complexity comes primarily from the color changes, hardware placement, star buttons, and the separate puff-stitch strap.
What size crochet hook is used?
The pattern uses a US G6/4mm crochet hook.
How many stitches are in the bag?
The bag body has 76 stitches throughout the specified rounds, including the rounds where the D rings are incorporated and the final round with the button loop.
What is the finished size?
The finished bag is approximately 8.5 inches tall by 8.5 inches wide, excluding the strap.
How long is the original strap?
The original strap was worked to 45 inches. Because the cotton strap has some stretch, the pattern recommends accounting for that stretch when determining the most suitable length for the wearer.
Can the yarn be substituted?
Yes. The original pattern notes that WeCrochet Dishie or Lily Sugar ’n Cream are suitable alternatives. The original yarns are size 4 worsted-weight, 100% cotton yarns.
Can the stars be crocheted instead of sewn-on buttons?
Yes. The source notes that the star from the Christmas Tree Coaster pattern can be used as an alternative. However, when using crocheted stars, the closure needs to be adapted because the original button-and-loop closure is designed around the button. The source notes that an open top or a magnetic closure can be used instead.
Why is a stitch marker useful for this project?
The body is worked in continuous rounds, so a stitch marker helps keep track of the round position. It is especially useful before and during the hardware placement section.
Quick Reference for the Main Body
Start: With red yarn, chain 38.
R1: Work around both sides of the foundation chain for a total of 76 stitches. Do not join.
R2-R3: Red, single crochet around; change to white at the end of R3.
R4-R6: White, single crochet around; change to red at the end of R6.
R7-R9: Red, single crochet around; change to white at the end of R9.
R10-R27: Repeat the R4-R9 stripe sequence and change to blue at the end of R27. There are 5 red stripes and 4 white stripes at this point.
R28-R41: Blue, single crochet around.
R42: Crochet over the two D rings, using 3 stitches for each side attachment.
R43: Create the center-back chain-10 button loop, slip stitch around, and finish with an invisible join.
Why This Bag Is So Adaptable
Although the original design uses red, white, and blue, the construction does not require those colors. Because the body is made primarily from single crochet, the same basic approach can be adapted visually by changing the color palette. The original pattern specifically notes that the bag can be worked in blue and white stripes for a nautical-inspired look, in two colors of your choice, or even in a solid color.
This flexibility makes the project useful beyond a single holiday. The star buttons and patriotic color arrangement create the original seasonal character, but the underlying bag construction can inspire other versions with different yarn colors and decorative choices.
Final Thoughts on the Star Spangled Crochet Bag
The Star Spangled Crochet Flag Bag brings together several approachable crochet techniques in one practical accessory. The main body relies on single crochet and a repeating stripe sequence, while the hardware and button details give the finished bag a polished appearance. The separate puff-stitch strap adds the most distinctive textural feature, creating a braided effect that complements the structured striped body.
For the cleanest result, focus on the details that the pattern emphasizes: maintain the 76-stitch count, follow the specified color-change rounds, use a jogless join technique if desired for cleaner stripes, carefully position the three marked stitches on each side before attaching the D rings, and pay attention to the unusual construction of the puff-stitch strap.
Once the body, closure, decorative stars, D rings, and strap are complete, the result is an approximately 8.5-inch square crochet bag that is both festive and functional. Whether you keep the classic red, white, and blue palette or use the construction as inspiration for another color combination, this project offers a practical way to combine simple stitches with eye-catching finishing details.