
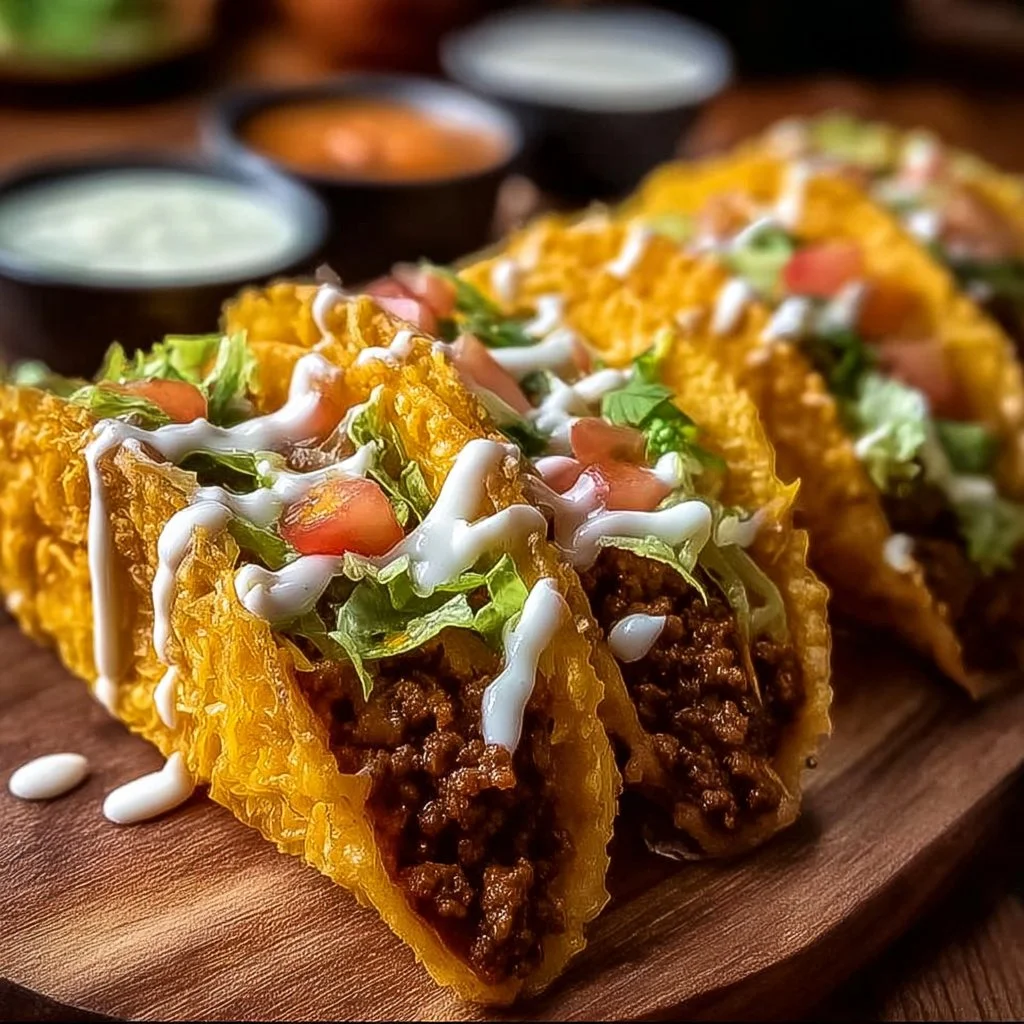
Easy Loaded Cheesy Pocket Tacos
There’s something exciting about biting into a taco brimming with flavor, cheese, and a delightful crunch. Easy Loaded Cheesy Pocket Tacos encapsulate that thrill in each pocket! With a golden, crispy exterior housing a savory mixture of seasoned beef and gooey melted cheese, these tacos are the perfect fusion of texture and taste. Ideal for any mealtime—be it breakfast, lunch, dinner, or a fun snack at a party—these pocket tacos make for a satisfying and casual dish that everyone will love.
These cheesy pockets are not just limited to taco lovers; they appeal to anyone who enjoys comfort food. What makes them even more special is their versatility. You can customize the fillings, add toppings, and serve them with a variety of sauces to suit your personal taste. Plus, who could resist the fact that they are pan-fried to perfection?
Prep Time, Cook Time, Total Time:
Prep Time: 10 min | Cook Time: 25 min | Total Time: 35 min
How to make Easy Loaded Cheesy Pocket Tacos
Ingredients
- 1 tbsp olive oil
- 1 ½ lbs lean ground beef
- 1 large yellow onion, finely chopped
- 3 cloves garlic, minced
- 1 packet (1 oz) taco seasoning mix
- ½ cup beef broth
- ½ cup tomato sauce
- 1 tsp ground cumin
- ½ tsp smoked paprika
- Salt and black pepper to taste
- 12-16 medium flour tortillas (8-inch diameter)
- 4 cups shredded Colby Jack or Mexican blend cheese
- 2 tbsp vegetable oil, for pan-frying
OPTIONAL ADD-INS & TOPPINGS:
- 1 can (15 oz) refried beans, heated
- Sliced pickled jalapeños
- Sour cream or Greek yogurt
- Salsa or pico de gallo
- Guacamole or diced avocado
- Fresh cilantro, chopped
- Shredded lettuce
- Lime wedges
Step-by-Step Instructions
-
Prepare Meat Filling: Brown Beef:
Heat 1 tbsp olive oil in a large skillet over medium-high heat. Add the ground beef, breaking it up as it cooks for about 6-8 minutes or until browned. Drain excess fat. -
Sauté Aromatics and Season:
Lower the heat to medium and add the chopped onion, cooking until softened (5-7 minutes). Stir in minced garlic and sauté for 1 minute. Then, mix in taco seasoning, cumin, and smoked paprika; continue to cook for 1 minute until fragrant. -
Simmer Filling:
Pour in beef broth and tomato sauce, letting it simmer on low for 10-15 minutes, covered, to allow flavors to meld. Season with salt and pepper to taste, and allow the mixture to cool slightly. -
Assemble Tacos: Warm Tortillas & Layer Cheese:
Warm tortillas in a microwave or dry skillet for better pliability. Lay a tortilla flat and sprinkle ¼ cup shredded cheese over one half. -
Add Filling and Optional Layers:
Spoon 2-3 tablespoons of the meat filling over the cheese. Feel free to add refried beans or pickled jalapeños, then top with another ¼ cup of shredded cheese. -
Fold into Pockets:
Fold the empty half of the tortilla over the filled half to make a semi-circle pocket. Gently press to seal the edges. Repeat this for all tortillas and filling. -
Cook Tacos: Pan-Fry First Side:
Heat 1-2 tablespoons vegetable oil in a large non-stick skillet over medium heat. Place 2-3 assembled tacos seam-side down. Cook for 3-5 minutes until golden and crispy. -
Flip and Finish Cooking:
Carefully flip each taco and cook for another 3-5 minutes until also golden and crispy, with the cheese inside fully melted. -
Keep Warm & Cook Batches:
Transfer cooked tacos to a wire rack, keeping them warm in a low oven (200°F/95°C) while cooking remaining batches, adding more oil as needed. -
Serve:
Cut each taco diagonally and serve immediately with optional toppings like sour cream, salsa, guacamole, cilantro, shredded lettuce, and lime wedges.
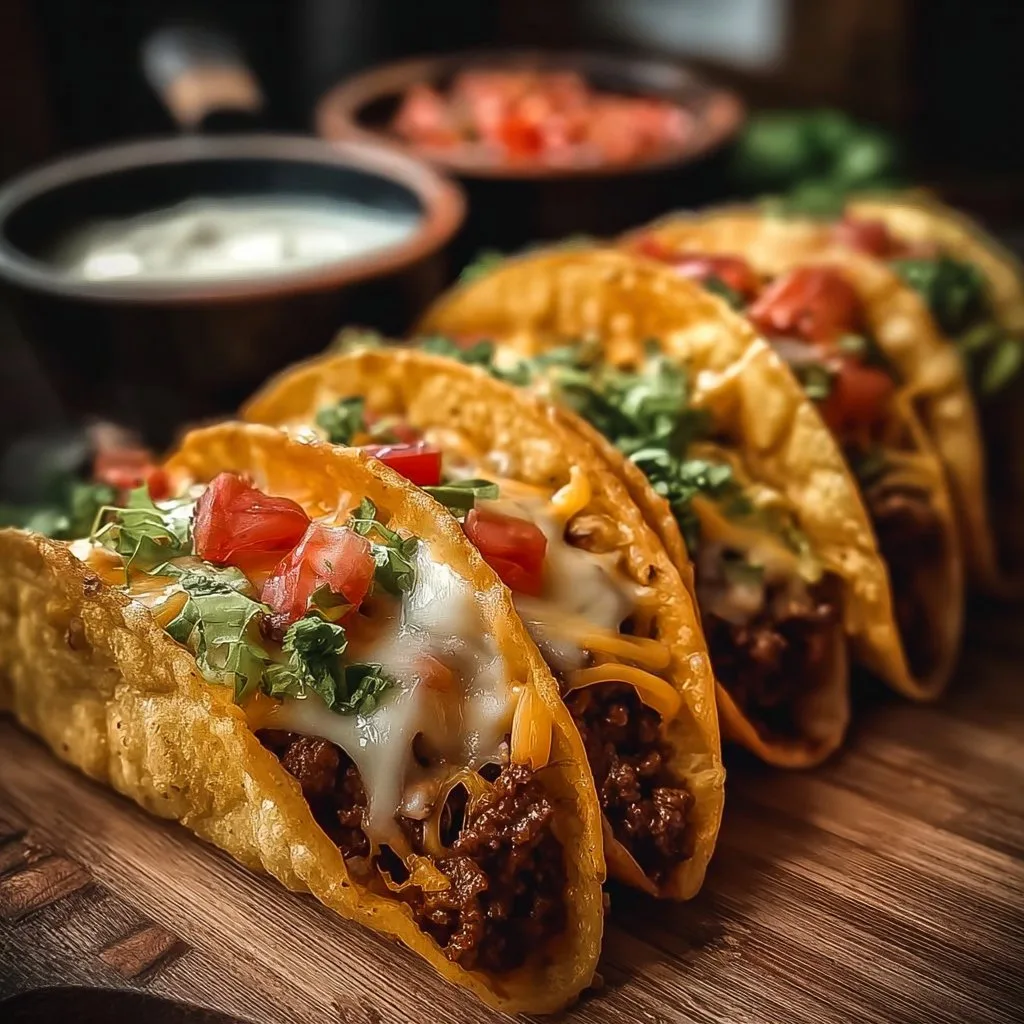
Pro Tips
-
Select the Right Tortillas: For a crispier texture, opt for flour tortillas. If you want a lower-carb option, try using low-carb tortillas or lettuce wraps.
-
Don’t Overcrowd the Skillet: When pan-frying, do not crowd the skillet. This ensures each taco gets that golden crisp everyone loves. Cook in batches if necessary.
-
Customize Seasoning to Taste: If you enjoy more spice, consider adding chili powder or a touch of cayenne pepper to the filling.
-
Keep Your Filling Cool: Let the meat mixture cool slightly before filling the tortillas. If it’s too hot, it may tear the tortillas while folding.
-
Seal Carefully: Ensure the edges of the tortillas are well-sealed to prevent the filling from leaking during cooking. Press firmly with your fingers and a fork to check the seal.
-
Experiment with Cheese: While Colby Jack is delicious, you can swap it for pepper jack for an extra kick or use a low-fat cheese option for a healthier choice.
Why You’ll Love This Recipe
These Easy Loaded Cheesy Pocket Tacos are a delightful meal that combines familiar, comforting flavors with a fun twist. The incredible mixture of the seasoned beef and layers of cheese creates a flavor explosion that is hard to resist. Each bite delivers a satisfying crunch, balanced by warm, cheesy goodness inside.
Moreover, the simplicity of the recipe makes it a go-to for busy weeknights or quick lunches. It’s easy to customize according to dietary preferences—vegetarians can replace the meat with beans or veggies, while spice-lovers can enjoy a jalapeño kick. Perfect for family dinners or casual get-togethers, these tacos appeal to all.
How to Serve Easy Loaded Cheesy Pocket Tacos
When serving these delicious tacos, consider a vibrant platter to display them. Cut them diagonally and arrange them beautifully on the plate, perhaps with a sprinkle of fresh cilantro on top.
Accompany the tacos with small bowls of toppings like sour cream, guacamole, salsa, or pico de gallo, letting guests personalize their meals. For side dishes, consider serving with Mexican rice, refried beans, or a fresh avocado salad. Drinks like iced tea, margaritas, or light beers pair wonderfully with these flavors.
How to Store Easy Loaded Cheesy Pocket Tacos
For the best storage, ensure tacos are cooled completely before placing them in an airtight container in the fridge. They’ll generally keep well for about 3-4 days.
If you want to freeze them, assemble the pocket tacos completely without cooking them. Lay them flat on a baking sheet until frozen solid, then store in a zip-top bag for up to three months. Just remember to label your bags with the date!
Tips to Make Easy Loaded Cheesy Pocket Tacos
- Adjust Cooking Time for Crispy Tacos: If your tacos aren’t getting crispy enough, try increasing the heat, but keep a close eye on them to avoid burning.
- Add More Fillings: Adding black beans or corn can enhance nutrition and flavor. Be mindful not to overfill, though!
- Use Fresh Ingredients: Fresh veggies not only add to flavor but also provide extra nutrients. Chopped tomatoes and spinach can complement the beef nicely.
- Serve with Refreshing Drinks: Pairing with a light, refreshing drink can help balance the richness of the tacos. Consider lemonade or a fruity beverage.
Variation
If you’re looking to mix things up, why not try some of these variations?
-
Vegan Version: Substitute ground beef with lentils or a plant-based meat alternative. Use vegan cheese for a dairy-free option.
-
Low-Carb Option: Try portobello mushrooms or grilled zucchini slices in place of tortillas to create a healthy taco salad.
-
Spicy Loaded Tacos: Mix in chopped jalapeños or spicy salsa into the meat filling for those who crave heat.
-
Gluten-Free: Use gluten-free tortillas or lettuce leaves instead of flour tortillas to cater to gluten sensitivities.
Nutrition Information
Serving Size: 2 tacos | Calories: 450 | Protein: 25g | Carbs: 40g | Fat: 24g | Fiber: 3g | Sugar: 2g
These tacos offer a hearty dose of protein thanks to the beef and cheese, while keeping carbs moderate. The fiber content can help with digestion, making them a more balanced meal option.
Storage and Reheating
To reheat leftovers:
-
Microwave: Place the tacos on a microwave-safe plate and cover them with a damp paper towel. Heat on medium for about 30-60 seconds until warmed through.
-
Oven: Preheat to 350°F (175°C) and place tacos on a baking tray. Heat for 5-7 minutes for a crispier result.
-
Skillet: Lightly oil a skillet over medium heat and warm the tacos for about 3-5 minutes on each side until heated through and crispy.
Customization Ideas
Consider adding different spices or herbs to the meat filling for a personal touch. For toppings, think outside the box: mango salsa, roasted corn, or even a drizzle of chipotle sauce can elevate the flavors.
Common Mistakes to Avoid
-
Overfilling: Stuffing tacos too full can lead to tearing. Stick to a moderate amount of filling.
-
Not Cooking the Beef Thoroughly: Ensure the meat is fully cooked and well-seasoned for the best flavor.
-
Skipping the Cooling Step: Filling warm tortillas can make them tear. Let the filling cool slightly first.
-
Not Testing Tortilla Flexibility: If tortillas are cold, they can crack when folded. Warm them first!
-
Frying at Too High a Heat: This can burn the outside while leaving the inside cold. A medium heat is key to crispy perfection.
Serving Occasions
Easy Loaded Cheesy Pocket Tacos are perfect for a variety of occasions! They can be a hit at family gatherings, casual parties, or even multi-course dinners. They also serve well for casual movie nights or quick lunches that please adults and kids alike.
Why Make This Recipe
What sets these Easy Loaded Cheesy Pocket Tacos apart from traditional tacos is the unique combination of a stuffed taco pocket with frying that creates an irresistible crunchy texture. Plus, the ability to customize fillings and toppings means they can be tailored to suit any preference, meal, or dietary need. They bridge the gap between casual and gourmet dining, making for a fun and engaging meal.
FAQs
-
Can I use chicken or turkey instead of beef?
Absolutely! Ground turkey or shredded chicken would work beautifully in this recipe. Just adjust seasoning for the leaner meat. -
How can I make these tacos healthier?
You can use leaner meats, whole-grain tortillas, or substitute beans for protein. Adding more veggies to the filling can also boost nutrition. -
What if I have leftover filling?
The filling can be stored in the fridge for a few days. Use it in burritos, salads, or omelets! -
Can I make these tacos ahead of time?
Yes! Prepare the meat filling a day ahead, and assemble just before frying for optimal freshness and crunch. -
What’s the best way to reheat leftover tacos?
The oven is best for keeping them crispy, but the microwave works in a pinch. Just be sure to put a paper towel over it while reheating to maintain moisture.
Disclaimer:
Nutrition values are approximate and can vary based on ingredient brands and cooking methods. Always check ingredient packaging for accuracy.
Print
Easy Loaded Cheesy Pocket Tacos
- Total Time: 35 minutes
- Yield: 4 servings 1x
- Diet: Omnivore
Description
Delicious pocket tacos filled with seasoned beef and gooey melted cheese, pan-fried to perfection for a crispy exterior.
Ingredients
- 1 tbsp olive oil
- 1 ½ lbs lean ground beef
- 1 large yellow onion, finely chopped
- 3 cloves garlic, minced
- 1 packet (1 oz) taco seasoning mix
- ½ cup beef broth
- ½ cup tomato sauce
- 1 tsp ground cumin
- ½ tsp smoked paprika
- Salt and black pepper to taste
- 12–16 medium flour tortillas (8-inch diameter)
- 4 cups shredded Colby Jack or Mexican blend cheese
- 2 tbsp vegetable oil, for pan-frying
- 1 can (15 oz) refried beans, heated (optional)
- Sliced pickled jalapeños (optional)
- Sour cream or Greek yogurt (optional)
- Salsa or pico de gallo (optional)
- Guacamole or diced avocado (optional)
- Fresh cilantro, chopped (optional)
- Shredded lettuce (optional)
- Lime wedges (optional)
Instructions
- Heat 1 tbsp olive oil in a large skillet over medium-high heat. Add ground beef and cook until browned, about 6-8 minutes. Drain excess fat.
- Lower heat to medium and add chopped onion; cook until softened, about 5-7 minutes. Stir in minced garlic and sauté for 1 minute. Add taco seasoning, cumin, and smoked paprika; cook for 1 minute until fragrant.
- Pour in beef broth and tomato sauce. Simmer on low for 10-15 minutes, covered, then season with salt and pepper to taste and let mixture cool slightly.
- Warm tortillas in the microwave or a dry skillet. Place a tortilla flat, sprinkle ¼ cup shredded cheese over one half.
- Spoon 2-3 tablespoons of the meat filling over the cheese. Add optional ingredients if desired, then top with another ¼ cup of shredded cheese.
- Fold the tortilla to create a semi-circle pocket and press to seal. Repeat for all tortillas and filling.
- Heat 1-2 tablespoons vegetable oil in a non-stick skillet over medium heat. Place 2-3 tacos seam-side down and cook for 3-5 minutes until golden and crispy. Flip and cook for another 3-5 minutes until fully cooked.
- Transfer cooked tacos to a wire rack to keep warm while cooking remaining batches.
- Cut each taco diagonally, serve immediately with optional toppings.
Notes
These tacos are customizable with different fillings and toppings. For a healthier option, use lean meats and fresh vegetables.
- Prep Time: 10 minutes
- Cook Time: 25 minutes
- Category: Main Course
- Method: Pan-Frying
- Cuisine: Mexican
Nutrition
- Serving Size: 2 tacos
- Calories: 450
- Sugar: 2g
- Sodium: 800mg
- Fat: 24g
- Saturated Fat: 10g
- Unsaturated Fat: 10g
- Trans Fat: 0g
- Carbohydrates: 40g
- Fiber: 3g
- Protein: 25g
- Cholesterol: 70mg