

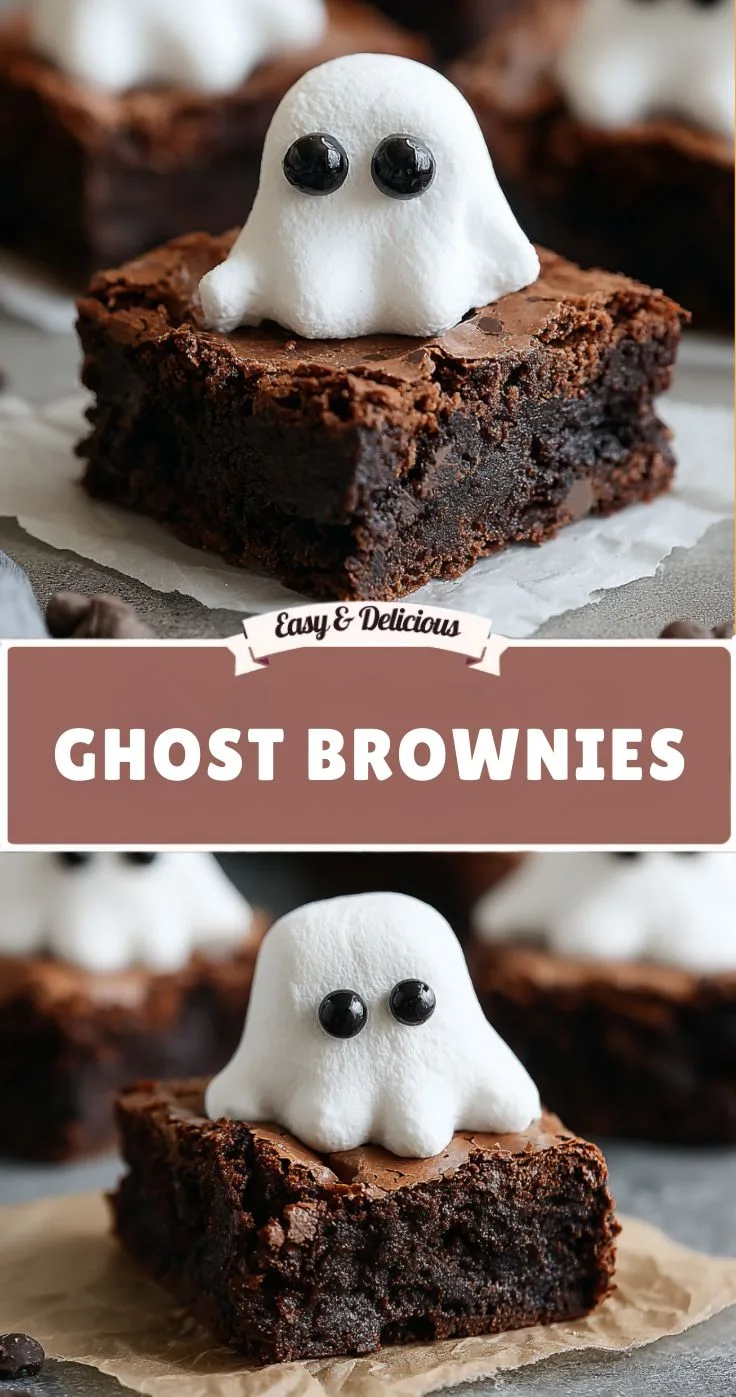
Halloween desserts are at their best when they are both delicious and fun to look at, and these Ghost Brownies check both boxes. Rich, fudgy chocolate brownies become the perfect base for adorable marshmallow ghosts covered in a smooth white chocolate coating. A few tiny chocolate chips create simple spooky faces, turning an ordinary brownie into a festive Halloween treat.
The recipe is wonderfully easy because it starts with a boxed brownie mix. You do not need to make homemade brownie batter or spend hours decorating individual desserts. Once the brownies have cooled, each square is topped with a marshmallow, covered with melted white chocolate, and decorated with a simple ghost face.
These brownies are ideal for Halloween parties, school celebrations, bake sales, family gatherings, or a cozy movie night at home. They are also a fun project to make with children because the decorating process is simple and creative.
The combination of dense chocolate brownie, soft marshmallow, and sweet white chocolate creates a satisfying contrast in every bite. And because the ghosts are slightly different from one another, the finished platter has a charming homemade look.
Why You’ll Love These Ghost Brownies
There are plenty of reasons these spooky brownies deserve a place on your Halloween dessert table.
They Are Extremely Easy
Using a boxed brownie mix keeps the preparation simple. Just prepare the batter according to the package directions, bake it, and allow it to cool before decorating.
They Look Festive
You only need three small chocolate chips to create each ghost’s face. The white chocolate coating provides the classic ghost appearance without complicated piping or decorating skills.
They Are Great for Kids
Children can help place the marshmallows, decorate the ghost faces, and arrange the finished brownies on a platter. It turns dessert preparation into a fun Halloween activity.
They Can Be Made Ahead
The brownies can be prepared before your party and decorated once they are completely cool. Store the finished treats in an airtight container until you are ready to serve them.
Recipe Details
Prep Time: 15 minutes
Cook Time: 25 minutes
Total Time: 40 minutes
Yield: 12 brownies
Pan: 9×13-inch baking pan
Ingredients
Brownie Base
1 box brownie mix:
Use your favorite boxed brownie mix. Prepare it according to the package directions, including the eggs, oil, and water required by the specific mix.
A fudgy brownie mix works especially well because the dense chocolate base provides a sturdy foundation for the marshmallow ghosts.
Marshmallows
You will need 12 large marshmallows, one for each brownie.
The marshmallows create the body of the ghosts and give the brownies their distinctive three-dimensional appearance.
White Chocolate
Use 1 cup white chocolate chips or white candy melts.
The melted white chocolate coats the marshmallow and creates the smooth white exterior. Candy melts are particularly convenient because they are designed for melting and setting.
Mini Chocolate Chips
Use ¼ cup mini chocolate chips to create the eyes and mouths.
You can use regular mini chocolate chips for small, subtle faces or larger chocolate chips for a bolder appearance.
How to Make Ghost Brownies
Step 1: Prepare the Brownie Batter
Begin by preparing the brownie mix according to the instructions on the package.
Different brownie mixes require different amounts of eggs, oil, and water, so follow the specific directions provided with your mix.
Mix the batter until the ingredients are combined and the consistency is smooth.
Avoid overmixing once the flour has been incorporated. Overmixing can affect the final texture and make brownies less tender.
Step 2: Bake the Brownies
Grease a 9×13-inch baking pan or line it with parchment paper.
Pour the prepared brownie batter into the pan and spread it evenly.
Bake according to the package instructions until the brownies are set.
For an especially fudgy result, avoid overbaking. The exact baking time can vary depending on the brownie mix and your oven, so use the package instructions as your main guide.
Once baked, remove the pan from the oven and allow the brownies to cool completely.
This is an important step. If the brownies are still warm when you add the marshmallows and melted chocolate, the marshmallows can become unstable and the coating may not set properly.
How to Make Extra-Fudgy Brownies
If you prefer brownies with a dense, fudgy center, slightly underbake them according to the recipe’s recommended baking range.
The brownies should still be set enough to cut into squares, but they should not be dry.
Once removed from the oven, allow them to cool completely in the pan. As they cool, the center will firm up while retaining its rich texture.
Do not try to decorate them while they are warm.
Step 3: Cut the Brownies
Once the brownies are completely cool, cut them into 12 even squares.
A sharp knife will help create clean edges.
For particularly neat pieces, wipe the knife with a clean damp cloth between cuts. This removes crumbs and chocolate residue that can otherwise make the edges look messy.
The brownies do not need to be perfectly identical. Slightly different shapes can actually make the finished ghost platter look more playful.
Step 4: Add the Marshmallow Ghosts
Place one large marshmallow in the center of each brownie square.
Try to position the marshmallow upright so it creates a clear ghost shape.
If the brownies are very soft, press the marshmallow gently into the surface. You want it to sit securely without crushing the brownie.
At this point, the brownies will already start to look like little ghosts.
Step 5: Melt the White Chocolate
Place the white chocolate chips or candy melts in a microwave-safe bowl.
Microwave for approximately 20 seconds at a time, stirring thoroughly after each interval.
Continue until the chocolate is smooth and completely melted.
Short heating intervals are important because white chocolate can burn or seize if overheated.
Stir between each interval, even if the chocolate does not appear fully melted. The residual heat from the bowl can help finish melting the remaining pieces.
If you prefer, you can melt the white chocolate using a double boiler over gently simmering water.
Step 6: Create the Ghost Coating
Once the white chocolate is smooth, carefully spoon or drizzle it over each marshmallow.
Allow the chocolate to flow down the sides of the marshmallow.
The goal is not to cover every part perfectly. Letting some of the white chocolate drip naturally creates a ghost-like shape.
The chocolate should extend slightly onto the brownie surface around the marshmallow, helping create the appearance of a flowing ghost costume.
Work with one brownie at a time while the chocolate is still melted.
Step 7: Add the Ghost Faces
Before the white chocolate sets, add the mini chocolate chips.
Use two chips for the eyes and one for the mouth.
Press them gently into the soft coating.
You can make the faces identical, or give each ghost a different expression.
Try:
- Two round eyes and a tiny mouth
- Wide eyes for a surprised ghost
- One eye slightly higher than the other
- A large open mouth for a screaming ghost
- Smaller eyes for a cute ghost
The decorating does not need to be precise. The imperfections make each little ghost unique.
Step 8: Let the Brownies Set
Allow the decorated brownies to sit at room temperature until the white chocolate has hardened.
Depending on the temperature of your kitchen, this can take several minutes.
If you need them to set more quickly, you can place them in the refrigerator briefly.
Once the coating has hardened, the ghosts are ready to serve.
Tips for the Best Ghost Brownies
Let the Brownies Cool Completely
This is one of the most important steps.
Warm brownies can make the marshmallows unstable, while heat can cause the melted white chocolate to remain too soft.
Allow the brownies to cool completely before decorating.
Use a Fudgy Brownie Base
Fudgy brownies provide a sturdy and rich foundation for the marshmallow ghosts.
Avoid very thin or overly soft brownies that may not support the toppings.
Melt White Chocolate Slowly
White chocolate is more delicate than many types of chocolate.
Microwave it in short intervals and stir frequently to prevent overheating.
Work Quickly With the Faces
The mini chocolate chips need to be added while the white chocolate is still soft.
Have your chocolate chips ready before you begin coating the ghosts.
Do Not Overload the Chocolate
You want enough white chocolate to cover the marshmallow and create drips, but too much can make the ghosts heavy.
A moderate coating gives them a cleaner appearance.
Fun Ghost Face Ideas
The ghost faces are one of the easiest ways to personalize these brownies.
For a cute Halloween dessert, use small chocolate chips and make tiny eyes and smiles.
For a scarier look, use larger chocolate chips to create wide eyes and open mouths.
You can even create different expressions across the platter so that no two ghosts look exactly alike.
If you are making these with children, let them decide what expressions each ghost should have. This can be one of the most entertaining parts of the recipe.
Halloween Variations
Chocolate Ghost Faces
The original mini chocolate chips are quick and easy, but you can also use melted dark chocolate to pipe eyes and mouths.
Allow the chocolate to firm slightly before piping so it does not spread too much.
Orange Ghost Brownies
Add orange Halloween sprinkles around the ghost while the white chocolate is still soft.
The combination of orange, white, and dark chocolate creates a classic Halloween color palette.
Spooky Sprinkle Brownies
Add black, purple, orange, or green sprinkles to the white chocolate before it sets.
Chocolate Brownie Graveyard
For a larger Halloween dessert display, arrange the ghost brownies on a platter with crushed chocolate cookies around them to create a spooky graveyard effect.
Bigger Ghosts
If you want larger ghosts, use bigger marshmallows and cut the brownies into fewer, larger portions.
Making Ghost Brownies With Kids
These brownies are particularly good for a family Halloween baking activity.
Adults can prepare and bake the brownies, while children can help with the decorating.
Once the brownies are cool, let the kids:
- Place the marshmallows
- Spoon white chocolate over the ghosts
- Add chocolate-chip eyes
- Create different facial expressions
- Add Halloween sprinkles
- Arrange the finished brownies on a platter
Children do not need to make every ghost identical. In fact, allowing them to create their own designs makes the final dessert more fun.
Always supervise children around hot baking pans, melted chocolate, and kitchen appliances.
Make-Ahead Instructions
These brownies are convenient when you are preparing several dishes for a Halloween party.
You can bake the brownies earlier in the day and let them cool completely. Once cooled, decorate them with the marshmallows and white chocolate.
The finished brownies can then be stored in an airtight container until serving.
If you are preparing them for a party, decorating them a few hours before guests arrive gives the white chocolate enough time to set.
How to Store Ghost Brownies
Store the finished brownies in an airtight container for up to 3 days.
Place parchment paper between layers if you need to stack them. This helps prevent the ghost decorations from sticking to one another.
Keep the container in a cool, dry place away from direct sunlight and heat.
If your kitchen is particularly warm and the white chocolate begins to soften, refrigerate the brownies briefly.
Before serving refrigerated brownies, allow them to sit for a few minutes so the texture becomes more pleasant.
How to Serve Ghost Brownies
These brownies are best served as a fun Halloween dessert or party snack.
Arrange them on a large platter so the white ghosts stand out against the dark chocolate brownies.
For an extra festive presentation, surround them with Halloween candies, orange and black sprinkles, or small bowls of other treats.
You can also serve them alongside:
- Hot chocolate
- Apple cider
- Coffee
- Vanilla ice cream
- Whipped cream
- Chocolate milk
For a Halloween movie night, place the brownies on a dessert tray alongside popcorn and other easy snacks.
Halloween Party Presentation
Presentation can make these simple brownies look much more impressive.
Use a dark-colored serving platter to create contrast with the white chocolate ghosts.
Arrange the brownies in rows or place them in a circular pattern.
For a playful Halloween centerpiece, place a small bowl of Halloween candy in the center of the platter and arrange the ghost brownies around it.
You can also scatter a few Halloween sprinkles around the brownies for additional color.
Avoid placing non-food decorations directly on the brownies unless they are specifically designed for food use.
Frequently Asked Questions
Can I use homemade brownies?
Yes. You can replace the boxed brownie mix with your favorite homemade brownie recipe. The important thing is to bake the brownies in a 9×13-inch pan so you have enough surface area for the 12 ghost decorations.
Can I use white candy melts instead of white chocolate?
Yes. White candy melts are an excellent alternative and can be particularly convenient because they are designed for coating and decorating.
Why is my white chocolate too thick?
White chocolate can become thick if it is overheated or if it is exposed to moisture. Try melting it slowly and stirring frequently.
If necessary, a small amount of appropriate melting aid can help, depending on the product you are using.
Can I use dark chocolate for the ghost faces?
Absolutely. Dark chocolate provides a strong contrast against the white coating and creates very recognizable ghost faces.
Can I make the brownies ahead of time?
Yes. The brownies can be prepared and decorated ahead of your event. Store them in an airtight container and serve within about three days.
How do I stop the marshmallows from moving?
Make sure the brownies are completely cool and gently press each marshmallow into the brownie surface. The melted white chocolate will also help secure it as it sets.
Can I use mini marshmallows?
Large marshmallows are recommended because they create a more recognizable ghost shape. Mini marshmallows would produce much smaller decorations.
Nutrition Information
The estimated nutrition per brownie is:
| Serving Size | Calories | Protein | Carbs | Fat | Fiber | Sugar |
|---|---|---|---|---|---|---|
| 1 brownie | 320 | 4g | 45g | 14g | 2g | 34g |
Nutrition information is estimated and may vary depending on the brownie mix, chocolate, marshmallows, and other ingredients used. Serving size and preparation methods can also affect the final values.
Why These Brownies Are Perfect for Halloween
There is something magical about transforming an everyday dessert into something that looks like it belongs at a Halloween party.
These Ghost Brownies require very little decorating experience, yet the finished treats have plenty of visual impact. The dark brownie creates a dramatic background, the white chocolate gives the marshmallows their ghostly appearance, and the chocolate-chip faces bring them to life.
They are also versatile enough for almost any Halloween occasion.
For a children’s party, let kids decorate their own ghosts. For a school event, make a large batch and arrange them on a festive platter. For a family gathering, serve them alongside warm drinks and other seasonal desserts.
Even if you are simply looking for an easy Halloween dessert to make at home, this recipe delivers plenty of festive fun without requiring a long ingredient list.
Final Thoughts
These Ghost Brownies are a simple, spooky, and delicious Halloween treat made from fudgy chocolate brownies, fluffy marshmallows, smooth white chocolate, and tiny chocolate-chip faces.
The recipe starts with a convenient boxed brownie mix, making it accessible even when you are short on time. Once the brownies are baked and cooled, the decorating process is quick and enjoyable. Place a marshmallow on each square, cover it with melted white chocolate, and add a few chocolate chips to create the ghost’s face.
The result is a tray of adorable Halloween ghosts that look impressive while requiring surprisingly little effort.
Whether you are hosting a Halloween party, preparing treats for children, or enjoying a spooky movie night at home, these Ghost Brownies are sure to bring a little extra Halloween magic to the table. Make the faces cute, silly, or spooky—or let everyone create their own ghostly personality.
However you decorate them, these fudgy chocolate treats are almost guaranteed to disappear quickly.