

Halloween is the perfect excuse to go all out with dessert, and nothing makes a stronger statement than a dramatic homemade Halloween cake. These Spooky Halloween Cakes combine rich chocolate cake layers with creamy buttercream frosting and playful decorations such as candy eyeballs, gummy worms, crushed cookies, colorful sprinkles, and bright Halloween-colored frosting.
The finished cake is designed to look spooky and festive while still tasting like a classic chocolate celebration cake. Deep cocoa-flavored layers provide a rich foundation, while fluffy buttercream adds sweetness and a smooth texture. The decorations bring the Halloween theme to life, allowing you to create everything from a creepy graveyard to a colorful monster-inspired cake.
Although the finished cake looks elaborate, the decorating process is flexible and forgiving. You do not need professional cake-decorating skills to make it look impressive. A few piping bags, several Halloween colors, and some fun candy decorations are enough to transform a simple layer cake into a centerpiece.
Whether you are hosting a Halloween party, preparing a cake for a school celebration, entering a Halloween bake-off, or simply looking for a fun weekend baking project, this cake is a wonderful choice.
Why You’ll Love This Halloween Cake
There are plenty of reasons this spooky cake deserves a place at your Halloween table.
Rich Chocolate Flavor
The cake layers contain cocoa powder and vanilla, creating a deep chocolate flavor that pairs beautifully with sweet buttercream.
Dramatic Halloween Colors
Black, orange, purple, and green buttercream create a classic Halloween palette. You can use all four colors or focus on just two or three.
Fun to Decorate
The decorating process is where you can get creative. Add candy eyeballs, gummy worms, cookie crumbs, sprinkles, frosting vines, or green slime-like drips.
Perfect for Parties
This is a full-size layer cake designed to serve a group, making it ideal for Halloween gatherings.
Easy to Customize
The basic chocolate cake can be decorated in countless ways. Make it creepy, cute, colorful, or completely over-the-top.
Recipe Details
Prep Time: 25 minutes
Bake Time: 35 minutes
Decorating Time: 30 minutes
Total Time: About 1 hour 30 minutes
Yield: One three-layer 8-inch cake
Ingredients
For the Chocolate Cake Layers
2 cups all-purpose flour:
Provides the structure needed for the three cake layers.
2 cups granulated sugar:
Adds sweetness and helps create a tender cake texture.
1 cup unsweetened cocoa powder:
Provides the rich chocolate flavor and dark color that make the cake perfect for Halloween.
1½ teaspoons baking powder:
Helps the cake rise.
1½ teaspoons baking soda:
Provides additional leavening and contributes to the cake’s texture.
1 teaspoon salt:
Balances the sweetness and enhances the chocolate flavor.
2 large eggs:
Add structure, richness, and moisture.
1 cup whole milk:
Helps create a smooth batter and tender crumb.
½ cup vegetable oil:
Keeps the cake moist and soft.
2 teaspoons vanilla extract:
Adds warmth and enhances the chocolate flavor.
1 cup boiling water:
The boiling water creates a thin batter and helps intensify the cocoa flavor.
For the Buttercream Frosting
2 cups unsalted butter, softened:
Creates the creamy base of the frosting.
6 cups powdered sugar:
Provides sweetness and structure.
2 teaspoons vanilla extract:
Adds flavor.
2–3 tablespoons heavy cream:
Helps adjust the consistency of the buttercream.
Gel food coloring:
Use black, orange, purple, and green to create a Halloween-inspired palette.
For Decoration
You will also need:
- Candy eyeballs
- Crushed Oreo cookies for “dirt”
- Gummy worms or gummy spiders
- Halloween sprinkles
- Piping bags
- Round and star piping tips
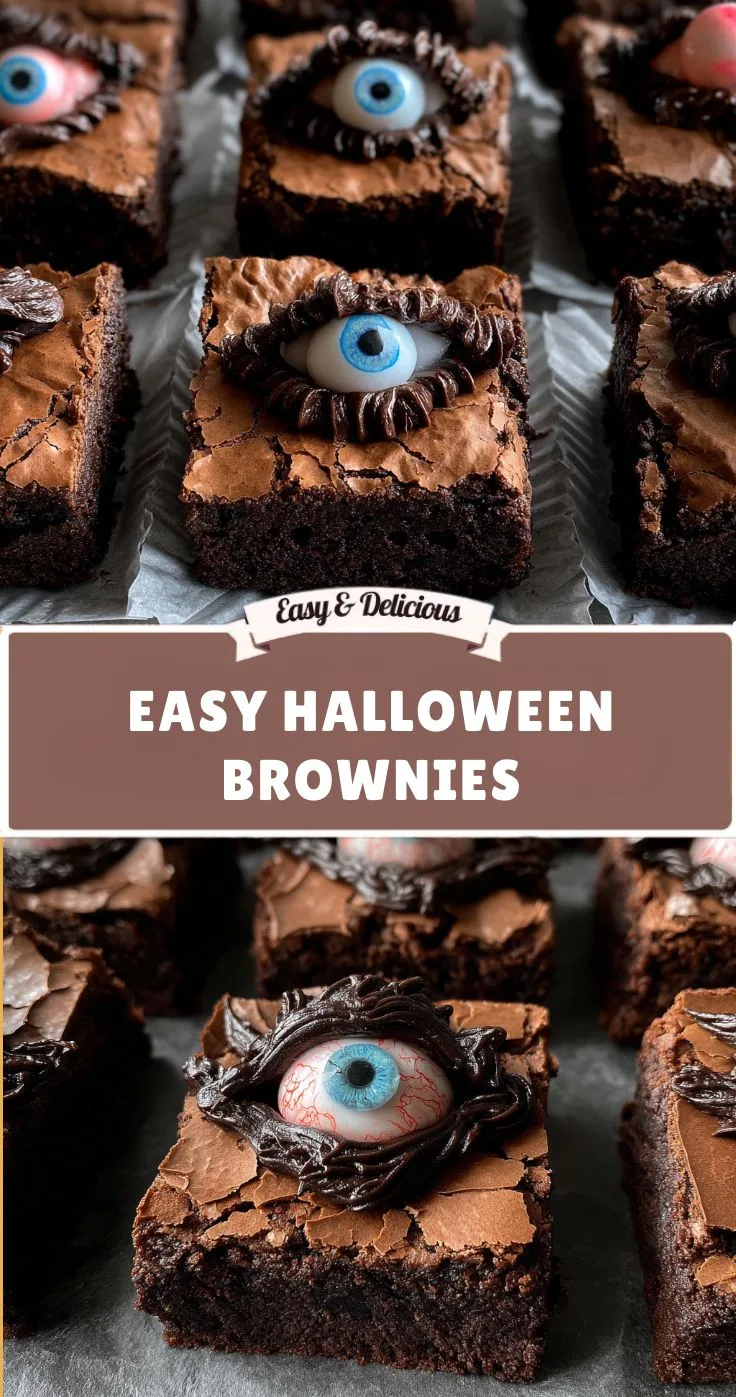
How to Make Spooky Halloween Cake
Step 1: Prepare the Cake Pans
Preheat your oven to 350°F (175°C).
Grease and flour three 8-inch round cake pans.
You can also line the bottoms with parchment paper for easier removal.
Preparing the pans carefully is important because the cake layers need to release cleanly once baked.
Set the pans aside while you prepare the batter.
Step 2: Mix the Dry Ingredients
In a large mixing bowl, whisk together the flour, granulated sugar, cocoa powder, baking powder, baking soda, and salt.
Whisk thoroughly so that the cocoa powder and leavening agents are evenly distributed.
This prevents concentrated pockets of baking soda or cocoa from forming in the finished cake.
Step 3: Add the Wet Ingredients
Add the eggs, whole milk, vegetable oil, and vanilla extract to the dry ingredients.
Beat or whisk until the ingredients are combined and the batter is smooth.
Do not worry if the mixture looks relatively thin once the ingredients have been incorporated.
The boiling water added next will make the batter even thinner.
Step 4: Add the Boiling Water
Carefully pour the boiling water into the batter while stirring.
The batter will become quite thin.
This is normal and is an important part of the recipe. The hot water helps hydrate the cocoa powder and contributes to the rich chocolate flavor of the finished cake.
Be careful when handling the boiling water and stir slowly to prevent splashing.
Step 5: Divide the Batter
Pour the batter evenly among the three prepared 8-inch cake pans.
Try to distribute the batter as evenly as possible so the finished layers are similar in thickness.
If necessary, gently tap the pans on the counter once or twice to release large air bubbles.
Step 6: Bake the Cake Layers
Place the pans in the preheated oven.
Bake for approximately 30–35 minutes, or until a toothpick inserted into the center comes out clean.
Because ovens vary, begin checking toward the lower end of the baking range.
Avoid opening the oven repeatedly while the cakes are baking because sudden temperature changes can affect how they rise.
Once baked, remove the pans from the oven.
Step 7: Cool the Cakes Completely
Allow the cake layers to cool before attempting to frost them.
Warm cake is delicate and can cause buttercream to melt or slide.
Let the layers cool in their pans for a short time, then carefully remove them and allow them to finish cooling on a rack.
For easier assembly, the cake layers should be completely cool.
If you are making the cake a day ahead, wrap the cooled layers tightly and store them until you are ready to decorate.
How to Make the Buttercream
Step 8: Beat the Butter
Place the softened unsalted butter in a large mixing bowl.
Beat until smooth and creamy.
Softened butter is important because cold butter can make the frosting difficult to mix.
Step 9: Add the Powdered Sugar
Gradually add the powdered sugar, mixing well after each addition.
Adding it gradually helps prevent a cloud of powdered sugar from covering your kitchen and makes it easier to achieve a smooth frosting.
Continue mixing until the buttercream is creamy and well combined.
Step 10: Add Vanilla and Cream
Add the vanilla extract.
Then gradually add 2–3 tablespoons of heavy cream to adjust the consistency.
You want a frosting that is smooth enough to spread but firm enough to hold its shape when piped.
If the frosting is too thick, add a little more cream.
If it becomes too soft, add a little more powdered sugar.
Step 11: Divide and Color the Frosting
Divide the buttercream into separate bowls.
Tint the frosting using black, orange, purple, and green gel food coloring.
Gel coloring is useful because it provides strong color without requiring a large amount of liquid.
For the main exterior of the cake, black buttercream creates a dramatic Halloween background.
The orange and purple frosting can be used for decorative swirls, while green creates vines, slime drips, or other spooky details.
Step 12: Assemble the Cake
Place the first cake layer on a serving plate or cake board.
Spread an even layer of buttercream over the top.
Place the second cake layer on top and gently press it into position.
Add another layer of buttercream.
Finish with the third cake layer.
Check the cake from the side to make sure the layers are aligned.
If necessary, gently adjust the top layer before applying the crumb coat.
Step 13: Apply a Crumb Coat
Spread a thin layer of buttercream around the entire cake.
This first layer does not need to look perfect.
Its purpose is to trap loose crumbs so they do not appear in the final layer of frosting.
Once the cake has been crumb-coated, place it in the refrigerator for approximately 15 minutes.
The frosting will firm up and create a stable surface for the final decoration.
Step 14: Add the Black Buttercream
Remove the chilled cake from the refrigerator.
Apply black buttercream over the outside of the cake.
Use an offset spatula or cake scraper to smooth the frosting around the sides.
It does not have to be perfectly smooth. A slightly textured finish can actually enhance the spooky appearance.
Make sure the top is covered evenly before moving on to the decorations.
Step 15: Add Orange and Purple Swirls
Fill piping bags with orange and purple buttercream.
Using a round or star piping tip, pipe decorative swirls around the top edge of the cake.
You can alternate colors or create clusters of orange and purple.
Do not worry about making every swirl identical.
A combination of different shapes and sizes creates a more playful Halloween effect.
Step 16: Add the Candy Eyeballs
Press candy eyeballs into the frosting around the cake.
Some can be placed on top, while others can be positioned around the sides.
Use different sizes if available.
The random placement makes the cake look as though strange creatures are hiding throughout the frosting.
Step 17: Create the Graveyard Dirt
Crush Oreo cookies into fine crumbs.
Sprinkle the crumbs around the bottom edge of the cake.
The dark cookie crumbs resemble dirt and create a simple graveyard effect.
You can use a thin layer or pile the crumbs more heavily around the base.
Step 18: Add Gummy Worms and Spiders
Place gummy worms or gummy spiders among the cookie crumbs.
Let some gummy worms appear to crawl out of the “dirt.”
This small detail can make the cake look much more like a spooky Halloween graveyard.
For the best appearance, add delicate gummy decorations toward the end of the decorating process.
Step 19: Add Green Slime Details
Use green buttercream to create vines, drips, or slime-like decorations.
Pipe green frosting down the sides of the cake in a few places.
You can create irregular drips rather than making them perfectly even.
The bright green against the black frosting creates a dramatic contrast.
Step 20: Finish With Sprinkles
Add Halloween sprinkles around the top and sides.
Black, orange, purple, and green sprinkles can tie the entire design together.
Use them sparingly or generously depending on how colorful you want the finished cake to look.
How to Create a Simple Graveyard Cake
If you want to emphasize the graveyard theme, focus the decorations around the bottom of the cake.
Start with crushed Oreo “dirt.”
Add gummy worms and spiders.
You can also use Halloween-shaped sprinkles to create the appearance of small objects scattered through the graveyard.
The black buttercream creates the perfect background for this design.
Tips for Perfect Spooky Cakes
Bake the Layers Ahead
Cake layers can be baked a day before decorating.
Once completely cool, wrap them tightly and keep them ready for assembly the following day.
This can make decorating much less stressful.
Cool Completely Before Frosting
Never frost warm cake.
Heat can soften the buttercream and make the layers slide.
Use Gel Food Coloring
Gel colors are especially useful when creating strong black, orange, purple, and green frosting.
They generally allow you to achieve vivid colors without adding a large amount of liquid.
Apply a Crumb Coat
The crumb coat is especially helpful with chocolate cake because dark crumbs can easily show through lighter decorations.
A short chilling period helps create a cleaner final layer.
Don’t Aim for Perfection
Halloween cakes are ideal for creative, slightly imperfect decorating.
Uneven drips, different-sized eyes, irregular swirls, and scattered sprinkles can all add to the spooky effect.
Make-Ahead Instructions
This cake can be prepared in stages.
One Day Before
Bake the three cake layers.
Allow them to cool completely, then wrap them tightly.
You can also prepare the buttercream and store it covered until you are ready to decorate.
Day of the Party
Assemble the cake, apply the crumb coat, chill it, and complete the final decorations.
Adding gummy worms, candy eyeballs, and sprinkles on the day of serving helps maintain their best appearance.
How to Store the Cake
Store the decorated cake in a cool environment.
If refrigeration is necessary, place the cake in a suitable cake container to protect the decorations.
Keep it covered to prevent the cake from drying out or absorbing odors.
Allowing the cake to sit for a short time before serving can help the frosting soften slightly.
Halloween Decoration Variations
There are countless ways to change the appearance of this cake.
Bloody Halloween Cake
Use red frosting to create dramatic drips down the sides.
Monster Cake
Cover the cake in colorful frosting and use large candy eyeballs to create a friendly monster.
Witch Cake
Focus on purple, green, and black frosting and add witch-inspired decorations.
Spider Cake
Use black frosting, candy spiders, and thin piped chocolate lines to create a spiderweb effect.
Pumpkin Cake
Use orange and black frosting to create pumpkin-inspired decorations.
Graveyard Cake
Keep the black buttercream base and focus on crushed cookies, gummy worms, and spooky decorations around the bottom.
Kid-Friendly Decorating Activity
This cake can become a fun family Halloween project.
Adults can bake and assemble the cake while children help decorate.
Give children small bowls of candy eyeballs, Halloween sprinkles, and gummy worms.
Let them decide where the decorations should go.
The cake does not need to look professionally decorated. The goal is to have fun and create something everyone can enjoy.
Always supervise children around kitchen equipment, hot cake pans, and sharp decorating tools.
Serving Ideas
This cake is rich enough to stand alone, but it can also be served with simple accompaniments.
Try serving slices with:
- Vanilla ice cream
- Whipped cream
- Fresh berries
- Chocolate sauce
- Caramel sauce
- Hot chocolate
- Apple cider
For a Halloween party, pair the cake with other seasonal desserts and drinks.
The combination of black, orange, purple, and green decorations makes it an excellent centerpiece.
Frequently Asked Questions
Can I use a different cake flavor?
Yes. The chocolate cake provides a dramatic dark base, but you can substitute vanilla, red velvet, or another favorite cake.
Can I make the cake one day ahead?
Absolutely. Baking the layers the day before can actually make assembly easier.
Wrap the cooled layers tightly and decorate the following day.
Why is my cake batter so thin?
The recipe intentionally uses boiling water, which creates a thin batter.
This is normal and contributes to the texture and chocolate flavor of the finished cake.
Can I use store-bought frosting?
Yes. Prepared frosting can save time and works well for decorating.
Do I need all four frosting colors?
No. Black, orange, purple, and green create a classic Halloween palette, but you can use only the colors you prefer.
Can I make this cake without gummy candy?
Yes. Simply leave out the gummy worms or spiders and use sprinkles, candy eyeballs, or other decorations instead.
Can children decorate the cake?
Yes. Children can safely help with many of the decorating steps when supervised by an adult.
Nutrition Information
The estimated nutrition per slice is:
| Serving Size | Calories | Protein | Carbs | Fat | Fiber | Sugar |
|---|---|---|---|---|---|---|
| 1 slice | 480 | 6g | 65g | 22g | 4g | 52g |
Nutrition information is estimated and may vary depending on the exact brands and quantities of ingredients, frosting, candies, and decorations used. Portion size can also affect the final nutritional values.
Why This Cake Is Perfect for Halloween
A Halloween celebration deserves a dessert that feels like part of the event, and this cake does exactly that.
The dark chocolate layers create a rich foundation, while black buttercream gives the cake a dramatic appearance. Orange and purple swirls bring classic Halloween color, while green frosting adds the appearance of vines or mysterious slime.
The candy decorations make it even more playful. Candy eyeballs give the cake a haunted personality, crushed cookies create edible dirt, and gummy worms or spiders add movement and texture.
Perhaps the best thing about this cake is that there is no single correct way to decorate it. You can follow the suggested design or create something completely different based on the ingredients you have available.
That flexibility makes it ideal for both experienced bakers and beginners.
Final Thoughts
These Spooky Halloween Cakes combine everything you want from a festive Halloween dessert: rich chocolate cake, creamy buttercream, dramatic colors, and plenty of creative decorating possibilities.
The three chocolate layers provide a moist and flavorful base, while the buttercream allows you to create a spooky design in black, orange, purple, and green. Candy eyeballs, crushed Oreo “dirt,” gummy worms, spiders, and Halloween sprinkles transform the cake into a dramatic centerpiece.
Whether you choose to make a creepy graveyard, a colorful monster, a mysterious witch-inspired cake, or your own Halloween creation, the decorating process is part of the fun.
Prepare the cake layers ahead of time, take your time with the buttercream, and do not worry about making every detail perfect. Halloween is the perfect occasion for creative decorating, and little imperfections can make the finished cake even more charming.
Serve generous slices alongside hot chocolate or apple cider, gather your friends and family, and enjoy a dessert that looks spooky, tastes delicious, and makes your Halloween celebration feel extra special.