
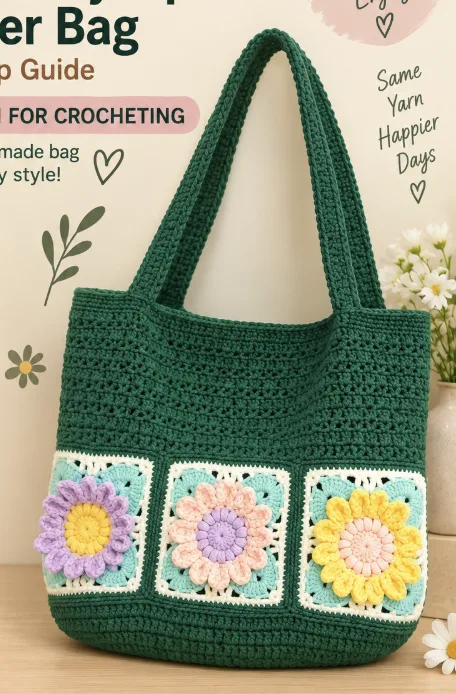
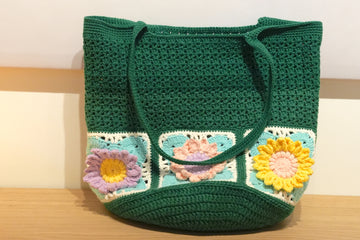
If you love crochet accessories that combine classic techniques with a modern shape, this granny square bucket bag is a wonderful project to add to your handmade collection. The design brings together six sunflower-style granny squares and turns them into a practical bucket-shaped bag with a structured bottom and crocheted straps.
This project is especially enjoyable because it is built in several clear stages. You first crochet six individual granny squares, then join them into the main body, create the circular bottom, attach that bottom to the body, and finally work the upper section and straps. Each stage can be completed separately, making the project easy to organize even if you are still developing your crochet confidence.
The finished bag measures approximately 13 inches (33 cm) tall and 10.6 inches (27 cm) wide. Each granny square measures approximately 4 inches (10 cm), and six squares are used to construct the bag. The sample uses a forest green base with mint, yellow, and soft pink floral colors, but the color combination can be adapted to your own style without changing the construction of the pattern.
Project Overview
The granny square bucket bag has a particularly appealing construction because the decorative squares form the visual centerpiece of the bag while the crocheted bottom and upper body provide the functional structure. The six squares are arranged into a ring, joined together, and then connected to a separately crocheted circular bottom.
The granny square section is worked through Round 11. The bottom is crocheted separately through Round 12 using double-stranded yarn and a 3.5mm crochet hook. The bag body then continues with a 3.0mm hook, beginning with a single crochet foundation and alternating pattern rounds through Round 17. The upper section is completed through Round 22, with the straps created during Round 19.
Because the project contains several stitch techniques, it is useful to keep the pattern nearby while working. Stitch markers are also helpful for keeping track of joining points, the center of the bag, and the strap locations.
Finished Measurements
- Granny square size: 4 inches (10 cm)
- Number of granny squares: 6
- Finished bag height: 13 inches (33 cm)
- Finished bag width: 10.6 inches (27 cm)
These measurements describe the finished design given in the source pattern. Keeping your crochet tension consistent throughout the project will help your individual components remain compatible during assembly.
Materials You Will Need
- Loopara 5ply combed cotton yarn
- 3.0mm crochet hook
- 3.5mm crochet hook
- Stitch marker
- Scissors
- Yarn needle
The recommended yarn is Loopara 5ply combed cotton. The example uses a forest green base with mint, yellow, and soft pink flowers. The original pattern also notes that you can choose other colors according to your preference.
US Crochet Abbreviations
- ch – chain
- sc – single crochet
- dc – double crochet
- sl – slip stitch
- hdc – half double crochet
- tr – treble crochet
- dc2tog – double crochet 2 together
- dc3tog – double crochet 3 together
- sc3tog – single crochet 3 together
- bobble st – bobble stitch
- picot – picot stitch
- inc – increase
- dec – decrease

Step 1: Crochet the Six Sunflower Granny Squares
The decorative foundation of this bag is made from six identical sunflower granny squares. Work all six squares through Round 11. Keeping the six squares as consistent as possible will make the joining and final shaping much easier.
Round 1

Make a magic ring, chain 3, work 15 double crochet into the ring, and slip stitch to join.
Round 2

Chain 2, work (2 double crochet bobble stitch), chain 1, (3 double crochet bobble stitch) 15 times, chain 1, and slip stitch to join.
Pay particular attention to the size of the bobble stitches. The original pattern recommends keeping them consistent so the center of each flower has a uniform appearance.
Round 3

Chain 1, work (single crochet, chain 4 picot, single crochet) 16 times, then slip stitch to join.
Round 4

Chain 1, work (single crochet, half double crochet, 2 double crochet, chain 2 picot, 2 double crochet, half double crochet, single crochet), chain 1, slip stitch. Repeat this sequence 16 times.
Round 5

Chain 5, then work [double crochet, working into one loop of the bobble stitch from Round 2, chain 2] 15 times. Slip stitch to join.
Round 6

Chain 1, then work [single crochet increase, chain 2, single crochet, chain 2, (single crochet, chain 4 picot, single crochet), chain 2, single crochet, chain 2] 4 times. Slip stitch to join.
Round 7

Chain 1, then work [2 single crochet, chain 2, single crochet (5 double crochet, chain 2, 5 double crochet), single crochet, chain 2] 4 times. Slip stitch to join.
Round 8

Work [2 single crochet, chain 2, double crochet 2 together (1 double crochet in single crochet, skip 1, 1 double crochet in next stitch), 3 double crochet increase, (2 double crochet, chain 2, 2 double crochet), 3 double crochet increase, double crochet 3 together (skip 1, 1 double crochet in single crochet), chain 2] 4 times, then slip stitch to join.
Round 9

Chain 5, then work the specified sequence of treble crochet, double crochet, chain 2 spaces, single crochet, slip stitch, and the center (single crochet, chain, single crochet) section. Repeat the main sequence 3 times, complete the remaining section as written in the original pattern, and slip stitch to join.
Round 10

Chain 1, then work [13 single crochet, (3 single crochet in the corner), 10 single crochet] 4 times. Slip stitch to join.
Round 11

Chain 1, then work [14 single crochet, (3 single crochet in the corner), 11 single crochet] 4 times. Slip stitch to join.
Weave in all ends to finish the square. Repeat the complete process until you have six granny squares.
Block the Six Squares Before Joining
Once all six granny squares are complete, block them before assembly. The source pattern specifically recommends blocking the squares after completing all rounds because this helps even out the stitches and makes joining easier later.
Try to keep all six squares at the same finished size and shape. Consistency here is more useful than trying to force individual stitches into a particular appearance. The goal is to have six compatible pieces ready to form the body of the bucket bag.
Step 2: Arrange and Join the Granny Squares

The six squares are connected into a ring following the flat layout. Before making any permanent joins, take a moment to arrange the squares according to the diagram. This is a useful checkpoint because the arrangement determines how the floral motifs will appear around the finished bag.
Joining Step 1

Connect the six granny squares into a ring following the flat diagram.
Joining Step 2

Take two squares and place them back to back.
Joining Step 3

Pick up the inner half of each stitch for a slip stitch join.
Repeat the join at the starting point for reinforcement. Continue the join along the corresponding stitches of the two square edges.
Joining Steps 5 and 6

Continue joining the corresponding stitches along the edges. Repeat the join at the endpoint for extra security.
Joining Step 7

Weave in the ends on the wrong side, securing them multiple times.
Joining Steps 8 to 11

Use the same joining method for the remaining squares.

Begin forming the bag into a ring shape.

Before starting the final join, weave in the loose ends.

Use the same slip stitch join method, picking up the inner half stitches.
Stitch markers can be useful when aligning the corners and midpoints of the squares before joining. After the squares are connected, gently stretch and reshape the work so the seams can settle into place.
Step 3: Crochet the Circular Bag Bottom
The bottom is worked separately using double-stranded yarn and a 3.5mm crochet hook. This part of the construction creates the circular base that will later be sewn to the bottom edge of the joined body panels.
Round 1

Make a magic ring, chain 3, which counts as the first double crochet, work 11 double crochet into the ring, and slip stitch into the top of the starting chain-3 to join. There are 12 double crochet total.
Rounds 2 to 6

Round 2: Chain 3, which counts as the first double crochet, double crochet increase in the same stitch, double crochet increase in each stitch around, and slip stitch into the top of the starting chain-3 to join. There are 24 double crochet total.

Round 3: Chain 3, double crochet increase, double crochet, repeated around. Slip stitch into the top of the starting chain-3 to join. There are 36 double crochet total.
Round 4: Chain 3, then repeat (double crochet increase, 2 double crochet) around. Slip stitch into the top of the starting chain-3 to join. There are 48 double crochet total.
Round 5: Chain 3, then repeat (double crochet increase, 3 double crochet) around. Slip stitch into the top of the starting chain-3 to join. There are 60 double crochet total.
Round 6: Chain 3, then repeat (double crochet increase, 4 double crochet) around. Slip stitch into the top of the starting chain-3 to join. There are 72 double crochet total.

Round 7: Chain 3, then repeat (double crochet increase, 5 double crochet) around. Slip stitch into the top of the starting chain-3 to join. There are 84 double crochet total.
Round 8: Chain 3, then repeat (double crochet increase, 6 double crochet) around. Slip stitch into the top of the starting chain-3 to join. There are 96 double crochet total.

Round 9: Chain 3, then repeat (double crochet increase, 7 double crochet) around. Slip stitch into the top of the starting chain-3 to join. There are 108 double crochet total.
Round 10: Chain 3, then repeat (double crochet increase, 8 double crochet) around. Slip stitch into the top of the starting chain-3 to join. There are 120 double crochet total.
Round 11: Chain 3, then repeat (double crochet increase, 9 double crochet) around. Slip stitch into the top of the starting chain-3 to join. There are 132 double crochet total.
Round 12: Chain 3, then repeat (double crochet increase, 10 double crochet) around. Slip stitch into the top of the starting chain-3 to join. There are 144 double crochet.

Fasten off, leaving a long tail for sewing.
When working with double-stranded yarn, keep both strands together consistently throughout the entire bottom. Count the stitches at the end of every round, especially during the later rounds where missing an increase can affect the shape.
Step 4: Attach the Bottom to the Body Panels

Place the bag bottom face down. Use stitch markers to align and secure the bottom with the body panels. This makes the sewing process easier and helps keep the pieces positioned correctly.

Use the bottom stitches as a guide. Pick up the inner half of each stitch from the bottom and match it with the corresponding inner half stitch from the body panel. Use a whipstitch to join them.
You do not need to match every single stitch exactly. The important part is to work steadily around the circumference while keeping the bottom positioned correctly.

Continue sewing around the entire circumference. When the circle is complete, bring the thread to the wrong side and weave in the ends to finish. Periodically check that you are not pulling too tightly because the bottom should lie flat without puckering.
Step 5: Crochet the Bag Body and Upper Section
For the body, switch to a 3.0mm crochet hook. The first round establishes a single crochet foundation with a stitch count that is a multiple of 3. The following rounds create the repeating openwork pattern that continues through the main section of the bag.
Round 1
Chain 1, work a round of single crochet, ensuring the single crochet count is a multiple of 3, then slip stitch to join.
Round 2
Chain 3, then repeat [skip 2 stitches, (double crochet, chain, double crochet)] until the last group. Work double crochet, chain 1, and slip stitch to join.
Round 3
Chain 3, work 3 double crochet in each chain space, and repeat until the last group. Work 2 double crochet and slip stitch to join.

Rounds 4–17: Repeat Round 2–3.
This is an important checkpoint in the project. Because these rounds repeat, stitch markers can help you keep track of where you are. Avoid changing the repeat sequence or adding or removing stitches, as the repeating structure is what creates the body pattern.
Round 18

Chain 1, work a round of single crochet without increasing or decreasing, and slip stitch to join.
Now lay the bag flat and fold it in half to find the center point. Attach a stitch marker at the center. Place stitch markers at the fifth pattern group to the left and right of the center. These markers identify the positions for the bag straps.
Round 19: Creating the Straps

Chain 1, single crochet without increasing or decreasing until you reach the stitch marker. Chain 120 for the strap, then single crochet without increasing or decreasing to the other side of the bag. At the corresponding strap position, chain 120 and connect to the other side of the strap position. Continue with single crochet to the end and slip stitch to join.
When making the straps, chain loosely to allow for some stretch. Count the chains carefully so that both straps are the same length.
Rounds 20 and 21

Round 20: Chain 1, decrease with a single crochet at the corner of the strap, single crochet without increasing or decreasing for the rest, and slip stitch to join.
Round 21: Repeat Round 20.
Round 22

Chain 1, work single crochet without increasing or decreasing for the rest. At the corner of the strap, work three single crochet together as one stitch, then slip stitch to join. Fasten off.
Beginner Checkpoints Before You Finish
- Make sure you have six completed granny squares.
- Check that the squares are approximately 4 inches (10 cm).
- Block the squares before joining.
- Confirm that the six squares are arranged according to the layout.
- Secure the joining ends on the wrong side.
- Keep both yarn strands together when crocheting the bottom.
- Check the stitch count at the end of each bottom round.
- Leave a long tail after Round 12 for sewing the bottom.
- Use stitch markers when positioning the bottom and straps.
- Make both 120-chain straps carefully and keep their lengths consistent.
Common Construction Problems to Watch For
One of the easiest places to lose accuracy is the circular bottom. The number of stitches increases steadily from 12 double crochet in Round 1 to 144 double crochet in Round 12. Counting at the end of each round helps identify a missed increase before the mistake affects the next round.
The granny squares also benefit from careful blocking. If the six pieces differ noticeably in shape or size, joining them can become more difficult. Blocking helps even out the stitches and makes the edges easier to align.
Another useful point to monitor is the tension of the seams. When joining squares, use the prescribed inner-half-stitch slip stitch method and reinforce the starting and ending points as described. When sewing the circular bottom, avoid pulling the yarn too tightly because the bottom should remain flat rather than puckering.
The straps are another area where consistency matters. Round 19 requires two separate chains of 120. Count each chain carefully and keep the tension similar so the finished straps have matching lengths.
Finishing and Care
After completing the crochet and assembly, weave in the remaining ends securely. The original pattern emphasizes securing ends multiple times on the wrong side during the joining process.
For everyday care, avoid placing the bag on rough or dirty surfaces when possible. If you notice a small stain, gently dab it with a damp cloth rather than aggressively rubbing the crochet fabric.
For deeper cleaning, check the yarn label first. The source recommends hand washing as the safest general approach: use cool water and a small amount of mild detergent, gently submerge the bag, rinse thoroughly, squeeze out excess water without wringing, reshape the bag, and allow it to air dry flat.
For storage, make sure the bag is completely clean and dry. Stuffing it with acid-free tissue paper can help maintain its shape. Store it in a cool, dry place away from direct sunlight, and consider using a dust bag or pillowcase for additional protection. Avoid placing heavy objects on top of the crochet bag.
Final Thoughts
This granny square bucket bag is a satisfying project because it combines decorative crochet motifs with practical construction techniques. The six sunflower granny squares create the colorful focal point, while the circular double-crochet bottom gives the bag its base and the later single-crochet and repeating double-crochet rounds complete the upper structure.
For beginners, the most useful approach is to treat the project as a series of manageable checkpoints rather than trying to complete the entire bag in one sitting. Finish the six squares first, block them, arrange them, and then move through the joining, bottom, sewing, and body stages one at a time.
The pattern provides plenty of opportunities to practice magic rings, bobble stitches, picots, increases, decreases, slip stitch joins, whipstitching, and strap construction. At the same time, the technical instructions remain consistent: six 4-inch (10 cm) squares, a finished bag approximately 13 inches (33 cm) tall and 10.6 inches (27 cm) wide, a 3.0mm hook for most of the bag, and a 3.5mm hook with double-stranded yarn for the bottom.
Once all the components are joined and the finishing work is complete, you have a handmade bucket bag that combines the timeless look of granny squares with a practical everyday silhouette.