
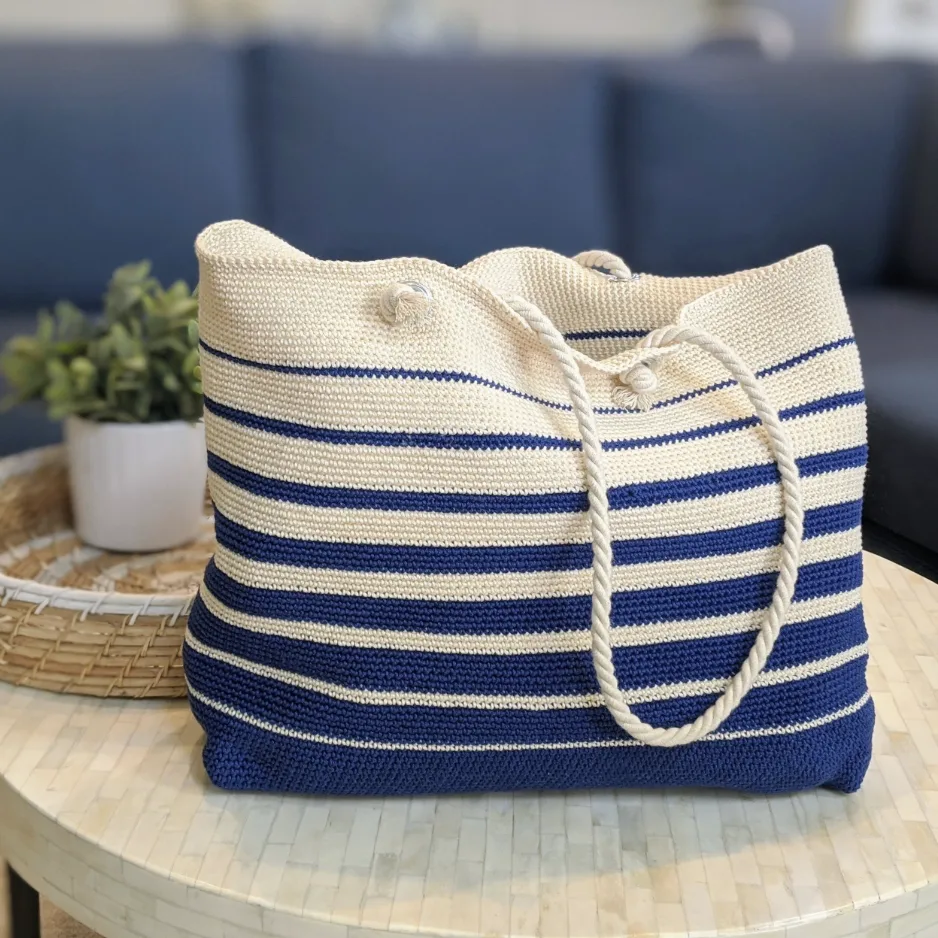
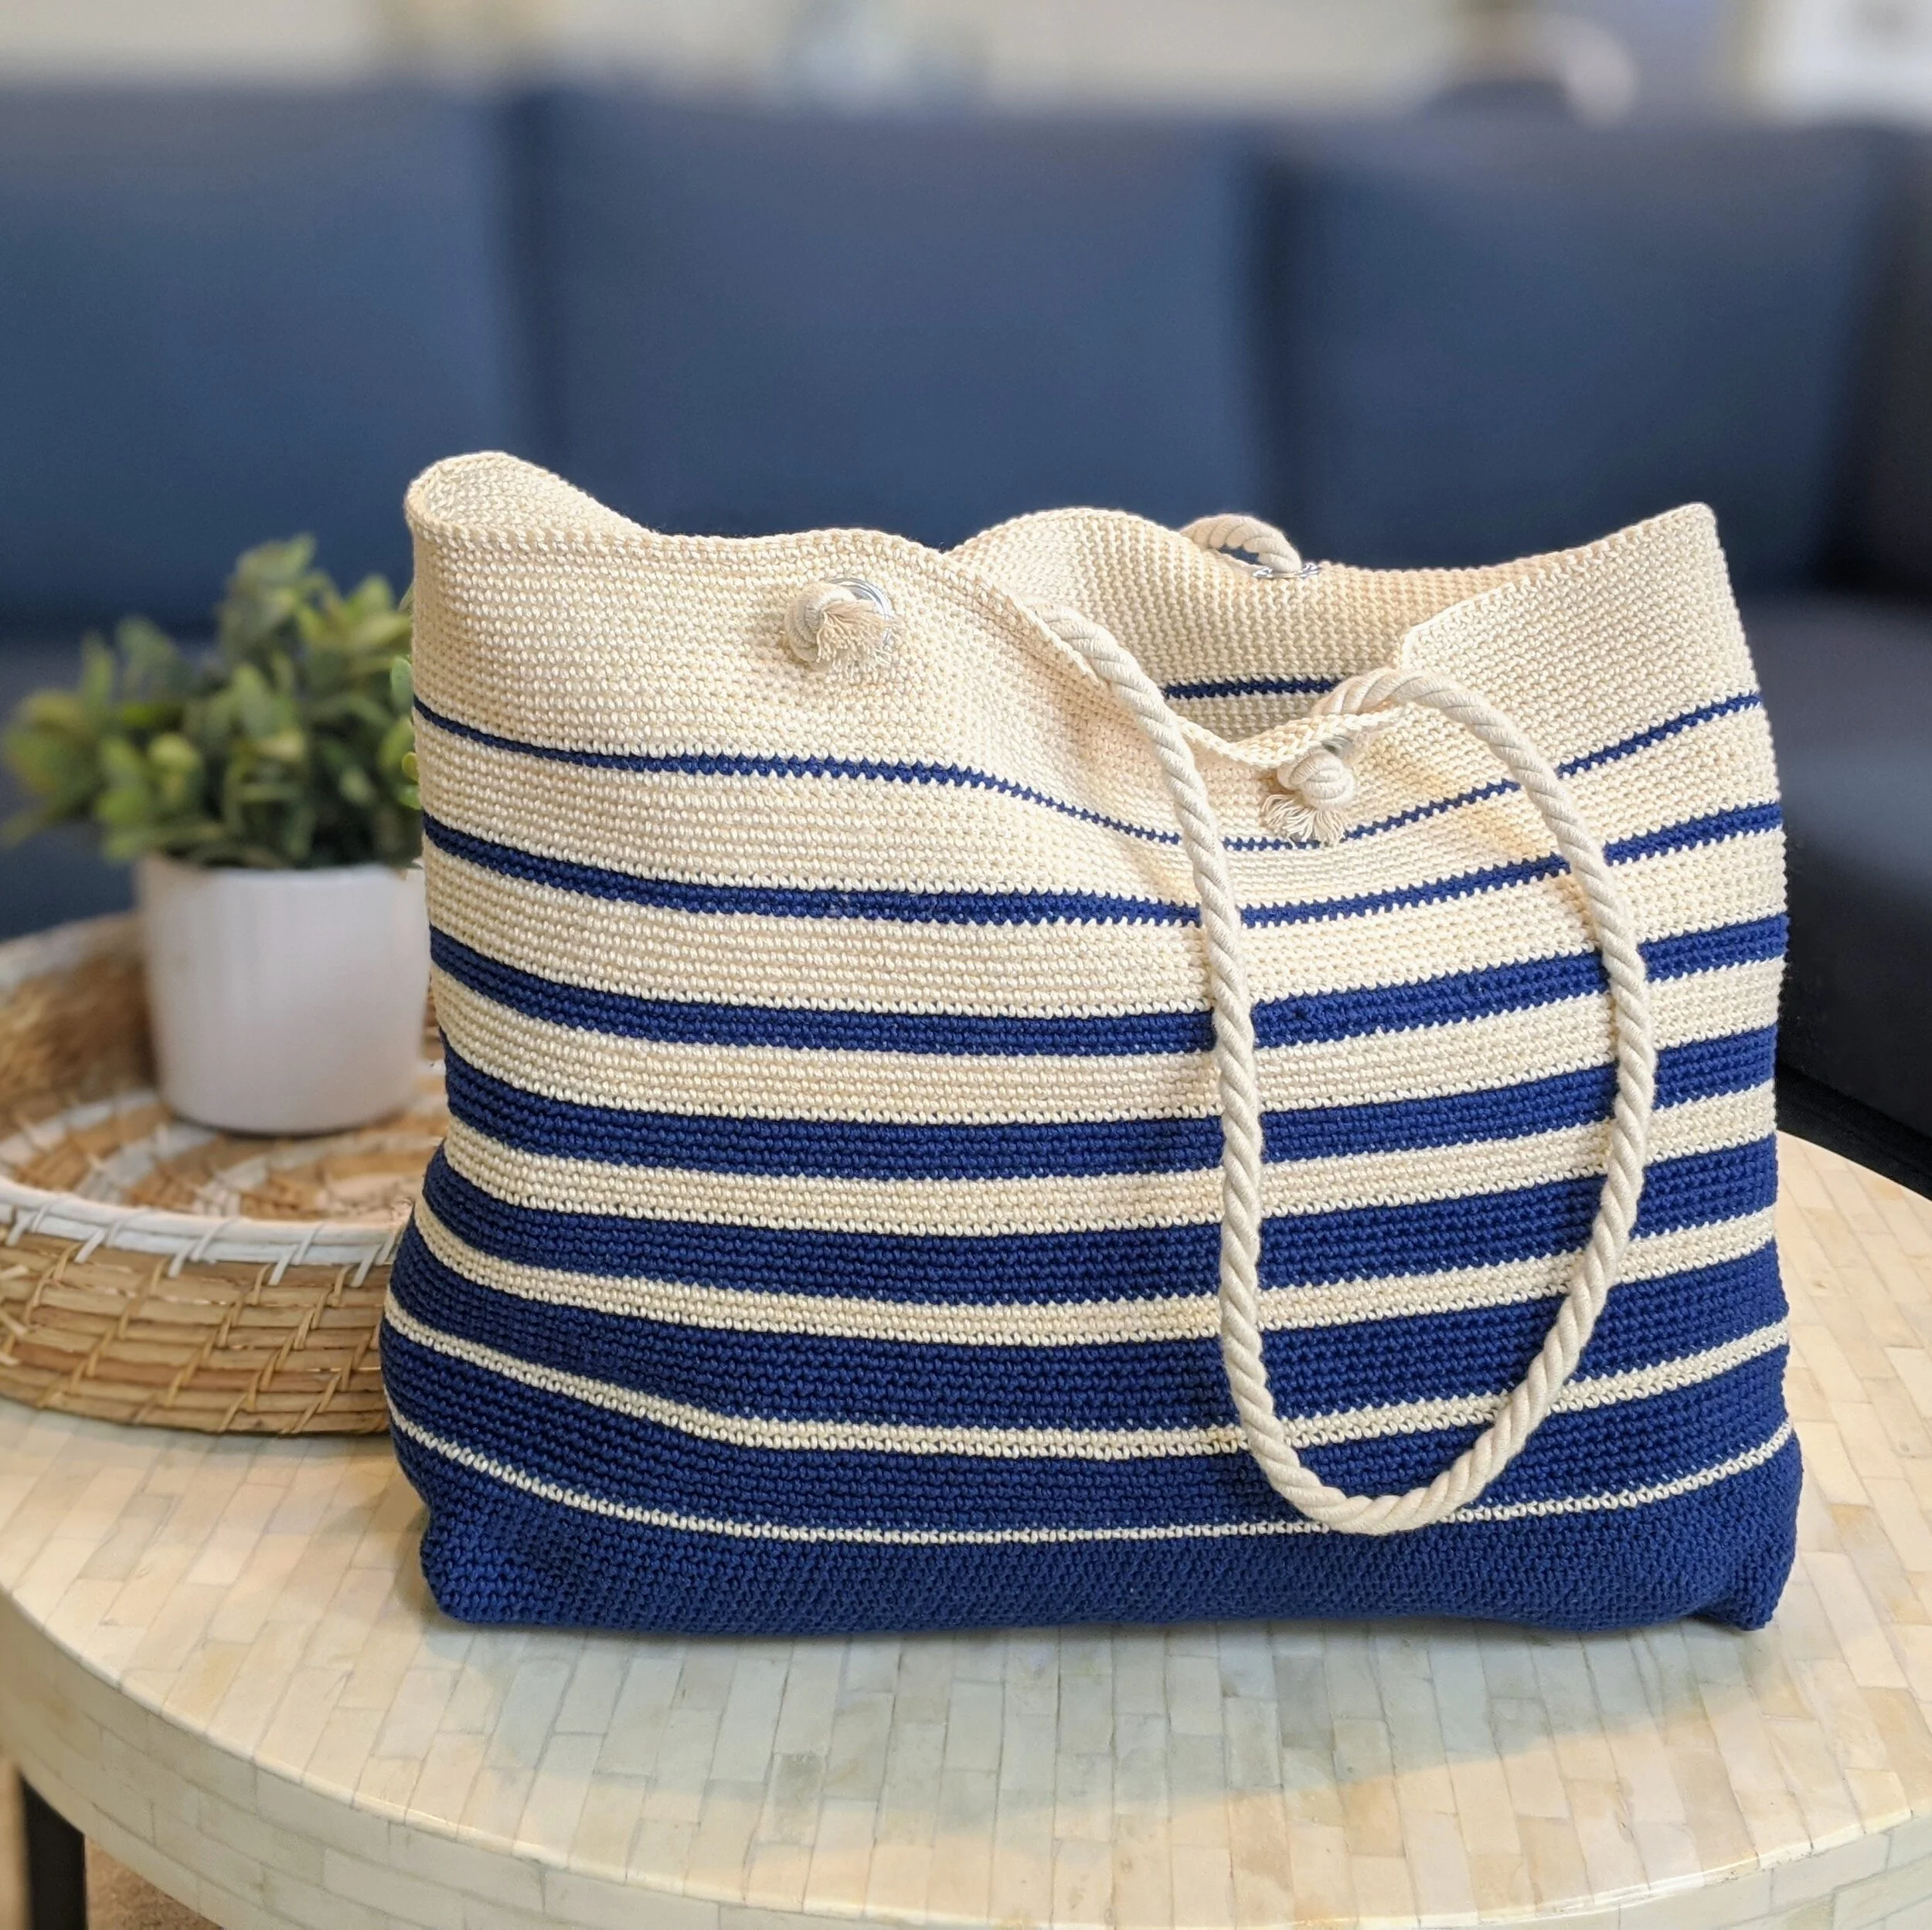
If you are looking for a crochet project that is both practical and stylish, the Marina Tote is a wonderful beach bag to add to your handmade collection. Designed with a classic nautical color combination and finished with rustic rope handles and metal grommets, this roomy tote has the look of a boutique summer accessory while being made with a surprisingly simple crochet stitch pattern.
The Marina Tote was originally created as part of a beach-themed gift bundle for a one-year-old niece who lived close to the beach. Along with a swimsuit, sun hat, and beach toys, the project needed a practical companion for carrying everything to the shore. The result was a generously sized tote designed for the grown-up who would be carrying all those beach essentials.
Although the finished bag looks detailed and sophisticated, the crochet portion relies on only three basic stitches: chain stitch, slip stitch, and single crochet using US crochet terminology. That makes this project particularly approachable for an advanced beginner, while a confident true beginner may also enjoy taking it on as a first larger crochet bag project.
The construction is worked from the bottom up. The crochet body is created in the round, the lower edge is later stitched together to establish the shape and depth of the bag, and the upper section is finished with four openings for the grommets. Once the grommets are installed, twisted cord is threaded through them to form the two handles.
What Makes the Marina Tote Special?
The appeal of this beach bag comes from the combination of simple crochet construction and thoughtful finishing details. Instead of relying on complicated stitch patterns, the design creates its nautical character through the alternating navy and ecru color sections. The single crochet fabric also gives the project a substantial handmade appearance.
The bag measures approximately 21.5 inches wide, 14 inches high, and 5 inches deep when finished. That generous size makes it suitable for the kinds of things you might want to take to the beach, while the 5-inch depth gives the finished tote a useful three-dimensional shape rather than leaving it as a flat crocheted rectangle.
One of the most distinctive features is the use of four grommets, sometimes called eyelets. These are placed into the openings made near the top of the bag and provide the finished tote with a polished, professional appearance. The rope handles then pass through these openings and create the classic beach-bag look.
If you have never installed grommets before, there is no need to be intimidated. The original project used them for the first time as well. A grommet kit is recommended because it contains the pieces needed for installation. The important thing is to follow the instructions supplied with your particular kit.
Finished Size and Project Overview
- Finished width: Approximately 21.5 inches
- Finished height: Approximately 14 inches
- Finished depth: Approximately 5 inches
- Construction: Worked from the bottom up and crocheted in the round
- Main crochet stitch: Single crochet
- Color palette: Navy and ecru
- Handles: Two pieces of approximately 36-inch twisted cord
- Grommets: Four total
Because this project contains many rounds of single crochet, it is helpful to think of it as a steady, rhythmic crochet project rather than something that requires complicated stitch manipulation. Once the foundation chain is joined correctly, much of the body consists of repeating the same basic action around the circle while following the specified color changes.
Materials You Will Need
Crochet Hook
Use a Size E crochet hook. The original project specifically uses this hook size with Lion Brand 24/7 Cotton yarn. Keeping the hook size consistent with the pattern is important because changing hook size can alter the fabric and finished measurements.
Yarn
The project calls for approximately 3 skeins of each color, for 6 skeins total, of Lion Brand 24/7 Cotton yarn. The colors are:
- Color A: Navy
- Color B: Ecru
The nautical navy-and-ecru combination is a major part of the visual identity of the Marina Tote. Keep the two colors clearly separated when preparing to work the stripes so that your color changes remain easy to follow.
Grommets or Eyelets
You will need 4 grommets or eyelets. They should be approximately 1/2 inch or 7/16 inch in size, and they should be slightly larger than the diameter of the rope used for the handles.
A grommet kit is recommended, particularly if this is your first time working with grommets. The original instructions also recommend a kit because it provides the components needed for installation.
Rope Handles
For the handles, use approximately 2 yards of 3/8-inch twisted cord in natural color or another color of your choice. The cord is eventually divided into two pieces of approximately 36 inches each.
Other Supplies
- Hammer
- Yarn or tapestry needle
- Scissors
Understanding the Crochet Abbreviations
The pattern uses straightforward US crochet terminology. Before beginning, familiarize yourself with these three abbreviations:
- Ch = chain
- Sl st = slip stitch
- SC = single crochet
These are the only stitch abbreviations used in the main crochet instructions, which is one reason the Marina Tote can be a manageable project for an advanced beginner.
Before You Begin: A Few Important Preparation Tips
The very first foundation round is especially important because the entire bag is built from it. You will chain 200 stitches and join the chain to form a circle. Before making the joining slip stitch, carefully check that the chain is not twisted.
A twisted foundation chain can affect the entire shape of the project. Take a moment to lay the chain flat or gently run your fingers along it before joining. Once the circle is correctly formed, you will crochet in the round going forward.
Because the body contains many rounds, keeping track of your round numbers is also useful. A stitch marker or another personal tracking method can help you identify where you are in the sequence, especially when switching between navy and ecru.
Step 1: Create the Foundation Circle
Begin with Color A, navy.
Chain 200. Carefully join the final chain to the first chain to form a circle. Make sure the foundation chain has not twisted before completing the join.
From this point forward, the project is crocheted in the round.
Step 2: Crochet the First 25 Rounds
For Rounds 1 through 25, work the following sequence:
Ch 1. SC in each stitch around. Join with a SL ST to the top of the first SC. (200)
These first 25 rounds establish a substantial section of the bag body. Each round contains 200 stitches, so maintaining the stitch count is an important checkpoint.
Since the same basic instruction is repeated for all 25 rounds, this is a good opportunity to establish a comfortable rhythm. Work carefully enough to maintain the stitch count without accidentally skipping or adding stitches.
Step 3: Begin the Navy and Ecru Color Sequence
After completing Round 25, the color changes begin. The stripe arrangement is an important visual feature of the Marina Tote, so follow the round ranges exactly as written.
Round 26
Attach Color B, ecru, and fasten off Color A.
Ch 1. SC in each stitch around. Join with a SL ST to the top of the first SC.
Rounds 27–33
Attach Color A and fasten off Color B.
Ch 1. SC in each stitch around. Join with a SL ST to the top of the first SC.
Rounds 34–35
Attach Color B and fasten off Color A.
Ch 1. SC in each stitch around. Join with a SL ST to the top of the first SC.
Rounds 36–41
Attach Color A and fasten off Color B.
Ch 1. SC in each stitch around. Join with a SL ST to the top of the first SC.
Rounds 43–45
Attach Color B and fasten off Color A.
Ch 1. SC in each stitch around. Join with a SL ST to the top of the first SC.
Important: The source instructions move from Rounds 36–41 to Rounds 43–45. The original pattern does not provide a separate Round 42 instruction, so this article preserves the source exactly rather than inventing or correcting a missing round.
Rounds 46–49
Attach Color A and fasten off Color B.
Ch 1. SC in each stitch around. Join with a SL ST to the top of the first SC.
Rounds 50–53
Attach Color B and fasten off Color A.
Ch 1. SC in each stitch around. Join with a SL ST to the top of the first SC.
Rounds 54–57
Attach Color A and fasten off Color B.
Ch 1. SC in each stitch around. Join with a SL ST to the top of the first SC.
Rounds 58–62
Attach Color B and fasten off Color A.
Ch 1. SC in each stitch around. Join with a SL ST to the top of the first SC.
Rounds 63–65
Attach Color A and fasten off Color B.
Ch 1. SC in each stitch around. Join with a SL ST to the top of the first SC.
Rounds 66–71
Attach Color B and fasten off Color A.
Ch 1. SC in each stitch around. Join with a SL ST to the top of the first SC.
Rounds 72–73
Attach Color A and fasten off Color B.
Ch 1. SC in each stitch around. Join with a SL ST to the top of the first SC.
Rounds 74–80
Attach Color B and fasten off Color A.
Ch 1. SC in each stitch around. Join with a SL ST to the top of the first SC.
Round 81
Attach Color A and fasten off Color B.
Ch 1. SC in each stitch around. Join with a SL ST to the top of the first SC.
Rounds 82–90
Attach Color B and fasten off Color A.
Ch 1. SC in each stitch around. Join with a SL ST to the top of the first SC.
Keeping the Color Changes Neat
With so many color transitions, it is useful to keep the unused color from becoming tangled with the working yarn. Fasten off the previous color as specified before attaching the next one. This keeps the construction consistent with the original instructions and makes the inside of the bag easier to manage.
Do not let the long sequence of rounds make you feel that the project is overly complicated. Most of the work is simply single crochet in every stitch around, with the main challenge being accurate round tracking and correct color changes.
Step 4: Create the Four Grommet Openings
The next section changes the construction slightly because the bag needs four openings for the future handles.
Round 91
Work the following sequence:
Ch 1, *SC 31, Ch 3, sk 3 sts, SC 32, Ch 3, sk 3 sts, SC 31*. Repeat from * to *. Join with a SL ST to the top of the first SC.
The chain-3 sections create the openings where the four grommets will eventually be installed. Take care not to accidentally work into the three skipped stitches.
Round 92
Work the following:
Ch 1, *SC 31, 3 SC inside the space created by the 3 ch sts, SC 32, 3 SC inside the space created by the 3 ch sts, SC 31*. Repeat from * to *. Join with a SL ST to the top of the first SC.
This round reinforces the areas around the chain spaces by working three single crochets inside each space created in Round 91.
Rounds 93–95
Ch 1. SC in each stitch around. Join with a SL ST to the top of the first SC.
Round 96
Ch 1, TURN, SC in each stitch around. Join with a SL ST to the top of the first SC.
Fasten off and weave in all ends.
Grommet Installation: Turning the Crochet Body Into a Tote
Now comes one of the most distinctive finishing steps of the Marina Tote: installing the four grommets.
Follow the instructions supplied with your grommet kit to attach the grommets in the four openings created during Round 91. There are four grommets in total.
It is particularly important to use a suitable hard surface when installing the grommets. The original instructions specifically warn against using a glass coffee table. Protect your work area and follow the instructions supplied with your kit.
If the grommets initially seem too tall for the crochet fabric, do not immediately assume that you have chosen the wrong size. The edge of the grommet needs to curl around to hold it in place, and the original instructions note that insufficient force can make the grommet appear as though it is not installing properly.
Work carefully and follow the kit directions rather than improvising the installation method.
Sewing the Bottom of the Bag
Once the grommets are attached, it is time to form the bottom of the tote. This is the stage that transforms the long crocheted tube into a bag with a defined base.
First, turn the bag inside out so that the wrong side is facing outward. Lay the bag flat and line up the eyelets or grommets.
When the bag is lying flat, the alignment should show:
31 sts + grommet + 32 sts + grommet + 31 sts
This arrangement should appear on each side.
Using yarn color A, cut a piece of yarn approximately 4–5 times the length of the bottom of the bag. Thread this yarn onto your yarn needle and seam the bottom of the bag from end to end, stitch by stitch, using the seam stitch of your choice.
Fasten off and weave in the ends once the seam is complete.
Creating the 5-Inch Corner Seams
Keep the bag inside out and turn it upside down. Position the bottom so that one end lays out in a triangular shape, with the seam centered.
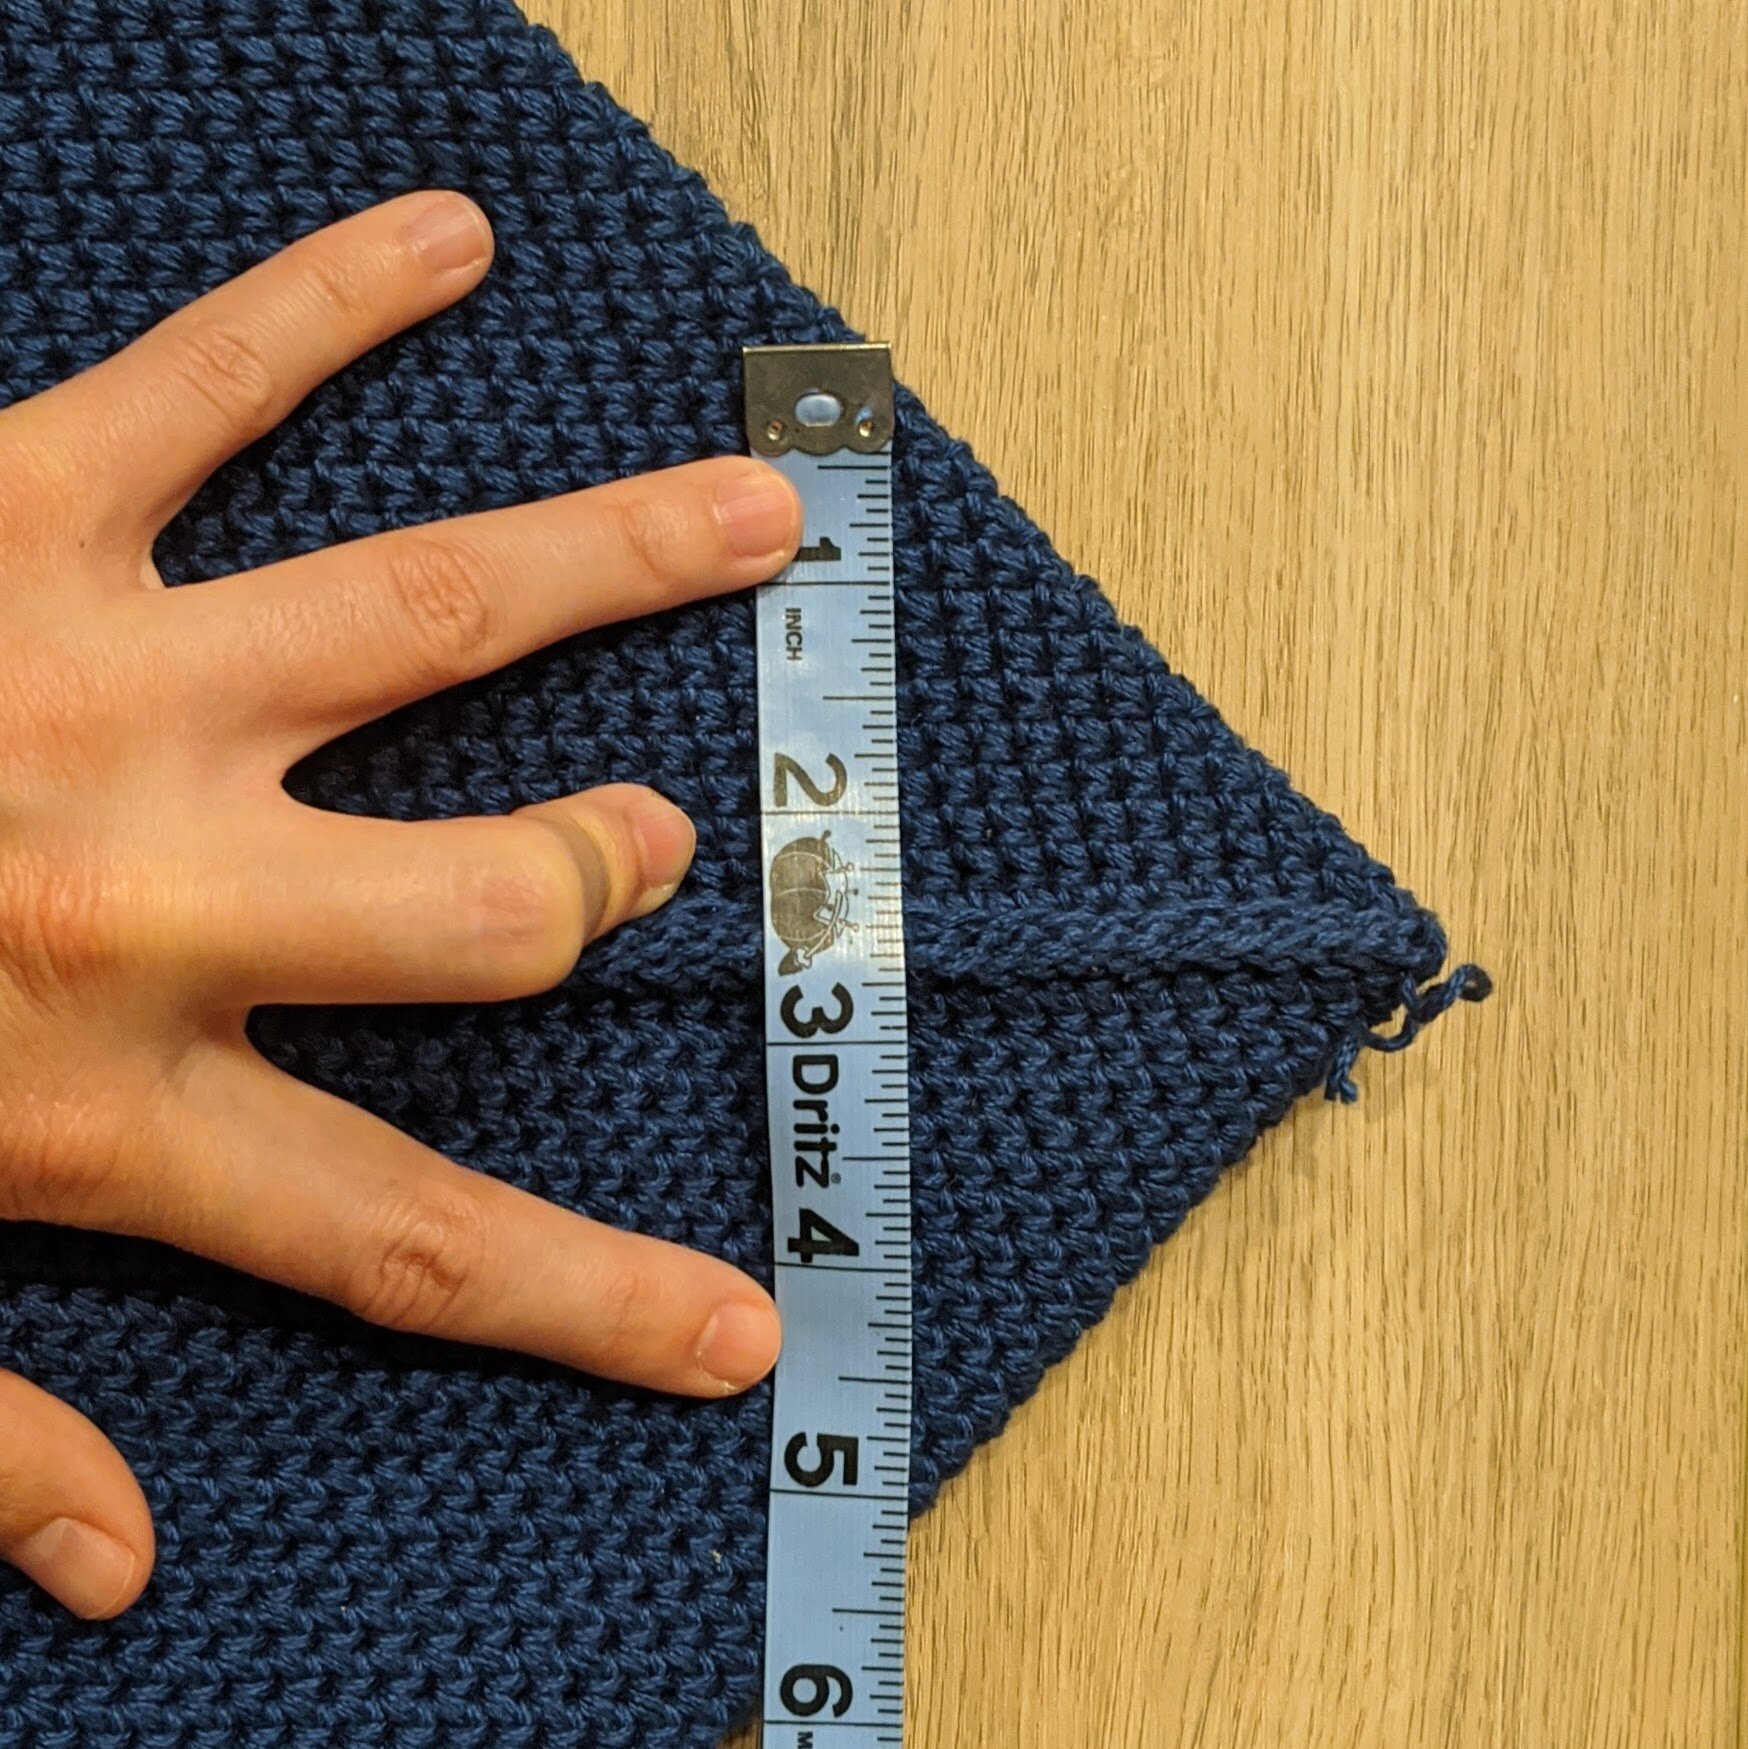
Using a tape measure, measure and mark a 5-inch line across the corner base. Stitch across this line, making sure that your stitching passes through both layers of fabric.
Repeat the same process on the opposite side.
These corner seams are what give the finished tote its approximately 5-inch depth. Take your time positioning the fabric before stitching so that the two sides are as symmetrical as possible.
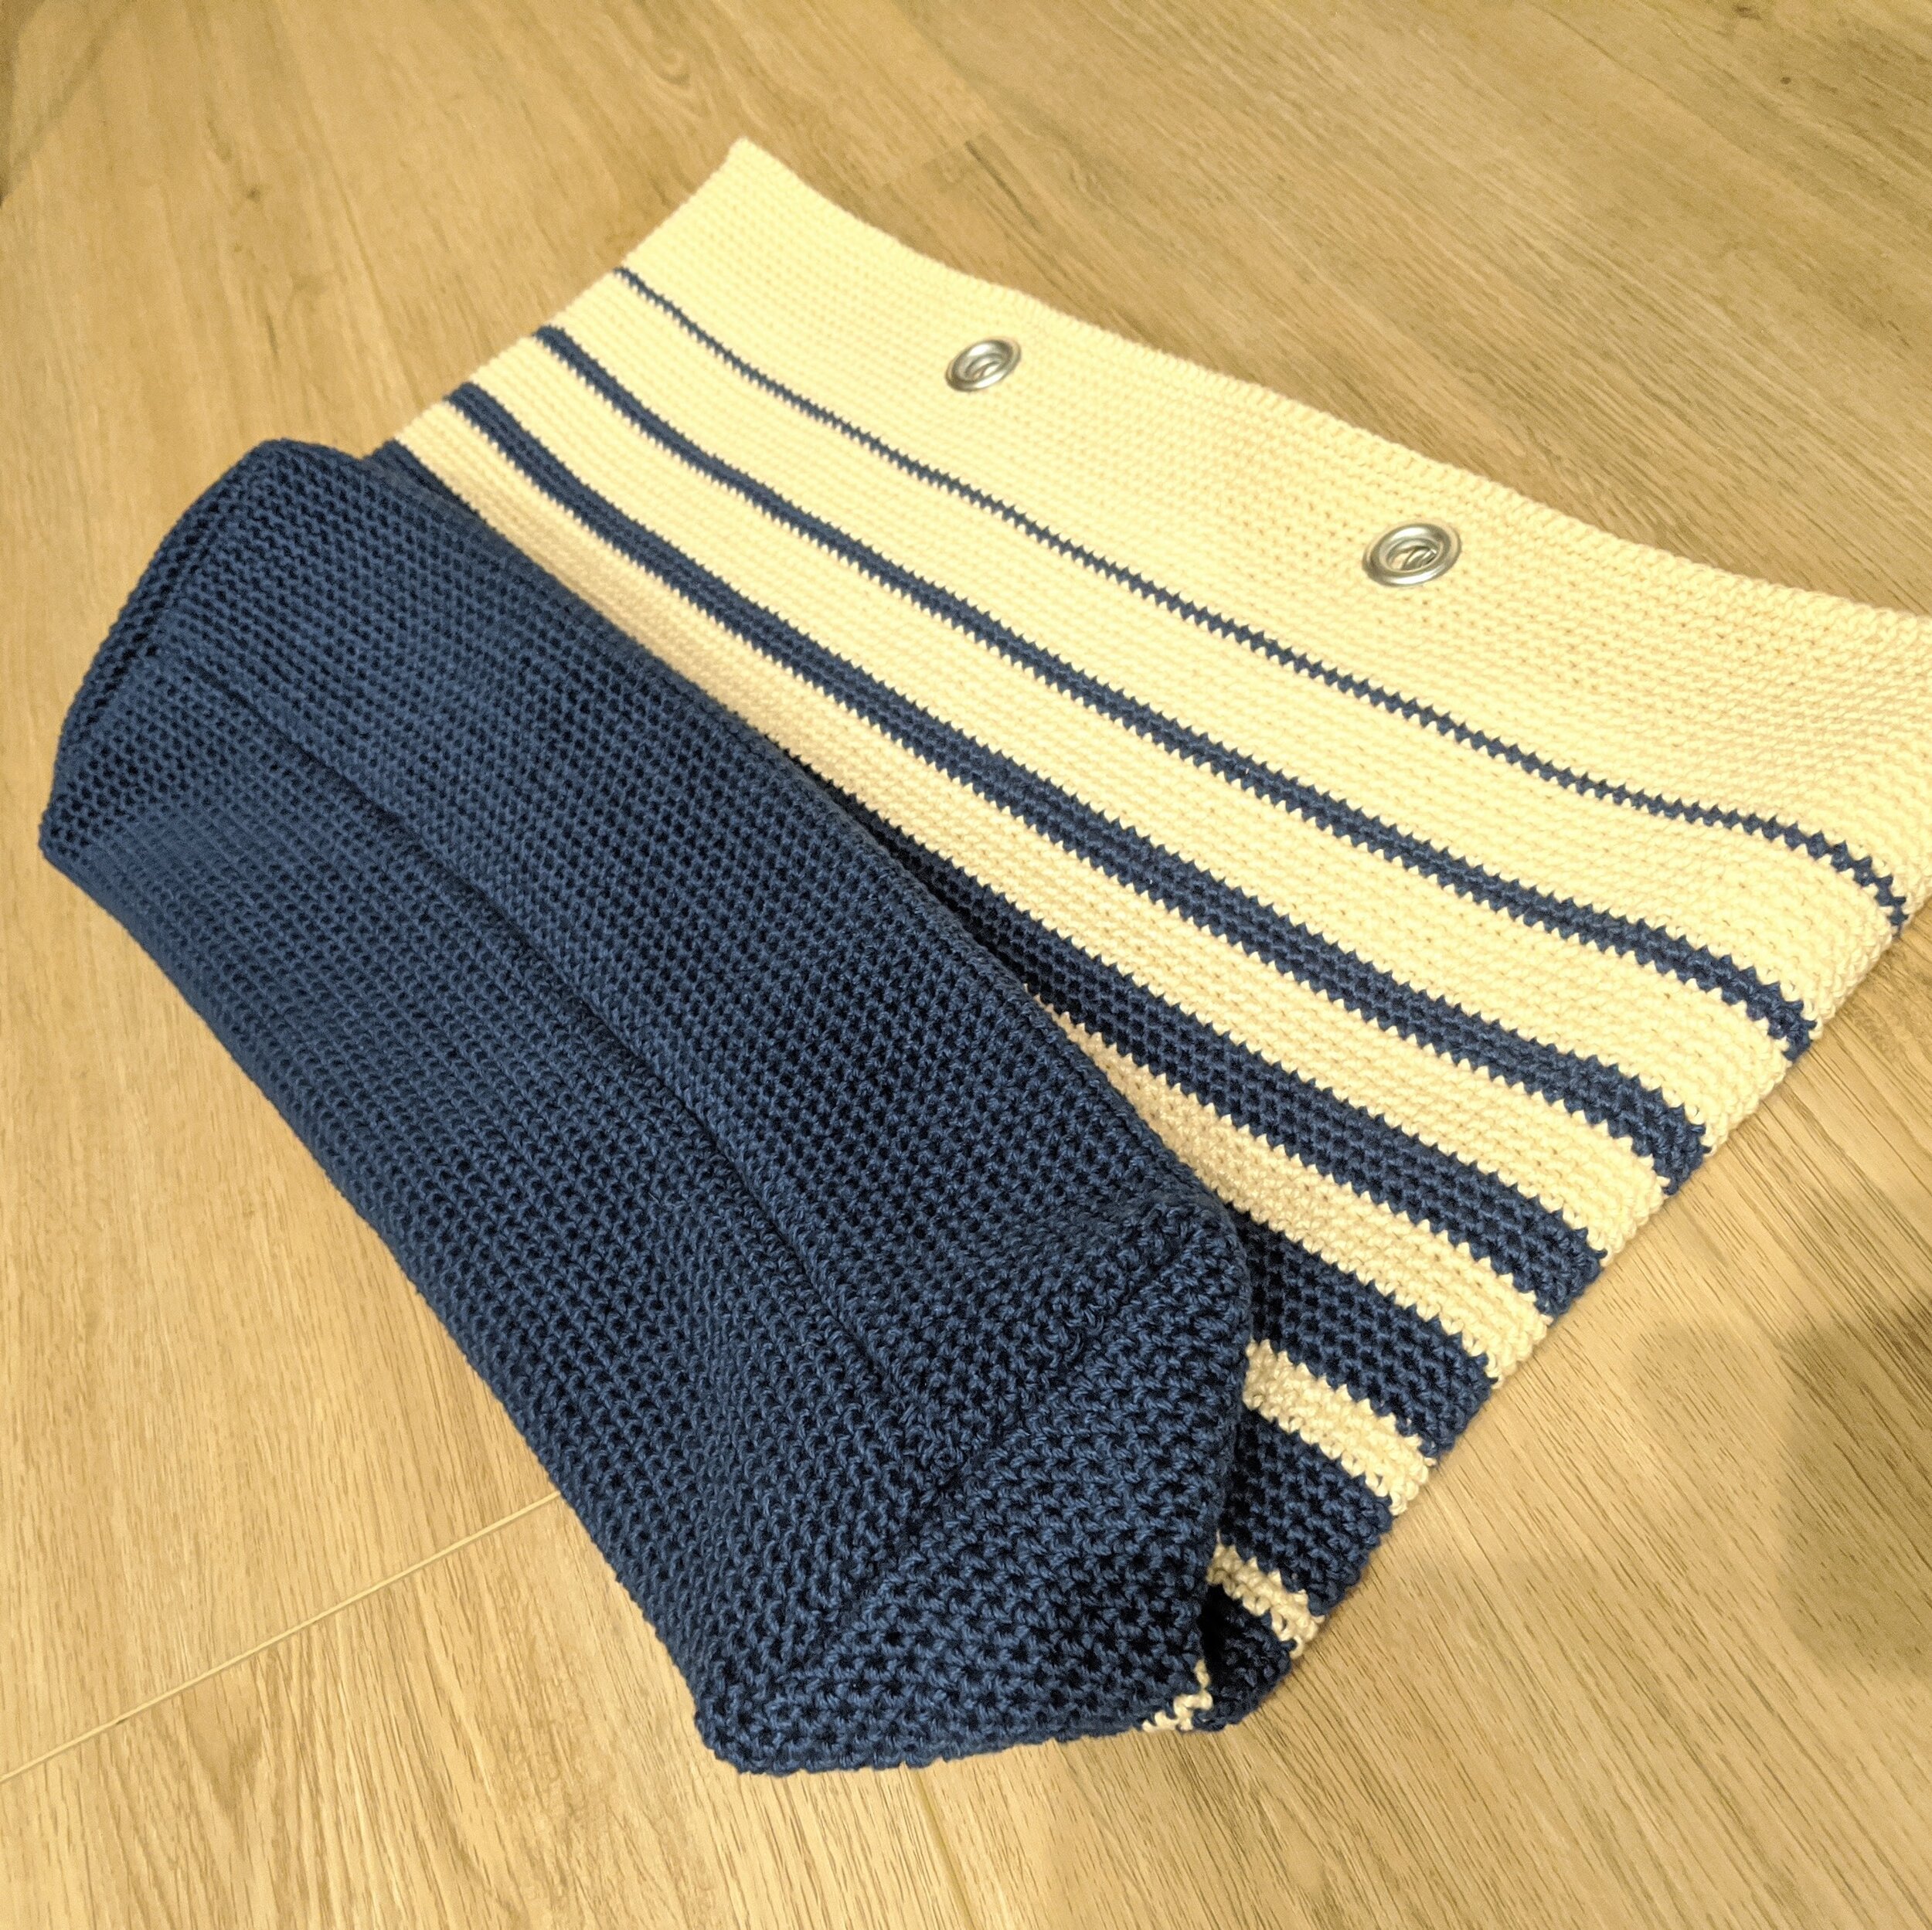
Once both corner seams are finished, turn the bag right side out. The bottom should now have the structured shape shown in the original project.
Why the Bottom Construction Matters
The Marina Tote does not achieve its depth through complicated increases or decreases. Instead, the crochet body is created as a large tube and the bottom is shaped afterward. This makes the crochet portion relatively straightforward while allowing the final sewing stage to establish the three-dimensional base.
When stitching the corners, pay particular attention to the 5-inch measurement. This measurement is part of the original construction and should not be casually changed if you want to reproduce the specified finished shape.
It is also useful to check that the central seam remains aligned while you work. A centered seam helps the finished bottom look balanced.
Adding the Rustic Rope Handles

The final construction step is adding the two rope handles. Start with approximately 2 yards of 3/8-inch twisted cord.
Cut the cord in half so that you have two pieces measuring approximately 36 inches each.
Take the first piece of cord and tie a knot at one end, leaving approximately 3/4 inch of cord sticking out from the end.
Thread the opposite end through one grommet. Pull the cord so that the knot sits tightly on the right side of the bag.
Next, thread the same cord through the other grommet on the same side of the bag. This creates the loop that will become the handle.
Adjust the length of the strap to your liking before tying the second knot. Once you are satisfied with the handle length, tie a knot at the other end of the cord.
Use good scissors to cut the excess rope approximately 3/4 inch below the knot.
Creating the Rustic Frayed Rope Finish
If your twisted cord has additional threads wrapped around the main cord, you can unwind those threads and cut them away. Then spread out the exposed strands to create the rustic, frayed appearance seen in the finished design.
This small finishing detail helps reinforce the nautical character of the tote. The combination of the navy and ecru crochet stripes, metal grommets, and natural twisted cord gives the bag its distinctive beach-inspired style.
Repeat the entire handle process with the second 36-inch piece of cord. Before considering the bag finished, compare the two handles carefully and make sure they are the same length.
Handle Symmetry Check
Handle symmetry is one of the easiest finishing details to notice on a completed tote. After attaching both handles, place the bag on a flat surface and compare their lengths visually.
- Make sure both cords use the same approximate starting length.
- Check that both handles pass through the corresponding grommets correctly.
- Compare the knot positions on both handles.
- Adjust the strap length before tying the final knot.
- Trim the excess cord approximately 3/4 inch below each knot.
- Finish the rope ends consistently for a balanced appearance.
Beginner Tips for a Smoother Crochet Experience
Count the Foundation Chain Carefully
The project begins with 200 chains, so this is a large foundation. It can be helpful to count in manageable groups while creating the chain, then double-check the total before joining.
Prevent the Foundation From Twisting
This is perhaps the most important preparation step. Before joining the 200-chain foundation, make sure the chain lies naturally in one direction. Joining a twisted foundation can create a permanently twisted bag body.
Track Your Rounds
There are many rounds in this project, and several color changes. Mark each completed group in your notes or use a method that lets you confidently identify your current round.
Respect the Color Sequence
The navy and ecru stripe arrangement is part of the design. When changing colors, fasten off the previous color as specified and attach the new one before beginning the next round group.
Do Not Rush the Grommets
If this is your first grommet project, take time to read the kit instructions before starting. The grommets are a decorative and functional feature, so careful installation will make the finished tote look much more polished.
Measure the Bottom Corners
The corner seams are marked at 5 inches. Use a tape measure rather than estimating the distance. Consistent measurements on both sides help produce a balanced finished bottom.
Common Finishing Problems to Avoid
One common issue with a project of this size is losing track of where you are in the pattern. Because much of the crochet body uses the same single crochet instruction, it can be easy to complete a round and forget to record it. A simple round checklist can prevent this.
Another issue can occur during the foundation stage if the 200-chain circle becomes twisted. Always check the orientation before joining.
During the grommet stage, avoid working on an unsuitable surface. The original instructions specifically recommend a hard surface and caution against using a glass coffee table.
When sewing the bottom, make sure the needle passes through both layers when creating the 5-inch corner seam. The purpose of this stitching is to establish the shape of the bottom, so both layers need to be secured.
Marina Tote Construction Checklist
- Chain 200 and join without twisting.
- Work Rounds 1–25 in Color A.
- Follow every specified navy and ecru color change.
- Maintain the 200-stitch count where specified.
- Create the four chain-3 openings in Round 91.
- Work the three single crochets into each chain space in Round 92.
- Complete Rounds 93–95.
- Complete Round 96, turn, fasten off, and weave in ends.
- Install 4 grommets in the Round 91 openings.
- Turn the bag inside out.
- Align the grommets and stitch the bottom seam.
- Mark a 5-inch line across each corner base.
- Stitch through both layers on each corner.
- Turn the bag right side out.
- Cut the cord into two approximately 36-inch pieces.
- Thread and knot the first handle.
- Adjust its length and finish the rope end.
- Repeat for the second handle.
- Check that both handles are the same length.
Quick Reference for the Main Pattern
Foundation: Ch 200 and join to form a circle without twisting.
Rounds 1–25: Ch 1. SC in each ST around. Join with a SL ST to top of first SC. (200)
Round 26: Color B.
Rounds 27–33: Color A.
Rounds 34–35: Color B.
Rounds 36–41: Color A.
Rounds 43–45: Color B.
Rounds 46–49: Color A.
Rounds 50–53: Color B.
Rounds 54–57: Color A.
Rounds 58–62: Color B.
Rounds 63–65: Color A.
Rounds 66–71: Color B.
Rounds 72–73: Color A.
Rounds 74–80: Color B.
Round 81: Color A.
Rounds 82–90: Color B.
Round 91: Create two pairs of chain-3 spaces by working SC 31, Ch 3, sk 3 sts, SC 32, Ch 3, sk 3 sts, SC 31, repeating the sequence.
Round 92: Work 3 SC into each chain-3 space.
Rounds 93–95: SC in each stitch around.
Round 96: Ch 1, turn, SC in each stitch around, join, fasten off, and weave in ends.
Final Finishing and Beach-Ready Details
Once the two rope handles are attached and balanced, the Marina Tote is ready for its final inspection. Check the inside of the bag for loose yarn ends, make sure the bottom seam is secure, and confirm that all four grommets are firmly installed.
The finished proportions should be approximately 21.5 inches wide, 14 inches high, and 5 inches deep. The combination of the large crocheted body and structured bottom gives the tote a roomy shape, while the rope handles provide the practical finishing touch.
The Marina Tote demonstrates how a project can look much more complicated than the actual crochet techniques involved. The main body is based on chain stitches, slip stitches, and single crochet, while the distinctive appearance comes from the carefully arranged color changes and professional finishing details.
The grommets and rope handles are especially effective because they transform a simple crocheted fabric into a functional tote with a strong nautical personality. They also make the project a useful opportunity to learn finishing techniques beyond traditional crochet.
Frequently Asked Questions
Is the Marina Tote suitable for beginners?
The crochet portion uses basic stitches and can be suitable for an advanced beginner or a confident true beginner. The larger challenge is the size of the project, the number of rounds, the color changes, and the finishing steps involving grommets and sewing.
What crochet terminology does this pattern use?
The instructions use US crochet terminology. The abbreviations include Ch for chain, Sl st for slip stitch, and SC for single crochet.
How many grommets are required?
The project requires 4 grommets or eyelets. They are installed into the openings created in Round 91.
What size should the grommets be?
The source specifies grommets measuring 1/2 inch or 7/16 inch, slightly larger than the diameter of the rope handles.
How long are the finished handle pieces before attachment?
The approximately 2 yards of twisted cord is divided into two pieces of approximately 36 inches each.
How deep is the finished bag?
The finished size is approximately 5 inches deep. The bottom depth is established through the corner seams, each marked with a 5-inch line.
Can I use a different color for the rope?
The original materials call for 3/8-inch twisted cord in natural color or a color of your choosing. The navy and ecru yarn colors are specified as Color A and Color B for the crochet body.
Why are there grommet openings in Round 91?
The chain-3 spaces created in Round 91 provide the openings used for installing the four grommets. The rope handles are then threaded through those grommets.
Enjoy Your Handmade Marina Tote
After completing all of the crochet rounds, shaping the bottom, installing the grommets, and attaching the two rope handles, you have a handmade Marina Tote with a classic beach-ready aesthetic.
It is a project that combines simple crochet techniques with a few construction details that make the final result feel especially polished. The navy and ecru stripes give the bag its nautical character, while the grommets and rustic cord handles complete the look.
Most importantly, the project shows that you do not need an advanced stitch vocabulary to create an impressive crochet accessory. With careful round tracking, accurate color changes, attention to the 5-inch bottom measurements, and patient finishing, the basic single crochet fabric can become a stylish and practical tote.
Once your Marina Tote is complete, all that remains is to fill it with your beach essentials, grab your swimsuit and enjoy the shore.
Pattern note: The original designer permits finished products made from the pattern to be sold, with a request to link back to the original post. The pattern itself and its photographs should not be republished as original work or claimed as your own.