
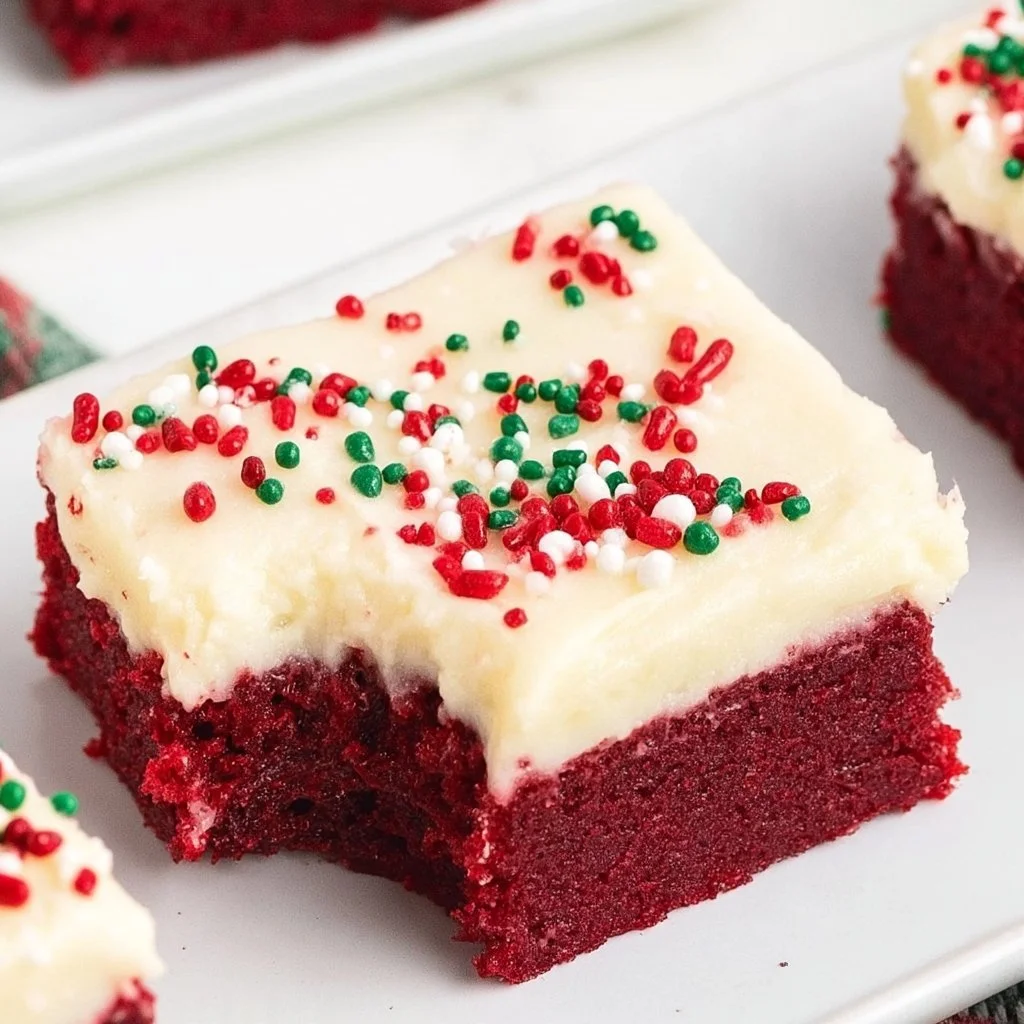
Red Velvet Cookie Bars
Red Velvet Cookie Bars are a delightful treat that brings a twist to the beloved flavor profile of red velvet cake in a portable, easy-to-share format. These cookies combine the signature deep crimson color and the subtly rich cocoa flavor of traditional red velvet with a soft and chewy texture that is simply irresistible. Topped with a creamy cream cheese frosting, they offer a perfect balance of sweetness and tang, making them an appealing dessert for countless occasions.
When you take a bite of these bars, you’re greeted with a moist, buttery texture followed by the subtle notes of vanilla and chocolate. The eye-catching red color makes them an impressive addition to any dessert table, while the cream cheese frosting adds both richness and a velvety finish that complements the cookie base flawlessly. These cookie bars can evoke nostalgia, reminding many of festive celebrations and special gatherings.
Suitable for a variety of events, these cookie bars shine at birthday parties, family get-togethers, or as a treat to indulge in during an afternoon break. Their straightforward preparation and pleasing presentation make them an ideal choice for both skilled bakers looking to impress and novice cooks keen to try something new. Beyond just their taste and aesthetic appeal, Red Velvet Cookie Bars embrace the joy of baking and sharing desserts, creating moments of happiness and connection around the table.
What Makes This Recipe Special
What truly sets Red Velvet Cookie Bars apart from standard cookie recipes is their unique flavor combination and eye-catching appearance. Unlike traditional cookies, the distinct red hue and subtle cocoa flavor create a striking visual and taste experience that captures the essence of red velvet cake. The cookie bars maintain a soft and chewy texture while providing a satisfying depth of flavor thanks to the addition of cocoa powder and buttermilk, a hallmark of classic red velvet dishes.
In comparison to other dessert bars, these cookie bars excel due to the addition of a luscious cream cheese frosting. This sweet and tangy topping not only enhances the bars’ flavor but also adds a layer of creaminess that isn’t often found in other cookie recipes. The frosting also lends a sophisticated look to the bars, making them appear elegantly presented, whether served at a casual family gathering or a more formal occasion.
The recipe itself is relatively simple, requiring only a few common ingredients. This accessibility makes it a great option for a quick treat or last-minute dessert, while still feeling special. The combination of rich butter, sugars, and high-quality cocoa powder creates a deep flavor profile that balances sweetness with a hint of bitterness from the cocoa, appealing to a broad range of taste preferences.
Ingredient Overview and Helpful Notes
When it comes to baking Red Velvet Cookie Bars, the quality of your ingredients matters. The main components include all-purpose flour, cocoa powder, baking soda, salt, unsalted butter, granulated sugar, brown sugar, eggs, food coloring, and vanilla extract. Each of these ingredients plays a crucial role in creating the final product.
-
All-Purpose Flour: This is the foundation of the cookie bars and provides the structure. For best results, make sure to measure it correctly. Using the spoon and level method—spooning the flour into your measuring cup and leveling it off with a knife—helps ensure you don’t use too much flour, which could lead to dry bars.
-
Cocoa Powder: It contributes the signature chocolate flavor that balances the sweetness of the sugars and complements the tanginess of the cream cheese frosting. Opt for high-quality cocoa powder for a richer flavor.
-
Baking Soda & Salt: These raise the cookie bars and enhance the overall flavor. Be careful when measuring both; too much baking soda can lead to a soapy taste.
-
Unsalted Butter: This brings richness and moisture to the cookie bars. It should be softened, so it creams well with the sugars, but not melted.
-
Granulated and Brown Sugar: The combination of these sugars contributes to the cookie’s texture. Granulated sugar helps them spread, while brown sugar, which contains molasses, provides chewiness and a hint of caramel flavor.
-
Egg: Acts as a binder and adds moisture. Using a room-temperature egg ensures better emulsification with the wet ingredients.
-
Red Food Coloring: This is what gives these cookie bars their vibrant hue. Liquid food coloring is standard, but gel coloring can provide a more vivid shade if preferred. Be sure to use it appropriately to avoid a medicinal taste.
-
Vanilla Extract: Adds depth to the overall flavor profile, balancing the sweetness with its aromatic notes.
-
Cream Cheese, Powdered Sugar, and Vanilla Extract (for frosting): The cream cheese creates a tangy frosting that elevates the cookie bars. Powdered sugar helps achieve that smooth texture, while additional vanilla enhances the flavor.
Preparation begins by ensuring your butter is at the right temperature—softened but not overtly melted—for easy creaming. This will help you achieve that light and fluffy texture that makes these bars so enjoyable.
Nutrition & Recipe Details
Nutritional values may vary depending on ingredients, brands, portion sizes, and preparation methods. Here’s a rough estimate based on a standard serving:
| Item | Value |
|---|---|
| Prep time | 20 minutes |
| Cook time | 25 minutes |
| Store time | Up to 5 days in the refrigerator |
| Calories | 180 per serving |
| Protein | 2g |
| Carbohydrates | 26g |
| Fat | 7g |
How to Make Red Velvet Cookie Bars
Making Red Velvet Cookie Bars is simple and straightforward, making it a great project for bakers of all skill levels. Begin by assembling your tools and ingredients: an oven, mixing bowls, a whisk or electric mixer, a baking pan, and an array of measuring cups and spoons. Having everything ready and at hand will streamline your cooking process and help ensure success.
First, preheat your oven to 350°F (175°C) and prepare your baking pan by greasing it well; this will help prevent the cookie bars from sticking. If you prefer a slightly easier cleanup, consider lining the pan with parchment paper, allowing you to lift the bars out once cooled.
Ingredients
| Ingredient | Quantity |
|---|---|
| All-purpose flour | 1 1/4 cups |
| Cocoa powder | 1/2 cup |
| Baking soda | 1/2 teaspoon |
| Salt | 1/4 teaspoon |
| Unsalted butter, softened | 1/2 cup |
| Granulated sugar | 1 cup |
| Brown sugar | 1/4 cup |
| Large egg | 1 |
| Red food coloring | 1 tablespoon |
| Vanilla extract | 1 teaspoon |
| Cream cheese (for frosting) | 1/2 cup |
| Powdered sugar (for frosting) | 1/2 cup |
| Vanilla extract (for frosting) | 1 teaspoon |
To prepare the ingredients for your cookie bars, start by measuring all dry ingredients—flour, cocoa powder, baking soda, and salt—in one bowl. This ensures even distribution of leavening and flavor across the cookies. In a separate bowl, cream the softened butter with granulated and brown sugars until light and fluffy. This process incorporates air, resulting in a tender texture in the finished bars. Beat in the egg, food coloring, and vanilla extract until the mixture is homogenous. Finally, add the dry mix gradually into the wet ingredients, combining until just incorporated to avoid overmixing.
Step-by-Step Instructions
-
Preheat your oven to 350°F (175°C) and grease a baking pan with non-stick spray or butter. Line the bottom with parchment paper for easy removal later, if desired.
-
In a medium mixing bowl, whisk together the all-purpose flour, cocoa powder, baking soda, and salt. Set this dry mixture aside, as you will combine it with the wet ingredients shortly.
-
In a large mixing bowl, cream the softened unsalted butter, granulated sugar, and brown sugar together using an electric mixer or a whisk until the mixture is light and fluffy. The color will lighten slightly as air is incorporated into the batter, usually about 3-5 minutes with a mixer.
-
Next, beat in one large egg, red food coloring, and vanilla extract into the butter mixture. Mix until fully combined, ensuring that the food coloring distributes evenly throughout the batter to achieve that iconic red hue.
-
Gradually add the dry mixture from your earlier step into the wet ingredients. Stir gently until just combined; it’s essential not to overmix, as this can develop gluten and lead to denser bars.
-
Pour the red velvet cookie dough into your prepared baking pan, using a spatula to spread it evenly and smooth the top. This will help ensure uniform baking and a pleasant presentation.
-
Place the pan in the preheated oven and bake for 20-25 minutes, or until a toothpick inserted into the center comes out clean. Keep an eye on your bars during the last few minutes to avoid overbaking, which could make them dry.
-
Allow the cookie bars to cool completely in the pan on a wire rack before frosting. This cooling step is crucial to prevent the frosting from melting.
-
While the bars are cooling, prepare the cream cheese frosting. In a separate bowl, beat together the cream cheese, powdered sugar, and vanilla extract until the mixture is smooth and creamy.
-
Once the cookie bars are completely cooled, spread the cream cheese frosting evenly over the top using a spatula. After frosting, slice the bars into squares for serving.
Understanding the Flavor and Texture
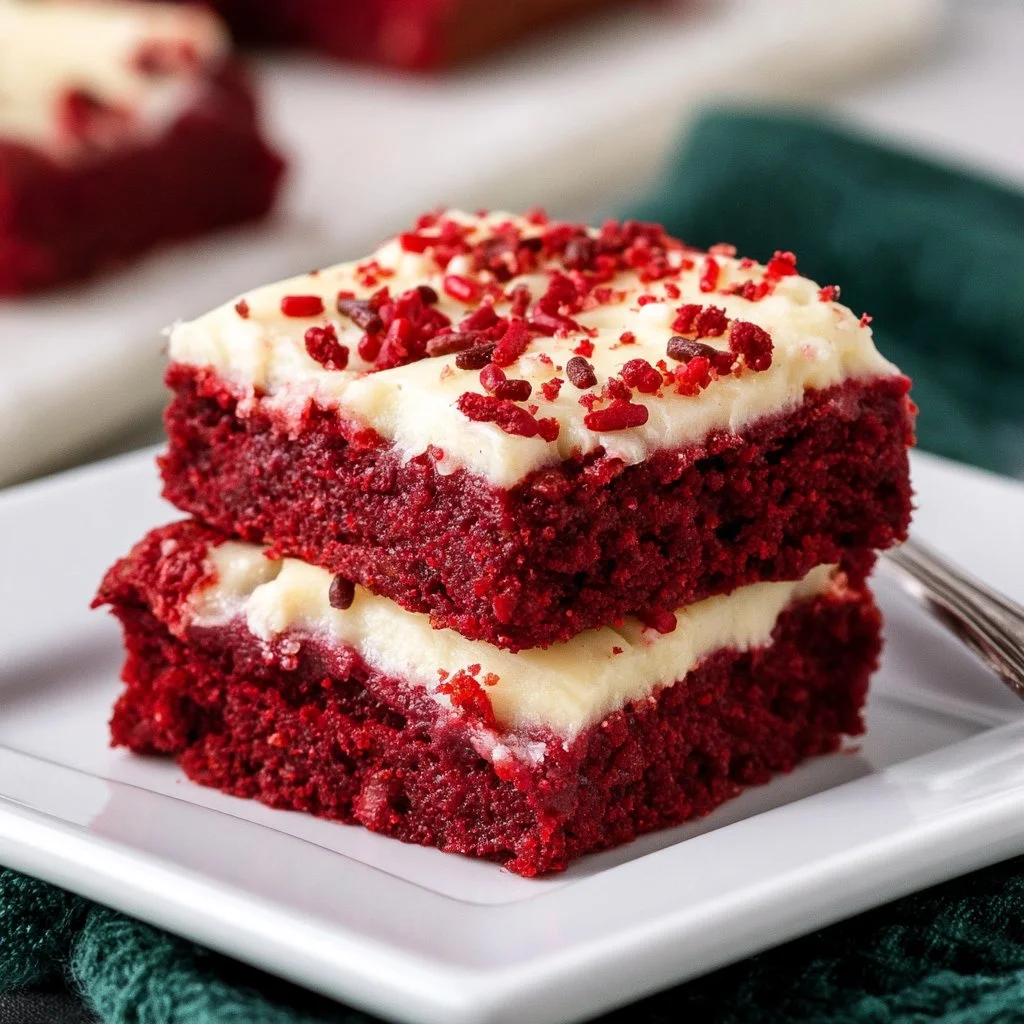
The final result of your Red Velvet Cookie Bars is a true feast for the senses. Visually, the vibrant red color against the creamy white frosting creates a striking contrast that draws the eye. It’s a dessert that promises decadence with its rich colors, enticing anyone who sees it. Each bar should be tender and soft, with just a slight chewiness at the edges, which conjures the ideal texture for cookie lovers.
Upon tasting, the flavors unfold beautifully; the cocoa powder offers a deep chocolate undertone while the cream cheese frosting introduces a tangy richness that elevates the overall experience. Each bite strikes a balance between sweetness and a subtle hint of cocoa, with the frosting adding a creamy dimension. The appearance and textural contrast of the frosting against the cookie base contribute to an enjoyable mouthfeel that is luxurious yet approachable.
The baking method plays a crucial role in achieving the right texture. Baking at the correct temperature ensures the edges become slightly crisp while maintaining the warmth and gooeyness of the center. A successful batch will have a flavorful crust and a moist, rich center. Recognizing these elements is essential in determining the quality of your finished cookie bars.
Pro Tips
Cooking is an art, and small techniques can significantly enhance your results. Here are some valuable tips to ensure your Red Velvet Cookie Bars turn out perfectly:
| Tip | Description |
|---|---|
| Use soft, but not melted butter | Softened butter incorporates air easily into the mixture, providing a fluffy texture to the cookie bars. If the butter is too melted, it will lead to greasy cookies that lack the right structure. |
| Measure flour correctly | Proper measurement of flour is essential. Spoon it into your measuring cup and level it off with a knife rather than scooping directly from the container, which can lead to excess flour and dry bars. |
| Don’t overmix the batter | Mixing just until combined prevents the overdevelopment of gluten, which can make your cookie bars tough. This technique is crucial for achieving the soft, chewy texture that is desired. |
| Cool completely before frosting | Frosting on warm bars can lead to melting and soggy frosting. Ensure your bars are cooled completely so the frosting sets beautifully on top, maintaining its shape and flavor. |
In addition to these cooking tips, consider using high-quality cocoa powder and pure vanilla extract. The quality of your ingredients can heighten the flavor, ensuring each bite is as rich and delicious as possible. Also, if you want a more intense hue, feel free to adjust the amount of food coloring until you achieve your desired color aesthetic.
Why You’ll Love This Recipe
Red Velvet Cookie Bars bring together a crowd-pleasing flavor profile, making them perfect for a variety of occasions. The comforting combination of creamy and chocolatey elements appeals to a wide audience, offering something for everyone—from children to adults. The ease of preparation means that even those new to baking can feel confident as they whip up this delightful dessert.
Moreover, the versatility of these bars is a major win. They can be served fresh from the oven or enjoyed cold from the fridge, with the frosting adding an extra level of richness whether at room temperature or chilled. The opportunities for customization also cater to different preferences; you can easily add sprinkles, nuts, or even chocolate chips to the batter for an added twist.
Cleanup is a breeze when making these cookie bars, as the preparation involves simple mixing and baking without elaborate steps or exotic tools. This makes Red Velvet Cookie Bars not only a delicious treat but a practical option for busy home cooks, allowing everyone to enjoy a bit of indulgence without the fuss.
How to Serve Red Velvet Cookie Bars
Presenting your Red Velvet Cookie Bars beautifully can transform them from a homey treat to something fit for a celebration. For an attractive display, consider cutting them into uniform squares or rectangles. Arranging them on a decorative platter enhances their visual appeal—garnishing with fresh mint leaves or a sprinkle of cocoa powder can create an elegant touch.
These bars are delightful on their own, but the flavors can be elevated further by serving them with complementary additions. Pair with a dollop of whipped cream or a scoop of vanilla ice cream for an indulgent dessert. Additionally, consider serving slices alongside a fruit salad or a scoop of berries to introduce freshness and balance the richness of the bars.
Beverage pairing is also essential; serve with a glass of milk, a strong brewed coffee, or even a refreshing iced tea to bring out the flavors of the cookie bars. If you’re hosting a seasonal gathering, think about how festive drinks, such as a warm cocoa or spiced latte, would pair beautifully with this dessert.
Optional serving suggestions like drizzling chocolate or caramel sauce over the top can excite your guests and personalize the presentation. If desired, dust a hint of powdered sugar on top as a finishing touch for elegance.
How to Store Red Velvet Cookie Bars
To maintain the freshness of your Red Velvet Cookie Bars, allow them to cool completely in the baking pan before storing. Once cooled, cut the bars into squares if you haven’t already, as this will ease the process when you want to serve them later.
For short-term storage, place the bars in an airtight container and store them in the refrigerator. They should remain fresh for up to five days. The chilled environment will also help maintain the integrity of the cream cheese frosting. Avoid keeping them at room temperature for too long, as this can negatively affect the texture of the frosting.
If you wish to store them for a more extended period, you can freeze the bars. Wrap each piece individually in plastic wrap, followed by aluminum foil, to protect them from freezer burn. When ready to eat, thaw them in the refrigerator overnight before serving. However, keep in mind that the icing may change in texture slightly, though the flavor will remain delicious.
During storage, the texture of the bars may become denser as they chill. This can be a delightful way to enjoy them cold for a change, but for the best experience, they are often best when served at room temperature.
Tips to Make Red Velvet Cookie Bars
Creating the ultimate Red Velvet Cookie Bars can be heightened with a few practical tips that enhance their final appearance and texture. First, consider the temperature at which your ingredients are mixed. Using room-temperature butter and eggs helps achieve a more homogenous batter, ensuring stable, even baking.
Next, balance the sugar content. If the sweetness level feels too high, you can adjust by slightly reducing either the granulated or brown sugar. Keep in mind that adjustments could alter the texture slightly, so it’s best to reduce just a tablespoon or so at first.
Pay close attention to your baking time. Ovens can vary, so checking for doneness a few minutes early is advisable. The edges may begin to pull away from the pan slightly, and a toothpick inserted into the center should come out clean.
Lastly, consider your serving size. Each cookie bar can be cut into larger pieces for a substantial dessert or can be made smaller for bite-sized treats at a gathering. Adjusting the serving style will help cater to your guests’ needs and the occasion.
Variations and Substitutions
While the core recipe for Red Velvet Cookie Bars is already a hit, there are numerous ways to customize or adapt them for different tastes or dietary needs. Here are some variations you can experiment with:
-
Gluten-Free Version: For those avoiding gluten, consider using a gluten-free all-purpose flour blend in place of standard flour. Many brands provide options that yield excellent results without sacrificing flavor or texture.
-
Dairy-Free Alternative: To make a dairy-free version, replace the unsalted butter with coconut oil or a plant-based butter substitute. Instead of cream cheese, look for dairy-free cream cheese alternatives available on the market today.
-
Nutty Twist: Adding chopped pecans or walnuts to the batter can introduce an enjoyable crunch and nutty flavor that beautifully complements the rich cookie base. A handful of chocolate chips could also add another layer of taste.
-
Cheesecake Layer: For a more decadent approach, try sandwiching a layer of cream cheese mixture in between two layers of cookie dough, creating a delicious red velvet cheesecake bar.
Each of these variations still maintains the original spirit of Red Velvet Cookie Bars, ensuring a fun twist without losing the comforting taste and texture that make them a beloved treat.
Storage and Reheating
When dividing and storing any leftovers, consider how long you wish to keep your Red Velvet Cookie Bars. If you’re planning to eat them within a few days, simply place them in an airtight container in the fridge as outlined earlier.
For those who want to enjoy them later but ensure they remain fresh, wrapping individual bars in plastic wrap and storing them in the freezer is recommended. Defrost them overnight in the refrigerator for best results, preventing them from becoming soggy during thawing.
When it comes to reheating, the goal should be to revive the texture without overheating and drying them out. The microwave is convenient for quick reheating; pop a single bar in for about 10–15 seconds. For two or more, consider using an oven set to low heat (around 300°F) to ensure even warming without drying them out completely.
If the bars seem a little dry, a light drizzle of cream cheese icing can help revive some moisture after reheating. Maintaining consistent texture is crucial, so being mindful of your reheating method will yield the best results in keeping these delights enjoyable.
Customization Ideas
If you want to personalize your Red Velvet Cookie Bars further, there are numerous ways to make them your own. Incorporating spices, such as cinnamon or cardamom, can enhance the warmth and depth of flavor in the bars. The use of flavored extracts—like almond or coffee—can introduce a new aromatic profile as well.
Toppings can also be experimented with. Consider adding a layer of crushed nuts on top of the frosting for a textural contrast or sprinkling edible glitter for a festive look during special occasions. Alternatively, drizzle melted dark chocolate over the bars after frosting them, catering to chocolate lovers.
Another approach is to get creative with the frosting itself. Instead of regular cream cheese frosting, consider infusing it with other flavors like orange or lemon zest for a refreshing twist. This would add brightness to the sweetness, resulting in an invigorating contrast with the rich cookie bars.
All of these ideas foster a personalized culinary experience while still maintaining the essence of Red Velvet Cookie Bars, ensuring that they appeal to a variety of guests and preferences.
Common Mistakes to Avoid
Every baker encounters obstacles while whipping up sweet treats. Here are five common mistakes to watch for with Red Velvet Cookie Bars:
-
Using Cold Ingredients: Starting with cold butter or eggs can lead to uneven mixing and a denser texture. Always ensure your butter is softened and your eggs are at room temperature.
-
Overbaking the Bars: A subtle misstep can turn soft, chewy cookies into dry, hard bars. Keep an eye on your bars in the oven, taking them out as soon as a toothpick comes out clean.
-
Not Sheltering the Flavor: Failing to add sufficient food coloring can lead to bland-looking cookie bars. Don’t shy away from using the recommended amount to achieve that striking red hue.
-
Neglecting the Pans: Skipping the greasing or lining of the pan can result in cookie bars sticking, making them difficult to cut or remove without ruining their shape. Always prepare your pans for success.
-
Skipping the Cooling Step: Frosting warm bars can lead to melted, runny icing. Make it a priority to cool your cookie bars completely before adding the cream cheese frosting.
By avoiding these pitfalls, you can be well on your way to mastering this delicious dessert recipe.
Serving Occasions
Red Velvet Cookie Bars can be the star of dessert tables at holiday gatherings, birthday parties, or casual family dinners. The rich flavor and beautiful presentation ensure they suit both formal and informal occasions.
During the holiday season, these cookie bars bring a festive touch to cookie platters, while at summer gatherings, they can provide refreshing sweetness. Their versatility allows you to adapt serving styles, whether you cut them into large rectangles for casual events or small squares for elegant parties.
For family movie nights or casual get-togethers with friends, these bars can serve as a delightful centerpiece that invites people to enjoy something sweet together. The vibrant color and creamy topping can compliment a range of other treats and snacks, making them the ideal addition to a fun, laid-back dessert table.
Why Make This Recipe?
What makes Red Velvet Cookie Bars worthy of your time in the kitchen? They combine a unique flavor with simplicity and versatility that few desserts can match. They capture the essence of comfort food while allowing for personalization, and remain approachable for novice bakers seeking to build their skills.
The cookies not only taste incredible but also bring a sense of celebration to any setting, making them a go-to option when you want to impress without excessive effort. Their ability to please a variety of palates means you can confidently share them with friends and family without worrying about limited likes or dislikes.
Moreover, quick preparation and straightforward baking make these bars a perfect solution for last-minute events, bringing joy and treat to any gathering with minimal fuss—all while keeping baking fun and creative.
Make-Ahead Preparation
Preparing Red Velvet Cookie Bars ahead of time can save valuable hours when plans get hectic. While it’s best to frost the bars the day you plan to serve them to preserve texture, you can easily make the cookie base in advance.
Consider baking the bars a day or two ahead of your gathering. Once cooled, wrap them securely in plastic wrap and store them in the refrigerator or freezer until you’re ready to ice and serve. Just remember to allow them to thaw completely if frozen before frosting.
Another preparation option is to make the cream cheese frosting in advance. Store the icing in an airtight container in the fridge for up to three days. Just give it a mix before spreading it over the cooled cookie bars for best texture.
Planning allows you to enjoy the moment without panicking over dessert preparation, ensuring that you can focus on creating special memories with family and hosting guests effortlessly.
Equipment and Kitchen Preparation
To create perfect Red Velvet Cookie Bars, having the right kitchen equipment can make the process smoother and more successful. Here’s a list of essential tools:
-
Mixing Bowls: A set of various-sized bowls is essential for combining dry and wet ingredients properly. Glass or stainless-steel bowls are preferred for their durability and ease of cleaning.
-
Whisk or Electric Mixer: Whisks work well for small batches and lighter mixtures, while an electric mixer can quickly cream butter and sugars, saving you time and effort, especially for thicker batters.
-
Baking Pan: A 9×13-inch pan is the standard size for this recipe. Non-stick pans or those lined with parchment paper facilitate easy removal and cleanup.
-
Measuring Cups and Spoons: Accurate measurements are crucial for baking success, so a good set of dry and liquid measuring cups and measuring spoons is a must.
Preparing your workspace is also important. Clear off any clutter, gather your ingredients, and measure out the dry and wet ingredients beforehand. Having everything organized keeps the process flowing well and encourages a stress-free baking experience.
FAQs
-
Can I use cupcake liners to make these cookie bars?
- Cookie bars are best baked directly in a pan to achieve a nice flat surface for bar-cutting. However, you can bake a batter in cupcake liners, but the texture will differ—more like a muffin than a cookie bar.
-
How can I adjust the sweetness of the frosting?
- Depending on your preference, you can easily decrease the amount of powdered sugar in the frosting. Alternatively, consider reducing or omitting the sugar in the cookie base for a balance.
-
Can I make these cookie bars without food coloring?
- Yes, you can skip food coloring if desired, but keep in mind you will lose the signature red appearance. The flavors will remain unchanged, so you can still enjoy their rich taste.
-
How do I prevent the cookie bars from drying out?
- Make sure not to overbake them; check for doneness a few minutes prior to the recommended time. A too-dry environment can also exacerbate drying out during storage, so use airtight containers.
-
Can I freeze these cookie bars?
- Yes, you can freeze Red Velvet Cookie Bars! Wrap them tightly in plastic wrap and store them in an airtight freezer bag or container. They can last for up to three months in the freezer.
-
What if I don’t have unsalted butter?
- If you only have salted butter, it can be used as an alternative. Just reduce the added salt in the recipe to balance the flavors.
-
How do I make sure the cookie bars are not too sweet?
- Adjust the sugar levels gradually, but remember that reducing too much could affect the structure of the bars. Consider balancing out sweetness with chopped nuts or a hint of sea salt.
-
How long do these cookie bars last?
- When stored properly in the refrigerator, they can last for up to five days. Freezing them extends their shelf life for several months!
Disclaimer
Nutritional information is approximate and may vary based on ingredient brands, substitutions, portion sizes, and preparation methods.