
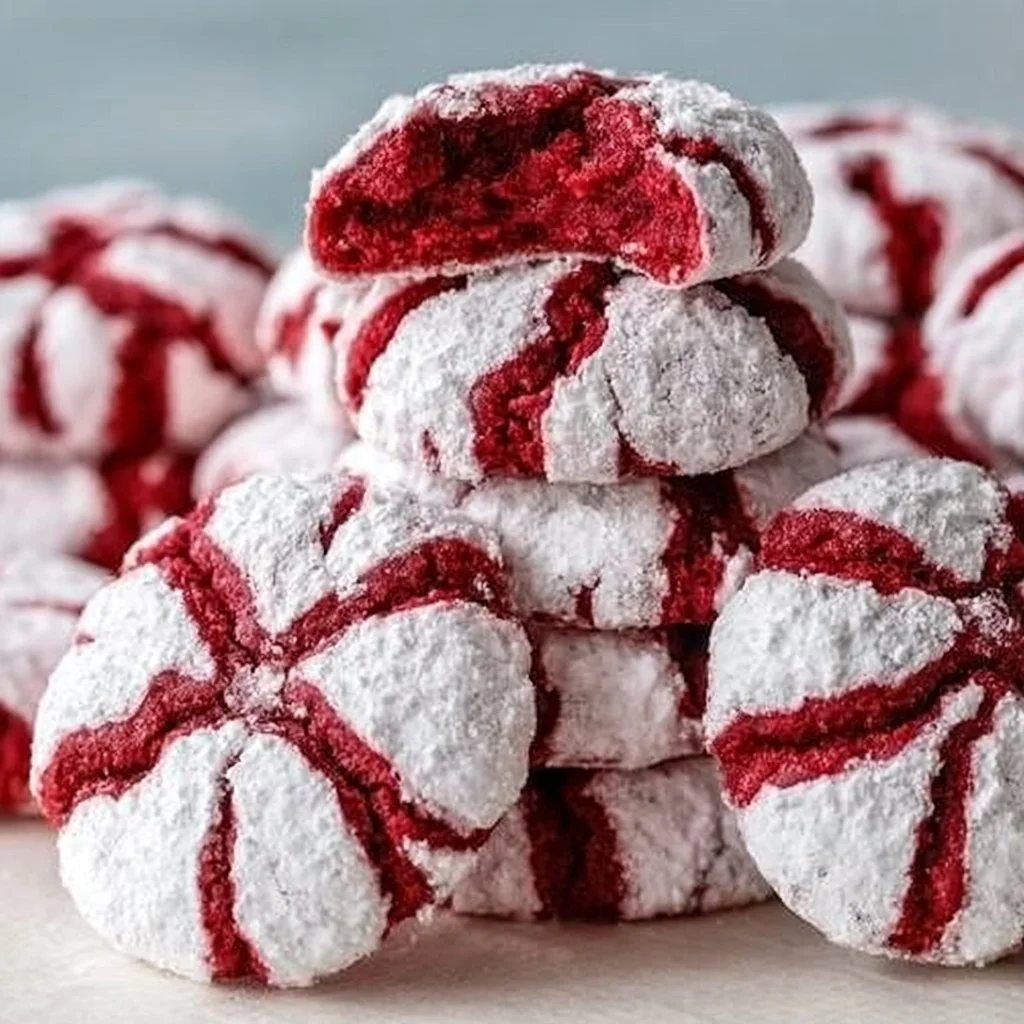
Redvelvet cookie | Red desserts ideas, Red velvet treats, Red velvet crinkle cookies
When it comes to treat-worthy cookies, red velvet cookies stand out not only for their striking color but also for their unique flavor profile and texture. This delightful dessert transports you to a world of rich cocoa flavor complemented by creamy notes of vanilla and cream cheese. With the right balance of sweet and subtly tangy, a red velvet cookie can offer more than just sugar; it provides a whole experience with every bite. Unlike conventional chocolate chip cookies, these cookies often have a soft, almost cake-like texture, making them a favorite among those who crave something distinct yet reminiscent of classic treats.
Imagine taking a bite out of a freshly baked red velvet cookie that’s slightly crispy at the edges yet tender and chewy in the center. The vibrant red hue immediately draws you in, while the white chocolate chips or cream cheese frosting drizzle can add a luxurious touch. These cookies are perfect for any occasion. Whether you’re preparing for a holiday celebration, a casual gathering, or simply wanting a special afternoon snack, red velvet cookies are sure to impress and satisfy.
Incorporating red velvet cookies into your dessert selection allows you to provide something visually stunning and deliciously complex. Their festive appearance enhances the experience, making them suitable for birthday parties, Valentine’s Day celebrations, or even as a delightful after-school snack for kids. Whether served warm with a glass of milk or paired with a scoop of vanilla ice cream, red velvet cookies are a delectable treat that brings joy to anyone who indulges in them.
What Makes This Recipe Special
This recipe shines as it brings together the classic qualities of red velvet cake, transformed into a delightful cookie form. The signature red color comes from food coloring combined with cocoa powder, which not only adds to the cookie’s appearance but also ensures that every bite is infused with a mild chocolate flavor. The distinctiveness does not end there; this cookie incorporates butter for richness, sugar for sweetness, and eggs to bind the ingredients, creating a soft and chewy texture that results in a nostalgic homage to its cake counterpart.
Comparative to other cookies, such as chocolate chip or oatmeal raisin, red velvet cookies hold a unique space in the baking world. They’re the show-stopper cookies, visually appealing and intriguing to the palate with their blend of flavors. The presence of cream cheese, either in the dough or as a frosting, further elevates the cookie experience, bringing a velvety smoothness that binds all the flavors together. It’s not just about taste; it’s about the experience of indulging in a cookie that feels both wholesome and celebratory.
Additionally, the versatility of red velvet cookies means they can be personalized to fit any preference. Whether you choose to fold in white chocolate chips for an added flavor burst or you decide to drizzle a cream cheese glaze over the top before serving, the options are endless. It allows both novice and experienced bakers alike to get creative, ensuring that each batch of red velvet cookies can be as unique as the occasion they are crafted for.
Ingredient Overview and Helpful Notes
To make the perfect red velvet cookie, understanding the role of each ingredient is essential. The main components of the dough include flour, cocoa powder, baking soda, sugar, butter, eggs, vanilla extract, and buttermilk. Each ingredient contributes unique properties that enhance the overall flavor and texture of the cookie.
Flour is the backbone of any cookie recipe, providing structure and stability. For red velvet cookies, all-purpose flour is commonly used, offering the perfect balance of strength without being too dense. It’s important to measure flour accurately; that typically means spooning it into a measuring cup and leveling it off with a straight edge to avoid overly dense cookies.
Cocoa powder not only enhances the cookie’s chocolate flavor but also interacts with baking soda to help create lift and a softer texture. It’s important to choose high-quality cocoa powder and avoid using Dutch-processed cocoa, as it can affect the coloration and flavor profile of the cookies.
Sugar aids in sweetness and moisture retention. The combination of granulated and brown sugar is effective here, as brown sugar brings in additional moisture and a hint of caramel flavor, enriching the overall taste profile of the cookie.
Butter, especially when it is softened to room temperature, helps create a tender texture while contributing to the cookie’s rich, flavorful profile. The fat content in butter is crucial for achieving the desired chewiness and softness in red velvet cookies.
Eggs serve as a binding agent, adding moisture and richness. They also help activate the baking soda, causing the cookies to rise as they bake.
Finally, buttermilk adds necessary moisture and its acidity interacts with the baking soda, allowing for a beautiful rise. It also contributes to the distinctive tanginess associated with red velvet desserts, setting this cookie apart from others.
When selecting your ingredients, aim for freshness and quality. Fresh butter, eggs, and leavening agents deliver the best results. Bringing ingredients like butter and eggs to room temperature helps them incorporate smoothly, resulting in a homogenous dough that bakes evenly.
Nutrition & Recipe Details
Nutritional values can vary depending on the specific brands and types of ingredients used, as well as portion sizes. While following this red velvet cookie recipe, it’s essential to recognize that these values are approximate.
| Item | Value |
|---|---|
| Prep time | 20 minutes |
| Cook time | 10-12 minutes |
| Store time | 1 week |
| Calories | 150 (per cookie) |
| Protein | 2 grams |
| Carbohydrates | 20 grams |
| Fat | 7 grams |
How to Make Red Velvet Cookies
Baking red velvet cookies requires a few strategic steps to ensure the final product is delicious. Start by gathering your ingredients and essential tools. A mixing bowl, baking sheet, parchment paper, and a whisk or mixer are necessary for a seamless baking process. Preheat your oven to a temperature of 350°F (175°C) in preparation for baking. It helps to line your baking sheet with parchment paper to prevent sticking and ensure even baking.
Before you dive into mixing, organize your ingredients. Make sure that your butter is softened to room temperature, which will make creaming it together with sugar much easier. Bringing eggs and buttermilk to room temperature is equally important to avoid curdling when mixed into the batter. This can also lead to a more uniform cookie texture.
Ingredients
| Ingredient | Quantity |
|---|---|
| All-purpose flour | 2 cups |
| Cocoa powder | 2 tablespoons |
| Baking soda | 1 teaspoon |
| Granulated sugar | 1 cup |
| Brown sugar | 1/2 cup |
| Butter | 1/2 cup (softened) |
| Egg | 1 large |
| Buttermilk | 1/2 cup |
| Vanilla extract | 1 teaspoon |
| Red food coloring | 2 tablespoons |
In preparation for the actual baking, gather your dry ingredients—flour, cocoa powder, and baking soda—and whisk them together to combine. This helps strengthen the structure of the cookies by evenly distributing the leavening agents throughout the dough. Next, in another bowl, cream together the softened butter with both the granulated and brown sugars, which is a vital step for ensuring a light and fluffy cookie consistency.
Once creamy, you can beat in the egg until fully incorporated before adding the buttermilk, vanilla, and red food coloring. It’s crucial to mix these wet ingredients well so they meld together seamlessly and provide the desired color and moisture.
Step-by-Step Instructions
-
Preheat the oven: Start by preheating your oven to 350°F (175°C). This ensures that your cookies have an optimal baking environment the moment they hit the oven.
-
Prepare your baking sheet: Line a baking sheet with parchment paper to prevent the cookies from sticking and to achieve even browning.
-
Mix the dry ingredients: In a medium mixing bowl, whisk together 2 cups of all-purpose flour, 2 tablespoons of cocoa powder, and 1 teaspoon of baking soda until well combined. This incorporates air, enhancing the cookie’s texture by preventing clumping.
-
Cream the butter and sugars: In a large bowl, combine 1/2 cup of softened butter with 1 cup of granulated sugar and 1/2 cup of brown sugar. Use a hand mixer or stand mixer to beat this on medium speed until light and fluffy, usually about 3-4 minutes. The texture should be pale and voluminous at this stage.
-
Add the wet ingredients: Crack 1 large egg into the butter mixture and beat until just incorporated. Follow with 1/2 cup of buttermilk, 1 teaspoon of vanilla extract, and 2 tablespoons of red food coloring. Mix briefly until combined, being careful not to overmix as that could affect the cookie’s texture.
-
Combine wet and dry ingredients: Gradually add the dry flour mixture to the wet mixture, mixing until just combined. Overmixing can lead to tough cookies, so stir gently until you see no more flour streaks.
-
Scoop the dough: Use a cookie scoop or tablespoon to drop mounds of dough onto the prepared baking sheet, spacing them about 2 inches apart to allow for spreading.
-
Bake: Place the baking sheet in the preheated oven and bake for 10-12 minutes, or until the edges are set but the centers may still appear soft. They will firm up as they cool, so be cautious not to overbake.
-
Cool the cookies: Once out of the oven, let them sit on the baking sheet for 5 minutes; this allows for some additional cooking from the residual heat. Then transfer them to a wire rack to cool completely.
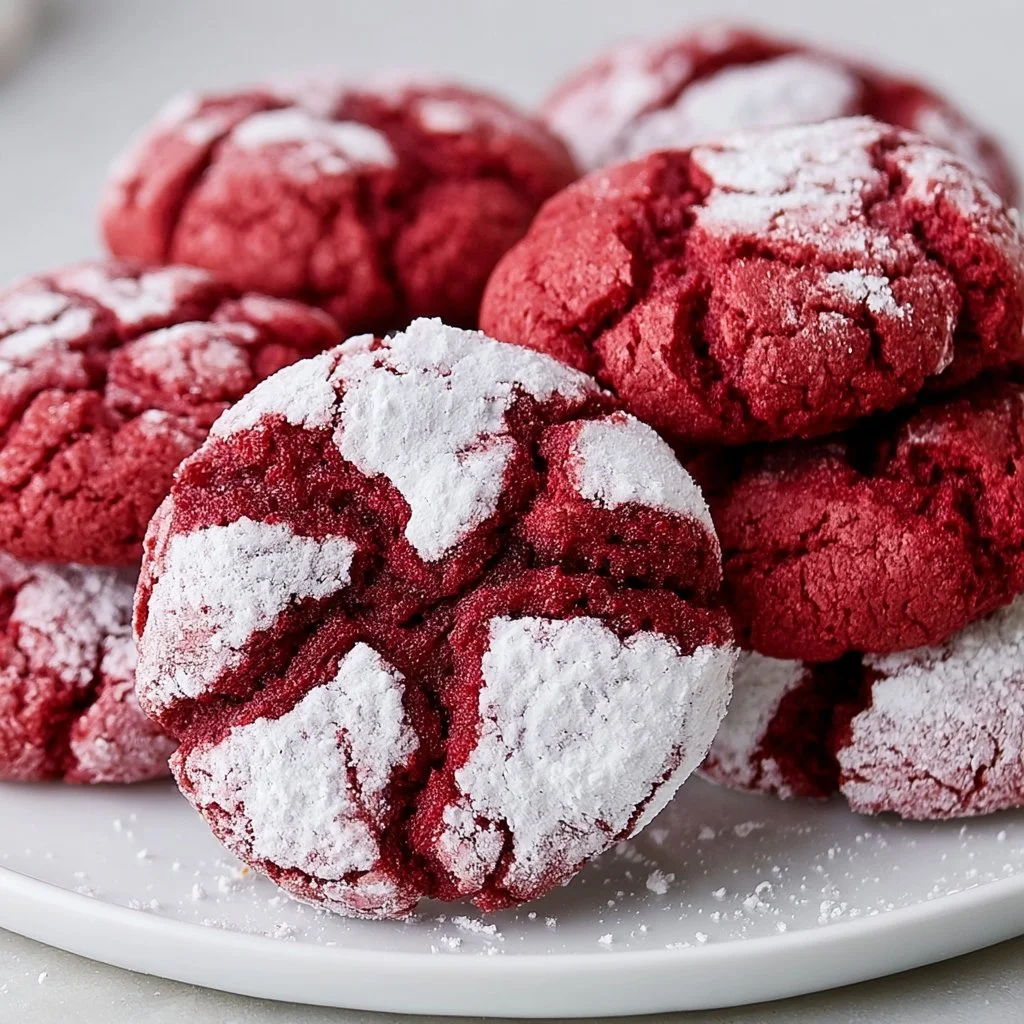
Understanding the Flavor and Texture
Red velvet cookies are celebrated not just for their stunning color but for their nuanced combinations of flavor and texture. The underlying cocoa powder contributes a light chocolate flavor, complemented by the sweetness of both sugars, balanced against the slight tang from buttermilk. The creaminess from the butter enhances the overall indulgence while the eggs add a rich and moist quality to the cookie, ensuring they remain soft and chewy.
When perfectly baked, red velvet cookies should have a beautiful contrast where the edges are slightly crisp while the centers remain delightfully chewy. You might find a subtle crust on the outside that gives way to a tender interior, reminiscent of a freshly baked red velvet cake slice. The red food coloring not only provides a visual impact but also emphasizes the theme of the dessert, making it instantly recognizable.
Additionally, if you opt to enhance your red velvet cookies with white chocolate chips or even a cream cheese frosting drizzle, you add layers of sweetness and creamy texture that elevate the cookie experience. These garnishes contribute to a well-rounded flavor profile, ensuring that each bite is an exploration of taste and texture.
Pro Tips
Baking red velvet cookies can be a rewarding process, and several techniques can elevate your results. Consider the following expert tips to ensure your cookies are perfect every time.
| Tip | Description |
|---|---|
| Measure Ingredients Accurately | Utilizing a kitchen scale or precise measuring cups can result in consistent cookie quality. Incorrect measurements may lead to dry or overly dense cookies. |
| Chill the Dough | Chilling cookie dough for about 30 minutes can enhance the flavors and prevent spreading while baking. This is especially effective in warmer climates. |
| Use Quality Ingredients | Investing in high-quality cocoa powder, food coloring, and butter can dramatically affect the taste and appearance of your cookies. |
| Don’t Skip the Cooling | Let the cookies cool completely on a wire rack for the best texture. This prevents sogginess and ensures they hold their shape and structure. |
For an optimal baking experience, consider the originality of your ingredients. For instance, opting for pure vanillas and unsweetened cocoa powder allows the essential flavors of the red velvet cookie to shine. Additionally, if you prefer an even richer cookie, you could choose to fold in some crushed nuts or mini chocolate chips into the dough. Both options offer delightful contrasts to the smooth texture of the cookie base.
Why You’ll Love This Recipe
What makes this recipe truly delightful is not just its remarkable appearance but the uncomplicated process behind it. Even novice bakers can successfully recreate these decadent cookies, making them a fantastic choice for kitchen beginners eager to impress family and friends. The straightforward ingredients and procedures come together to create an indulgent treat that can be whipped up in less than an hour.
The vibrant colors and rich flavors make these cookies suitable for a range of occasions. They are fantastic for holiday gatherings, elegant dinners, or casual snacks; you can dress them up with frosting or keep them simple for everyday enjoyment. Additionally, the cookies are easy to store and maintain their lovely soft and chewy texture over time, so you can make them ahead of events or simply keep them for late-night cravings.
The versatility doesn’t end there; pairing red velvet cookies with a side of cream cheese frosting or a scoop of ice cream opens avenues for delightful serving options. Moreover, these cookies can even be transformed into an extravagant dessert by combining them with layers of cake or various fillings.
How to Serve Red Velvet Cookies
Once your red velvet cookies have been baked and are cooling, it’s time to think about serving them. Presenting them attractively enhances the appeal of this already stunning dessert. For casual settings, simply stack them on a decorative plate. If you want to get creative for holiday occasions, consider arranging them in a festive cookie jar or on a dessert platter, optionally garnished with fresh mint leaves or sprinkles to add color.
These cookies pair wonderfully with traditional accompaniments. A glass of cold milk is a classic pairing that cuts through the sweetness and brings out the subtle chocolate notes. For something a bit more indulgent, consider pairing red velvet cookies with a scoop of vanilla bean ice cream or a dollop of whipped cream. It adds an element of flair to the dessert and enhances the experience.
For special occasions, drizzling each cookie with a little bit of cream cheese frosting before serving can elevate both appearance and taste. You can simply glaze them or pipe intricate designs to impress guests at a gathering. If you’re feeling adventurous, try teaming these cookies with fruit—particularly strawberries or raspberries—as the tartness balances well with the rich sweetness of the cookie.
How to Store Red Velvet Cookies
Storing red velvet cookies properly is essential to preserving their freshness and chewy texture. Start by allowing the cookies to cool completely at room temperature after baking. Once cooled, transfer them to an airtight container to lock in moisture and flavor.
For short-term storage, red velvet cookies can last at room temperature for about 4-5 days if kept in an airtight container. Ensure that they are layered with parchment paper to prevent them from sticking together. If you need to store them for a longer period, consider placing the cookies in the refrigerator, where they can stay fresh for about a week.
Alternatively, red velvet cookies can be frozen. To freeze, arrange them in a single layer on a baking sheet to avoid them sticking together, then freeze until solid. Once firm, move them to a freezer-safe bag or container and seal tightly. Baked cookies can last in the freezer for up to three months. When you’re ready to enjoy them, thaw cookies at room temperature or heat them gently in a microwave for a few seconds to regain their chewy texture.
Tips to Make Red Velvet Cookies
To ensure that your red velvet cookies turn out perfectly every time, there are several tips worth considering. First, pay close attention to the mixing process. Beat your butter and sugars until they reach a light and fluffy texture, as this will incorporate air into the dough, allowing for a rise during baking.
Second, be mindful of the baking time. Every oven is different, so while the recommended baking time is a guideline, keeping a close eye on the cookies will help avoid over-baking. They should look slightly soft and underdone when removed from the oven, but they will firm up as they cool.
Third, don’t hesitate to customize the flavor profile. Consider adding spices such as cinnamon or nutmeg for warmth, or experiment with different kinds of chocolate chips or nuts to diversify the taste and texture of the cookies.
Finally, if you are baking a larger quantity, remember to bake in batches. This helps maintain consistent heat in the oven and ensures that each batch bakes evenly.
Variations and Substitutions
While the classic red velvet cookie recipe is delightful as is, there are several variations and substitutions you can try, depending on dietary needs or personal preferences. For a gluten-free version, replacing all-purpose flour with a gluten-free blend can allow those with gluten sensitivities to enjoy red velvet cookies while maintaining a similar texture.
If you’re looking for a dairy-free alternative, consider using plant-based butter and almond or coconut milk in place of buttermilk. Be mindful that this may slightly alter the flavor profile, but it can still provide a rich result without compromising the essence of the cookie.
For a more indulgent treat, you might consider incorporating chocolate chunks instead of chips for a richer chocolate experience. Additionally, if you enjoy a nutty flavor, adding chopped pecans or walnuts works well and can provide a pleasant crunch.
Lastly, experimenting with different types of food coloring can lead to some fun variations. You can use a more natural coloring source, like beet juice, to achieve the red hue without artificial additives, but keep in mind that it may influence the flavor slightly.
Storage and Reheating
If you have leftover cookies, proper storage techniques are crucial for maintaining their quality. After cooling, ensure the cookies are stored in an airtight container and kept at room temperature for a limited time of 4-5 days, or in the refrigerator for up to a week.
When it comes to reheating, a few methods can be used depending on preference and urgency. In a microwave, heat the cookies for a brief 10-15 seconds to warm them up while retaining their soft texture. Be careful not to overdo it, as longer heating times may result in dryness.
If you prefer a crisp, fresh-out-of-the-oven feel, you can reheat them in an oven at 350°F (175°C) for about 5 minutes. This method helps revive the cookies’ original texture, particularly their crisp edges and chewy center.
Make sure to allow your cookies to cool slightly before eating to avoid burns. It’s all about enhancing the experience of enjoying these delicious treats!
Customization Ideas
Customizing your red velvet cookies can amplify their appeal and offer something for everyone. One classic option is adding a cream cheese frosting, which can be spread on top of cooled cookies, giving them an added richness that complements the flavors beautifully. You might also consider rolling your dough in some powdered sugar before baking to create a stunning crinkle effect along with added sweetness.
If you want to try a flavor variation, adding spices can be transformative. A sprinkle of cinnamon or even cardamom can introduce new aromatic notes, marrying well with the rich cocoa. You could also incorporate a splash of espresso powder in the dough; coffee enhances the chocolate flavor remarkably.
Toppings can also be an excellent way to customize. For a festive flair, consider toasting coconut and sprinkling it on top of the cookies or adding edible glitter before serving. These visual elements provide an incredibly aesthetic treat that is perfect for parties, formal events, or just for fun.
Common Mistakes to Avoid
Baking cookies may seem straightforward, but a few common pitfalls can lead to disastrous results. Here are five common mistakes to avoid:
-
Skipping Ingredient Temperatures: Using cold butter or eggs can prevent proper incorporation. Always ensure your butter is soft and eggs are at room temperature for better mixing.
-
Overmixing the Dough: While combining the ingredients, excessive mixing can lead to tough cookies. Mix just until combined; the dough should be slightly lumpy.
-
Ignoring Baking Times: Cookies might look underbaked, but they continue to set as they cool. Remove them from the oven once the edges are firm, ensuring a chewy center.
-
Inaccurate Measurements: Baking requires precise measurements. Using too much flour or sugar can throw off the balance and alter texture and flavor, so employ meticulous measuring techniques.
-
Not Cooling Properly: Placing hot cookies directly into an airtight container can lead to moisture buildup and a soggy texture. Always cool them completely before storage to maintain optimal quality.
Serving Occasions
Red velvet cookies are incredibly versatile, making them suitable for a wide variety of occasions. Their vibrant hue and charming flavor make them a go-to for holidays like Valentine’s Day, where they can symbolize affection and love. They are also an excellent addition to birthday parties, where they serve as colorful and festive treats that appeal to guests of all ages.
The cookies can easily transition into a casual afternoon snack or a sophisticated dessert option for family dinners. Their charming look makes them suitable for potlucks or bake sales, where they can attract attention on any dessert table.
Additionally, they fit perfectly as a holiday treat option, which pairs well with seasonal beverages like hot cocoa or spiced tea. Red velvet cookies can transition from a traditional dessert to an everyday sweet treat, assuring their place in a year-round cookie rotation.
Why Make This Recipe?
What makes red velvet cookies deserving of a cherished spot in your baking repertoire is their unique and delightful flavor profile. With the combination of distinctly red color and soft, chewy texture, they resonate well with both the young and the young at heart. The simplicity of its preparation, coupled with the flexibility for customization, makes it an attractive option for both novice and experienced bakers looking to create something special.
These cookies bring a combination of nostalgia and festivity that adds a celebratory aspect to any gathering, providing an experience that goes beyond merely satisfying a sweet tooth. The rich taste, captivating appearance, and ease of preparation contribute to their relevance as an enduring favorite in dessert collections.
With this recipe in hand, preparing a batch for gatherings, celebrations, or simply to indulge in during quiet moments becomes a rewarding experience. You’ll find that these cookies are not only irresistible in taste but also represent the heartfelt joy of sharing homemade treats with loved ones.
Make-Ahead Preparation
For those keen on culinary planning, red velvet cookies lend themselves well to make-ahead preparations. One method is to prepare the dough in advance. Once mixed, you can chill the dough for up to 24 hours before baking. This not only enhances the flavor but allows for flexibility when it comes to timing and reduces last-minute stress.
Alternatively, consider freezing the cookie dough in portioned mounds. This way, you can instantly bake just the number of cookies you desire. To bake, simply transfer the frozen dough to a baking sheet and add a couple of extra minutes to the baking time.
Another option is to bake a batch fully and then freeze the baked cookies. Once cooled, you can freeze them in an airtight container separated by parchment paper to avoid sticking. When you’re ready to enjoy them, unnecessary thawing is not necessary—just heat them up slightly for a warm, fresh taste.
Equipment and Kitchen Preparation
Before you start making your red velvet cookies, having the right equipment will ensure a smooth baking process. Essential items include mixing bowls for wet and dry ingredients, a whisk or mixer for creaming the butter and sugars, a baking sheet lined with parchment paper, and a cookie scoop for evenly portioning the dough.
Using a stand mixer can save time and effort, particularly when beating butter and sugar, as it incorporates air into the mixture effectively. If you choose to use a hand mixer instead, be prepared for a bit of manual labor as mixing may take a bit longer.
In preparing your kitchen, ensure that your work surfaces are clean and that your ingredients are laid out conveniently. Having your butter softened beforehand and your eggs at room temperature will facilitate the mixing process and deliver superior results. Consider pre-measuring your dry ingredients to streamline the recipe execution, thus keeping everything organized and efficient.
FAQs
-
Can I make red velvet cookies without food coloring?
Yes, you can make red velvet cookies without food coloring. The flavor will still come through, but they will lack the distinctive red appearance. Consider using natural color sources like beet juice if you prefer a hue without artificial color. -
How do I know when the cookies are done baking?
Cookies are typically done baking when the edges are set, and the centers appear slightly undercooked, as they’ll continue to firm up while cooling. Look for a very slight gloss on the surface of the cookies. -
What can I add to the dough for extra flavor?
You can add chopped walnuts or pecans for a crunchy texture, chocolate chips for added sweetness, or even seasonal spices like nutmeg or cinnamon to enhance the flavor of your red velvet cookies. -
Do these cookies need to be refrigerated?
While they can be stored at room temperature in an airtight container for about 4-5 days, refrigerating them can prolong freshness for a week. Be sure they’re in an airtight container to maintain texture. -
Can I make these cookies gluten-free?
Absolutely! You can use a gluten-free all-purpose flour blend, which should work well in the recipe. Make sure your baking soda and cocoa powder are also gluten-free to avoid cross-contamination. -
How long do the cookies take to cool before serving?
Allow your cookies to cool on the baking sheet for about 5 minutes, and then transfer them to a wire rack to cool completely. Cooling them properly ensures the correct texture and prevents sogginess. -
Can I freeze the cookie dough?
Yes, you can freeze the cookie dough! Portion it out, wrap it tightly in cling wrap or place it in an airtight container, and store it in the freezer for up to three months. When ready, bake them directly from frozen or thaw overnight in the fridge. -
What can I do with leftover cookies?
Leftover cookies can be stored for a few days in an airtight container or frozen for long-term storage. You can chop them up and sprinkle them over ice cream or blend them into a shake for additional flavor and texture.
Disclaimer
Nutritional information is approximate and may vary based on ingredient brands, substitutions, portion sizes, and preparation methods.