
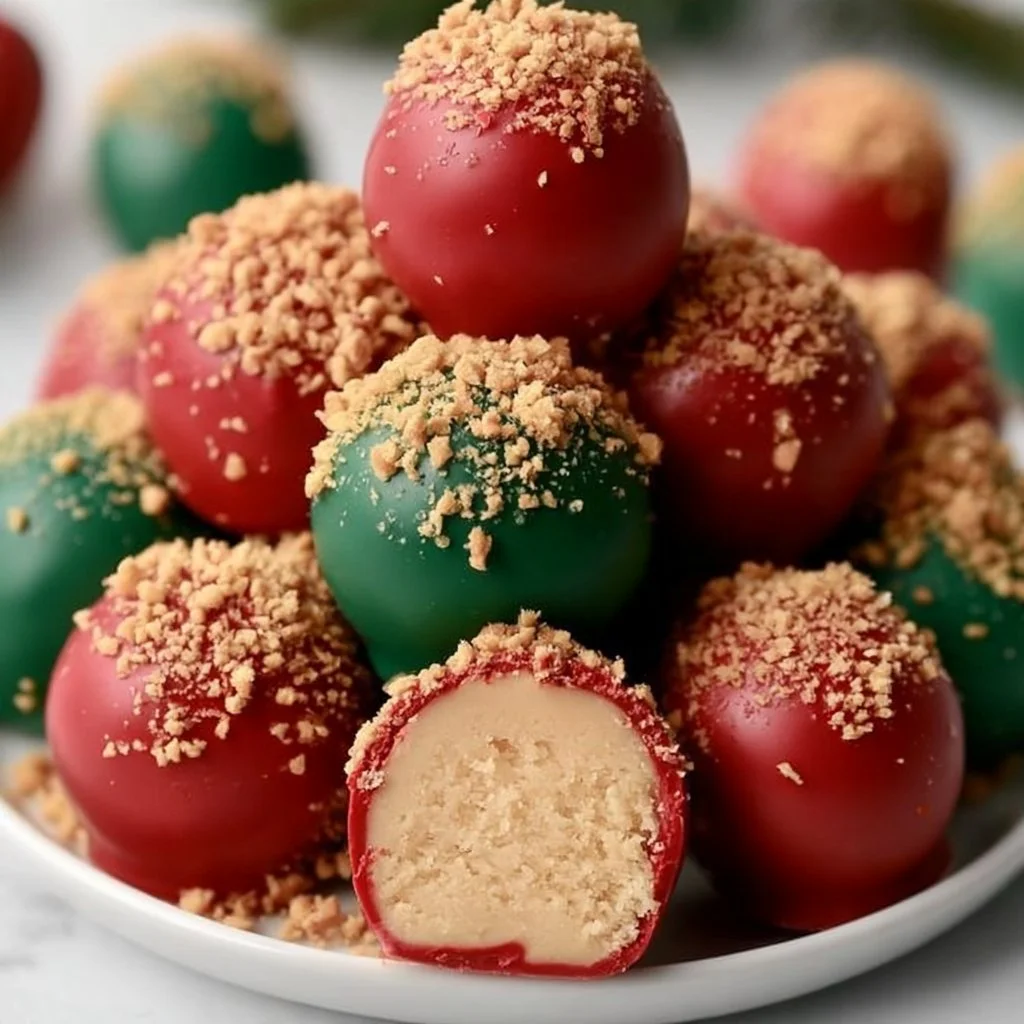
Festive Butterfinger Balls
The holiday season is a time for gathering with family and friends, and what better way to celebrate than with delightful treats that put everyone in a festive mood? Festive Butterfinger Balls are the perfect combination of sweet, crunchy, and creamy, bringing together the beloved flavors of Butterfinger candy bars and the classic taste of peanut butter. These no-bake delights are not just delicious; they are a visual treat, adorned in bright red and green chocolate coatings that instantly catch the eye.
Imagine biting into one of these balls and experiencing a satisfying crunch followed by a smooth, rich flavor that’s reminiscent of your childhood favorite candy. The crunch comes from the crushed Butterfinger bars, providing a unique texture that pairs beautifully with the creamy, nutty essence of peanut butter. Dipped in vibrant melted chocolate, they have an attractive appearance that makes them an appealing addition to any holiday dessert table.
Festive Butterfinger Balls are incredibly versatile; they’re perfect for holiday parties, casual gatherings, or even just as a sweet snack to enjoy while watching your favorite holiday movies. They also make fantastic gifts; just package them in a decorative box or container, and you have a thoughtful present that friends and family are sure to appreciate. With minimal ingredients and quick preparation, these balls are an ideal way to indulge your sweet tooth without spending too much time in the kitchen.
What Makes This Recipe Special
One of the standout features of Festive Butterfinger Balls is their irresistibly unique flavor combination. The sweet, crunchy notes of Butterfinger candy bars create a nostalgic experience that many will recognize and love. When combined with creamy peanut butter, the flavors meld together to create a perfect blend that satisfies both crunchy and smooth texture cravings. The decision to coat these treats in bright red and green chocolate is not just for aesthetics; it adds an additional layer of sweetness and enhances the overall flavor profile while adding a festive touch.
Unlike traditional truffles or chocolate-covered treats, these balls do not require baking, making them a quick and easy option for those who might feel rushed during the holiday season. The process allows for innovation in flavor and shape, letting cooks experiment with different chocolate coatings or add-ins. For example, if you’re a fan of coconut, a sprinkle of toasted coconut on top could enhance the look and taste of these balls.
What really makes this recipe shine is its simplicity and its capacity for customization. Each batch can be adapted to suit different tastes or dietary preferences without compromising the foundational flavors. Whether you decide to modify the chocolate coating or even the base, you can make this recipe your own while keeping it just as festive and delectable.
Ingredient Overview and Helpful Notes
At the heart of Festive Butterfinger Balls are just a few simple ingredients: crushed Butterfinger candy bars, peanut butter, powdered sugar, and chocolate melts. Each one plays a vital role in creating the delicious flavor and texture of this treat.
Butterfinger Candy Bars: These are the star ingredient, providing a unique combination of peanut butter and chocolate flavor, as well as a delightful crunch. When crushed, they form the base and give the bites their signature texture. It’s essential to use fresh Butterfinger bars for the best taste.
Peanut Butter: This ingredient lends a creamy texture and a rich flavor, effectively binding the crushed candy bars and powdered sugar. Look for a natural peanut butter that does not contain added sugars or unnecessary additives, as this will maintain the treat’s overall flavor and texture.
Powdered Sugar: Also known as confectioners’ sugar, this ingredient adds sweetness and helps to achieve the right consistency when mixed with peanut butter and crushed candy. It’s important to measure this correctly because too much sugar may make the mixture overly sweet, while too little could make it too crumbly.
Chocolate Melts: The chocolate melts bring a lovely sweetness and a colorful coating to the Butterfinger balls. They can be found in various colors to fit the holiday theme. The key is to melt them carefully, either in a microwave or a double boiler, to ensure a smooth texture for dipping.
When preparing these ingredients, ensure that you crush the Butterfinger bars into fine pieces—this will help the mixture stick together when rolled into balls. It’s also vital to have your peanut butter at room temperature so it can blend easily with the other ingredients.
Nutrition & Recipe Details
Nutritional information may vary significantly based on the specific brands of ingredients used, serving sizes, and preparation methods. Below is a general estimate to give you an idea of what to expect per serving.
| Item | Value |
|---|---|
| Prep time | 15 minutes |
| Cook time | 0 minutes |
| Store time | 1 week |
| Calories | 120 calories (per ball) |
| Protein | 3 grams |
| Carbohydrates | 18 grams |
| Fat | 5 grams |
How to Make Festive Butterfinger Balls
Creating these delightful treats is straightforward and requires minimal equipment. You’ll need a mixing bowl, a cookie sheet lined with wax paper, and a microwave-safe bowl or a double boiler for melting chocolate. Before cooking, gather all your ingredients so that you can streamline the process.
Ingredients
| Ingredient | Quantity |
|---|---|
| Crushed Butterfinger candy bars | 1 ½ cups |
| Peanut butter | 1 cup |
| Powdered sugar | 2 cups |
| Red chocolate melts | 1 cup |
| Green chocolate melts | 1 cup |
Before beginning, take some time to crush the Butterfinger candy bars into small chunks. This can be done easily by placing them in a plastic bag and smashing them with a rolling pin or the bottom of a sturdy glass. Make sure to measure your ingredients carefully, especially the crushed candy bars, as this will affect the texture of your mixture.
Step-by-Step Instructions
-
Combine Ingredients: In a large mixing bowl, combine the crushed Butterfinger candy bars, peanut butter, and powdered sugar. Using a spatula, mix these ingredients until they form a dough-like consistency. You should see no dry powdered sugar remaining, and the mixture should hold together when squeezed.
-
Shape the Mixture: Once the mixture is well combined, use your hands to roll the dough into small balls about 1 inch in diameter. This step should be done quickly before the mixture becomes too sticky. Place the formed balls onto the prepared cookie sheet lined with wax paper.
-
Chill the Balls: Once all the mixture has been rolled into balls, place the cookie sheet in the refrigerator for approximately 20 minutes. This will help them firm up, allowing for easier dipping later on.
-
Melt the Chocolate: While the butterfinger balls chill, prepare to melt the chocolate. In a microwave-safe bowl or a double boiler over simmering water, melt the red chocolate melts and green chocolate melts in separate bowls. Stir until smooth and fully melted. Make sure not to overheat as this could cause the chocolate to seize up.
-
Dip the Balls: Using a fork or toothpick, dip half of the chilled balls into the melted red chocolate, ensuring they are completely covered. Allow the excess chocolate to drip off before placing them back onto the wax paper. Repeat the process with the green chocolate melts on the other half of the balls.
-
Let Set: Allow the chocolate to set at room temperature or in the refrigerator until it hardens completely. This usually takes about 15-30 minutes, depending on the thickness of the coating.
-
Serve and Enjoy: Once the chocolate coating has set solidly, your festive Butterfinger balls are ready to be served. They can be displayed on a platter or packaged as delightful treats.
Combine crushed Butterfingers, peanut butter, and powdered sugar in a bowl. Roll into small balls and refrigerate for 20 minutes. Melt the red chocolate and green chocolate melts separately. Dip half the balls into red chocolate and the other half into green. Let them set on wax paper. Serve these festive Butterfinger balls for a holiday treat!
Understanding the Flavor and Texture
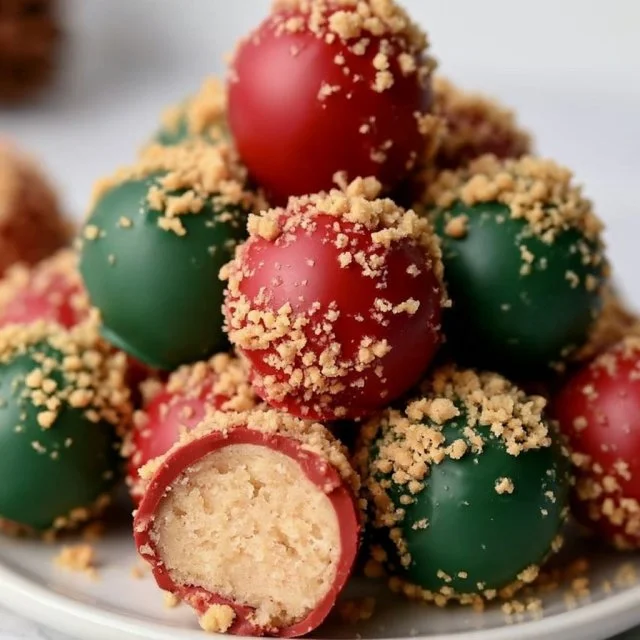
The flavor of Festive Butterfinger Balls is a harmonious blend of sweetness, creaminess, and crunch. The bright, sweet chocolate coating enhances the overall experience, along with the contrasting textures found within. This sweet treat is rich enough to satisfy any sweet tooth, yet not overwhelmingly so, allowing you to indulge without feeling overstuffed.
When you first bite into a Butterfinger ball, the initial crunch from the crushed candy bars gives way to the creamy richness of the peanut butter. These contrasting textures create a delightful eating experience that is both satisfying and fun. The novelty of the chocolate coating adds an appealing visual element, while the flavor balances the sweetness of the Butterfinger with the nutty taste of peanut butter.
The combination of chocolate melts used in the recipe allows you to control the sweetness. If you prefer a less sugary flavor, consider opting for dark chocolate which will provide a more complex flavor profile. However, the traditional red and green colors of the chocolate are iconic during the holiday season, making them look particularly festive and inviting.
Pro Tips
A few small techniques can significantly enhance the outcome of your festive Butterfinger balls.
| Tip | Description |
|---|---|
| Chill for Easy Handling | Refrigerate the mixture before rolling it into balls. This makes handling easier and prevents the dough from becoming too sticky during shaping. |
| Use Quality Chocolate Melts | Invest in high-quality chocolate melts for coating. This will ensure a smooth finish that sets nicely and enhances the overall flavor. |
| Experiment with Coatings | Try different chocolate flavors or even sprinkle crushed nuts or sprinkles on top for added texture and flair. This keeps the recipe fresh and exciting. |
| Avoid Overheating Chocolate | When melting chocolate, avoid overheating as it can seize. Melt it slowly and stir continuously to achieve a silky texture. |
To further enhance your Butterfinger balls, consider making an adjustments to the chocolate coating based on seasonal themes or personal preferences. This can include using festive sprinkles or drizzles to add a colorful touch, making them even more visually appealing.
Why You’ll Love This Recipe
This recipe is a delightful option for anyone looking to impress friends and family without spending hours in the kitchen. The relatively simple preparation allows for plenty of time to enjoy with loved ones while creating these sweet treats. With readily available ingredients, anyone can enjoy making and indulging in these festive bites, whether at a holiday gathering or simply for a movie night.
The crunchy, creamy texture paired with the sweetness from the chocolate makes these treats appealing to both adults and children alike. They can even serve as a fun activity for kids who want to help decorate their balls with different colored chocolate or toppings. Plus, since they require no baking, they are perfect for novice bakers or those short on time.
Serving these festive Butterfinger Balls at gatherings adds an element of fun as they don’t just taste great, but also look visually appealing. The vibrant colors and shapes can brighten up any dessert table, making it perfect for holiday celebrations, birthday parties, or any occasion that calls for something sweet.
How to Serve Festive Butterfinger Balls
Presentation is key when it comes to serving Festive Butterfinger Balls. Consider placing them on a decorative platter surrounded by festive decorations such as sprigs of holly or colorful confetti. Using cupcake liners can also elevate their presentation, giving each ball an individual touch and making them easy to grab for guests.
As for portioning, you might want to offer these treats as a self-serve dessert at parties, allowing guests to choose how many they’d like. This way, everyone can indulge without feeling obligated to take a full serving. It’s also a good idea to provide small tasting paper cups for those wishing to sample before committing to a larger portion.
There are plenty of drink options that pair well with these sweet treats. Consider offering milk or a fun holiday-themed hot chocolate alongside them. Alternatively, cold beverages like apple cider or even festive cocktails can complement the sweet flavor quite well.
When you serve these treats, consider the atmosphere and context of your gathering. If it’s a formal setting, you may want to present them on elegant trays with additional holiday-themed desserts, whereas for a casual party, a simple bowl filled with Butterfinger Balls may suffice.
How to Store Festive Butterfinger Balls
Storing Festive Butterfinger Balls properly ensures they maintain their flavor and texture. Once the chocolate coating has set, you can store them in an airtight container, either in the refrigerator or at room temperature, depending on your preference.
If you opt for refrigeration, place the butterfinger balls in a single layer in the container, with parchment paper between layers if stacking is necessary. This prevents them from sticking together. When stored properly in the fridge, they can last for about a week.
For longer storage, consider freezing the balls. You can freeze them in an airtight container lined with parchment paper for up to three months. By doing this, you can pull them out whenever you need a quick sweet treat or need to impress unexpected guests. Just ensure to thaw them in the refrigerator, which will preserve their texture and flavor.
Keep in mind that over time, chocolate may start to lose its sheen or develop a white coating due to fat bloom; while this may affect appearance, it does not impact the treat’s taste.
Tips to Make Festive Butterfinger Balls
To ensure the best outcome when making these treats, focus on consistency and timing. Sticking strictly to the outlined proportions of ingredients leads to the best outcome. Pay close attention to how the mixture feels and looks as you combine the ingredients; it should be moist enough to hold together without being sticky.
Another important detail is to monitor the texture of the chocolate. A smooth chocolate coating will enhance the overall appeal of your Butterfinger balls. On top of that, be sure to check the chocolate’s viscosity before dipping; it should be thin enough for easy coating without running off completely.
Lastly, don’t rush the refrigeration step. Allowing the balls to set properly before dipping not only aids in shaping but also ensures a smooth chocolate coating. If the center is too soft, the chocolate may not adhere as well or may even collapse during dipping.
Variations and Substitutions
While the original recipe for Festive Butterfinger Balls is delightful as is, there are numerous substitutions and variations you can explore to cater to different tastes. For instance, for those who prefer a richer chocolate flavor, you may substitute the red and green melts for dark chocolate or milk chocolate, providing a new layer of flavor complexity.
You can also make a delightful lower-carb version by using sugar-free chocolate melts and sugar substitutes for the powdered sugar. Coconut flour may be used instead of powdered sugar for a bit of natural sweetness with lower carbohydrate content, though this will slightly alter the texture.
Should you wish to add a bit of spice, consider incorporating cinnamon or nutmeg into the chocolate coating, or even integrating a few crushed pretzels into the peanut butter mixture for a salty-sweet contrast.
For a more holiday-themed approach, rolling the balls in crushed candy cane or sprinkling them with holiday-themed sprinkles adds festive flair. This not only makes them visually appealing, but it can provide an extra taste dimension that complements the existing flavors.
Storage and Reheating
If you have leftovers from the festive gathering, storing them is crucial to keep them fresh. Allow the Butterfinger balls to cool completely before placing them in an airtight container, which prevents moisture and air from affecting their quality. Always store them in a cool, dry place to maintain their texture, ideally in the refrigerator if you’re in a warm climate.
For those looking to reheat, know that these treats are best enjoyed at room temperature. Allow them to sit out for about 10-15 minutes before serving, which enhances the flavors and makes the chocolate outer layer slightly softer.
If you freeze the balls, you can effectively reheat them by placing them in the fridge overnight. This method prevents the chocolate from melting or becoming too messy when eaten. They should never be reheated in a microwave, as this can lead to uneven temperature distribution and possible texture changes in the chocolate coating.
Customization Ideas
Customization can transform your Festive Butterfinger Balls into a signature treat that reflects your taste. For example, adding a tablespoon of vanilla extract or almond extract into the peanut butter mixture can elevate the flavor profile significantly. Don’t be afraid to experiment; these extracts will blend nicely without overpowering the fundamental profile.
You might also think about adding additional ingredients like toasted oats for a nuttier texture, or even mini chocolate chips for a chocolate overload, which can play well with the candy bar base. These variations can cater to a larger crowd and provide different textures and flavors that enhance the experience.
The coating can also be customized to fit personal aesthetics. Besides the traditional red and green chocolate melts, consider using colored candy melts to match different holidays or celebrations. Presenting them at various festivities can bring a unique twist to your gatherings!
Common Mistakes to Avoid
A few common mistakes can impact the deliciousness of your festive Butterfinger balls:
-
Inconsistent Mixing: If the mixture is not combined thoroughly, some balls may not hold their shape, leading to crumbling. Ensure all ingredients are evenly mixed until a dough-like texture is achieved.
-
Overheating Chocolate: Melting chocolate too quickly can cause it to seize. Use low heat and stir consistently to achieve a smooth melted chocolate consistency.
-
Not Chilling the Mixture: Skipping the refrigeration step can lead to sticky, difficult-to-handle balls. Always allow the mixture to firm up in the fridge before shaping.
-
Skipping Quality Control: Using subpar chocolate or outdated Butterfingers can compromise flavor. Always choose fresh ingredients for the best results.
-
Not Measuring Accurately: Baking is a science. Measuring ingredients inaccurately will alter the final product. Be precise with your measurements for perfect texture and flavor.
Establishing consistency in techniques can vastly improve the outcome of your Butterfinger balls, ensuring they are a hit with everyone at your gathering.
Serving Occasions
Festive Butterfinger Balls shine in a variety of settings and occasions. Their simple preparation and delightful visual appeal make them ideal for casual gatherings, holiday parties, and family celebrations alike. If you find yourself hosting a potluck, they can be an enticing addition to the dessert table, pleasing both kids and adults.
These delightful bites also work wonderfully as gifts during the holiday season when packaged thoughtfully in decorative boxes or tins. Moreover, they can serve as a fun dessert option for movie nights or cozy evenings around the fireplace, bringing a sense of nostalgia and comfort.
On a more personal level, they can serve as an enjoyable activity to include children in the kitchen, allowing everyone to roll the balls and choose their preferred chocolate coating. Whatever the occasion, these Butterfinger balls will make any moment a bit sweeter.
Why Make This Recipe?
This recipe stands out in the world of festive treats for many reasons. First, its unique combination of flavors and textures brings together beloved childhood memories of Butterfinger bars while also introducing a festive, modern twist. The ease of preparation—requiring no baking—adds to its attractiveness for anyone looking to create delightful confections quickly.
With simple, readily available ingredients, Festive Butterfinger Balls are approachable for both novice cooks and seasoned bakers. Their customizable nature allows you to adapt and experiment, making them easily achievable which inspires creativity in the kitchen.
Incorporating these festive balls into your regular dessert rotation can provide versatility; you can easily switch up the coatings and ingredients throughout the year. Their popularity makes them a timeless treat that transcends seasonal limitations, so it’s worth keeping this recipe handy for future gatherings.
Make-Ahead Preparation
When preparing Festive Butterfinger Balls, certain steps can be made ahead of time for smoother execution, especially during busy holiday seasons. The mixture itself can be made and rolled into balls a day or two in advance, allowing them to chill as needed. Simply store them in an airtight container in the refrigerator until you are ready to coat them.
Another excellent make-ahead tip is preparing the chocolate melts in advance. You can melt them and store them in sealable containers. When ready to use, simply reheat slowly on gentle heat, stirring constantly until smooth again, ensuring minimal time is spent during the gathering itself.
Monitoring how the texture of chocolate may change over time is essential; the chocolate can thicken as it cools. Having everything prepared in advance ensures that assembling the treats will be a quick, enjoyable process without the stress of last-minute preparations.
Equipment and Kitchen Preparation
To make Festive Butterfinger Balls, having the right kitchen tools on hand simplifies the process. A large mixing bowl is essential for combining the ingredients, and a sturdy spatula will help mix everything together effectively.
A cookie sheet lined with wax paper is crucial for placing the chocolate-coated balls after dipping, ensuring the chocolate doesn’t stick. For melting chocolate, using a microwave-safe bowl or a double boiler setup is recommended, as this guarantees gentle heating, avoiding burnout or burning.
Setting up your workspace ahead of time will allow for a more efficient cooking process. Measuring cups, spoons, and clear containers will keep your ingredients neat and organized, making your workspace as functional as possible to achieve the best results.
FAQs
1. Can I use other types of chocolate?
Absolutely! You can use white, dark, or even milk chocolate melts for a different flavor profile. Customizing the chocolate will change the overall sweetness and taste.
2. How do I store the leftovers?
Once the Butterfinger balls have set, they can be stored in an airtight container in the fridge for about a week or in the freezer for up to three months.
3. Can I make these gluten-free?
Yes! Butterfinger bars are typically gluten-free, however, it’s always best to check the labels. Additionally, ensure that any chocolate melts you use are certified gluten-free.
4. What else can I add to the mixture?
You can add crushed pretzels for a salty contrast or incorporate various nuts depending on your preference for added texture.
5. Are these suitable for a vegan diet?
To make this recipe vegan-friendly, use vegan chocolate melts and a plant-based alternative to peanut butter (look for options that are dairy-free).
6. Why did my chocolate coating not set properly?
This can occur if the chocolate was overheated or if condensation formed on the cooled balls before dipping; ensure they are dry and cool before dipping them.
7. Can the balls be rolled in alternative coatings?
Sure! You can roll them in crushed nuts, coconut, or sprinkles as a fun variation.
8. How long can I leave the Butterfinger balls out at room temperature?
They can safely be left out for a few hours, but it’s best to keep them refrigerated during prolonged periods to prevent melting and maintain the coating’s integrity.
Disclaimer
Nutritional information is approximate and may vary based on ingredient brands, substitutions, portion sizes, and preparation methods.