
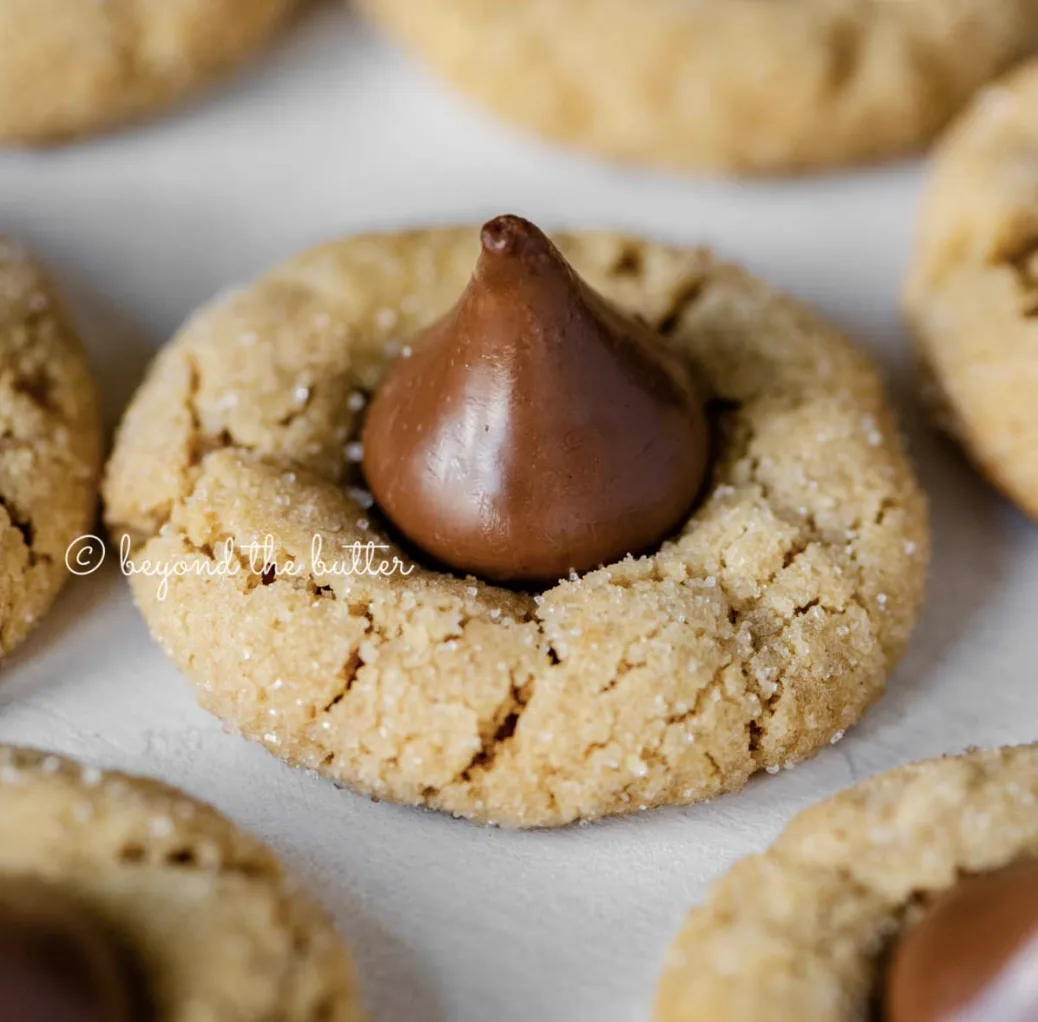
Classic Peanut Butter Blossoms are a timeless homemade cookie that combines the rich, nutty flavor of peanut butter with a soft, chewy texture and a delicious milk chocolate center. Rolled in granulated sugar before baking, these cookies develop a lightly crackled exterior that contrasts beautifully with the smooth chocolate kiss pressed into the center of each cookie.
These cookies are especially popular during the holiday season, when their simple appearance and familiar flavors make them a favorite for Christmas cookie trays, family gatherings, and homemade gifts. However, you do not have to wait for a special occasion to enjoy them. Their easy preparation and classic combination of peanut butter and chocolate make them a wonderful treat throughout the year.
One of the best things about Peanut Butter Blossoms is how little decorating they require. The chocolate kiss provides a beautiful finishing touch without frosting, icing, or complicated techniques. The sugar coating adds a delicate crunch, while the cookie itself remains soft and tender.
This recipe is adapted from the details provided by Beyond the Butter. It makes approximately 48 cookies, with a preparation time of 20 minutes, a chilling time of at least 1 hour, and a baking time of about 10 minutes per batch. The total time is approximately 1 hour and 30 minutes.
Why You’ll Love These Classic Peanut Butter Blossoms
There are many reasons these cookies have remained a favorite for generations. Their familiar ingredients, straightforward preparation, and attractive appearance make them suitable for beginner bakers and experienced home cooks alike.
1. A Perfect Combination of Peanut Butter and Chocolate
Peanut butter and chocolate are a classic pairing for good reason. The creamy, nutty flavor of peanut butter complements the sweetness of milk chocolate, creating a balanced and satisfying dessert.
Each cookie features a soft peanut butter base with a chocolate kiss in the center. As you bite into the cookie, you enjoy the slightly sweet, nutty dough together with the smooth chocolate topping.
Using milk chocolate kisses gives these cookies their recognizable appearance and familiar flavor. The chocolate is not mixed into the dough; instead, it is placed on each cookie after the initial baking period.
2. Soft and Chewy Centers
The texture is one of the defining characteristics of a good Peanut Butter Blossom. The cookies should be tender and chewy rather than dry or hard.
Creamy peanut butter, butter, and brown sugar all contribute to the rich texture. The egg helps bind the ingredients, while the flour and baking soda provide structure.
The baking method is also important. The cookies bake for 7 to 8 minutes before the chocolate kisses are added, followed by another 2 minutes in the oven. This helps the cookies develop their shape while allowing the chocolate to sit neatly in the center.
3. A Sweet, Crackled Sugar Coating
Before baking, each dough ball is rolled in granulated sugar. This creates a delicate sugary exterior that contrasts with the soft cookie inside.
The sugar coating also contributes to the cookies’ attractive appearance, making them look especially inviting when arranged on a dessert plate.
For the most consistent results, roll each dough ball thoroughly in the sugar before placing it on the baking sheet.
4. Simple Ingredients and Easy Preparation
You do not need unusual ingredients or complicated equipment to make these cookies. The recipe uses familiar baking staples, including flour, baking soda, salt, butter, peanut butter, sugars, an egg, milk, vanilla extract, and chocolate kisses.
The dough is mixed in a bowl, chilled, shaped into small balls, coated in sugar, and baked. The chocolate is added near the end of the baking process.
Although chilling requires some advance planning, the hands-on steps are manageable and easy to follow.
5. Perfect for Holiday Baking
Peanut Butter Blossoms have a long history as a popular holiday cookie. Their simple round shape and chocolate centers look beautiful on Christmas cookie trays.
They are also a good choice for cookie exchanges, potlucks, family celebrations, and homemade edible gifts. You can prepare a large batch and arrange the cookies with other favorites to create a varied dessert platter.
6. Easy to Make Ahead
The dough can be refrigerated for at least one hour or overnight. This flexibility makes it easier to organize your baking schedule.
You can also freeze the shaped dough balls before coating them in sugar. When you are ready to bake, roll the frozen dough balls in sugar and follow the recipe’s instructions for baking from frozen.
This makes Peanut Butter Blossoms a practical option when you want fresh cookies without completing every preparation step on the same day.
Ingredients for Classic Peanut Butter Blossoms
This recipe uses simple ingredients that work together to create a soft peanut butter cookie with a sugary coating and a milk chocolate center.
For the Cookie Dough
- 1 3/4 cups all-purpose flour: Provides the structure needed to hold the cookie together.
- 1 teaspoon baking soda: Helps the cookies rise and develop their texture during baking.
- 1/2 teaspoon salt: Balances the sweetness and enhances the peanut butter flavor.
- 1/2 cup creamy peanut butter: Adds the signature nutty flavor and contributes richness.
- 1/2 cup unsalted butter, at room temperature: Helps create a smooth dough and a tender cookie.
- 1/2 cup granulated sugar: Adds sweetness and contributes to the cookie’s texture.
- 1/2 cup light brown sugar, lightly packed: Provides moisture and a subtle caramel-like flavor.
- 1 large egg: Binds the ingredients and helps the cookies hold their shape.
- 2 tablespoons milk: Adds moisture to the dough.
- 1 teaspoon vanilla extract: Complements the peanut butter and chocolate flavors.
For Rolling the Cookies
- 1/2 cup additional granulated sugar: Coats the dough balls before baking and creates the characteristic sugary exterior.
For the Chocolate Centers
- One 11-ounce bag of Hershey’s Kisses: Provides the chocolate center for the cookies.
Unwrap the chocolate kisses before baking so they are ready to use as soon as the first baking stage is complete.
Choosing the Right Ingredients
Creamy peanut butter: The original recipe specifies creamy peanut butter. Using a consistent, well-stirred peanut butter helps create a uniform dough. Natural peanut butter can have a different consistency, so substituting it may affect the texture.
Unsalted butter: Allow the butter to soften to room temperature before mixing. It should yield slightly when pressed but should not be melted or so soft that it loses its shape.
Light brown sugar: Brown sugar contributes moisture and flavor. Lightly pack it into the measuring cup when measuring.
Granulated sugar: The recipe uses granulated sugar both inside the dough and for the exterior coating. Keep the coating sugar separate from the sugar that goes into the dough.
Egg: A large egg helps hold the dough together. Adding it after creaming the butter and sugars makes it easier to incorporate evenly.
Milk: The two tablespoons of milk provide additional moisture and help bring the dough together.
Hershey’s Kisses: The chocolate kisses are the traditional finishing touch. Unwrapping them in advance makes the decorating step faster and safer when the baking sheet comes out of the oven.
Kitchen Equipment You’ll Need
Before beginning, gather the following equipment:
- A medium mixing bowl for the dry ingredients.
- A large mixing bowl for the wet ingredients.
- A hand mixer or stand mixer fitted with a paddle attachment.
- A whisk.
- Measuring cups and measuring spoons.
- A spatula for scraping the bowl.
- Two baking sheets.
- Parchment paper or silicone baking mats.
- A small bowl for the coating sugar.
- A wire cooling rack.
- A serving spatula for transferring the warm cookies.
A cookie scoop is optional. The original method uses a spoon and clean hands to shape the dough into balls approximately 1 inch in diameter.
How to Make Classic Peanut Butter Blossoms
Follow these steps to prepare the dough, bake the cookies, and add the chocolate kisses.
Step 1: Whisk Together the Dry Ingredients
In a medium bowl, whisk together the all-purpose flour, baking soda, and salt until evenly combined.
Sifting the ingredients is optional. A thorough whisk is sufficient to distribute the baking soda and salt throughout the flour.
Set the bowl aside while you prepare the wet ingredients.
Mixing the dry ingredients separately helps prevent concentrated pockets of baking soda or salt from remaining in the finished cookies.
Step 2: Cream the Peanut Butter, Butter, and Sugars
Place the creamy peanut butter, room-temperature unsalted butter, granulated sugar, and light brown sugar in a large mixing bowl.
Using a hand mixer or a stand mixer fitted with a paddle attachment, beat the ingredients on medium-high speed until they are well blended.
Stop occasionally to scrape down the sides of the bowl. This helps ensure that the butter and sugars are incorporated evenly.
The butter should be softened but not excessively soft. If it is nearly melting, the mixture may become too loose and affect the consistency of the dough.
Step 3: Add the Egg, Milk, and Vanilla
Add the large egg, milk, and vanilla extract to the peanut butter mixture.
Mix until the ingredients are fully incorporated. Scrape the sides and bottom of the bowl as needed to make sure no unmixed butter or peanut butter remains.
The mixture should look creamy and consistent. Adding these ingredients before the flour helps distribute the moisture evenly throughout the dough.
Step 4: Add the Dry Ingredients
Reduce the mixer speed and gradually add the flour mixture to the wet ingredients.
Mix just until everything is combined. Avoid running the mixer at high speed when adding flour, as this can cause the dry ingredients to scatter outside the bowl.
Once the flour has been incorporated, stop mixing. Excessive mixing can make cookies firmer than intended.
The dough should be cohesive and suitable for shaping into small balls.
Step 5: Chill the Dough
Transfer the dough to a well-sealed food storage container, or cover the mixing bowl tightly with plastic wrap or a reusable alternative.
Refrigerate the dough for at least 1 hour. You can also leave it in the refrigerator overnight.
Chilling is an important step in this recipe because it helps prevent the cookies from spreading too much during baking. It also makes the dough easier to handle when shaping the portions.
Do not leave the dough uncovered in the refrigerator, as the surface can dry out.
If you plan to bake the cookies the next day, keep the dough sealed until you are ready to portion it.
Step 6: Prepare the Oven and Baking Sheets
After the dough has chilled, preheat the oven to 375°F (190°C).
Position the oven rack at the second level from the bottom, just above the center, as specified in the source recipe.
Line two baking sheets with parchment paper or silicone baking mats.
Prepare a small bowl containing the additional granulated sugar for coating the dough balls.
Before baking, unwrap the chocolate kisses and place them in a bowl. Having them ready makes it easier to add one to each cookie immediately after the first baking stage.
Step 7: Shape the Dough into Balls
Remove the chilled dough from the refrigerator.
Using a spoon and clean hands, shape the dough into balls approximately 1 inch in diameter.
Keeping the portions close to this size helps the cookies bake evenly and makes it easier to achieve the intended yield of approximately 48 cookies.
You do not need a cookie scoop, although one can be convenient if you prefer uniform portions.
If the dough becomes too soft while you are working, return it to the refrigerator briefly before continuing.
Step 8: Roll Each Ball in Sugar
Place each dough ball in the bowl of granulated sugar and turn it until the surface is evenly coated.
The sugar creates the cookies’ characteristic sweet exterior and gives the baked surface a slightly crackled appearance.
After coating, place each ball on the prepared baking sheet.
Space the dough balls approximately 1 1/2 to 2 inches apart. The cookies need room to spread during baking, and adequate spacing helps them bake more evenly.
Continue until the baking sheet contains a single layer of evenly spaced dough balls.
Step 9: Bake the Cookies for 7 to 8 Minutes
Place the baking sheets in the preheated oven and bake the cookies for 7 to 8 minutes.
The cookies should begin to set around the edges while remaining soft in the center.
Do not wait until the cookies are completely firm. They will continue to bake during the second stage, after the chocolate kisses are added.
Keep an eye on the cookies as they approach the end of the first baking period. Oven performance can vary, so use the specified time as a guide.
Step 10: Add the Chocolate Kisses
Carefully remove the baking sheet from the oven.
Working quickly but cautiously, place one unwrapped milk chocolate kiss in the center of each cookie. Gently press each kiss down into the cookie.
This step creates the classic Peanut Butter Blossom appearance. Pressing the chocolate into the soft cookie also encourages the edges to form their characteristic cracks.
Be careful when handling the hot baking sheet. The cookies and the baking surface will be very hot, so work slowly enough to avoid burns while completing the task efficiently.
Step 11: Return the Cookies to the Oven
Place the baking sheet back in the oven and bake for an additional 2 minutes.
This short second baking period completes the cookie baking process and allows the chocolate kisses to settle into the centers.
Follow the timing specified in the source recipe rather than extending the baking time unnecessarily.
Step 12: Cool the Cookies on the Baking Sheet
Remove the cookies from the oven and allow them to rest on the baking sheet for 5 to 10 minutes.
The cookies will be soft when they first come out of the oven. Moving them immediately may cause them to break or lose their shape.
Letting them rest gives the cookie structure time to firm up while the chocolate remains in place.
Step 13: Transfer to a Cooling Rack
Using a serving spatula, carefully transfer the cookies to a wire cooling rack.
Allow them to cool completely before arranging them on a serving plate or placing them in a storage container.
The cookies are delicate while warm, so support each one from underneath when transferring it.
Once cooled, the peanut butter base should be soft and chewy, with a sugary coating and a chocolate kiss in the center.
Step 14: Serve and Enjoy
Arrange the cooled cookies on a plate, dessert tray, or cookie platter.
They are delicious on their own and pair well with milk, coffee, hot chocolate, or tea.
For a holiday dessert table, combine them with other homemade cookies to create a colorful assortment of flavors and textures.
Tips for the Best Peanut Butter Blossoms
A few simple techniques can help you achieve the soft texture and recognizable appearance that make these cookies so popular.
Chill the Dough for at Least One Hour
The original recipe specifically calls for a minimum chilling time of one hour, with overnight chilling also suitable.
Chilling helps prevent excessive spreading and makes the dough easier to shape. If you want to prepare the cookies for a special event, making the dough the night before can simplify the baking process the following day.
Use Room-Temperature Butter
The butter should be soft enough to blend smoothly with the peanut butter and sugars, but it should not be melted.
Butter that is too warm can change the consistency of the dough. Properly softened butter makes it easier to cream the ingredients evenly.
Keep the Dough Balls Small and Uniform
The source recipe recommends balls approximately 1 inch in diameter.
This size is useful for achieving a consistent bake and the intended yield of about 48 cookies. Larger cookies may need a different baking time and will produce fewer portions.
Prepare the Chocolate Kisses in Advance
Unwrap the chocolate kisses before putting the cookies in the oven.
The kisses need to be placed on the cookies immediately after the first baking stage, so having them ready helps keep the process smooth.
This small preparation step also reduces the time the baking sheet spends outside the oven.
Press the Chocolate Gently
Place one kiss in the center of each cookie and press down gently.
Pressing too forcefully can flatten the cookie excessively or cause it to break. A controlled press helps create the classic blossom shape while keeping the cookie intact.
Allow the Cookies to Rest Before Moving Them
The cookies will be delicate immediately after baking. Leave them on the baking sheet for 5 to 10 minutes before transferring them to a cooling rack.
Using a serving spatula makes it easier to support the cookie from underneath and helps prevent breakage.
Store the Cookies Properly
An airtight food storage container helps prevent the cookies from drying out.
The source recipe also recommends placing half a slice of bread in the container. The cookies can absorb moisture from the bread, helping them stay soft for longer.
Keep the container at room temperature and replace the bread if it becomes dry or stale.
Common Mistakes to Avoid
Skipping the Chilling Time
Skipping refrigeration can cause the dough to spread too much in the oven. Chill the dough for at least one hour before shaping and baking.
Using Butter That Is Too Soft
Butter that is nearly melted can make the dough overly loose. Start with butter at room temperature that still holds its shape.
Making the Cookies Too Large
The source recipe recommends 1-inch dough balls. Larger portions can affect the yield and may require adjustments to the baking time.
For the most predictable results, keep the portions close to the recommended size.
Overbaking the Cookies
Peanut butter cookies can become dry if baked for too long. Follow the initial baking period of 7 to 8 minutes, add the chocolate kisses, and bake for another 2 minutes.
Waiting Too Long to Add the Chocolate
The chocolate kisses should be placed on the cookies immediately after the first baking stage, while the cookies are still soft.
Having the chocolate unwrapped and ready before baking makes this step easier.
Moving the Cookies Too Soon
Warm cookies can break when lifted from the baking sheet. Allow them to rest for 5 to 10 minutes before transferring them to a cooling rack.
How to Store Classic Peanut Butter Blossoms
Correct storage helps maintain the soft, chewy texture of these cookies after baking.
At Room Temperature
Place the completely cooled cookies in a tightly sealed food storage container.
According to the source recipe, the cookies can last for up to one week at room temperature when stored properly.
For an extra-soft texture, place half a slice of bread in the container. The cookies absorb moisture from the bread, helping them stay soft for longer.
Keep the container away from direct sunlight and excessive heat.
Can You Make the Dough Ahead?
Yes. The dough can be refrigerated for at least one hour or overnight.
Keep it tightly covered in the mixing bowl or transfer it to a sealed storage container. When you are ready to bake, shape the dough into balls, coat them in sugar, and follow the baking instructions.
Preparing the dough in advance is especially helpful when making cookies for holiday gatherings or cookie exchanges.
Can You Freeze Peanut Butter Blossom Dough?
Yes. The source recipe provides specific instructions for freezing the dough before baking.
- Shape the dough into balls approximately 1 inch in diameter, but do not coat them in sugar.
- Place the dough balls on a baking sheet lined with wax paper or parchment paper.
- Freeze them for approximately 1 to 2 hours, until firm.
- Transfer the frozen dough balls to a freezer storage bag.
- When ready to bake, coat the frozen dough balls in granulated sugar.
- Bake directly from frozen for 9 to 11 minutes for the initial baking stage. Do not allow the dough balls to come to room temperature first.
- Add a milk chocolate kiss to each cookie and return them to the oven for another 2 minutes.
The recipe does not specify a maximum freezer storage duration, so follow suitable food-storage guidance for your freezer and label the bag with the preparation date.
How to Serve Peanut Butter Blossoms
These cookies are versatile enough for casual snacks, holiday dessert tables, and homemade gifts.
With a glass of milk: Milk complements the rich peanut butter flavor and sweet chocolate center.
With coffee or tea: Serve one or two cookies with your favorite hot drink for a simple afternoon treat.
On a Christmas cookie platter: Combine Peanut Butter Blossoms with sugar cookies, gingerbread cookies, shortbread, and chocolate crinkle cookies. The chocolate centers make them easy to recognize among other treats.
As homemade gifts: Arrange cooled cookies in a food-safe tin or box. Use parchment paper between layers to help protect the chocolate kisses.
At parties and family gatherings: Place the cookies on a serving platter where guests can easily pick them up. Their small size makes them convenient additions to a dessert spread.
For cookie exchanges: Their classic appearance and familiar peanut butter-and-chocolate flavor make them a welcome choice for sharing with friends, neighbors, and coworkers.
Frequently Asked Questions
What Are Peanut Butter Blossoms?
Peanut Butter Blossoms are soft peanut butter cookies rolled in granulated sugar and topped with a chocolate kiss. The chocolate is pressed into the cookie after the first stage of baking, creating the recognizable blossom shape.
They are particularly popular during the holiday season and have been enjoyed for generations.
Why Do I Need to Chill the Dough?
Chilling helps prevent the cookies from spreading excessively while baking. It also makes the dough easier to shape into uniform balls.
This recipe requires at least one hour of refrigeration, although the dough can also be chilled overnight.
Can I Chill the Dough Overnight?
Yes. The source recipe specifically allows overnight chilling.
Keep the dough tightly covered so the surface does not dry out. When you are ready to bake, shape the dough into 1-inch balls, roll them in sugar, and continue with the recipe.
Can I Use Crunchy Peanut Butter?
The source recipe specifies creamy peanut butter. Crunchy peanut butter would introduce small peanut pieces and change the texture.
If you want to use crunchy peanut butter, expect a different result. For the closest match to the published recipe, use creamy peanut butter.
Why Did My Cookies Spread Too Much?
Possible reasons include skipping the chilling step or using butter that is too soft. The recipe recommends chilling the dough for at least one hour and using butter at room temperature rather than butter that is nearly melted.
Accurate measuring and keeping the dough cool while shaping can also help produce more consistent cookies.
When Should I Add the Chocolate Kisses?
Add the chocolate kisses after the cookies have baked for 7 to 8 minutes.
Remove the baking sheet from the oven, place one kiss in the center of each cookie, press gently, and return the cookies to the oven for another 2 minutes.
Why Are My Cookies Breaking When I Transfer Them?
The cookies are soft when they first come out of the oven. Moving them immediately can cause them to break.
Allow them to rest on the baking sheet for 5 to 10 minutes before transferring them carefully to a cooling rack with a serving spatula.
How Long Do Peanut Butter Blossoms Last?
The source recipe states that these cookies can last up to one week at room temperature when kept in a tightly sealed container.
Adding half a slice of bread to the container can help maintain their softness by providing moisture.
Can I Freeze the Cookie Dough?
Yes. Shape the dough into 1-inch balls without coating them in sugar. Freeze the balls on a lined baking sheet for 1 to 2 hours, then transfer them to a freezer storage bag.
When ready to bake, coat the frozen balls in sugar and bake directly from frozen for 9 to 11 minutes before adding the chocolate kisses and baking for another 2 minutes.
Do I Need a Cookie Scoop?
No. The source recipe recommends using a spoon and clean hands to shape the dough.
A cookie scoop is optional and can help create uniform portions, but it is not necessary.
Can I Make These Cookies for Christmas?
Absolutely. Peanut Butter Blossoms are a classic choice for holiday baking. Their sugar-coated exterior and chocolate centers make them attractive additions to Christmas cookie platters, gift boxes, and family gatherings.
What Is the Best Way to Keep the Cookies Soft?
Store the cooled cookies in a tightly sealed food storage container. The source recipe recommends placing half a slice of bread in the container to help the cookies absorb moisture and stay soft for longer.
Classic Peanut Butter Blossoms Recipe Card
Recipe name: Classic Peanut Butter Blossoms
Category: Cookies, Dessert, Holiday Baking
Prep time: 20 minutes
Chilling time: 1 hour minimum
Cook time: 10 minutes
Total time: 1 hour 30 minutes
Yield: 48 cookies
Ingredients
- 1 3/4 cups all-purpose flour
- 1 teaspoon baking soda
- 1/2 teaspoon salt
- 1/2 cup creamy peanut butter
- 1/2 cup unsalted butter, at room temperature
- 1/2 cup granulated sugar
- 1/2 cup light brown sugar, lightly packed
- 1 large egg
- 2 tablespoons milk
- 1 teaspoon vanilla extract
- 1/2 cup additional granulated sugar for coating
- One 11-ounce bag of Hershey’s Kisses
Instructions
- Whisk together the flour, baking soda, and salt in a medium bowl. Set aside.
- In a large bowl, cream the peanut butter, unsalted butter, granulated sugar, and light brown sugar using a hand mixer or stand mixer with a paddle attachment.
- Add the egg, milk, and vanilla extract. Mix until combined, scraping down the sides of the bowl as needed.
- Reduce the mixer speed and gradually add the dry ingredients. Mix until fully incorporated.
- Cover the dough tightly and refrigerate for at least 1 hour or overnight.
- Preheat the oven to 375°F (190°C). Position the rack just above the center and line two baking sheets with parchment paper or silicone baking mats.
- Shape the dough into 1-inch balls using a spoon and clean hands. Roll each ball in the additional granulated sugar.
- Arrange the dough balls approximately 1 1/2 to 2 inches apart on the prepared baking sheets.
- Bake for 7 to 8 minutes.
- Carefully remove the baking sheet from the oven and gently press one unwrapped milk chocolate kiss into the center of each cookie.
- Return the cookies to the oven and bake for another 2 minutes.
- Let the cookies cool on the baking sheet for 5 to 10 minutes.
- Transfer them carefully to a wire cooling rack and allow them to cool completely.
- Store in an airtight container at room temperature for up to one week.
Recipe Notes
- Chill the dough for at least one hour to help prevent excessive spreading.
- Unwrap the chocolate kisses before baking so they are ready to use.
- Allow the cookies to rest before transferring them because they will be soft when hot.
- To freeze the dough, shape it into balls without coating them in sugar. Freeze for 1 to 2 hours, then store in a freezer bag.
- Bake frozen dough balls directly from the freezer for 9 to 11 minutes before adding the chocolate kisses and baking for another 2 minutes.
- For softer cookies, store them in a tightly sealed container with half a slice of bread.
Nutrition Information
The source recipe provides the following estimated nutrition information per cookie:
| Nutrient | Amount |
|---|---|
| Calories | 107 kcal |
| Carbohydrates | 14 g |
| Protein | 2 g |
| Total fat | 5 g |
| Saturated fat | 3 g |
| Polyunsaturated fat | 0.4 g |
| Monounsaturated fat | 1 g |
| Trans fat | 0.1 g |
| Cholesterol | 10 mg |
| Sodium | 66 mg |
| Potassium | 26 mg |
| Fiber | 0.4 g |
| Sugar | 10 g |
| Vitamin A | 65 IU |
| Calcium | 18 mg |
| Iron | 0.4 mg |
Nutrition values are estimates supplied with the source recipe and may vary depending on the specific ingredients and brands used.
Final Thoughts
Classic Peanut Butter Blossoms are a wonderful example of how simple ingredients can create a memorable homemade dessert. Their soft, chewy peanut butter base, sugary coating, and milk chocolate center make them appealing to both children and adults.
The preparation is straightforward, but a few details make a real difference: chill the dough for at least one hour, shape the portions consistently, add the chocolate kisses after the initial baking period, and let the cookies rest before transferring them to a cooling rack.
Whether you are preparing a Christmas cookie platter, making treats for a family gathering, or freezing dough for a future baking day, these cookies are a dependable choice. Their classic flavor and recognizable appearance have helped make Peanut Butter Blossoms a favorite for generations.
Bake a batch, serve them with your favorite drink, and enjoy the delicious combination of peanut butter and chocolate in every bite.