
No-Bake Christmas Oreo Lasagna
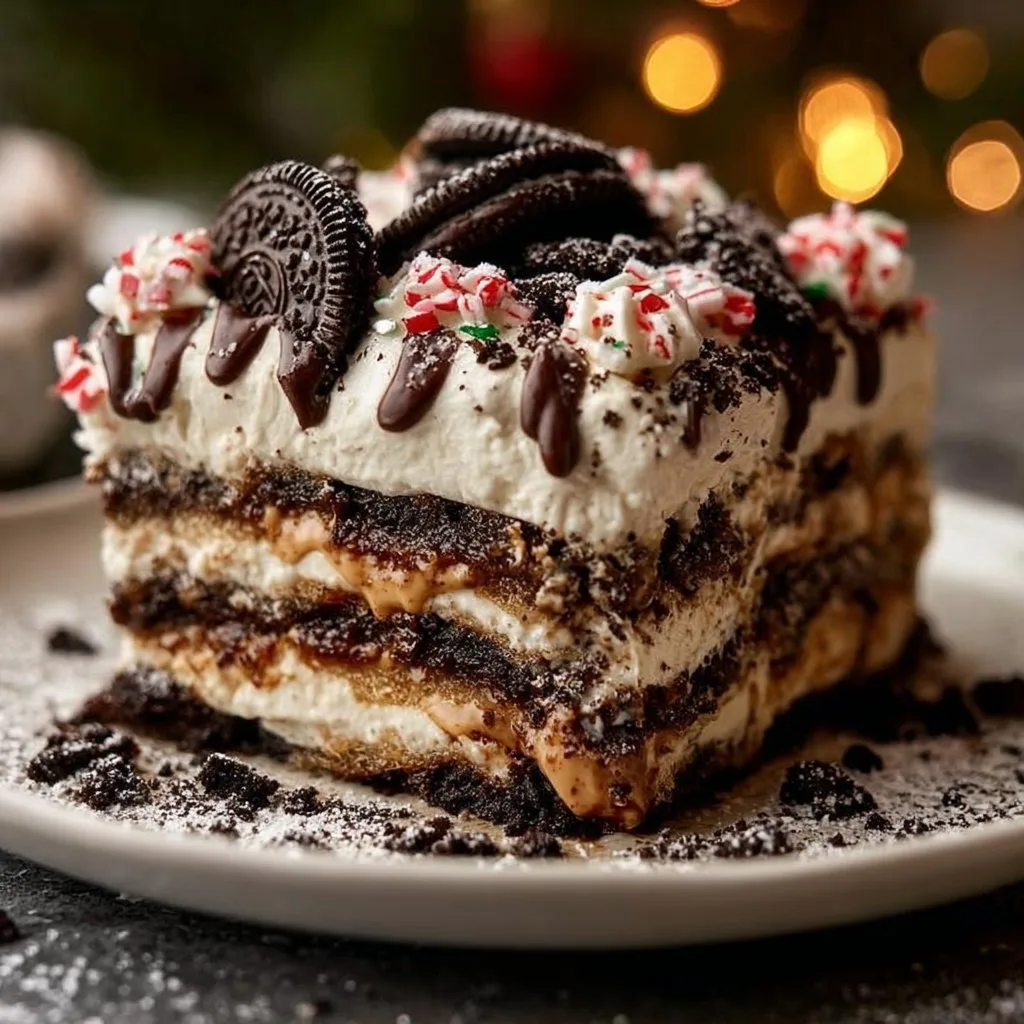
This No-Bake Christmas Oreo Lasagna is a festive dessert that’s as delightful to the eyes as it is to the taste buds. With its rich layers of creamy filling and crunchy chocolate cookies, it strikes the perfect balance between indulgent and light. The festive trimmings of crushed peppermint candies and sprinkles add a seasonal touch that’s sure to impress your holiday guests.
Ideal for holiday gatherings, family potlucks, or any time you want to add a bit of sweetness to your celebrations, this dessert is a unique twist on traditional lasagna. You don’t have to turn on the oven, putting less pressure on your cooking time during busy holiday seasons. Plus, you can prepare it ahead of time, making it a stress-free choice for your festive menu.
Prep Time: 20 min | Chill Time: 3 hours | Total Time: 3 hours 20 min
How to Make No-Bake Christmas Oreo Lasagna
Ingredients
- 1 package (15.35 oz) Oreo cookies (regular or holiday-themed)
- 1/4 cup unsalted butter, melted
- 1 package (8 oz) cream cheese, softened
- 1/4 cup powdered sugar
- 2 cups heavy whipping cream
- 1 teaspoon vanilla extract
- 1 package (3.4 oz) instant vanilla pudding mix
- 2 cups milk
- 1 cup mini marshmallows (optional, for extra fluffiness)
- 1/2 cup crushed peppermint candies or mini M&Ms (for garnish)
- Red and green sprinkles (optional, for decoration)
- Extra whole Oreos for topping
Step-by-Step Instructions
-
Prepare the Oreo Crust: Start by pulsing the Oreo cookies in a food processor until they are finely ground. Don’t forget to reserve some for topping later. Once crushed, mix the crumbs with melted butter until they are evenly coated. Press this mixture into the bottom of a 9×13-inch baking dish for a firm base that provides great texture.
-
Make the Cream Cheese Layer: In a large bowl, beat together the softened cream cheese and powdered sugar until the mixture is smooth and creamy. In a separate bowl, whip the heavy cream with vanilla extract until it forms stiff peaks. Carefully fold the whipped cream into the cream cheese mixture, combining them thoroughly. This results in a light layer that adds a creamy, dreamy texture to your lasagna.
-
Make the Pudding Layer: In another bowl, whisk together the instant vanilla pudding mix and cold milk. Allow it to sit for about two minutes to thicken. Spread this pudding layer evenly on top of the cream cheese layer in your dish for a delightful contrast in flavor and texture.
-
Top with Marshmallows (Optional): For an extra touch of fluffiness, sprinkle mini marshmallows on top of the pudding layer. This addition not only enhances the texture but also adds a hint of sweetness.
-
Chill: Cover the lasagna and refrigerate it for at least three hours, or until it’s set. Chilling the layers will ensure they firm up nicely, making it easier to slice.
-
Garnish and Serve: Before serving, get creative with garnishes! Sprinkle crushed peppermint candies, add some festive sprinkles, and place whole Oreo cookies on top for that perfect holiday look. Slice into squares and enjoy a heavenly treat!
Pro Tips
-
Choose Your Oreos Wisely: While regular Oreos work perfectly, using holiday-themed Oreos can elevate the festive spirit of your lasagna. They also often come in fun flavors!
-
Don’t Rush the Chilling Process: Make sure you allow enough time for the lasagna to chill. This solidifies the layers and makes serving easier. If possible, let it sit overnight.
-
Experiment with Flavor: Feel free to use different pudding flavors like chocolate or even peppermint for a unique twist! Each change can dramatically alter the dessert’s overall taste.
-
Make it Lighter: If you’re looking for a healthier version, consider swapping some ingredients with low-fat or sugar-free options. For example, use low-fat cream cheese or lighten up the whipped cream.
-
Layer with Care: When layering the mixtures, take your time to avoid mixing them. Create distinct layers for visual appeal and texture.
-
Customize Your Garnishing: Aside from peppermint candies and sprinkles, try adding chopped nuts or even crushed cookies on top for added crunch.
Why You’ll Love This Recipe
This No-Bake Christmas Oreo Lasagna is not just about looks; it delights with each bite! The creamy filling melts in your mouth, while the crunchy Oreo base provides a satisfying contrast. With a medley of flavors and textures, it’s a crowd pleaser that fits elegantly into any dessert table.
It’s incredibly simple to prepare, making it an accessible choice for cooks of any skill level. Impress your family and friends with minimal effort while enjoying a breathtaking dessert that requires no baking at all! The dessert fits various dietary needs, especially if you adapt it to be gluten-free or dairy-free, allowing more people to join in on the fun.
How to Serve No-Bake Christmas Oreo Lasagna
For presentation, serve the Oreo lasagna directly from the baking dish or transfer it to a festive platter. Add a dollop of whipped cream on the side for an extra creamy touch. This dessert pairs beautifully with a warm cup of coffee or a cold glass of milk, helping balance its sweetness.
As for side dishes, consider a light fruit salad or a scoop of vanilla ice cream to contrast the richer flavors of the lasagna. A fun idea is to sprinkle extra crushed Oreos onto the ice cream, creating an Oreos-and-cream delight that complements the main dessert!
How to Store No-Bake Christmas Oreo Lasagna
This delectable treat can be easily stored in the refrigerator, where it will stay fresh for up to 5 days. Just cover it tightly with plastic wrap or a lid to keep its flavors intact. While it’s best enjoyed chilled, if you prefer to freeze it, you can wrap portions tightly and freeze them for up to 3 months. Just remember to let it thaw in the refrigerator for a few hours before serving.
Tips to Make No-Bake Christmas Oreo Lasagna
-
Timing Is Key: Allow the layers to set properly before slicing. If you cut into it too soon, the layers may not hold together, resulting in a messy presentation.
-
Use Cold Ingredients: Make sure your cream cheese and whipped cream are chilled but not frozen. Cold ingredients whip better and formulate a fluffier texture.
-
Adapt for Events: If you’re making it for a larger crowd, consider doubling the recipe. It can be easily doubled, and you can use two baking dishes to serve more guests.
-
Check Consistency: The pudding layer should be thick; if it seems too runny, it may not set properly. Always check the packaging instructions for best results.
Variation
-
Chocolate Version: Swap out regular Oreos for chocolate Oreos and use chocolate pudding instead of vanilla for an indulgent chocolate lover’s delight.
-
Vegan Options: Substitute traditional ingredients with vegan alternatives like coconut cream for whipping, vegan cream cheese, and plant-based milk.
-
Gluten-Free Version: Use gluten-free Oreo cookies to make this dessert accessible for those with gluten intolerance.
-
Cake Mix Layer: Add a layer of your favorite cake mix prepared as per instructions instead of or alongside the pudding for an exciting texture change.
Nutrition Information
- Serving Size: 1 square
- Calories: 320
- Protein: 3g
- Carbs: 30g
- Fat: 22g
- Fiber: 1g
- Sugar: 15g
This dessert is high in calories and fat, so it’s best enjoyed in moderation. The indulgent ingredients provide a satisfying taste, but they also mean that those watching their intake may choose to limit portion sizes.
Storage and Reheating
To reheat any leftovers, you can use the microwave for quick, individual servings. Start with 15-20 seconds to see how warm it gets, as you don’t want to melt the layers. For larger portions, place in an oven preheated to 350°F for about 10 minutes. Always monitor to avoid overcooking.
Customization Ideas
Feel free to explore different flavors by modifying the pudding or incorporating different crushed candies on top. For a fruity twist, consider adding layers of fresh strawberries or bananas. If you’re feeling adventurous, try adding a drizzle of salted caramel or chocolate sauce for added decadence!
Common Mistakes to Avoid
-
Overmixing the Cream: Be careful not to overwhip the cream, as this can create a grainy texture rather than a smooth, fluffy layer.
-
Not Allowing Enough Chill Time: Skipping or shortening the chill time can lead to a soggy dessert that doesn’t hold its shape.
-
Skipping the Layering: Ensure you layer the ingredients as directed. Mixing everything together can lead to a less desirable consistency.
-
Using Warm Ingredients: Make sure cream cheese is at room temperature and not too hot. Warm ingredients can cause the layers to mix instead of staying distinct.
-
Not Reserving Toppings: Always remember to save some crushed Oreos, candies, or sprinkles for garnishing at the end!
Serving Occasions
This festive dessert is perfect for holiday parties, family gatherings, or even a cozy night in. It also makes for a great offering at potluck dinners or as a sweet surprise at a children’s birthday party. The vibrant colors and fun texture make it a delightful addition to any festive occasion.
Why Make This Recipe
What sets this No-Bake Christmas Oreo Lasagna apart from traditional desserts is its quick preparation and the no-bake aspect, making it a hassle-free yet impressive choice for any gathering. You can easily modify the layers and toppings to suit any palate, and it’s a guaranteed crowd-pleaser without requiring extensive kitchen skills. It’s not only a treat for the taste buds but a feast for the eyes, creating memorable moments around the dessert table.
FAQs
-
Can I make this dessert ahead of time?
Yes! It’s perfect for making ahead of time. Just cover tightly and refrigerate or freeze until you’re ready to serve. -
How can I make it gluten-free?
Use gluten-free Oreos and double-check the other ingredients to ensure they are gluten-free. -
Can I use a different flavor of pudding?
Absolutely! Feel free to experiment with other flavors like chocolate, butterscotch, or even pistachio for a fun twist. -
How do I ensure the cream cheese layer is smooth?
Beat the cream cheese thoroughly with the powdered sugar to remove any lumps before folding in the whipped cream. -
Can I freeze leftovers?
Yes, this dessert can be frozen. Just wrap portions tightly and store for up to 3 months. Thaw in the fridge when ready to eat.
Disclaimer: Note that nutritional information is approximate and can vary based on specific ingredients used. Always check labels for accurate data.
Print
No-Bake Christmas Oreo Lasagna
- Total Time: 200 minutes
- Yield: 12 servings 1x
- Diet: Vegetarian
Description
A festive no-bake dessert featuring layers of creamy filling and crunchy Oreo cookies, garnished with peppermint and sprinkles for the holidays.
Ingredients
- 1 package (15.35 oz) Oreo cookies (regular or holiday-themed)
- 1/4 cup unsalted butter, melted
- 1 package (8 oz) cream cheese, softened
- 1/4 cup powdered sugar
- 2 cups heavy whipping cream
- 1 teaspoon vanilla extract
- 1 package (3.4 oz) instant vanilla pudding mix
- 2 cups milk
- 1 cup mini marshmallows (optional)
- 1/2 cup crushed peppermint candies or mini M&Ms (for garnish)
- Red and green sprinkles (optional)
- Extra whole Oreos for topping
Instructions
- Prepare the Oreo Crust: Pulse Oreo cookies in a food processor until finely ground. Mix with melted butter and press into a 9×13-inch baking dish.
- Make the Cream Cheese Layer: Beat cream cheese and powdered sugar until smooth. Whip heavy cream with vanilla extract, then fold into the cream cheese mixture.
- Make the Pudding Layer: Whisk instant vanilla pudding mix with cold milk and let sit for 2 minutes to thicken. Spread on top of the cream cheese layer.
- Top with Marshmallows (Optional): Sprinkle mini marshmallows on top for added fluffiness.
- Chill: Cover and refrigerate for at least 3 hours to set.
- Garnish and Serve: Add crushed peppermint, festive sprinkles, and whole Oreos as a topping before slicing and serving.
Notes
For a lighter version, consider using low-fat substitutes for cream cheese and whipped cream. Can be made gluten-free by using gluten-free Oreos.
- Prep Time: 20 minutes
- Cook Time: 0 minutes
- Category: Dessert
- Method: No-Bake
- Cuisine: American
Nutrition
- Serving Size: 1 square
- Calories: 320
- Sugar: 15g
- Sodium: 300mg
- Fat: 22g
- Saturated Fat: 10g
- Unsaturated Fat: 8g
- Trans Fat: 0g
- Carbohydrates: 30g
- Fiber: 1g
- Protein: 3g
- Cholesterol: 30mg