

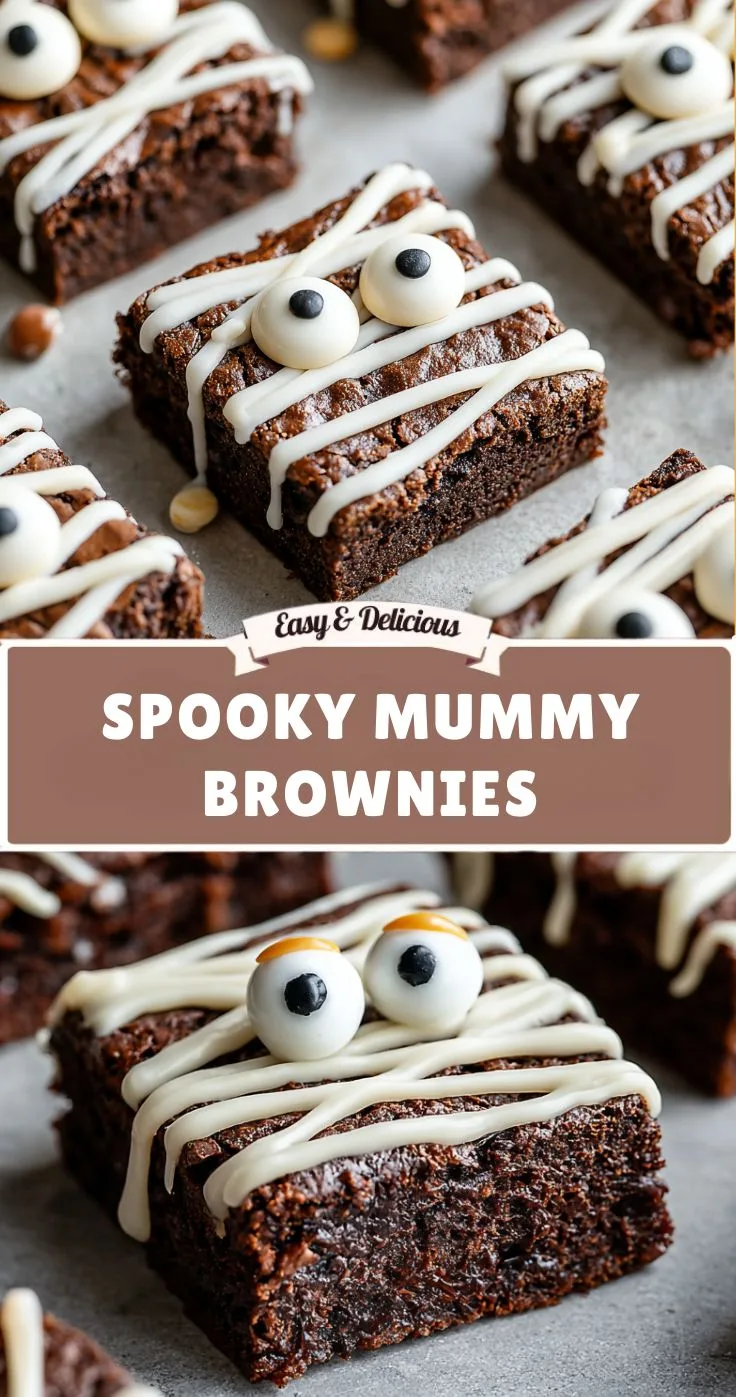
Halloween desserts are at their best when they are delicious, festive, and easy enough for anyone to make. These Spooky Mummy Brownies check every box. Rich, fudgy brownies are transformed into adorable little Halloween mummies with simple white chocolate “bandages” and candy eyes.
The decoration is surprisingly easy. You do not need professional piping skills, special molds, or complicated frosting techniques. A piping bag—or even a simple spoon—can create the white chocolate strips that give each brownie its mummy appearance.
The dark chocolate brownie base provides the perfect contrast against the bright white chocolate, while the candy eyes add a playful finishing touch.
With only about 40 minutes from start to finish, these brownies are perfect for Halloween parties, school celebrations, family gatherings, or a spooky movie night at home.
You can also prepare the brownies a day in advance and decorate them just before serving, making this an especially convenient dessert during a busy Halloween celebration.
Why You’ll Love These Mummy Brownies
They are incredibly easy
The brownie base can be made from a boxed mix or your favorite homemade brownie recipe. Once baked and cooled, the decoration takes only a few minutes.
They look adorable
White chocolate strips instantly transform ordinary brownie squares into little mummy characters.
No complicated decorating skills required
The mummy bandages are simply drizzled back and forth over the brownies. They do not need to be perfectly straight or evenly spaced.
Perfect for kids
Children can help place the candy eyes and, with adult supervision, participate in the decorating process.
Great for Halloween parties
Individual brownie squares are easy to arrange on a platter and serve to guests.
Recipe Details
| Detail | Information |
|---|---|
| Prep Time | 15 minutes |
| Cook Time | 25 minutes |
| Total Time | 40 minutes |
| Servings | Approximately 12 brownies |
| Difficulty | Easy |
| Method | Baking |
| Best For | Halloween parties, dessert tables, family treats |
Ingredients
1 Box Brownie Mix
Use your favorite boxed brownie mix and prepare it according to the package directions, including the required eggs, oil, and water.
If you prefer baking from scratch, you can substitute your favorite homemade brownie recipe.
The most important thing is to allow the brownies to cool completely before decorating.
1 Cup White Chocolate Chips
White chocolate creates the mummy bandages.
You can also use white candy melts, which are particularly convenient for drizzling and piping.
The bright white topping contrasts beautifully with the dark brownie underneath.
Candy Eyeballs
Two candy eyeballs per brownie give each piece its recognizable mummy face.
You can use traditional candy eyes or another edible eye decoration that you have available.
Nonstick Spray or Parchment Paper
Use nonstick spray or parchment paper to prepare the baking pan.
Parchment is particularly helpful because it makes it easier to remove the cooled brownies and cut them into clean pieces.
How to Make Spooky Mummy Brownies
Step 1: Bake the Brownies
Begin by preparing the brownie batter according to the instructions on your brownie mix package.
If you are using homemade brownie batter, prepare it according to your preferred recipe.
Prepare your baking pan with parchment paper or nonstick spray.
Pour the brownie batter into the prepared pan and bake according to the recipe or package instructions.
The original recipe uses approximately 25 minutes of baking time, but the exact time can vary depending on the brownie mix, pan size, and oven.
Check the brownies according to the instructions for your specific mix or recipe.
Once baked, remove the pan from the oven and allow the brownies to cool completely.
This cooling step is essential.
If the brownies are still warm, the white chocolate decoration can melt when it touches the surface.
Step 2: Cut the Brownies
Once the brownies have cooled completely, remove them from the pan if you used parchment paper.
Use a sharp knife to cut the brownies into rectangles or squares.
Rectangular brownies work particularly well for the mummy design because they provide enough surface area for the white chocolate bandages.
Try to cut the pieces relatively evenly if you are preparing them for a party.
For cleaner edges, you can wipe the knife between cuts.
If you prefer rustic-looking brownies, slightly uneven pieces are perfectly fine.
The white chocolate decoration will become the main focus anyway.
Step 3: Melt the White Chocolate
Place the white chocolate chips or candy melts into a microwave-safe bowl.
Microwave in 30-second intervals, stirring well after each interval.
Continue until the chocolate is smooth and creamy.
Be careful not to overheat white chocolate.
It can become thick or seize if exposed to too much heat, so short heating intervals and frequent stirring are important.
Once the chocolate has melted completely, allow it to cool very slightly if it seems extremely hot or runny.
You want it fluid enough to drizzle but thick enough to remain visible on the brownie surface.
Step 4: Create the Mummy Bandages
Transfer the melted white chocolate to a piping bag.
If you do not have a piping bag, use a clean zip-top bag and snip a very small corner off.
Hold the bag over one brownie and drizzle the white chocolate back and forth across the surface.
Move the bag in slightly different directions to create overlapping strips.
The goal is to make the chocolate resemble mummy bandages.
Do not worry about making the lines perfectly straight.
In fact, irregular strips can make the brownies look more playful and authentic.
Leave a small area uncovered near the top of each brownie for the eyes.
Repeat until all of the brownie pieces have been decorated.
No Piping Bag? No Problem
You can also use a spoon.
Simply drizzle thin lines of melted white chocolate over each brownie.
The result will have a more rustic appearance, but it will still clearly resemble mummy bandages.
This is especially useful when making the brownies with children because they can participate without needing specialized decorating equipment.
Step 5: Add the Candy Eyes
While the white chocolate is still soft, gently press two candy eyeballs onto each brownie.
Place the eyes near the top of the brownie, where you left a small opening between the white chocolate strips.
You can position them evenly for a classic mummy appearance or slightly change their placement to give each brownie its own personality.
Some mummies can look surprised, while others can look sleepy or silly.
The eyes are what really bring the little brownie characters to life.
Step 6: Let the Chocolate Set
Once all the brownies have been decorated, allow the white chocolate to set completely before serving.
The setting time will depend on the temperature of your kitchen and the thickness of the chocolate.
If you want to speed up the process, you can place the brownies in the refrigerator for a short time.
Once the chocolate is firm, the brownies are ready to serve.
Tips for Perfect Mummy Brownies
Cool the brownies completely
Do not rush the decorating stage.
Warm brownies can soften the white chocolate and make the bandages difficult to control.
Let the brownies cool completely before adding the decoration.
Use parchment paper
Parchment makes it easier to lift the brownie slab from the pan and helps produce cleaner cuts.
It also makes cleanup much easier.
Keep the chocolate smooth
Melt the white chocolate gradually and stir frequently.
If it becomes too thick, it may be difficult to create thin mummy bandages.
Leave space for the eyes
Do not cover the entire brownie with white chocolate.
Leaving a small dark area for the eyes makes the mummy design easier to recognize.
Don’t worry about perfection
Mummy bandages are supposed to look irregular.
There is no need for perfectly straight lines or identical designs.
A little imperfection actually makes these Halloween brownies more charming.
How to Make the Brownies Extra Fudgy
The texture of the finished dessert depends largely on the brownie base you choose and how long you bake it.
If using a boxed mix, follow the package directions carefully and avoid overbaking.
Brownies generally continue to firm as they cool, so removing them when they are properly baked can help preserve a soft, fudgy center.
Allow the brownies to cool completely before cutting.
If you prefer particularly clean slices, refrigerate the cooled brownies briefly before cutting and decorating.
Decorating Variations
The classic white chocolate mummy design is simple, but there are several ways to personalize these Halloween brownies.
White Candy Melts
White candy melts can be used instead of white chocolate chips.
They are convenient for decorating because they melt smoothly and are easy to drizzle.
Chocolate Mummies
For a different appearance, you could use a lighter-colored brownie base or contrast the dark chocolate with a bright white coating.
Extra Halloween Sprinkles
Add a few Halloween-themed sprinkles while the white chocolate is still soft.
Keep the decorations minimal so the mummy bandages and eyes remain the focus.
Different Eye Sizes
Try using different sizes of candy eyes to create funny mummy characters.
Large eyes can make the brownies look especially playful.
Make-Ahead Instructions
These brownies are excellent for preparing ahead.
You can bake the brownie base one day before your Halloween event.
Allow it to cool completely, cover it, and store it until you are ready to decorate.
The following day, cut the brownies into squares or rectangles and add the white chocolate bandages and candy eyes.
This approach can make party preparation much less stressful because the baking portion is already finished.
How to Store Mummy Brownies
Store the decorated brownies in an airtight container at room temperature for up to 3 days.
Keep them in a cool, dry location away from direct heat.
If your kitchen is particularly warm, refrigeration can help keep the white chocolate decoration firm.
If refrigerating, allow the brownies to sit at room temperature briefly before serving if you prefer a softer brownie texture.
How to Serve
Arrange the mummy brownies on a Halloween-themed serving platter.
For a party, place the brownies in rows with the eyes facing upward so guests can easily see the mummy faces.
You can also mix different brownie shapes and eye expressions to make the platter look like a group of little Halloween characters.
For a dessert table, serve them alongside Halloween cookies, cupcakes, fruit treats, or other chocolate desserts.
They are also perfect for a Halloween movie night because they can be picked up and eaten without utensils.
A Fun Halloween Activity for Kids
These mummy brownies can double as a simple Halloween decorating activity.
Bake the brownies ahead of time, then set out the melted white chocolate and candy eyes.
Let children help drizzle the chocolate over the brownies and decide where the eyes should go.
The designs do not need to be perfect.
In fact, letting children create their own mummy bandages makes the finished treats more personal and entertaining.
An adult should handle the hot melted chocolate and any sharp tools, while younger children can focus on the decorations.
Frequently Asked Questions
Can I use homemade brownies?
Yes. Homemade brownies work just as well as boxed brownies. Simply make sure the brownies are completely cooled before decorating.
Can I use white candy melts?
Absolutely. White candy melts are a convenient substitute for white chocolate chips.
What can I use if I don’t have a piping bag?
A clean zip-top bag with a small corner cut off works very well. You can also simply drizzle the melted chocolate with a spoon.
How do I stop the white chocolate from becoming too thick?
Melt it gradually and stir frequently. If necessary, gently warm it again in very short intervals.
Avoid overheating.
Can I make these brownies the day before?
Yes. The brownie base can be baked a day ahead, then decorated the following day.
How long do the finished brownies last?
They can be stored in an airtight container at room temperature for up to 3 days.
Can I freeze mummy brownies?
The brownie base can generally be frozen, but the white chocolate decoration and candy eyes may not look exactly the same after freezing and thawing. For the best appearance, decorate closer to serving time.
Can I make them without candy eyes?
Yes. You can use small pieces of chocolate or another edible decoration to create the eyes. The important part is leaving a small area visible between the white chocolate bandages.
Nutrition Information
The estimated nutrition per brownie is:
| Serving Size | Calories | Protein | Carbs | Fat | Fiber | Sugar |
|---|---|---|---|---|---|---|
| 1 brownie | 280 | 3g | 38g | 14g | 2g | 26g |
These nutrition values are estimates and may vary depending on the brownie mix or homemade recipe, white chocolate, candy eyes, and final serving size.
For specific dietary or medical concerns, check the nutrition information for the exact ingredients you use and consult a qualified nutrition professional.
Why These Mummy Brownies Are Perfect for Halloween
Halloween desserts do not need elaborate decorations to make an impression.
These mummy brownies take a familiar chocolate dessert and give it a simple seasonal transformation.
The dark brownie creates the perfect background for the bright white chocolate bandages. The irregular drizzle makes the decoration look like wrapped fabric, while the candy eyes turn each square into a little Halloween character.
The design is also extremely forgiving.
If one chocolate strip is slightly thicker than another, it does not matter. If the lines are not perfectly straight, the mummy still looks great.
That makes this recipe especially suitable for beginner bakers and families who want to make something festive together.
Perfect for Halloween Parties
If you are preparing a Halloween dessert table, these brownies can be made in a large batch and arranged neatly on a platter.
Because they are individually cut, guests can grab one without needing forks or plates.
You can also make different sizes depending on the rest of your menu.
Small squares work well when you have several desserts available, while larger rectangular pieces make a more substantial treat.
For an especially fun presentation, arrange the brownies so that the mummy faces point in different directions.
Final Thoughts
These Spooky Mummy Brownies are an easy and delicious way to bring Halloween fun to the dessert table.
A rich brownie base is transformed with simple white chocolate bandages and candy eyes, creating adorable little mummies without complicated decorating techniques.
The recipe takes approximately 40 minutes from start to finish, and much of that time is spent simply baking the brownies.
You can also prepare the brownies a day ahead, making them a convenient option for Halloween parties and gatherings.
Whether you are baking with children, preparing a classroom treat, or simply looking for a fun dessert for a spooky movie night, these brownies are sure to be a hit.
Fudgy chocolate brownies, creamy white chocolate bandages, and candy eyes are all you need to create a tray full of delicious little Halloween mummies.